Showing posts with label David Lebovitz. Show all posts

Saturday, October 7, 2023

Pasta Bolognese

I was craving a Bolognese sauce, and came across David Lebovitz's recipe later that day. I bought the ingredients really soon after and made this on a Sunday afternoon. It smelled great cooking and tasted even better. I used Trader Joe's "Cascatelli" pasta, which I brought back from the US this last summer, because I can't find it over here.... in Italy. Lol. Ironic. This would be good with any pasta shape, though. 

Pictured below are the ingredients I used... mixed ground meat (beef, veal and pork), and a small tray of veggies. 

Pasta Bolognese 
adapted from David Lebovitz

3 tablespoons butter, salted or unsalted, plus 1 tablespoon for finishing the pasta
3 tablespoons olive oil
1/2 cup (60g) diced onions
1/2 cup (65g) diced celery
1/2 cup (65g) diced carrots, (peeled)
12 ounces (340g) ground beef (I used a mix of veal, beef, and pork)
1 teaspoon salt, or more to taste
freshly-ground black pepper
3/4 cup (180ml) whole milk
1/8 teaspoon freshly ground nutmeg
1 cup (250ml) dry white wine
1 1/2 cups (350ml) canned plum tomatoes, crushed, with their juice
1 1/2 tablespoons tomato paste
1 pound (450g) pasta

1.  Melt the butter with the olive oil in a soup pot over medium-high heat. Add the onions and cook, stirring frequently, until the onions are soft and translucent, about 3 minutes. Add the celery and carrots and cook, stirring a few times, until they start to wilt, 3 to 4 minutes.

2.  Add the ground beef/meat, salt, and some freshly ground pepper. Lower the heat to medium and cook, stirring, until the beef is no longer raw on the outside. Pour in the milk, and cook at a steady simmer, stirring occasionally, until the milk is absorbed. Add a dusting of nutmeg and the wine and continue to cook until the wine is mostly absorbed. (This should take about 10-15 minutes.)

3.  Add the tomatoes in their juice and the tomato paste. Let come close to a boil then lower the heat to as low as possible until the sauce is just barely bubbling. Cook the sauce uncovered for 1 hour, stirring every once in a while, until most of the liquid is absorbed but the mixture is still wet, rich and thick. You can use the sauce now, or you can cook it for another hour. Add up to 1/2 cup of water if it dries out too much.

4.  To serve, cook the pasta in lightly salted water as directed on the package. (Before draining, reserve a little of the pasta cooking water.) Drain the pasta and toss the hot pasta in the Bolognese sauce with 1 tablespoon of butter. If the sauce needs a bit of thinning out, add a little splash of the reserved pasta water.

**This post and photos are property of http://dishingwithdish.blogspot.com/ **

Wednesday, December 23, 2020

Belgian Hot Chocolate

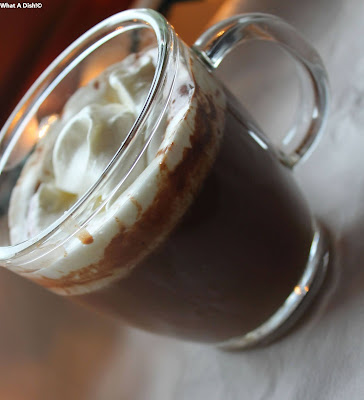
This was a great hot chocolate recipe for a snow day.  We've only had one snow day this year, and it happened on December 2.  Nobody had to go to work/school that day, and most of the fam (and the dog) enjoyed playing in the snow all day.  I took the opportunity to try this hot chocolate recipe I had bookmarked from David Lebovitz.  It was a popular choice after playing in the snow.  Happy Holidays everyone!

(Note: I used Ritter Sport bars for both kinds of chocolate.)
Belgian Hot Chocolate
adapted from David Lebovitz

1 quart (1 liter) whole milk
8 ounces (230g) bittersweet or semisweet chocolate, chopped
4 ounces (115g) milk chocolate, chopped
large pinch of salt (start with less)
1/2 teaspoon ground cinnamon
whipped cream, optional, for serving

1. In a medium saucepan, warm about one-third of the milk, with the chopped dark and milk chocolates, stirring until the chocolate is melted.

2. Whisk in the remaining half-and-half or milk as well as the salt and cinnamon, heating until the mixture is warmed through.

3. Use a hand-held blender, or a whisk, to mix the hot chocolate until it’s completely smooth. (Do not use a regular blender as blending hot liquid may make the lid blow off.)  The chocolate is ready to serve now, or you can let it rest a bit to thicken up.  We drank it right away and it was perfect.  Serve with whipped cream, optional.


**This post and photos are property of http://dishingwithdish.blogspot.com/ **

Friday, August 31, 2018

Mirabelle Plum Jam


I love this recipe from David Lebovitz.  I made his Red Plum & Strawberry Jam last year, but didn't get around to blogging about it (I think I didn't get a chance to take pics, but maybe they're around somewhere.  If so, I'll post that recipe too).

Anyway, I first made this with just regular yellow plums from my wild yard.  But then, I realized that we have a plum tree that I'm pretty sure is a Mirabelle plum tree!  I made the jam again with those plums and it was even better than the regular yellows.  It tastes honeyed.  I added vanilla and I loved that addition.  I made extra and put it in the freezer, so I hope it freezes well.

Note: this recipe also works with regular yellow plums.


David Lebovitz's Mirabelle Plum Jam
adapted from David Lebovitz

1 pound (450g) mirabelle plums
2/3 cups (130g) sugar
1 teaspoon freshly squeezed lemon juice
optional: 1/2 to 1 teaspoon kirsch, eau-de-vie or vanilla extract

1. Pit the mirabelles. I found the best way to do this was use my cherry pitter.  My plums were small enough.  After pitting, I cut each one in half.

2. Put the pitted plums in a non-reactive saucepan. Add enough water so it’s about 1/4-inch (a scant 1cm) deep in the pan. Cover and cook over medium heat, until the mirabelles are cooked through, about 8 to 10 minutes. (At this point, you can choose to blend some of the mixture up with an immersion blender.  I did this with one batch, and left one batch "whole".  If you don't blend, it's still very good and more like preserves, as it's very chunky.  Both ways are good, though.)

3. Add the sugar and lemon juice and continue to cook the mirabelles over medium heat, stirring frequently, until the liquid looks syrupy and thick. If you want to check it for doneness, you can turn it off and put a dab on a chilled plate in the freezer and check it in a few minutes, when it’s cold: if it wrinkles when you nudge it, it’s done. If using a candy thermometer, the jam will set at around 218-220ºF (103-104ºC). (I found mine set around 210-212.)

4. Remove from heat, add the kirsch, eau-de-vie or vanilla, if using, and balance the flavor with a little bit more lemon juice, if desired. (When cool enough to taste.) Pour the jam into a clean jar, cover, and refrigerate until ready to eat.

Storage: The jam will keep in the refrigerator for at least two weeks. (I stuck one jar in the freezer, but haven't pulled it out yet to see how well it freezes.)

**This post and photos are property of http://dishingwithdish.blogspot.com/**

Friday, November 18, 2016

Cranberry Upside Down Cake

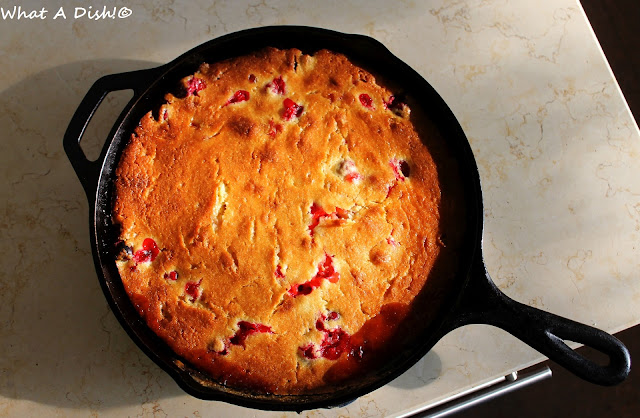
This cake was a surprise!!  I made it because it looked easy and I needed to use up some cranberries.  Well, it was SO GOOD!!  Of course I knew it'd be a good cake, but I was blown away by the awesome flavor.  The buttery cake, the caramel layer you cook on the bottom, and the tart cranberries.  So good!  Another great David Lebovitz recipe.  This would be great for Thanksgiving. (Btw, I've made so many of his recipes I'm gonna start a new David L. tag!)  

Note: the recipe calls for 10 oz. of cranberries.  My bag was about 12 oz., but I only used 10 oz.  Next time, I'd just throw the whole bag in there.  It would have been fine.  (The cranberries really cook down, and it wasn't that much extra.)  For now, I'll throw the extra cranberries into some mulling cider, but usually I'm glad not to have a tiny bit of something hanging around in my fridge.  Lol.  
Cranberry Upside Down Cake
adapted from David Lebovitz

Topping:
4 tablespoons (55g/2 ounces) unsalted butter, cubed (I used salted)
3/4 cup (125g) packed light brown sugar
3 cups (280g/10 ounces) fresh or frozen cranberries (I'd use my whole bag next time- almost 12 oz)

Batter:
1 1/4 cup (175g) all-purpose flour
1/4 cup (50g) coarse cornmeal or polenta (I used regular cornmeal I had on hand)
1 1/2 teaspoon baking powder, preferably aluminum-free
1/4 teaspoon salt
1/2 cup (115g/4oz) unsalted butter, cubed, at room temperature (I used salted)
3/4 cup (150g) granulated (white) sugar
grated zest of one lemon
2 large eggs, at room temperature
1 teaspoon vanilla extract
1/2 cup (125ml) whole or low fat milk, at room temperature

1. In a 9- to 10-inch (23-25cm) cast iron skillet*, melt the 4 tablespoons of butter and the brown sugar together, stirring frequently, until the sugar and butter is liquefied. When the mixture starts to bubble, remove from heat and set the pan aside. (*You can also use a cake pan, as long as it's ok on the stovetop for the short period of time needed to do this step.)

2. Preheat the oven to 350ºF (180ºC).

3. In a small bowl, whisk together the flour, cornmeal or polenta, baking powder, and salt.

4. In the bowl of a stand mixer, or by hand in a mixing bowl with a spatula, beat the ½ cup of butter, granulated sugar and lemon zest at medium high speed for 3 to 5 minutes, until very light and fluffy.

5. Reduce the speed of the mixer to medium and add the eggs one at a time, stopping the mixer to scrape down the sides. Mix in the vanilla extract.

6. At low speed, add half of the flour mixture, then the milk, then the remaining dry ingredients, mixing just enough so that they’re all combined. Do not overmix. I used a rubber spatula at the end to get the flour fully incorporated.

7. Distribute the cranberries in the prepared pan over the brown sugar mixture and shake the pan so they are in a relatively even layer. Spoon the batter over the cranberries in four mounds, then use a spatula to spread the batter evenly over the fruit.

8. Bake the cake until the top is golden brown and a toothpick inserted into the center comes out clean, about 40-50 minutes. (Mine was done at around 40,) Remove from the oven, wait 10-15 minutes, then run a knife around the cake. Place a serving platter overturned on top of the cake in the skillet, then using oven mitts to cover your hands, flip the two over simultaneously, until the cake releases from the pan.

Storage: The cake is best made and served the same day, warm if possible. You can rewarm slices in the microwave. It is also good served at room temperature.
**This post and photos are property of http://dishingwithdish.blogspot.com/ **

Monday, July 11, 2016

Moroccan-Spiced Grilled Chicken Kebabs with Cucumber Salad

I saw this delicious-looking chicken recipe on David Lebovitz's blog recently and made it soon after. I couldn't find the flatbread I wanted, and I didn't want to make it myself, so I picked up a few packages of Italian "Piadina" bread- it's like a large wrap bread.  It's really, really large, lol; I had to cut them in half for dinner.  (Usually I can find "Arabic Flatbread" here locally but I couldn't find it anymore.  Just use your favorite flatbread.  Homemade Naan bread would be great too.)
You make the chicken yogurt marinade ahead and let everything sit in the fridge for a while.  I made my own Moroccan spice mixture- Ras El Hanout, from a recipe I found online.  Then I made cucumber-feta salad from David Lebovitz.  I didn't even realize, until I was making it, that I've made the Cuke Salad before, a lot!  It's one of my favorite things.  I make it differently, usually, with tomatoes and olives added.


Moroccan-Spiced Grilled Chicken Kebabs with Cucumber Salad
adapted from David Lebovitz

6 cloves garlic, peeled
1 small onion, peeled
3/4 cup (180g) whole milk plain yogurt, preferably Greek-style
3 tablespoons fresh lemon juice
5 teaspoons Ras el Hanout spice mix, recipe below (I just used the whole mixture)
2 teaspoons freshly ground black pepper
1/2 teaspoon salt
1 teaspoon paprika, sweet or smoked
1 teaspoon crushed red pepper flakes
2-pounds (900g) boneless, skinless chicken thighs or breasts, trimmed of fat, cut into 1 1/4-inch (4cm) pieces

1. Finely mince the garlic. Grate the onion with the large holes of a grater. (Alternately, you can cut the garlic and onion into smaller pieces and finely chop them together in a mini-chopper- I used a mini food processor.) Put onions and garlic in a large zip-top freezer bag. You may also put them in a medium bowl and marinade the chicken in the bowl.

2. Mix in the yogurt, lemon juice, Ras el Hanout, salt, black pepper, paprika, red pepper, and chicken. Before you close the bag, push most of the air out of it, then seal the bag. Massage the chicken pieces so that they are all covered. Refrigerate for at least an hour, or overnight.

3. To cook, thread the chicken pieces on 4 to 6 skewers. Light the grill until the heat until it’s very hot. Brush the grill with a bit of oil and grill the skewers on one side until they are seared with grill marks, about 4 or 5 minutes, then turn the skewers and grill until the chicken is cooked through. They’ll take about 8-9 minutes, total. If you don’t have a grill, you can make these in a lightly oiled grill pan on the stovetop.

4. Serve with pita or flatbread and the Cucumber Feta Salad, recipe below.

Ras el Hanout 
adapted from Epicurious

1 teaspoon ground cumin
1 teaspoon ground ginger
1/2 teaspoon salt
3/4 teaspoon freshly ground black pepper
1/2 teaspoon ground cinnamon
1/2 teaspoon ground coriander seeds
1/2 teaspoon cayenne
1/2 teaspoon ground allspice
1/4 teaspoon ground cloves

1.  In a small bowl whisk together all ingredients until combined well. Spice blend keeps in an airtight container at cool room temperature 1 month. (Use the whole amount for the chicken recipe.)

Cucumber Feta Salad Recipe
adapted from David Lebovitz

1 large English cucumber, peeled, seeded and diced into pea-sized pieces (I shredded it in my food processor)
coarse salt
8 ounces (225g) feta cheese (I used 6 oz- what I had)
1/4 cup (60ml) olive oil
2-3 tablespoons freshly squeezed lemon juice
freshly ground black pepper
1 small red onion, peeled and finely-diced (optional)
1 tablespoon (each) chopped fresh mint, parsley and fresh dill

1. Place the cucumber pieces in a colander, mix with a light sprinkling salt, and let drain 30 minutes to an hour, shaking the colander from time to time. (If you choose to shred it instead, you can skip this and squeeze out water with your hands.)

2. Crumble the feta into a bowl and mash together with the olive oil, lemon juice, water, and a few turns of black pepper.

3. Mix in the cucumbers, onions, and herbs. Taste, and add more salt if desired.

**This post and photos are property of http://dishingwithdish.blogspot.com/ **

Wednesday, September 16, 2015

Gluten-Free Brownies

We love David Lebovitz's recipe for Gluten-Free brownies.  This recipe had caught my eye a while ago, and when I found that a friend coming for dinner was gluten-free, I knew I had to make them. That first time was a little embarrassing, because I severely under-baked them and had to actually return them to the oven an hour after I had taken them out.  They still turned out well enought, though.  The second time I made them, it was just for our fam and they turned out perfect.  They are so moist and fudgy; they don't last long around here.  I used half bittersweet, half milk chocolate for these (Ritter Sport bars).


David Lebovitz's Gluten-Free Brownies 

6 tablespoons (85g) butter, salted or unsalted (add a pinch of salt if using unsalted)
8 ounces (225g) bittersweet or semisweet chocolate, chopped (can use a mix; half bitter, half milk)
3/4 cup (150g) sugar
2 large eggs, at room temperature
1 tablespoon unsweetened cocoa powder, natural or Dutch process
3 tablespoons (30g) corn starch
optional: 1 cup (135g) nuts, toasted and coarsely chopped

1. Line the inside of an 8-inch (or 9-inch) square pan with foil so that it goes up the sides and forms handles. Lightly grease the foil with butter or non-stick cooking spray. Preheat the oven to 350º (180ºC).

2. Melt the butter and chocolate (and salt, if using) in a medium to heavy saucepan over very low heat on the stove top, stirring constantly until smooth.  Remove from heat and stir in the sugar, then the eggs, one at a time.

3. Sift together the cocoa powder and corn starch in a small bowl then stir them into the chocolate mixture. Beat the batter vigorously for at least one minute (very important to do at least one minute!), until the batter is no longer grainy and nearly smooth. It will pull away from the sides of the pan a bit. Add the nuts, if using, then transfer the batter into the prepared pan.

4. Bake for 25-30 minutes, or until the brownies feel just set in the center. Do not overbake. Remove from oven and let cool completely before removing from the pan and slicing. (Brownies will be very moist and fudgy inside.)


**This post and photos are property of http://dishingwithdish.blogspot.com/**

Friday, June 5, 2015

White Chocolate Cherry Ice Cream

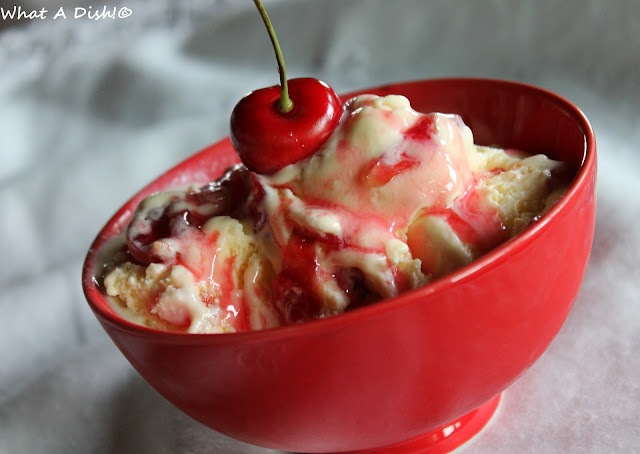
 I love David Lebovitz's ice cream book.  We have a cherry tree in our yard (yay! we thought it was an apple tree; lol.) that is full of cherries right now.  Or, was.  It's winding down now.  But anyway, we picked a bunch of them and I wanted to make ice cream.  In his book, there were many good ideas for using cherries in ice cream recipe, but this one jumped out at me because I love white chocolate.
You make a white chocolate custard base, and then cook cherries in sugar and water until they turn into a candy-like consistency.  Let both cool (I did overnight), and use the drained cherries in the ice cream and the leftover syrup on top.  Very good!  


White Chocolate Cherry Ice Cream
adapted from David Lebovitz

For the candied cherries:
1 pound fresh or frozen cherries, pitted (I measure after pitting)
1 1/2 cups water
1 cup granulated sugar
1 Tablespoon lemon juice
1/4 teaspoon pure almond extract

For the white chocolate ice cream:
8 ounces white chocolate, finely chopped
1 cup whole milk
2/3 cup sugar
Pinch of salt
5 large egg yolks
2 cups heavy cream

1.  Cherries: (Make the cherries ahead of time.) In a large heavy saucepan, combine the cherries, water, sugar and lemon juice. Heat over medium to medium high heat, until the liquid starts to boil.

2.  Turn down the heat to a low boil and cook, stirring frequently at first and then occasionally, for another 25 to 35 minutes, until the juice reduces to a thin syrupy consistency. Remove from the heat, stir in the almond extract and allow to cool to room temperature.

3.  Set a strainer over a bowl, and drain the cherries for at least 1 hour before folding into churned ice cream.  Overnight is good, too.  Coarsely chop the cherries or you can keep them whole. Reserve the liquid and store the candied cherries and syrup separately in the refrigerator for up to 2 weeks. To use, fold cherries into ice cream or drizzle the syrup as a topping.

4. Ice Cream Base: Place the chopped white chocolate in a large bowl with a mesh strainer set over top; set aside.

5.  In a medium heavy saucepan, heat the milk, sugar, and salt over medium-low heat until warm. In a separate medium bowl, beat the egg yolks together. Slowly pour the warm milk into the bowl with the egg yolks, whisking constantly, then transfer the mixture back into the saucepan.

6.  Set the saucepan back on the stove and heat the mixture over medium heat, stirring constantly with a heat-proof spatula or whisk, until the mixture thickens slightly. Pour the custard through the strainer over the white chocolate bowl. Stir the strained custard and white chocolate together until the white chocolate is completely melted and smooth. Stir in the cream.  Partially cover the bowl (at first) and chill the ice cream mixture in the refrigerator overnight. The next morning, freeze according to your ice cream maker's manufacturer's directions.

7.  As the ice cream comes out of the ice cream maker, place it into a freezer-safe container and fold in the candied cherries.  Cover, and freeze until hardened (or until desired consistency is reached.  My ice cream had a hard time freezing this time around; not sure why.)

**This post and photos are property of http://dishingwithdish.blogspot.com/ **

Friday, February 14, 2014

Easy Vanilla Frozen Yogurt

fro4W
I LOVE this frozen yogurt.  It's so incredibly easy, and just delicious, and only three ingredients.  This is so much better than any store-bought stuff with all the weird ingredients.  I made this twice in one week.  My kids loved it too.  We topped it off with strawberry mochi from Nuts.com....... SO GOOD!!!  (I love their mochi!  It's deliciously soft.)  (PS: Happy Valentine's Day; we're having chocolate lava cakes later but it will be too dark to take pics.  So I'm posting this delicious fro-yo... I said fro-yo again!)
fro2W
This is a David Lebovitz recipe, and you know any frozen treat from his has got to be good.  I have his ice cream book and love it; I've made quite a few recipes from there.  This one is as easy as mixing up 3 cups of whole milk yogurt (I used Greek whole milk yogurt), adding some sugar, and vanilla.  To give this one a little extra boost, I also added the seeds from one vanilla bean.  You just stir it together, stick it in the fridge for an hour, and then pour into your ice cream maker.  
fro7W
For any local readers, three cups of yogurt is 5, 150 gram containers of the good, German-made, Greek yogurt we can get here (lol!).  So it's 750 grams (or 3 cups) of yogurt total.  (The one I used is pictured below; that is good stuff to use for this if you can get it!)
fro8W
Easy Vanilla Frozen Yogurt
adapted from David Lebovitz

3 cups (about 750 grams) plain Greek yogurt (I used full-fat)
3/4 cup sugar
1 teaspoon vanilla extract
1 vanilla bean, scraped, optional

1.  Stir together the yogurt, sugar, vanilla, and optional vanilla bean seeds.  Stir until sugar is fully dissolved.  Refrigerate for one hour.

2.  Freeze in your ice cream maker according to manufacturer's directions.  I love this ice cream "soft-serve", or right out of the ice cream maker.  If frozen, let it soften a bit before serving, or it will kind of chip out.  
froW
*This post and photos are property of http://dishingwithdish.blogspot.com/ **

Tuesday, December 31, 2013

Salted Butter Caramel Sauce

carm3W
Let's send 2013 off in a good way, with some delicious salted caramel.  :)  There's an ice-cream place here that I love mostly for their salty-sweet homemade caramel sauce.  I wish it was PC to ask for a cupful of that with a spoon, and to skip the ice cream altogether. Because I totally want to.  But now, I don't have to, because I can make it myself at home, and it's even better!!  I loooove this stuff. Thanks, David Lebovitz.  
carmW
Salted Butter Caramel Sauce
adapted from David Lebovitz

6 tablespoons (85g) butter, salted or unsalted*
1/4 cup (150g) sugar
1 cup (250ml) heavy cream
1/2 teaspoon pure vanilla extract
3/4 to 1 teaspoon coarse salt* (good-quality sea salt or kosher salt)

1.  Melt the butter in a large, deep heavy-duty saucepan or oven.  Stir in the sugar and cook, stirring frequently, until the sugar is a deep golden brown (do not let it get too brown or caramel will taste burnt.)

2.  Remove from the heat, and immediately whisk in half of the cream until smooth.  (Wear an oven mitt, since the mixture will steam and may splatter and bubble up.)  Stir in the rest of the cream, then the vanilla, and salt.  *(If using salted butter, use only 3/4 teaspoon salt.  Up the salt to 1 teaspoon if using unsalted butter.)  If there are any lumps or caramel, whisk the sauce gently over low heat until they are dissolved. (I had quite a big lump that never dissolved, despite my trying.  So I just removed the lump from the caramel when it was all done cooking.)  Serve warm.  

Note:  This sauce can be stored in the fridge for up to 2 weeks.  Rewarm it gently in the microwave or in a small saucepan over very low heat.  
carm4W
**This post and photos are property of http://dishingwithdish.blogspot.com/ **

Wednesday, December 4, 2013

Biscoff Cookie-Lemon Ice Cream

bisc2W
This ice cream combines lemon and cinnamon-y Biscoff (or speculoos) cookies, which go very well together!!  The method of heating the lemon zest really makes for an intense lemon ice cream.  Instead of zesting the lemons, I cut long strips of zest off with a veggie peeler.  I made sure to only get the yellow part.  That step made this recipe much easier.  I also used store-bought Biscoff cookies instead of making my own.  

Biscoff Cookie-Lemon Ice Cream
adapted from David Lebovitz

3 large lemons lemons
3/4 cup sugar (150g)
2 cups heavy cream
1 cup whole milk
pinch of salt
5 large egg yolks
10-15 Biscoff or other spiced cinnamon sugar cookies, crushed

1.  Zest the lemons, into a food processor or blender. (I peeled off the yellow part only in long strips with a vegetable peeler.)  Blend together the sugar and the lemon zest. Add the lemon scented sugar to the milk and 1/2 cup of the heavy cream. Heat until steaming in a heavy bottomed sauce pan until the sugar is dissolved. Cover and let infuse for an hour.

2. Rewarm the lemon-infused mixture.  Pour the remaining 1 1/2 cups cream into a large bowl and set a mesh strainer on top.  In a separate medium bowl, whisk together the egg yolks and salt.  Slowly pour the heated heavy cream into the egg yolks while whisking constantly. Alternately you can carefully ladle the heavy cream into the yolks while whisking constantly.

3.  Once all the heavy cream is whisked into the eggs return the mixture to the sauce pan and heat over medium low until thickened, stirring constantly. DO NOT LET IT BOIL! You will know it’s ready once your finger can leave a trail on the back of the spatula or spoon, or a thermometer reads 170ºF.

4.  Pour the thickened cream mixture through the fine mesh strainer into the chilled cream. Stir until cooled, then cover with plastic wrap and chill overnight.  (Discard lemon zest.)

5.  Churn in your ice cream maker according to the instructions. Once the ice cream has been churned pour it into a container for freezing, and layer in the crushed biscoff cookies.  Freeze for at least 3 hours before serving.
bisc3W

Friday, October 25, 2013

Maple Walnut Ice Cream

mapleW
My daughter chose this ice cream for us to make together.  It was fun to make it with her, and tasted wonderful; perfect for fall!  I love David Lebovitz's ice cream book.  It never fails to make a delicious ice cream.  For this one, make the Maple Walnuts (Wet Walnuts) ahead of time so they can cool completely before being added to the ice cream.  I toast the walnuts in a skillet, remove then, and then use that same skillet to boil the syrup and complete the walnuts.

Last year, I made this Maple Gelato and loved that as well- it was delicious on apple crisp.  I haven't made an apple crisp yet, this year.
maple1W
Maple Walnut Ice Cream
adapted from David Lebovitz

1 ½ cups whole milk
2 tablespoons sugar
1 ½ cups heavy cream
5 large egg yolks
¾ cup dark amber maple syrup
1/8 teaspoon coarse salt
¼ teaspoon vanilla extract
Wet Walnuts; recipe below


1.  Warm the milk and sugar in a medium saucepan. Pour the cream into a large bowl and set a mesh strainer on top.

2.  In a separate medium bowl, whisk together the egg yolks. Slowly pour the warm mixture into the egg yolks, whisking constantly, then scrape the warmed egg yolks back into the saucepan.

3.  Stir the mixture constantly over medium heat with a heatproof spatula, scraping the bottom as you stir, until the mixture thickens and coats the spatula. Pour the custard through the strainer and stir it into the cream to cool. Add the maple syrup, salt, and vanilla, and stir until cool over an ice bath.

4.  Chill the mixture thoroughly in the refrigerator, then freeze it in your ice cream maker according to the manufacturer’s instructions. During the last few minutes of churning, add the Wet Walnuts, recipe below.

Wet Walnuts

1/4 cup dark amber maple syrup
3/4 cups walnuts, toasted and very coarsely chopped
Big pinch of salt

1.  Heat the maple syrup in a small skillet or saucepan until it just begins to come to a full boil. Stir in the walnuts, then cook until the liquid comes to a full boil once again. Stir the nuts for 10 seconds, then remove them from the heat and let cool completely. The nuts will still be wet and sticky when cooled. Chop coarsely and add to ice cream during last minute of churning.

**This post and photos are property of http://dishingwithdish.blogspot.com/ **
Friday, October 4, 2013

Golden Oreo Ice Cream

cic2W
After making the simple vanilla bean ice cream recently, I thought that recipe would be a really good base for a Cookies and Cream ice cream.  I bought the ingredients to make it, not bothering to buy Oreos, because I usually keep some on hand for cooking with (I don't like to eat Oreos unless it's in ice cream, or Oreo truffles sometimes).  Well, I didn't have any regular Oreos, but I did have a package of Golden Oreos.  My husband suggested that they'd be just as good as the regular in an ice cream recipe, so I gave it a go.  This ice cream was delicious!  (Well, what ice cream isn't.... really?)  
cic5W
Golden Oreo Ice Cream
adapted from this recipe (base recipe from David Lebovitz)

1 cup whole milk
¾ cup granulated sugar
2 cups heavy cream, divided

Pinch of salt
1 vanilla bean, split in half lengthwise
6 egg yolks
¾ teaspoon vanilla extract
15 (or so) Golden Oreos, coarsley chopped

1. Warm the milk, sugar, 1 cup of the heavy cream and the salt in a medium saucepan over low heat, stirring until the sugar is dissolved.  Scrape the seeds from the vanilla bean into the milk mixture and add the bean to the mixture as well.  Cover, remove from the heat and let steep at room temperature for 30 minutes.
2. Pour the remaining 1 cup heavy cream into a large bowl and place a fine-mesh sieve on top. Whisk the egg yolks in a medium bowl (I use my KitchenAid).  Slowly pour the warmed milk mixture into the egg yolks, whisking constantly.  Scrape the mixture back into the saucepan.
3. Place the saucepan over medium heat and stir constantly with a rubber spatula, being sure to scrape the bottom of the pan as you stir, until the mixture thickens and coats the back of the spatula, a few minutes.  The mixture should register 170 to 175 degrees F on an instant-read digital thermometer.
4. Pour the custard through the fine-mesh sieve and stir it into the cream.  Place the vanilla bean into the custard, stir in the vanilla extract, and place the bowl over an ice bath.  (I skip the ice bath.) Stir occasionally, until the mixture is cool. Cover and transfer the custard to the refrigerator until completely chilled, at least 8 hours or overnight.
5. When ready to churn the ice cream, remove the vanilla bean from the custard and freeze the mixture in your ice cream maker according to the manufacturer's instructions. Transfer to a freezer-safe container, and stir in the Oreos.  Store in the freezer (if you don't store in the freezer for a few hours, and eat right away, the Oreos will be crunchy instead of soft and melty like they should be). 
cicW
**This post and photos are property of http://dishingwithdish.blogspot.com/ **

Monday, September 16, 2013

Vanilla Bean Ice Cream

ic4W
Vanilla Bean ice cream is a basic, yet fancy-ish ice cream and everyone should have a recipe for it.  I've shared one or two recipes for this in the past, but I much prefer this one for how simple it is, plus the rich and creamy flavor.  This is another perfect recipe from David Lebovitz.  
ic2W
Vanilla Bean Ice Cream
adapted from David Lebovitz

1 cup whole milk
¾ cup granulated sugar
2 cups heavy cream, divided
Pinch of salt
1 vanilla bean, split in half lengthwise
6 egg yolks
¾ teaspoon vanilla extract
1. Warm the milk, sugar, 1 cup of the heavy cream and the salt in a medium saucepan over low heat, stirring until the sugar is dissolved.  Scrape the seeds from the vanilla bean into the milk mixture and add the bean to the mixture as well.  Cover, remove from the heat and let steep at room temperature for 30 minutes.
2. Pour the remaining 1 cup heavy cream into a large bowl and place a fine-mesh sieve on top. Whisk the egg yolks in a medium bowl (I use my KitchenAid).  Slowly pour the warmed milk mixture into the egg yolks, whisking constantly.  Scrape the mixture back into the saucepan.
3. Place the saucepan over medium heat and stir constantly with a rubber spatula, being sure to scrape the bottom of the pan as you stir, until the mixture thickens and coats the back of the spatula, a few minutes.  The mixture should register 170 to 175 degrees F on an instant-read digital thermometer.
4. Pour the custard through the fine-mesh sieve and stir it into the cream.  Place the vanilla bean into the custard, stir in the vanilla extract, and place the bowl over an ice bath.  (I skip the ice bath.) Stir occasionally, until the mixture is cool. Cover and transfer the custard to the refrigerator until completely chilled, at least 8 hours or overnight.
5. When ready to churn the ice cream, remove the vanilla bean from the custard and freeze the mixture in your ice cream maker according to the manufacturer's instructions. Transfer to a freezer-safe container and store in the freezer.
icW
**This post and photos are property of http://dishingwithdish.blogspot.com/ **