Showing posts with label coconut. Show all posts

Saturday, March 28, 2020

Easy Coconut Macaroons

I'm kind of cleaning out my pantry, using up older ingredients so I can better organize it right now.  In there, I had a bag of sweetened coconut and a can of sweetened condensed milk that was older and needed used.  I don't really use sweetened coconut for much anymore; I prefer unsweetened coconut chips when I make homemade granola now, and I don't use coconut for much else.  I didn't have high hopes for these but they were wonderful! I really wanted a recipe that used the whole bag of coconut and the whole can of milk, and this recipe was perfect.  I've made similar recipes before, like this one, but I prefer this new one, since the egg whites add a bit more substance, I think.  Although, the other one I linked up there is great for right now if you can't find, or don't want to use your precious eggs.
Easy Coconut Macaroons
adapted from Ina Garten

14 ounces sweetened flaked coconut
14 ounces sweetened condensed milk
1 teaspoon pure vanilla extract
2 egg whites, at room temperature
1⁄4 teaspoon kosher salt

1.   Preheat the oven to 325 degrees F.  Combine the coconut, condensed milk, and vanilla in a large bowl.

2.  Whip the egg whites and salt on high speed in the bowl of an electric mixer fitted with the whisk attachment until they make medium-firm peaks.

3.  Carefully fold the egg whites and salt into the coconut mixture. Drop the batter onto sheet pans lined with parchment paper using either a 1 3/4-inch diameter ice cream scoop, or 2 teaspoons.

4.  Bake for 25 to 30 minutes, until golden brown. Cool on wire racks.
**This post and photos are property of http://dishingwithdish.blogspot.com/ **

Friday, February 24, 2017

Halawa Dihiniyya- Iraqi-Style Fudge


This is my seventh and final recipe for our Seven Countries Dinner.  You can click on that link to see them all.  I featured recipes from Sudan, Somalia, Libya, Syria, Yemen, Iran, and Iraq.  I enjoyed the whole process of this dinner.  (Thinking of the idea in the first place, researching food from these countries, making a shopping list, and cooking.  I started cooking some things the day before.  The whole family loved this dinner and we had a chance to talk about these countries.)

The idea to do it actually came to me in a Zumba class.  :)  Lol.  (Where I do some of my best thinking, I guess.)  I was upset about the travel ban on these countries and was thinking of a way to do something to raise awareness and education about these countries. One thing all of humanity has in common is food.  We all need to eat, and so much culture and history is shown through food.  Food has the ability to bring people together.  I love learning about different cultures this way.  If I can't get the real thing from a country, I just make it myself.

I think trying food from different countries has the ability to make one more open-minded.  I hope you'll try some of these recipes.  For lots of recipes from all different countries, check out my Worldwide Cuisine tag.  
This fudge was just a delight. I'm so glad I found and made this recipe.  It had a great chewy texture that was broken by the nuts, and it showcased the flavors of coconut and cardamom.  This is something that I'll definitely be making again.  I recommend going to the original blog In My Iraqi Kitchen to read some history of this dessert.  The method is interesting; cooking some ingredients on the stove-top together, and then baking the whole thing. It was traditionally made using clarified butter, but I used half regular butter and half sunflower oil.


Halawa Dihiniyya- Iraqi-Style Fudge
adapted from My Iraqi Kitchen

1 cup milk
1 cup fat (I use 1/2 cup butter and 1/2 cup sunflower oil)
2 cups sugar
2 tablespoons date syrup (OR honey)
2 cups all-purpose flour
1 teaspoon ground cardamom
1 1/2 cups unsweetened shredded coconut
1 cup walnut halves

1. Preheat oven to 340 degrees F.  Put milk, fat, sugar and date syrup (or honey) in a small heavy pot. Stir and let mix boil until bubbly over medium heat (about 10 minutes). Then take the pot away from heat and right away start adding flour gradually, using electric mixer, like you do with cakes. (I poured mixture into my stand mixer and mixed from there.  If you had a small hand mixer you could mix right in the pot.) Mix in cardamom.

2. Grease a 12x7x2 -inch pan (or approximate size- I used a 9x13), and spread the bottom with half of the coconut. Scatter the walnut halves all over it. Then, pour the batter over the walnuts, and cover the surface with the rest of the coconut.

3. Place the pan on the middle shelf of the oven, drape it loosely with a piece of aluminum foil, and let bake for 35 to 40 minutes. (I had a hard time telling when it was done.  It was still a little soft looking, but browned.  I took it out and it firmed up to a perfect texture once it was cool.)

4. Take it out of the oven, and let it cool down completely on a cooling rack. Cut it into squares and serve. Store the leftovers in a plastic container and keep in refrigerator, where it will stay good to eat for several weeks (if you can resist the temptation). Enjoy!            
**This post and photos are property of http://dishingwithdish.blogspot.com**

Monday, April 4, 2016

Chicken Tikka Masala Soup

This isn't really traditional Indian food, but a soup based on the dish Chicken Tikka Masala.  I liked it, but I kind of missed the rice.  It was still good though, especially with homemade Naan bread for dipping.  I used a rotisserie chicken and simmered the carcass to make the 2 cups of broth.
Chicken Tikka Masala Soup
adapted from The Modern Proper

2 tbsp coconut oil
1 small onion
3 garlic cloves, minced
1/2 tsp cayenne pepper (or to taste)
1 Tbsp garam masala
1 tsp ground ginger
1/2 tsp cumin
1 tsp turmeric
1/2 tsp cinnamon
2 cups chicken stock
1 (28 oz) can crushed tomatoes
1 (14 oz) can coconut milk
salt, to taste
1 rotisserie chicken, meat removed and shredded for the soup

1.  Heat coconut oil over medium-high heat in a heavy soup pot.  Saute the onion for a few minutes and then add garlic for a few more minutes.  Add the spices and saute for 3 minutes longer.  To the pot, add the chicken stock, tomatoes, and coconut milk.  Simmer for 30 minutes, covered.  Using an immersion blender, puree soup until smooth and creamy.  Add shredded chicken and season with salt.
**This post and photos are property of http://dishingwithdish.blogspot.com/ **

Friday, June 20, 2014

Coconut Horchata

horW
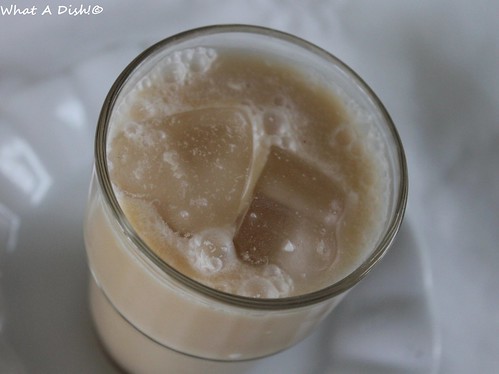
Way back in May, on Cinco de Mayo, we had this for our drink that night.  :)  I forgot what else we had, probably Carnitas and guacamole or something.  My husband I love horchata, and usually just make the rice kind.  (Horchata is a dairy-free rice drink from Mexico, usually flavored with cinnamon.)  I love that this recipe uses coconut milk also.  The only thing is that the coconut milk is kind of hard to incorporate; just whisk really well and enjoy anyway.  I think the kids tried this and like it.... but I don't remember.
hor4W
Coconut Horchata
adapted from Allrecipes

1 cup uncooked white rice
1/2 teaspoon ground cinnamon
4 1/2 cups water, divided
2/3 cup light or regular coconut milk
1/3 cup superfine sugar (or to taste)
1 teaspoon vanilla extract

1. Pour rice, cinnamon, and 3 cups water in a blender; blend until rice begins to break up, about 1 minute.
Transfer rice mixture to a large bowl and stir in remaining 1 1/2 cups water; let stand for at least 3 hours, whisking occasionally.

2.  Strain rice mixture with a fine sieve into a large pitcher and discard rice.  Stir coconut milk, sugar, and vanilla extract into the pitcher. Chill completely and stir before serving over ice.


                                                          **This post and photos are property of http://dishingwithdish.blogspot.com/ **

Monday, May 26, 2014

Fresh Strawberry Pie with Coconut Oil Crust

pie1W
First of all, I hope everyone has had a peaceful and meaningful Memorial Day today.  I grew up on military bases, and am still around them and their families on an almost daily basis.  I'm honored to know so many great military members.  

It seems like Memorial Day means it is finally summertime, so I wanted to share this strawberry pie with you. These delicious strawberries were not local, but imported from Spain.  (So, as "close" as we can get to local....lol!  Just a few hundred miles away by plane....)  Anyway, they were delicious, and strawberries have been scarce here this year, so I'm just happy to see them from anywhere at this point.  Can't wait for the local ones though; they are so good!!  I hope I don't miss the small window for them.
pie6W
Since we're moving, I didn't replace my usual organic shortening when I ran out, so I couldn't make my usual pie crust; my mom's recipe that is my go-to.  I made the same filling recipe as in that post; just a different crust; I used coconut oil instead of shortening! And we all loved it.  My boys aren't crazy about coconut in things, but they had no idea there was coconut oil in here, and I used virgin oil (has a stronger coconut flavor).  You can see my pie crust shrank some while blind-baking it, but I nobody really cares about that; this is delicious.  (I'm a rebel and never use pie weights- oh my!)
pie9W
pie7W
Fresh Strawberry Pie with Coconut Oil Pie Crust
adapted from here and Baking Bites

1 baked coconut oil pie crust (single), recipe follows
1 1/2 quarts (6 cups) strawberries, hulled
1/2 cup sugar
2 tablespoons cornstarch
1/2 cup water
1 package (3 oz) cream cheese, softened (I just used 1/2 block- 4 oz.)

1. In small bowl, mash enough strawberries to measure 1 cup. In 2-quart saucepan, mix sugar and cornstarch. Gradually stir in 1/2 cup water and mashed strawberries. Cook over medium heat, stirring constantly, until mixture thickens and boils. Boil and stir 1 minute; cool.

2. In medium bowl, beat cream cheese until smooth. Spread evenly in cooled pie crust. Top with remaining strawberries. Pour cooked strawberry mixture over top. Refrigerate until set, about 3 hours. Store in refrigerator.

Coconut Oil Pie Crust
One 9-inch single crust
from Baking Bites

1 1/2 cups all purpose flour
1 tbsp sugar
1/2 tsp salt
1/2 cup coconut oil, room temperature
4-7 tbsp water, cold

1.  Whisk together flour, salt and sugar in a large bowl.  Rub in coconut oil with your fingertips or a pastry blender, pressing it into the flour mixture and breaking it up, until mixture resemble very coarse sand and no pieces larger than a pea remain.

2.  Using a fork, stir in cold water until dough almost comes together into a ball. Add water gradually, a tablespoon or two at a time. Press dough into a ball with your hands and wrap in plastic.  Chill for at least 60 minutes before using.

(To bake crust for Strawberry Pie, roll out on a floured surface to fit a 9-inch pie pan.  Bake at 425 F for 15-20 minutes, or until lightly browned.  Cool before proceeding with recipe.)
*Makes crust for one 9-inch pie.  Recipe can be doubled for a double crust.
pieW
**This post and photos are property of http://dishingwithdish.blogspot.com/ **

Monday, March 3, 2014

Filipino Bibingka

Bibingka
This is a Filipino dessert.  It's gluten-free, containing rice flour and coconut.  The texture is a little chewy.  My friend and I made it to go with our Pancit.  We made a half recipe and it made so much still!  My kids were too scared to try it for some reason so I probably wont' make it again, although I really enjoyed trying this.  I don't remember if I've ever had it before.   Since I cut the recipe in half, I was left with a half-can of coconut milk and condensed milk; I just used both in some crockpot steel-cut oats and they were very good.
bibi1W
Filipino Bibingka
adapted from the Kitchn
(Adapted from Mark Marking)
this is a half-recipe; makes one 9x13 pan

1/2 (13.5-ounce) can coconut milk
1/2 (14-ounce) can sweetened condensed milk
1/4 cup (1/2 stick) butter, melted
3 eggs
1 (12-ounce) jars macapuno coconut strings in heavy syrup*
1/2 (16-ounce) box mochiko sweet rice flour* (so 8 oz.)
1/2 cup packed brown sugar
2 Tablespoons cup almond flour/ground almonds
1/2 tablespoon vanilla extract
Ground cinnamon

1.  Preheat oven to 375°F. Line a 9x13" baking pan with parchment paper.

2.  In a large mixing bowl, beat coconut milk, condensed milk, and melted butter until combined. Add eggs, one at a time, and beat until combined. Do the same with the jar of macapuno strings. Gradually beat in mochiko flour (do not pour all at once or it will get clumpy). Follow that with the brown sugar and almond flour.  Once you achieve an even consistency, add vanilla extract and beat until combined.

3. Pour batter into lined baking pan. Bake until lightly browned, about 20-30 minutes. Sprinkle cinnamon evenly over the cake. Continue to bake until golden brown and a toothpick inserted in the center comes out clean, between 2-15 minutes longer.

4.  Remove from pan and let cool on the parchment paper. Once cooled down, cut into to 2-inch squares. Store in an airtight container at room temperature for 1-2 days or in the refrigerator for 1 to 2 weeks.
*Available at Filipino and many Asian markets.  See last pic on post.
Bibingka

bibi9aW
**This post and photos are property of http://dishingwithdish.blogspot.com/ **

Friday, February 7, 2014

Coconut Cream Chocolate Fudge


I wanted to try coconut cream, or coconut butter (not the same as cream of coconut), so I bought a jar from Vitacost a few months ago.  Coconut butter is just raw coconut that is so blended up it becomes like a spread, almost solid at room temp.  This is because it contains the whole coconut flesh, which contains the oil.  It's very good just by itself, but I had a whole jar to use, so I needed to make something with it. 
I originally bought it so I could make my own coconut peanut butter, but decided not to do that after all.  So I chose this recipe- it's a dairy-free fudge that would be vegan if not for the honey. (One could use agave.)  I like nuts in my fudge, so I added 1/2 cup of chopped macadamias to this, and it was a good move.  

This fudge is supposed to set up in the fridge, but after that, I'd remove it and store and eat it at room temp.  For some reason, I thought you were supposed to store this in the fridge, and I really didn't like it very much!!  I finally took it out of the fridge to try it at room temp and it was SO MUCH better.  Out of the fridge, its' hard and tastes almost bitter.  At room temp, it's soft and creamy, melts in your mouth, and is not bitter at all.  I love it at room temp.  

Coconut Cream Chocolate Fudge
adapted from the Coconut Mama

1 1/2 cups coconut butter
1/3 cup organic cocoa powder
1 tablespoon vanilla extract
1/2 cup raw honey
1/8 teaspoon sea salt
1/2 cup chopped macadamias, optional

1. Heat a medium saucepan over low heat. Add coconut cream concentrate/coconut butter, cocoa powder, vanilla and sea salt. Mix well as the coconut cream melts. Slowly add the raw honey into the coconut mixture until combined.  If using nuts, mix them in now.

2. Pour the warm fudge into greased 8 inch square pan. Cover and refrigerate. Allow fudge to refrigerate for 4 hours or until its completely set. Cut into squares and serve at room temp.

**This post and photos are property of http://dishingwithdish.blogspot.com/ **

Saturday, November 23, 2013

Coconut Almond Macaroons

These coconut macaroons (not to be confused with French macarons) are SO quick and easy to make, and delicious as well!  The almond flavor really sends them over the top.  I tried to melt chocolate to drizzle on these things, but it just got all clumpy and weird, so I ended up kind of schlepping it on all messy-like.  I preferred the plain ones without chocolate, though.  The recipe called for a weird amount of coconut, but I just used a whole package.  The recipe also doesn't specify which coconut to use- sweetened or unsweetened.  I had to use sweetened, because it was all I had on hand at the time.  So, these turned out super sweet.  They were still good, but I'd like to try unsweetened next time, or half and half.  
Coconut Almond Macaroons
adapted from Allrecipes

1 package (14 oz) flaked coconut (I used sweetened, but want to try with unsweetened)
1 (14 ounce) can sweetened condensed milk
pinch salt
2 teaspoons vanilla extract
1 1/2 teaspoons almond extract

1.  Preheat oven to 350 degrees F (180 degrees C).

2.  In large mixing bowl, combine coconut, sweetened condensed milk, salt, and extracts; mix well.  Drop by rounded teaspoonfuls onto aluminum foil-lined and generously greased baking sheets. Bake 8 to 10 minutes or until lightly browned around the edges. Immediately remove from baking sheets. Store loosely covered at room temperature.
**This post and photos are property of http://dishingwithdish.blogspot.com/ **

Wednesday, June 5, 2013

Coconut Steel-Cut Oatmeal (Slow Cooker)

I've had the idea of an oatmeal made with coconut milk floating around in my head for a while.  I just took a recipe I've used often, and instead of one can of evaporated milk, I used one can of coconut milk.  It was delicious.  I topped servings with toasted coconut and sliced bananas.  

Coconut Steel-Cut Oatmeal (Slow Cooker)
adapted from here

1 cup steel cut oats
1 can (13.5 oz) coconut milk, plus enough water to bring liquid to 4 cups
1/4 cup pure maple syrup (or homemade)
2 tablespoons packed light brown sugar (add more or less to taste)
1/4 teaspoon salt
1/2 teaspoon ground cinnamon
1.  Lightly coat the inside of a small (2-3 quart) slow cooker with cooking spray. Combine all the ingredients in the slow cooker and stir. Cook for 4-5 hours on low. Stir thoroughly before serving with a rubber spatula or wooden spoon.
2.  If not serving immediately, cool and refrigerate, covered.  In the mornings, place portions in micro-wave safe bowls and microwave for 3-5 minutes, or until hot.  Serve with dairy or almond milk, fresh fruit and/or frozen berries, and flax and chia seeds, if desired, a dash of extra cinnamon, and toasted coconut.

                                                     **This post and photos are property of http://dishingwithdish.blogspot.com/ **

Wednesday, March 27, 2013

Coconut Oil Granola

Granola with Coconut Oil
On Pinterest lately, I've seen a few recipes for granola using coconut oil instead of canola or some other kind of oil.  I have coconut oil on hand and don't use it enough, so I figured I'd take my regular granola recipe and just swap out the regular oil for coconut.  The recipe already contains coconut, so it was perfect.  I had to melt the coconut oil first in the microwave, and it did not lend a strong coconut flavor to the granola.  I would have been fine either way, but this way, my picky kids ate it without protest.  :) 

Almond Maple Coconut Oil Granola
adapted from here and Allrecipes.com

3 cups rolled oats
1/2 cup sliced almonds or walnuts
2/3 cup raw whole almonds
1/4 cup wheat germ
2 Tablespoons ground flax seeds
1/2 cup pepitas, optional (shelled pumpkin seeds)
1/2 (14 ounce) package flaked coconut
1/3 cup unsalted sunflower seeds
1/3 cup pure maple syrup
2 Tablespoons packed dark brown sugar
1/4 cup coconut oil, melted
2 Tablespoons cup warm water
1/8 teaspoon salt

1. Preheat the oven to 250 degrees F (120 degrees C). Lightly grease 1 large cookie sheets (I use a 9x13 pan) with cooking spray.

2. In a large bowl, toss together the oats, almonds, wheat germ, flax, pepitas, coconut, and sunflower seeds. In a separate bowl, whisk together the maple syrup, brown sugar, coconut oil, water and salt. Pour the liquid over the oat and nut mixture, and stir until evenly coated. Spread out on the prepared cookie sheet.

3. Bake for 1 hour and 15 minutes in the preheated oven, stirring occasionally (every 15-25 min) until evenly toasted. Cool, and store in an airtight container at room temperature.
Granola with Coconut Oil
**This post and photos are property of http://dishingwithdish.blogspot.com/ **

Monday, October 22, 2012

Coconut & Lime Ice Cream

Not long ago, we had a friend over for some Indian food, and I wanted something cool, creamy and refreshing for dessert, so I looked for a coconut-lime ice cream flavor.  I found a recipe that looked good, and instead of using whole milk, I used coconut milk for even more coconut flavor, and it was very good!  This was really sweet though, so I'd suggest only used 2 Tablespoons of sugar instead of the 1/4 cup.  It already has sweetened condensed milk and sweetened coconut.  Or, use unsweetened coconut.
Coconut & Lime Ice Cream
adapted from Two Peas & Their Pod

1 can (about 13.5 oz) full-fat coconut milk
1 cup sweetened shredded coconut
2 Tablespoons granulated sugar
Pinch of salt
4 large egg yolks
1 (14 ounce) can sweetened condensed milk
1/2 cup fresh lime juice
1 Tablespoon finely chopped lime zest, optional
1 teaspoon coconut extract
toasted coconut, optional, for serving

1. In small sauce pot, combine the coconut milk, coconut, sugar, and salt. Stir with a wooden spoon over medium heat. Continue simmering until it has reduced to by about a fourth. Cover and allow to steep for one hour. After one hour, strain the coconut milk into a measuring cup. Reheat milk mixture over medium-low heat.  (I kept the coconut to spoon over my yogurt & granola in the mornings; save in the fridge.)

2. In a separate bowl, whisk egg yolks. Once milk mixture is hot, temper the yolks by adding half of the mixture into the eggs, whisking constantly. Return mixture to saucepan, and heat until thickened.

3. Pour sweetened condensed milk, lime juice and zest into a large mixing bowl, over an ice bath. Strain custard into the cream, stirring until cooled. Add coconut extract, stir, and place in refrigerator until thoroughly chilled, about 5 hours or overnight.

4. Once chilled, add to ice cream maker and follow manufacturer’s instructions.  For hard ice cream, store in a freezer-safe container, in the freezer for a few hours.  Serve with toasted coconut, if desired.

**This post and photos are property of http://dishingwithdish.blogspot.com **

Sunday, July 15, 2012

Chewy Coconut Cookies

I love these cookies- I made them a couple times back in 2005 or so and I just busted out the recipe again recently; I needed something to take to a book club.  They come together quickly and I love how they taste.  You could even add lime zest to make a coconut & lime cookie!  ;)  I've always used sweetened coconut, but one could make them less sweet by using unsweetened coconut.
Chewy Coconut Cookies
adapted from Allrecipes
makes about 3 dozen

1 1/4 cups all-purpose flour
1/2 teaspoon baking soda
1/4 teaspoon salt
1/2 cup butter
1/2 cup packed brown sugar
1/2 cup white sugar
1 egg
1/2 teaspoon vanilla extract
1 1/3 cups flaked coconut

1.  Preheat oven to 350 degrees F (175 degrees C.) Combine the flour, baking soda, and salt; set aside.

2.  In a medium bowl, cream the butter, brown sugar, and white sugar until smooth. Beat in the egg and vanilla until light and fluffy. Gradually blend in the flour mixture, then mix in the coconut. Drop dough by teaspoonfuls onto an ungreased cookie sheet. Cookies should be about 3 inches apart.

3.  Bake for 8 to 10 minutes in the preheated oven, or until lightly toasted. Cool on wire racks.


**This post and photos are property of http://dishingwithdish.blogspot.com/ **

Sunday, April 1, 2012

April Fools :)

I love these tiny hamburger "slider" cookies; they are so fun!  They taste pretty good too, but to me, I have more fun making and looking at them.  (But that did not stop me from eating two of them!!)  My husband and I made these for our kids today for April Fool's Day.  The kids loved them!!  They're so easy, too.  If desired, one could even add different colors of frosting for mustard & ketchup.  We kept things simple today with just the "bun", "meat", and "lettuce".
Hamburger Cookies
adapted from Allrecipes

2 drops green food coloring
1/4 cup flaked coconut
48 vanilla wafers
24 chocolate covered thin mints (Peppermint Patties)
1 tablespoon sesame seeds
water
corn syrup or honey

1.  Preheat oven to 350 degrees F (180 degrees C).              

2.  Put the coconut into a small ziplock bag.  Add the food coloring, close the bag, and shake until coconut is tinted. Set aside.               

3.  Place 1/2 of the vanilla wafers, flat side up, in an ungreased cookie sheet. Top each wafer with a peppermint patty. Place in the oven about 1 minute or just until chocolate begins to soften.             

4.  Remove cookies from oven and sprinkle each mint with 1/2 teaspoon coconut (for lettuce). Place another vanilla wafer on top and press gently. Put some water in a tiny bowl.  Add a drop of corn syrup to the bottom; do not stir.  Using a clean paint brush, drag it through both the corn syrup and water.  Brush the top of each "hamburger" with just enough water mixture to moisten so that the sesame seeds will stick when sprinkled on top of each cookie. 
**This post and photos are property of http://dishingwithdish.blogspot.com/**/

Wednesday, March 28, 2012

Homemade Almond Joy

Maybe I should have titled this post "What Not To Do.... When Making Homemade Almond Joys."  These would have turned out sooo well, had I just followed the directions.  (They still tasted good, just looked funky!!)  Instead, I thought I was being all smarty-pants by mixing up the coconut filling the night before and sticking it in the fridge.  That way, I thought, it'll be ready for me in the morning when I have more time!  Well.... bad idea, folks!  Even though I stuck the filling in an airtight container, it dried out and hardened pretty bad.  It was really hard to form the little "logs".  I tried adding some moisture as I was forming the logs, but it didn't really help.  They were crumbling in my hands! 
I still pressed forward, though, even though I probably should have just stopped and called it good.  Trying to dip them was just a joke... as you can see from the photo above, I only got one "good" one, out of the batch, and it's not even that good, lol!  I was getting frustrated by trying to do the rest, so I just glopped chocolate on top of the rest of the logs. 

But, I'm still putting this on my blog, because I'm sure if you follow the directions (from one of my fave bloggers, Joy the Baker), these will turn out great!  The "dough", when I first made it, was moist and perfect.  Plus, I spent quite a while on these and I liked how the pics turned out!  ;)  I need to document these!  I made this whole recipe wearing my baby on my back in my Boba baby carrier- my newest carrier, and I love it! 

PS:  Since the dippage went awry, I had a lot of leftover chocolate.  I stored it in an airtight container on the counter for a few days, and when I felt up to it, decided to make it into something else.  I took it, coconut chunks and all, and re-melted it with some peanut butter.  Then I filled tiny mini wax (or foil) muffin cups (the size of a mini Reeses pb cup) with the mixture.  The result- homemade, EASY, pb 'cups'.  They were very popular and gone in no time!  I thought I had the recipe here on my blog but I can't find it.  There's a pic of them here though (the gold foil ones).
Homemade Almond Joy
adapted from Joy the Baker

7 ounces sweetened condensed milk
1 cup powdered sugar
1 tablespoon pure vanilla extract
pinch of salt
2 1/2 cups unsweetened flaked coconut
30 almonds
about 20 ounces (a bag and a half) of good quality semi sweet chocolate chips

1.  Preheat the oven to 350 degrees F, spread raw almonds onto a baking sheet and toast for about 8-10 minutes. Don't let them get too brown.  Remove from the oven and allow to cool.

2.  In a medium bowl, whisk together sweetened condensed milk, powdered sugar, salt and vanilla extract. Stir in the unsweetened coconut. The mixture will be thick; I used my Kitchenaid. Place mixture in the fridge for 30 minutes. It’s easier to work with if it’s a little cold, but not too long- it will get too hard and dry out.

3.  Line a baking sheet with parchment paper. Remove the coconut mixture from the fridge. With clean hands, shape one tablespoon of coconut into a little log about 2 inches long and 3/4-inch thick. Press the logs together very well so they don’t crack when dipped. Place the log on the lined baking sheet and continue until all of the coconut mixture is gone. Rinse hands occasionally if they get too sticky. Press an almond on top of each coconut log.  It's ok if it does not completely stick. Place the baking sheet in the fridge to chill while you melt the chocolate.

4.  Place a medium pot with two inches of water over a medium flame. Bring the water to a simmer. Place chocolate chips in a heat proof bowl and place the bowl over the simmering water (a homemade double boiler). Stir the chocolate as it melts. Turn off the flame once the chocolate has melted but keep the bowl of melted chocolate over the hot water.

5.  Remove the coconut candies from the fridge. Place one coconut almond log on a fork. Use a spoon to scoop a bit of chocolate over the almond. This will help the almond stick to the candy and not fall off during dipping. Lower fork into chocolate and spoon chocolate over candy to coat. Lift fork and gently shake to release some of the chocolate. Scrape the bottom of the fork along the side of the bowl and place on the lined baking sheet. You might need a toothpick to help get the candy off the fork. Repeat until all candy is coated in chocolate. If chocolate gets thick, just turn on the flame and heat slightly.

6.  Let dipped candy harden in the fridge for 45 minutes. Store in an airtight container at room temperature. If you need to layer the candy in a container, use waxed paper to separate the layers.
**This post and photos are property of http://dishingwithdish.blogspot.com/**/

Friday, November 4, 2011

NY Times Olive Oil Granola

Wow- I absolutely loved this granola.  This love made me feel guilty about "cheating" on my first love, "The Granola", but after making The Granola regularly for the last 5+ years, I got the itch to try a new recipe and was so glad I did!  (I still love you, first love Granola.  It's ok). 

I was intrigued, first of all, by the use of olive oil in this recipe.  There was actually so much olive oil in here that I had to add an extra cup of oats because the mixture was so wet.  Next time, I would try 1/3 cup olive oil instead of 1/2 cup.  This recipe calls for 3/4 cup of maple syrup- I used 1/2 cup maple syrup and 1/4 cup agave nectar (trying it out for the first time).  I totally forgot to add the 1/2 cup brown sugar and was glad, because it was plenty sweet with all of that maple syrup and agave nectar.  I will omit that from the recipe posted below.

I LOVED the pistachios, pepitas (hulled pumpkin seeds), cinnamon, and especially cardamom in this!  The flavor combo was SO good!!  You might notice the almonds in the photo- that's because I ran out of pistachios and had to use part almonds/part pistachios.  I've since bought more pistachios, so next time (and it will happen soon), I'm going to use 1 cup raw pistachios and 1/2 cup whole almonds, because I really do like almonds in my granola.  After baking (and after taking these pics), I added some dried cranberries to this (instead of the dried apricots called for). 

In the recipe below, I changed the oats amount from 3 to 4 cups.  I also suggest you start out with 1/3 cup olive oil and add a bit more if needed.  PS:  I made this over a month ago when I could still get a few good nectarines here and there.  :(  Those days are over!  Waaaah!

Note:  If your oats are gluten-free, this granola is a gluten free food!  (Many oats are processed in the same facilities as wheat and other gluten-containing products, so many oats are "contaminated" with gluten.)  I'll include a Gluten-Free tag on this; chances are, if you cook gluten-free, you already know to look for gluten-free oats.  :)
NY Times Olive Oil Granola
from the NY Times :)

4 cups old-fashioned rolled oats
1 cup raw pistachios, hulled
1/2 cup raw whole almonds
1 cup raw pumpkin seeds, hulled
1 cup coconut chips (any unsweetened, dried coconut) 
1/2 cup pure maple syrup
1/4 cup agave nectar
1/2 cup extra virgin olive oil (first try 1/3 cup and see if that's enough-add more if needed)
1 teaspoon kosher salt
1/2 teaspoon ground cinnamon
3/4 teaspoon ground cardamom
3/4 cup dried cranberries, optional

1. Preheat oven to 300 degrees. In a large bowl, combine oats, pistachios, pumpkin seeds, coconut chips, maple syrup, agave nectar, olive oil, salt, cinnamon and cardamom. Spread mixture on a lightly greased, rimmed baking sheet in an even layer and bake for 60 minutes, stirring every 15 minutes, until golden brown and toasted. (May need to bake a bit longer.)  Cool on baking sheet.

2. Transfer granola to a large airtight container and add dried cranberries, tossing to combine.
**This post and photos are property of http://dishingwithdish.blogspot.com/ **

Wednesday, May 11, 2011

Lemon-Coconut Bread

This quick bread is moist and tasty, and easy to make.  There is not very much fat in it, either, unlike a lot of quick breads.  The original recipe called for veggie oil, but I used virgin coconut oil instead- loved it!  Don't be like me and use too much lemon juice in the glaze- mine was too thin and pretty much just ran right off the bread.  I had to gather up the extra glaze from the cutting board below and pour it back on the bread... over and over again, till it started to firm up and dry a little.  I don't know why I added so much liquid... I have made glazes like this before!

Lemon-Coconut Bread
Makes one 9×5-inch loaf

2 1/4 cups all-purpose flour (I used 1 cup whole wheat pastry)
3/4 cup granulated sugar
1 tablespoon baking powder
1/4 teaspoon salt
1 tablespoon lemon zest
3/4 cup sweetened coconut
2 tablespoons coconut oil or canola oil
2 eggs
3/4 cup milk
1/4 cup lemon juice

For lemon icing:
1 1/2 cups confectioners’ sugar
2-3 tablespoons lemon juice

1.  Preheat oven to 350 degree F. Grease one 9×5-inch loaf.  Stir together flour, sugar, baking powder, salt, and lemon zest in a large bowl. Stir in coconut.

2.  Beat oil, eggs, and milk with an electric mixer in a separate bowl until frothy. Stir in lemon juice. Pour mixture over dry ingredients and stir until just combined. Spoon into prepared pan.

3.  Bake in preheated oven for 40-70 minutes or until a toothpick inserted in the center comes out clean.

4.  Make the icing: Stir together confectioners’ sugar with 2 tablespoons lemon juice in a bowl. Add more lemon juice if it’s too stiff.

5.  When the cake is done, let it cool in pan over rack for 10 minutes. Remove pan and let it cool completely on rack before icing it.

**This post and photos are property of http://dishingwithdish.blogspot.com/ **

Saturday, April 16, 2011

Homemade Granola Bars

These are a fun, quicky and easy project.  They taste good, too!  I've used fat free sweetened condensed milk before with good results.  This time around, I used chopped white chocolate with a few chocolate chips thrown in.  You can add whatever grains and seeds to these that you want.  (I never use quick oats, but I did for these, because I accidentally bought a little container of them a while ago.  I think regular oats would be good too). 

Homemade Granola Bars

3 cups quick-cooking oats*
1 (14 ounce) can sweetened condensed milk
2 tablespoons butter, melted
1 cup flaked coconut
1 cup sliced almonds
1 cup miniature semisweet chocolate chips
1/2 cup sweetened dried cranberries


1.Preheat oven to 350 degrees F (175 degrees C). Grease a 9x13 inch pan.

2.In a large bowl, mix together the oats, sweetened condensed milk, butter, coconut, almonds, chocolate chips and cranberries with your hands until well blended. Press flat into the prepared pan.

3.Bake for 20 to 25 minutes in the preheated oven, depending on how crunchy you want them. Lightly browned just around the edges will give you moist, chewy bars. Let cool for 5 minutes, cut into squares then let cool completely before serving.
*Look for gluten-free oats if gluten is an issue.

**This post and photos are property of http://dishingwithdish.blogspot.com/ **

Friday, April 30, 2010

It's a Horse, of Course (Birthday Cake)

Here's an interesting birthday cake for you. My daughter has been begging for a horse cake for a few birthdays now.  She wanted to me carve a horse out of cake and frost it to look like a horse, but I told her there's no way that I could manage that.  (Especially with my farm-animal-turned-cake track record.....)  Finally, I said I'd do it, but only if I could use one of her plastic toy horses.  She agreed!!  If only I had known that 2 years ago....  This was one of the easiest cakes ever.  A single-layer vanilla bean cake, frosted with simple butter frosting (softend butter, powdered sugar, vanilla and a bit of milk),  and covered with coconut grass (put coconut into a ziplock bag with two drops of green food coloring and shake, shake, shake).  Mr. Horsey looks like he's enjoying a wonderful meal of ankle-deep coconut grass.  Good times, good times. 

Favorite Vanilla-Yellow Cake

1/2 cup unslated butter, softened
3/4 cup white sugar
4 egg yolks
1/4 cup and 2 tablespoons milk
1 teaspoon pure vanilla extract
1 cup cake flour
1 teaspoon baking powder
1/4 teaspoon salt
1 vanilla bean, split, seeds scraped out

1.  Preheat oven to 350 degrees F (175 degrees C). Butter and flour one 8-inch round pan, or a heart-shaped pan. Line bottom with waxed paper and butter the wax paper.

2.  Whisk together the flour, baking powder and salt. Set aside. In a large bowl of a stand mixer, cream together the butter and sugar until light and fluffy. Beat for 3-5 minutes to get a nice, light and fluffy cake. Beat in the egg yolks one at a time, then stir in the vanilla and vanilla bean seeds. Beat in the flour mixture alternately with the milk, mixing just until incorporated. Pour batter into prepared pan. Tap pan on countertop a few times to get rid of air bubbles.

3.  Bake in the preheated oven for 25 to 30 minutes, or until top springs back when lightly tapped, or toothpick comes out clean. Cool 15 minutes before turning out onto cooling rack.

**This post and photos are property of http://dishingwithdish.blogspot.com**

Friday, May 23, 2008

Coconut Marzipan Cookies

These cookies are so good. If you love a chewy, almond-flavored cookie, you will like these too. I used a package of inexpensive marzipan that I brought back from Germany. My package was 200 grams, which is a little over 7 ounces.

We're going to Portland, OR for the weekend, I can't wait to get out of town and go somewhere different! Yes, it will be raining there, but it's supposed to rain here all weekend anyway. ;)


Coconut Marzipan Cookies

7oz marzipan
1/2 cup unsalted butter, softened
1 cup sugar
1 large egg and one egg white, room temperature
1/4 teaspoon pure almond extract
3/4 cup all-purpose flour
1/2 cup whole-wheat pastry flour
1 teaspoon baking powder
1/4 teaspoon salt
1 cup rolled oats
1/2 cup unsweetened coconut flakes
colored sugar

1. Preheat oven to 350°. Grease 2 cookie sheets or line with parchment.
2. Mix marzipan, butter and 1 cup of sugar in stand mixer. Beat until well combined. Add egg and egg white, and almond extract. Beat on high for 3 minutes.
3 Sift flour with baking powder and salt. Add flour mixture, oats and coconut to almond mixture. Mix until combined. Form into 1" balls and place on prepared sheets. I used a medium cookie scoop with a wire release.
4. To slightly flatten balls, dip a flat bottomed glass into granulated sugar and press down lightly. Leave plain or, depending on the occasion, sprinkle with colored sugar.
5. Bake for 8-10 minutes. Remove from oven and cool on wire racks. Store in an air-tight container between layers of wax paper.

**This post and photos are property of http://dishingwithdish.blogspot.com/ **

Tuesday, April 1, 2008

"The" Granola

I love granola, but not the store-bought variety so much. I found this recipe about two years ago and have been making it regularly since then. Among my online forum cooking friends, it is known as "The Granola", and many of us make it regularly. I think a lot of us have been making it for a few years! The smell of it wafting through the house really brings back memories. The first time I made it, I was pregnant with my youngest son, and it brings me back to that time. I have also made it in my mother's kitchen when we were visiting with her and it makes me think of cool rainy afternoons in Germany.

I eat this for breakfast almost every morning with vanilla (or plain) yogurt and fruit. In the spring or summer it's fresh berries or peaches, and in the winter it's thawed frozen berries (I love the Northwest berries from Costco- they are so good!). If you are lucky enough to make your own freezer jam, or have a friend who does, that is great with this yogurt and granola, also. Here is my version of this lovely granola. Make sure to use regular rolled oats, not quick. This recipe makes a ton, so if you're not gonna eat it every single day like me, you may want to halve it.
Almond Maple Granola
adapted from Allrecipes

6 cups rolled oats
1 cup sliced almonds
1 1/2 cups raw whole almonds
1/2 cup wheat germ
1/4 cup whole flax seeds
1/4 cup ground flax seeds
1 (14 ounce) package flaked coconut
2/3 cup unsalted sunflower seeds
3/4 cup pure maple syrup
1/4 cup packed dark brown sugar
1/2 cup canola oil
1/4 cup warm water
1/4 teaspoon salt

1. Preheat the oven to 250 degrees F (120 degrees C). Lightly grease 2 cookie sheets with cooking spray.

2. In a large bowl, toss together the oats, almonds, wheat germ, coconut, and sunflower seeds. In a separate bowl, whisk together the maple syrup, brown sugar, oil, water and salt. Pour the liquid over the oat and nut mixture, and stir until evenly coated. Spread out on the prepared cookie sheet.
3. Bake for 1 hour and 15 minutes in the preheated oven, stirring occasionally until evenly toasted. Cool, and store in an airtight container at room temperature.