Showing posts with label gluten free. Show all posts

Wednesday, April 17, 2024

Butterscotch Monster Bars


These bars are so tasty, and super easy to make. I've made them twice now. Once, using half peanut butter and half almond butter. Just today, I made them using all almond butter. Use whatever you have on hand. They look ordinary but are really good! Especially with that butterscotch flavor.

Butterscotch Monster Bars
adapted from Mel's Kitchen Cafe

½ cup (113 g) salted butter, softened to room temperature
1 cup (255 g) creamy peanut butter OR almond butter
⅔ cup (141 g) light brown sugar
⅔ cup (141 g) granulated sugar
1 teaspoon baking soda
¼ teaspoon salt
2 large eggs
1 teaspoon vanilla extract
1 ¼ cups (125 g) quick oats
1 ¼ cups (125 g) old-fashioned oats
1 cup (170 g) chocolate chips
1 cup (170 g) butterscotch chips or peanut butter chips or more chocolate chips

1.  Preheat the oven to 350 degrees F. Lightly grease a 9X13-inch pan.

2.  In the bowl of a stand mixer fitted with the paddle attachment or in a large bowl using a handheld electric mixer, beat the butter, almond or peanut butter, brown sugar, granulated sugar, baking soda and salt together until light and fluffy, 1-2 minutes, scraping down the sides of the bowl as needed. Add the eggs and vanilla and beat until well-combined. Add the quick oats, old-fashioned oats, chocolate chips and butterscotch chips and mix until evenly combined.

3.  Spread the dough evenly in the bottom of the prepared pan. Bake for 20-25 minutes until the edges are lightly golden – don’t overbake or the bars might be dry and crumbly. (The middle may not be set all the way.) Cool the bars in the pan before cutting into squares.
**This post and photos are property of http://dishingwithdish.blogspot.com/ **

Wednesday, April 3, 2024

Butterscotch Rice Krispie Treats

These bars were super simple to make, and SO good. I love regular homemade Rice Krispie treats, but these are next level the addition of two simple ingredients (browned butter + butterscotch chips). The fam loved them too. They were gone in no time. 


Butterscotch Rice Krispie Treats
adapted from Mel's Kitchen Cafe

½ cup (113 g) salted butter
16 ounces (454 g) large or small marshmallows 
1 teaspoon vanilla extract
Pinch salt
8 cups (227 g) crisp rice cereal, like Rice Krispies
½ cup (85 g) butterscotch chips

1.  Butter the bottom and sides of a 9X13-inch pan. Set aside.

2.  In a large saucepan, melt the butter on low heat and let it cook until the solids start to turn golden brown and fragrant. Add the marshmallows and cook on low, stirring constantly until mostly melted, a few small lumps here and there are ok. Add the vanilla and salt and stir to combine.

3.  Remove the pan from the heat and add the rice Krispies and butterscotch chips. Stir until evenly combined. Scrape the mixture into the prepared pan and using lightly greased hands or a silicone spatula, lightly press the mixture into the pan (don't smash them down too much or they will be dense). Let cool before slicing into squares.

**This post and photos are property of http://dishingwithdish.blogspot.com/ **

Friday, December 22, 2023

Risotto with Zucchini & Smoked Pancetta


I've wanted to make risotto at home lately ever since I made some at a recent cooking class. I haven't made any at home for a while. I was able to use some special rice an Italian friend gifted me. I used 2 medium-small zucchini and a little container of smoked pancetta. We all had this for lunch a few days ago. It's nice to have more time over the Christmas break to actually cook. I feel like I haven't done any cooking in a really long time. 
Risotto with Zucchini & Smoked Pancetta 
adapted from here 

2 medium-small zucchini, sliced 
2 Tbs. olive oil
1/2 medium yellow onion, finely chopped
1/2 cup (more or less) cubed, smoked prosciutto (can sub chopped ham, bacon or Canadian bacon)
4-6 cups chicken broth
2 cups water 
(2 cups- about 377 grams) arborio, vialone nano, or carnaroli rice 
1 oz. (2 Tbs.) butter, cut into 4 pieces
1/2 to 1 cup finely grated Parmigiano-Reggiano or Grana 
Kosher salt and freshly ground black pepper

1. In a wide heavy-duty 5- to 6-quart pot, heat the olive oil over medium-low heat. Add the onion and chopped prosciutto and cook, stirring occasionally (a wooden spoon is best), until soft and translucent, 5 to 8 minutes. After you get this set up, in a skillet, heat some olive oil and cook the zucchini slices until crisp-tender. Stir occasionally so they don't burn. 

2. Meanwhile, in a 3-quart saucepan, bring the broth and water to a bare simmer over medium-low heat.

3. Add the rice to the onion and stir with a wooden spatula until the grains are coated with oil, slightly translucent around the edges, and opaque in the center, 2 to 3 minutes.

4. Using a large ladle, add about 3/4 cup of the broth. Stir, mixing any rice sticking to the pot’s sides back into the mixture, until most of the broth is absorbed, the rice no longer seems loose when you shake the pot, and a wide trail forms when you run the spatula across the bottom of the pot.

5. After about 10 minutes, add your cooked zucchini. Continue to add broth in 3/4-cup increments, stirring constantly and scraping around the edge of the pot, until the rice is al dente (still a bit firm to the bite but without a hard or crunchy center) and most of the broth is absorbed, 18 to 22 minutes. (You may or may not use all of the broth; if you run out, use hot water.) (If you want the risotto a little softer, go ahead and cook it longer, adding extra liquid if needed.) 

6. Immediately turn off the heat. Add another bit of broth and the butter, Parmigiano-Reggiano, and salt and pepper to taste, and stir quickly. Cover with a tight-fitting lid and let sit for 5 minutes. Stir again and serve. (I skipped the resting period and we just dug in immediately... lol). 

**This post and photos are property of http://dishingwithdish.blogspot.com/ **

Sunday, November 26, 2023

Turkey Korma (With Leftover Thanksgiving Turkey)

Yum, I loved this delicious and unexpected way to use up the last of our Thanksgiving turkey! I was excited to find this recipe; thinking it wouldn't be as good as a more labor-intensive Korma, but I was pleasantly surprised when I tasted it. It was really good! The sauce is thickened perfectly with almond flour, and using mostly broth for a base makes the dish lighter. I did add some coconut sugar (1-2 teaspoons) because I really love a slight sweetness to my Korma. (My onions were a little crunchy- I'll cook them longer next time. Keep that in mind when making this.) 

I served this with roasted curry broccoli- a bag of frozen baby broccoli florets, roasted in olive oil, salt, and Penzey's curry powder. (At 400 F for about 30 minutes.) Everything was so delicious. (Note: you can also use leftover, cooked chicken for this recipe. I want to try it with a rotisserie chicken next.) 


Turkey Korma  
adapted from An Edible Mosaic

2 tablespoons clarified butter ghee, coconut oil, or sunflower oil
1 large onion, chopped 
4 large cloves garlic *
1 tablespoon fresh-grated ginger *(I used 3-4 Tablespoons of ginger/garlic paste in place of garlic and ginger here)
½ cup almond flour
1 tablespoon garam masala spice mix
1 teaspoon ground turmeric
½ teaspoon ground cinnamon
½ teaspoon crushed red pepper flakes
½ teaspoon salt
¼ teaspoon ground cardamom
1 ½ cups reduced-sodium chicken broth (may need a bit more)
2 tablespoons tomato paste
2 teaspoons coconut sugar or brown sugar, optional, for sweetness
2 cups cooked chopped turkey or chicken (from a rotisserie chicken or leftover turkey)
¼ cup heavy cream

1. Melt the ghee in a large, deep skillet over medium heat. Once melted, add the onion and cook until caramelized, about 12 to 15 minutes, stirring occasionally. Add the garlic, ginger, Ior ginger/garlic paste) and almond flour and cook 30 seconds, stirring constantly. Stir in the garam masala, turmeric, cinnamon, crushed red pepper flakes, and salt, and cook 30 seconds more while stirring constantly.

2. Stir in the broth and tomato paste. Bring up to a simmer, and then simmer 2 minutes (uncovered), stirring frequently. (Make sure onions are cooked enough at the end of this step.)  If it gets too thick, add additional broth. I added at least another 1/2 cup or more. Add the optional coconut or brown sugar. Add the turkey/chicken and cook until warm throughout, about 2 to 3 minutes. Turn off the heat and stir in the cream.

 
**This post and photos are property of http://dishingwithdish.blogspot.com/ **

Tuesday, July 11, 2023

Carnitas Bowls

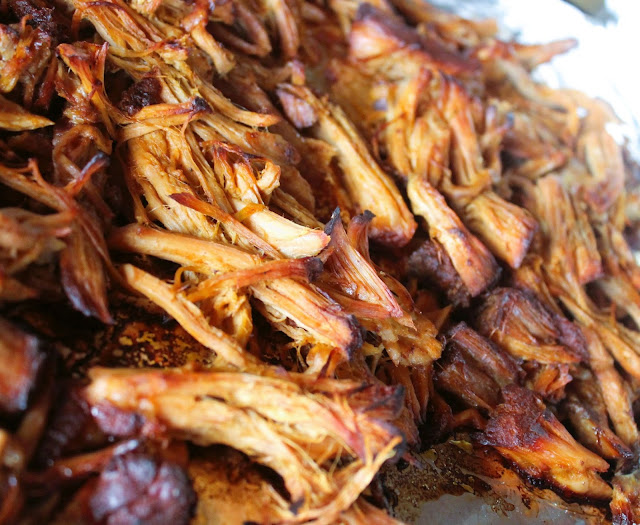
I made this Carnitas recipe again recently, but instead of using it as a taco filling, we made Carnitas bowls with the meat, rice, sauteed veggies, pickled red onions, salsa, cilantro-lime dressing, jalapenos, and fresh cilantro. So good and flavorful! There is a lot of prep, but you can do a lot of things ahead of time. 
Carnitas Bowls 
adapted from here

4-5 lbs pork shoulder/pork butt trimmed of excess fat (can use smaller, too)
1 tablespoon olive oil
1/4 cup orange juice
2 tablespoons lime juice
1 teaspoon liquid smoke
2 bay leaves
1 onion, chopped
1 jalapeno, deveined, deseeded, chopped, optional

Wet Spice Rub:
3 tablespoons olive oil
2 tablespoons tomato paste
1 tablespoon reduced sodium soy sauce
1/4 cup brown sugar, packed
1 tablespoon ground cumin
2 tsps EACH dried oregano, salt
1 tsp EACH chili powder, garlic powder, onion powder
1/2 tsp EACH smoked paprika, pepper
1/2-1 teaspoon ground chipotle chili pepper (optional; adds heat)

Toppings:
Warm cooked rice
Sauteed peppers and zucchini (or fave veggies)
Fresh or jarred salsa
Cilantro-Lime Dressing (scroll down) OR sour cream
Pickled jalapenos
Fresh cilantro

1. Heat 1 tablespoon olive oil over high heat in a large nonstick skillet. Using tongs or 2 forks, sear pork on all sides until lightly browned. Transfer pork to a large plate or cutting board until cool enough to handle. (If I'm feeling super lazy I skip this searing part.... because it does get seared or broiled at the end. You can choose to do this, or just dump it all in the crockpot without searing.) 

2. Meanwhile, whisk together all of the Wet Spice Rub ingredients in a medium bowl. When pork is cool enough, massage Wet Spice Rub evenly all over, then transfer pork to slow cooker. Add orange juice, lime juice, liquid smoke, and 2 bay leaves to slow cooker. Top pork with onions and optional jalapeno. Cook on LOW for 8 to 10 hours or on high for 5-6 hours OR until pork is fall apart tender and easily shreds with a fork.

3. Remove pork from slow cooker to cutting board, shred, and add back to slow cooker and toss with juices. Cook on low for 20 minutes. Meanwhile, preheat oven to 450 degrees F. Line a large baking sheet with foil.

4. After 20 minutes, remove pork (do NOT discard juices in slow cooker) and add shredded pork to baking sheet in an even layer. Drizzle with some of the remaining juices (about 1/4 cup) and bake for 15 minutes then broil to desired crispiness, watching closely so meat doesn’t burn (about 5-10 minutes). Drizzle with additional juices and toss. Another way to crisp the meat up is to sear in batches in a non-stick skillet on the stove.  (Or use a counter-top griddle.) 

5. Serve warm over rice with sauteed veggies, pickled red onions, salsas/sauces, pickled jalapenos and fresh cilantro. (Or other fave toppings!)

**This post and photos are property of http://dishingwithdish.blogspot.com/**

Wednesday, June 14, 2023

Thai Pork & Peanut Red Curry

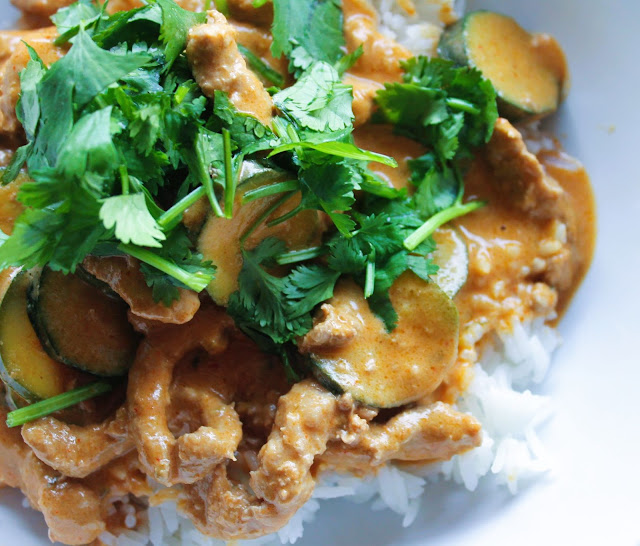
I had some sliced pork for stir-fry in the freezer that I wanted to use up, so I googled a pork Thai curry and found this recipe from BBC Food. It was good; the only change I made was to include some fish sauce to amp up the savory flavor. I also added a dried kaffir lime leaf and a lemongrass stalk, but it's not necessary. I use Thai Kitchen red curry paste currently, and I was afraid 4 Tbs would be too much, so I used 2. I couldn't taste any spice at all, so I added an additional tablespoon. I think start with 2 Tbs, and add to taste (taste after the meat is cooked all the way through, of course). The recipe called for baby corn, but I couldn't find any at the store, so I subbed baby zucchini instead.
Thai Pork & Peanut Red Curry
adapted from BBC Good Food

1 tbsp vegetable or coconut oil
bunch spring onions, sliced (I forgot these at the store, so omitted)
small bunch coriander (cilantro), stalks finely chopped, leaves saved for later
400g pork tenderloin, sliced (I used sliced stir-fry pork)
2-4 tbsp Thai red curry paste
4 tbsp peanut butter (I used smooth)
1 tbsp soft brown sugar OR coconut sugar
1 tbsp soy sauce
1 teaspoon fish sauce
400ml can coconut milk
3 baby zucchini, sliced
1 tbsp lime juice
steamed jasmine rice, to serve

1.  Heat the oil in a large saucepan or flameproof casserole. Add the spring onions and coriander (cilantro) stalks and cook for 1 min. Add the pork slices and cook for 5 mins until starting to brown. Stir in the curry paste and peanut butter. (For curry paste- start with 2 tablespoons. Can add more later, in step 2.) After 30 secs, add the sugar, soy and coconut milk, plus ½ can of water (I used less water than that, but ended up adding more later. Use it if you want to). Mix well, put a lid on and leave to simmer for 15 mins over medium-low heat, stirring occasionally.

2.  Remove the lid, add the baby zucchini and increase the heat. Simmer for 3 mins until the zucchini is cooked and the sauce has thickened a little. Stir in the lime juice and check the seasoning. At this point, add more red curry paste if you want more spice/flavor. Can also increase the sugar, fish sauce, and lime juice. Serve with chopped coriander (cilantro) leaves and rice.
**This post and photos are property of http://dishingwithdish.blogspot.com/ **

Saturday, April 15, 2023

Thai Drunken Noodles

There is no alcohol in this noodle dish, but different stories about the name. The dish is very flavorful and full of veggies. One can do lots of prep work the night or morning before, if needed, so this has the potential to come together very quickly. This pic was taken with the leftovers; in the process of re-heating on the stove, some of the noodles broke up, but it was still tasty. (Best way to reheat- in a small non-stick pan/skillet with some water added as it cooks slowly, while stirring with a silicone spatula.)
Thai Drunken Noodles
adapted from Carlsbad Cravings

CHICKEN
12 ounces chicken thighs, chopped into bite size pieces
1 tablespoon reduced sodium soy sauce
1 teaspoon toasted sesame oil
1 teaspoon cornstarch

SAUCE
3 tablespoons oyster sauce
3 tablespoons reduced sodium soy sauce
2 tablespoons dark brown sugar (may sub light)
1 tablespoon fish sauce
1 tablespoon rice vinegar
1 teaspoon molasses *don’t skip!
1/2 tsp EACH ground coriander, ground ginger
1/4 teaspoon pepper

NOODLE STIR FRY
3 tablespoons vegetable or peanut oil, divided
8 ounces wide rice noodles, fresh or dried
2-3 Birdseye/Thai chili peppers, deseeded and finely chopped, optional (I left out)
½ medium white onion, thinly sliced
1 red bell pepper, thinly sliced
6 ounces baby corn, halved
4 cloves garlic, minced
1 cup Thai basil leaves, loosely packed (may sub regular basil)
½ cup grape tomatoes, halved

1. Chicken: Whisk together 1 tablespoon soy sauce, 1 teaspoon sesame oil and 1 teaspoon cornstarch in a medium bowl. Add chopped chicken and toss to evenly coat; set aside.

2.  Noodles (skip this step if using fresh noodles): Place the wide rice noodles in a large bowl and pour boiling water over top until completely submerged and give them a good stir. Let them soak until softened, pliable, and limp but not fully tender/still al dente, stirring occasionally so they don’t stick together, about 12-15 minutes (less for thinner noodles). Rinse noodles in cold water, while separating any stubborn noodles with your fingers. Drain and toss with 1 teaspoon sesame oil. Set aside.

3.  Sauce: Whisk all of the Sauce Ingredients together in a medium bowl; set aside.

STIR FRY
4.  Heat 2 tablespoons vegetable oil in a wok over high heat or large nonstick skillet over medium-high heat. Once very hot, add chicken, onion, and chilies and cook for 2-3 minutes. Add bell peppers, corn and garlic and stir fry 2-3 minutes.

5.  Leave the chicken mixture in the pan. IF USING A WOK, add 1 Tablespoon additional oil and heat over high heat. IF USING A NONSTICK SKILLET, heat 1 teaspoon additional oil over medium-high heat (the oil helps prevent the noodles from sticking).

6.  Add the noodles and sauce to the pan and toss to combine. Spread the noodles over the surface of the pan and let them sit without touching for about 30 seconds. Flip the noodles and spread them out again; repeat 2-3 times until the noodles soak up the sauce, start to caramelize and reach desired tenderness.
Add the tomatoes and basil and toss to combine. Stir fry another 1 minute. Serve immediately.

**This post and photos are property of http://dishingwithdish.blogspot.com/ **

Thursday, February 9, 2023

Thai Red Curry with Beef

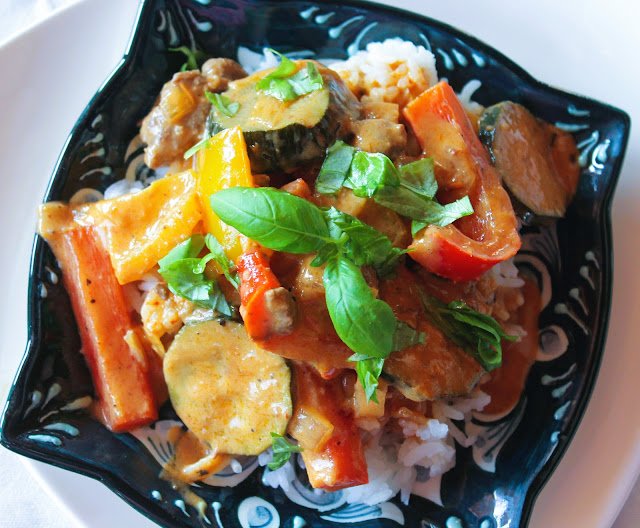
I totally meant to make this the intended way- with chicken- but I had a package of stir-fry beef in the fridge, already cut-up and ready to go. I could not resist the ease of just throwing that in and not having to cut raw meat. I hate cutting raw meat. I was pleasantly surprised to realize this tasted super, super amazing with the beef. I might like this better than my fave Panang Beef Curry.  I don't know..... the flavors on this Red Curry were just amazing. So perfect. I'm still thinking about it and I made it almost 2 weeks ago. It IS a bit more work than my Panang, since this one requires chopping veggies.  But, because of said veggies, it also feels like a healthier dish. You've got to try this one. I used Thai Kitchen red curry paste and it was not too spicy at all. I want to try this with chicken soon and see which one I prefer. (PS: Some of the pics look like ground beef, but it's not... it's thinly sliced steak.)

Thai Red Curry with Beef  
adapted from Carlsbad Cravings

1 1/2 tablespoons coconut oil
1 pound thinly sliced steak (such as stir-fry steak) OR 1 pound chicken breasts, sliced thin
1/2 large onion, chopped
2 tablespoons red curry paste
1 red bell pepper, thinly sliced then chopped into 2” pieces
1 orange or yellow bell pepper thinly sliced then chopped into 2” pieces
1 small zucchini, sliced
2 teaspoons freshly grated ginger
4 garlic cloves, minced (I used garlic/ginger paste for the ginger + garlic)
1 13.5 oz. can quality coconut milk
1 tablespoon Asian/Thai Sweet Chili Sauce (like Mae Ploy)
2 tablespoons reduced-sodium soy sauce
2 tablespoon fish sauce
2 tablespoons lime juice
1 tablespoon coconut palm sugar OR brown sugar
1 kaffir lime leaf OR 1 bay leaf
1/2 teaspoon dried basil
1/4 teaspoon salt more or less to taste
1/4 teaspoon pepper
sriracha to taste/Asian chili sauce (optional)

GARNISH
fresh basil
fresh cilantro
fresh lime juice
Steamed Rice, for serving

1.  Heat oil over medium high heat in large nonstick skillet. Add chicken or beef, onion and red curry paste and cook just until meat is no longer pink. Add bell peppers, zucchini, ginger and garlic and sautĆ© 1 minute. Add the coconut milk. Add all remaining ingredients (expect Garnishes).

2.  Bring to a boil, then reduce to a simmer for 5 minutes or until the sauce thickens and the vegetables reach desired crisp-tenderness. Discard kaffir lime/bay leaf. Garnish with additional optional fresh basil, cilantro, lime juice and Sriracha to taste. Serve with rice.
**This post and photos are property of http://dishingwithdish.blogspot.com/ **

Monday, November 28, 2022

Maple Pralines


I made these a few weeks ago to use up some heavy cream from another recipe. They were fun and easy to make. I used my digital thermometer to make these. It's actually a meat thermometer, but it works perfectly for candy, too.  These were very sweet, but they are melt-in-your-mouth delicious with the maple flavor and crunch of the nuts. 
Maple Pralines
adapted from Taste of Home

1 cup sugar
2/3 cup heavy whipping cream
1/2 cup maple syrup
2 tablespoons butter
3/4 cup coarsely chopped pecans, toasted

1. In a heavy 1-qt. saucepan, combine sugar, cream and syrup. Cook and stir over medium heat until mixture boils. Reduce heat to medium-low. Cook, uncovered, until a candy thermometer reads 234° F (soft-ball stage), stirring occasionally.

2. Remove from the heat. Add butter; do not stir. Cool, without stirring to 160° F. Stir in pecans. Beat vigorously with a wooden spoon until mixture just begins to thicken but is still glossy. Quickly drop by spoonfuls onto waxed paper. Cool. Store in an airtight container.

**This post and photos are property of http://dishingwithdish.blogspot.com/ **

Wednesday, October 12, 2022

Grilled Zucchini Salad


I loved this zucchini side dish. (I LOVE ZUCCHINI!! Anyways....)  Slices of zucchini are grilled (over a gas or charcoal grill) and then tossed with lemon juice, herbs, and feta. The grill adds such great flavor to this. I make a similar side dish just on the stove; the grill really takes it up a notch. The original recipe has you cutting the zucchini in a weird way, so it doesn't fall through the grill grates. Even better: just skewer the zucchini or use a veggie grilling basket if you have one. I used metal skewers. Summer has been over for a bit, but this recipe still works for fall.
Grilled Zucchini Salad
adapted from The Kitchn

3 pounds medium green zucchini or yellow summer squash
5 tablespoons olive oil, divided
Finely grated zest of 1 medium lemon
2 tablespoons freshly squeezed lemon juice (I used all the juice from my lemon)
1/4 teaspoon dried oregano
1 1/4 teaspoons kosher salt, divided
Freshly ground black pepper
1 cup crumbled feta cheese (about 4 1/2 ounces)
1 tablespoon coarsely chopped fresh mint or basil leaves

1. Heat a grill pan or outdoor grill to high (450°F to 550°F). Meanwhile, prepare the zucchini and dressing.

2. Cut the zucchini into slices; place in a large bowl and set aside. If using skewers, threat all of the zucchini onto skewers. They can be semi-close together. Place 3 tablespoons of the oil, lemon zest, lemon juice, oregano, and 1/4 teaspoon of the salt in a small bowl. Season with pepper and whisk to combine; set aside.

3. When the grill is ready, drizzle the zucchini with the remaining 2 tablespoons of oil, sprinkle with the remaining 1 teaspoon of salt and pepper, and toss to combine. Place in a single layer on the grill (using a veggie basket or skewers.) (Reserve the bowl; no need to wash). Cover and grill, turning occasionally, until charred in spots and crisp-tender, about 8 minutes total.

4. Transfer the squash back to the reserved bowl, drizzle with the dressing, and toss to combine. Set aside to cool to just warm or room temperature, at least 15 minutes. Add the feta and mint or basil and gently toss to combine.
**This post and photos are property of http://dishingwithdish.blogspot.com/ **

Monday, October 10, 2022

No-Churn Fluffernutter Ice Cream

This is a recipe I meant to post a few months ago, in the summer, but it got away from me. Well, here it is now. :) I love making no-churn ice creams; they are so quick and easy and they whole fam loves them. I took the original recipe, which was 3 ingredients, and added 2 more to make it 5. 
No-Churn Fluffernutter Ice Cream 

adapted from 30 Seconds

2 cups heavy cream

1 can (14 ounces) sweetened condensed milk

1 jar (7 ounces) marshmallow fluff

1/2 cup creamy peanut butter

1/2 cup mini marshmallows

1. Whip the heavy cream until stiff peaks form. Fold in the sweetened condensed milk, marshmallow fluff, peanut butter, and mini marshmallows. Pour into a loaf pan. Freeze until solid; a few hours or overnight.

**This post and photos are property of http://dishingwithdish.blogspot.com/ **

Sunday, September 4, 2022

Clam Dip

This clam dip is great for a movie or game night. We had a similar dip at my sister's house a few years ago as we played board games together. My kids still remember that and how fun it was, so we re-created it a few weeks ago. We never got to the board games though, because we just ate this dip right away and it was gone.  Ha ha. 

Clam Dip

8 oz cream cheese , softened
1/4 cup sour cream
1 clove garlic , minced
1/4 teaspoon dried parsley flakes (or 1 teaspoon fresh chopped parsley)
1/2 teaspoon Worcestershire sauce
Dash Tabasco or favorite hot sauce
1 6.5 oz can minced clams drained; juice reserved

1. In a mixing bowl, beat cream cheese until smooth. Stir in sour cream, garlic, parsley, Worcestershire sauce and hot sauce.

2. Stir in drained clams. Add reserved clam juice from the canned clams to thin the dip to desired consistency. Chill for 1-2 hours before serving. Taste and adjust seasonings as needed.
Serve with potato chips or crackers. Clam Dip will last, covered in the refrigerator for 3-5 days.
**This post and photos are property of http://dishingwithdish.blogspot.com/ **

Thursday, August 18, 2022

Classic Potato Salad

This delicious potato salad from Mel's Kitchen Cafe tastes just like my mom's. It's an old-fashioned style with mayo, mustard, and pickles. (Actually, the original recipe had olives instead of pickles, but I swapped the olives for pickles. I also added some pickle juice and increased the mustard.) We had this with fried chicken we picked up from a local chicken restaurant, and other sides like watermelon. I made it ahead of time and we ate it after a full day at the pool. Good times!
Classic Potato Salad
adapted from Mel's Kitchen Cafe
Recipe is cut in half- still makes a ton

1 cup mayonnaise 
1/3 cup buttermilk
1 teaspoon dried parsley
3/4 teaspoon salt
1/2 teaspoon onion powder
1/2 teaspoon garlic powder
1/2 teaspoon seasoned salt
1/2 teaspoon ground black pepper
2 tablespoons pickle brine (from the pickle jar)
2-3 tablespoons yellow mustard, to taste (I like more)
2 1/2 pounds potatoes 
1/2 - 3/4 cup diced dill pickles (add more or less to taste)
4-5 diced hard-boiled eggs (see note)

1. For the dressing, whisk all dressing ingredients (up to and including yellow mustard). 

2. For the salad, peel (optional- I didn't peel), dice, and boil potatoes until tender but not mushy (I cut my potatoes into bite-size pieces and boil for about 8-10 minutes). Drain potatoes well and pour into a large bowl.

3. Add pickles and hard-boiled eggs. Pour dressing over warm potatoes until desired “dressing-level” is reached. Can make this salad the night before and pour a thin coating of dressing over the potatoes, pickles and eggs while they rest in the fridge overnight.

4. Before serving the next day, add the rest of the dressing and mix until it looks right. Most importantly be sure and taste so you can add extra salt and pepper if needed!

**This post and photos are property of http://dishingwithdish.blogspot.com/ **

Wednesday, July 27, 2022

Indian Milk Barfi


We've enjoyed Barfi, an Indian Fudge, quite a few times at local Indian restaurants here. A small piece tastes so good after enjoying a hearty curry and naan bread. The fudge is made with ghee (clarified butter) and dry milk powder. (I find both at my local international foods store.) Sometimes, it contains finely shredded coconut. This version does not have coconut, but one could easily add it. My husband actually made this as part of an Indian Feast recently while I took the kids to a waterpark all day. He made Korma, rice, naan, Aloo Gobi, Mango Lassi, and this barfi. Everything was so good. A food scale is used to measure ingredients in this recipe (in grams). 

Indian Milk Barfi 
adapted from Masala and Chai

70 grams ghee (clarified butter)
250 grams whole milk
200 grams sugar
310 grams dry whole milk powder
1 teaspoon ground cardamom
1 teaspoon lemon juice
pinch of salt
7 pistachios, chopped

1. Line an 8" square pan with parchment paper so that it hangs over two opposite sides of the pan. In a nonstick pan on medium heat, pour in the milk and then add the ghee. Let the ghee melt and stir with a rubber spatula until the ghee is mostly combined with the milk. Pour the sugar into the pan and stir until it's fully melted.

2. Turn the heat to the lowest setting and add the milk powder to the pan. Stir until the milk rehydrates the milk powder. Continue to stir with no breaks on low heat for the next 4-5 minutes, being sure to scrape the bottom and sides to prevent burning.

3. At this point, the mixture should have reduced by about half and is thickening up. Add the cardamom powder, lemon juice, and salt. Stir the mix-ins well. Continue to mix and fold the barfi batter for another 4-5 minutes until it starts to pull away from the sides, leaving no residue.

4. Remove the pan from heat, and use the silicone spatula to scoop the batter into the square pan. Spread the batter across the pan, getting it as level as possible. Spread and press the chopped pistachio evenly across the top. Cover the pan. Transfer the pan to the refrigerator and allow it to chill for at least 30 minutes, or until fully set.

5. Once the barfi has set, use the parchment paper to lift it out of the square pan. Cut the barfi into 16 even squares and serve chilled.
**This post and photos are property of http://dishingwithdish.blogspot.com/ **

Saturday, July 16, 2022

Italian-American Iceberg Salad

This salad was surprisingly good! It seems like a simple and basic salad but there's a lot of good flavor here. It's a bit similar to Olive Garden's famous salad. If I make it again, I don't think it needs the mini fresh mozzarella balls; the Provolone provided enough cheese flavor.  (Note: Provolone piccante is a more aged cheese, but it's still soft. It's easy to find over here in Italy; not sure about the US.)
Italian-American Iceberg Salad 
adapted from Epicurious

1/2 cup olive oil
5 tablespoons white wine vinegar
1 tablespoon mayonnaise
1 tablespoon sugar
1 1/2 teaspoons dried oregano
1 garlic clove, finely grated
Kosher salt, freshly ground pepper
1 small head of iceberg lettuce
1/2 small red onion, sliced into rings
2 ounces provolone piccante cheese, thinly sliced 
1 cup drained small mozzarella balls, torn (optional- it ends up being a lot of cheese)
10 pepperoncini, halved if large

1. Whisk oil, vinegar, mayonnaise, sugar, oregano, and garlic in a small bowl. Season with salt and pepper.

2. Cut lettuce in half through stem end. Tear apart into large pieces. Arrange on a platter and scatter onion, provolone, mozzarella, and pepperoncini over, nestling in among leaves. Drizzle with dressing to coat to your liking (you’ll probably have some extra) and top with more black pepper.
**This post and photos are property of http://dishingwithdish.blogspot.com/ **