Showing posts with label meatless. Show all posts

Wednesday, July 15, 2020

Grilled Flatbread with Israeli Salad

I made this recipe twice because I could not get the bread right.  It looks great in the pics, but it was a pain to make.  The recipe calls for equal amounts of flour and yogurt (plus salt and baking powder), for a flatbread without yeast, but I think the proportions are wrong.  I thought maybe I had messed up, so I tried again, and it was even worse the second time.  A giant mess where I had to keep adding flour until I finally got so frustrated I gave up and we threw the sticky breads onto the grill, where they made a mess, but at least still tasted good.  Anyway, all that to say, this recipe is so tasty that I'd make it again, with my no-fail grilled naan bread for the flatbread.  The taste is similar, since there's yogurt in both, and that recipe has never failed me. I've made it probably 100 times.  (Hopefully everyone can get yeast now!)  I'll include my naan recipe below instead of the original flatbread one from the Kitchn.

The hummus topping the warm flatbread, covered with the veggie salad and feta and olives.... such wonderful flavors all together!  A good meatless meal for summer too.  I really like the salad recipe and the whole idea of this; I can't wait to make it again, this time using my beloved naan bread recipe.  :) Note: If you don't like mint, use basil instead.

Grilled Flatbread with Israeli Salad
adapted from the Kitchn; Naan recipe here

Grilled Naan Bread:
3+ cups flour (Can use one cup of whole wheat flour)
1 ½ teaspoons sugar
1 teaspoon salt
½ teaspoon baking powder
2 teaspoons yeast
2/3 cup warm milk
2/3 cup Greek or regular yogurt (room temp)
Ghee or vegetable oil for greasing
olive oil
1 Tablespoon za'atar, optional

Israeli Salad:
1 pound multi-colored cherry tomatoes, halved (about 3 cups)
1 English cucumber, diced
1 medium red bell pepper, seeded and diced
1/2 medium red onion, diced
2 tablespoons finely chopped fresh flat-leaf parsley leaves
2 tablespoons finely chopped fresh mint leaves (can use basil, instead or in addition)
2 tablespoons freshly squeezed lemon juice (from 1 lemon)
1 1/2 teaspoons ground sumac (optional)
2 tablespoons olive oil, plus more for the grill
Kosher salt
Freshly ground black pepper

For assembly:
3/4 cup hummus
Crumbled feta cheese and pitted kalamata olives, for serving (optional)

Naan Bread:
1. In a large mixing bowl (I used my Kitchenaid) dissolve the yeast in the milk and sugar, and stir in the yogurt. Add the flour and stir in the salt and baking powder. Mix thoroughly with the flour to form a dough.

2. Using your Kitchenaid or your hands, knead the dough until it is smooth and only slightly sticky (you might need to add more flour, I did), and place in a bowl covered with a clean cloth. Place in a warm place to rise for 2-4 hours.

3.  Heat the grill to medium-high, direct heat (400 to 450°F). Toss the tomatoes, cucumbers, bell pepper, onion, parsley, and mint together in a large bowl. Add the lemon juice, sumac, and 2 tablespoons of the olive oil, and toss to coat. Season to taste with salt and pepper; set aside.

Grill the flatbreads:
4.  Divide the risen dough into 12 equal sized portions and roll them into balls. On a lightly floured surface flatten the balls into oblong shapes, using both hands and slapping the naan from one hand to the other. (Or you can just use a rolling pin; I find that easier).

5.  Rub your grill grates with oil. Preheat your grill for 5-10 minutes on high (for gas). You want it nice and hot when that dough comes into contact. Place rolled-out naans onto grill and wait for the one side to cook and brown a little. The raw side should bubble up. Brush the raw side with olive oil, and flip over to cook the other side. Cook until you reach your desired color. (You can brush the other side with oil, too).

6. If cooking indoors: Grease a griddle or heavy based frying pan lightly with olive oil and heat it until it is very hot. Cook the naan on one side only a few at a time (careful not to burn it). Spread the raw side with oil, and flip and cook the other side until browned.

Assemble:
7.  Divide the hummus evenly among flatbreads, followed by Israeli salad. Top with feta, olives, and another drizzle of olive oil, if desired.
 **This post and photos are property of http://dishingwithdish.blogspot.com/ **

Monday, December 30, 2019

Three-Bean Vegan Chili (Re-post)


I love this chili.  I first made it over 10 years ago and I made up the recipe back then.  I used to buy these boxes (not cans, lol) of Stagg's veggie chili.  I looked at the ingredients and made my own one time and kept doing it because I liked it so much.  It's a mix of beans, canned tomato products, and fresh veggies like bell peppers, carrots, and onions.  It cooks low and slow (lol) all day in the crockpot.  This is vegan if you don't use any of the optional dairy toppings.  Or, use vegan topping options.

I served this at a Halloween party this year and one of the guests was vegan.  It got her stamp of approval and non-vegan guests also loved this chili; they "couldn't even tell it was vegan".  Lol.  I also had this chicken chili  at the party and a lot of guests chose this vegan recipe, although that chicken one is also really, really good.  

This makes a lot; we eat it as chili the first day and as a topping for frito pies the next day.  I love frito pies!

Three-Bean Vegan Chili
from my original recipe here

3 cloves garlic, minced
1 cup chopped onion
1 cup chopped carrots
1 green or yellow bell pepper, chopped
1 red bell pepper, chopped
2 (14.5 oz.) can whole petite diced tomatoes, with liquid
1 8 oz. can no-salt-added tomato sauce
1-3 canned chipotles in adobo, chopped, optional
1 teaspoon adobo sauce from canned chipotles, optional (I use chipotle paste from a squeeze tube now)
1 (15 oz.) can black beans, undrained
1 (15 oz.) can red or white kidney beans, undrained
1 (15 oz.) can pinto beans, undrained
1-2 cups frozen corn
1 tablespoon cumin
1 tablespoons dried oregano
1 tablespoons dried basil
1/2 tablespoon garlic powder
2 tablespoons chili powder
1/2 teaspoon smoked paprika
1/4 teaspoon chipotle chili powder
salt, to taste (I don't add any, on account of the canned products that contain salt)

Optional Garnishes:
shredded sharp Cheddar
plain greek yogurt or sour cream
chopped cilantro
tortilla chips

1. Put all ingredients (except garnishes) into a large crockpot; stir together. Cook on low about 5-8 hours, or until carrots are tender. Taste and add salt, if needed.  
**This post and photos are property of http://dishingwithdish.blogspot.com/ **

Monday, June 3, 2019

One-Pot Broccoli Pasta

This was a great, simple pasta dish.  It was totally one-pot, and I'm surprised it worked so well.  I really enjoyed it! It was super easy too; you just have to chop broccoli and some garlic.  At the end, you're supposed to garnish with parmesan, but I only had a little bit and I used it all in the pasta itself, so for a garnish, we used feta, and I really liked that.  You can add any fresh herbs you want, too; I used basil.  Or, don't use herbs if you don't want to.  You can also add dried herbs to the mix as it's cooking.  Make sure you taste for salt; mine needed a little more.  I thought about cooking in chicken broth, but didn't know if that would make it too salty.
One-Pot Broccoli Pasta
adapted from The Kitchn

1 pound broccoli (about 1 large or 2 medium heads), cut into bite-sized florets
12 ounces dried small shell or ditalini pasta
4 1/2 cups water
1/2 cup whole-milk plain Greek yogurt
2 tablespoons olive oil
4 cloves garlic, minced
1 teaspoon kosher salt, plus more to taste
1/4 teaspoon freshly ground black pepper
smoked paprika
1-2 teaspoons of Better than Bouillon chicken flavor
Pinch red pepper flakes (optional)
1/2 cup freshly grated Pecorino Romano or Parmesan cheese (about 1 ounce), plus more for serving, optional
a big scoop of whole-milk plain Greek yogurt
Feta cheese, for serving, optional
Fresh basil, for serving, optional

1.  Place the broccoli, pasta, water, yogurt, olive oil, garlic, salt, pepper, red pepper flakes, if using, water, paprika, and Better than Bouillon in a large pot or straight-sided skillet and stir to combine. Bring to a boil over high heat. Continue to boil uncovered, stirring occasionally to prevent the pasta from sticking, until the pasta is al dente and almost all the liquid is evaporated, 8 to 9 minutes. (I used a big non-stick soup pot and a wooden spoon- worked perfectly.)

2.  Remove from the heat and stir in the big scoop of yogurt and 1/2 cup Parmesan cheese. Taste and season with additional salt as needed. Serve in shallow bowls topped with feta cheese and fresh basil, if desired.
**This post and photos are property of http://dishingwithdish.blogspot.com/**

Friday, September 29, 2017

Tomato, Feta & White Bean Salad

I made this salad for my husband and I to eat for lunch for a few days last week.  It was easy to make, and it had great flavor.  It's a great summer or early fall dish.  I cut back on the feta to only about 1/2 cup.  It was plenty.  
Tomato, Feta & White Bean Salad
adapted from the Kitchn

2 tablespoons olive oil
1 tablespoon red wine vinegar
1 teaspoon minced shallot
Kosher salt
Freshly ground black pepper
1 (15-ounce) can white beans, drained and rinsed
1 pint cherry or grape tomatoes (about 2 cups), halved
1/2 cup crumbled feta cheese, or more to taste
1/2 cup coarsely chopped fresh parsley leaves
2 tablespoons chopped fresh oregano leaves or 1 teaspoon dry

1.  Whisk the oil, vinegar, shallot, a big pinch of salt, and a few generous grinds of black pepper together in a large bowl. Add the beans, tomatoes, feta, parsley, and oregano and toss to combine. Taste and add more salt and pepper as needed.
**This post and photos are property of http://dishingwithdish.blogspot.com/ **

Wednesday, August 19, 2015

Crunchy Black Bean Tacos

These tacos were quick, easy, and very tasty.  They're also meatless and gluten free, if you use corn tortillas.  They're kind of like quesadillas.  The grown-ups loved these but some of the kids didn't, for some reason.  They're weirdos, sometimes.  
Crunchy Black Bean Tacos
adapted from The Kitchn

2 cups cooked black beans
1/2 cup minced red onion
2 tablespoons minced fresh cilantro
1/2 teaspoon ground cumin
1 teaspoon paprika
Pinch of salt
4 to 6 ounces (1 heaping cup) grated Pepper Jack or Cheddar cheese
2 tablespoons vegetable or canola oil
8 corn tortillas

Toppings:
Avocado
Hot sauce
Salsa
Sour cream

1.  In a medium bowl, add beans along with red onion, cilantro, cumin, and paprika. Add a pinch of salt and lightly mash all the ingredients together. Grate the cheese and have it ready.

2.  In a large, nonstick or cast-iron skillet, add the 2 tablespoons oil and heat over medium-high heat. Add one corn tortilla at a time and let each get hot in the oil for a few seconds. Then add about 1/4 cup of the bean filling to one half of the tortilla. Top with a sprinkle of grated cheese. Try not to overfill the tacos, or you might have issues flipping them without losing filling.

3.  Using a spatula, carefully fold the other half of the tortilla over to form a shell. Press down lightly on the tortilla so it holds its shape. It's ok if some cheese spills out.  As the first taco cooks, move it to the side and begin a second one. Depending on the size of your pan, you can cook two or three tacos at once. A griddle will hold even more.

4.  Cook each taco until they are nicely browned and crispy, about 3 minutes per side. When flipping the taco to cook on the other side, use a spatula and flip the taco toward the fold so the filling doesn’t fall out. If your pan is very dry between batches, add another drizzle of oil.

5.  If you wish, place the cooked tacos in a warm oven while you finish the rest. If the tacos are very greasy, blot them with a paper towel before moving them to the oven.  Serve tacos with toppings like hot sauce, salsa, avocados, and sour cream.
**This post and photos are property of http://dishingwithdish.blogspot.com**

Friday, February 1, 2013

Panera's Mac & Cheese

mac4W
I had this delicious mac and cheese at a cooking friend's house this past summer, and made it for myself last week.  It's different from the majority of mac and cheeses I make in that it's a stove top recipe, requiring no baking, and it has a bit of white American cheese to help in the smooth and creamy department.  The rest of the cheesiness comes from extra sharp Vermont white cheddar.  For the pasta, I used organic mini wagon wheels I brought back from our last trip to Germany.  I couldn't find the requested pasta shape (pipette). 

The recipe calls for a full pound of pasta, but I found that was too much for the amount of sauce (for us, anyway).  It was perfect though, because my baby ate some of the leftover cooked plain pasta over the next few days and loved it.  Next time, though I'd probably only cook about 14 oz. of pasta instead of the 16 oz. 
mac3W
Panera's Mac & Cheese
adapted from Smells Like Home, via Cookin' Mama

14-16 oz pipette pasta or other small pasta shapes (Go with 14 oz for more sauce)
4 tbsp unsalted butter
1/3 cup all-purpose flour
2 1/2 cups milk or half-and-half
4 oz white American cheese, chopped or torn into pieces
8 oz extra sharp white Vermont cheddar, shredded
2 tsp – 1 tbsp Dijon mustard (to taste)
1 tsp Kosher salt
1/4 tsp hot sauce

1.  In a large stockpot, cook pasta according to package directions. Drain well.

2.  Meanwhile, melt the butter in a 4-quart sauce pan over medium heat. When the butter has melted and has started to bubble, whisk in the flour; cook for 1 1/2 minutes whisking constantly. Gradually whisk in the milk until no lumps remain. Reduce the heat to medium-low and cook milk mixture, whisking frequently, until it thickens and bubbles, about 8 minutes.

3.  Remove sauce pan from the heat and by the handful, stir in the cheeses, allowing all of the cheese to melt into the sauce before adding more. Stir in the mustard, salt, and hot sauce. Return the sauce pan to the heat and stir in the pasta. Be sure to stir up the sauce from the bottom of the sauce pan and thoroughly coat all of the pasta with sauce. Cook for 1-2 minutes over medium-low heat until heated through. Serve hot in bowls with spoons.

**This post and photos are property of http://dishingwithdish.blogspot.com/**/

Monday, December 3, 2012

Lebanese Spaghetti with Cilantro-Yogurt Sauce

Lebanese Yogurt Spaghetti
I really loved this dish.  It's so easy, flavorful too, and not half bad for you!!  The sauce is make from thick & creamy Greek yogurt, flavored with garlic, cilantro, salt, and pine nuts.  So easy and good!  By the time your spaghetti is done boiling, the sauce should be ready to go.  Then, just mix and serve.  :) 
Lebanese Yogurt Spaghetti

Lebanese Yogurt Cilantro Spaghetti
adapted from Taste of Beirut

8 ounces spaghetti (or other pasta-I used whole grain thin spaghetti)
4 cloves of garlic (more or less depending on taste)
kosher or sea salt, to taste
1/2 bunch fresh cilantro, stems discarded, leaves chopped
olive oil, as needed
1/4 cup pine nuts, fried in a pat of butter
12-16 ounces plain yogurt, depending on how "saucy" you want it (I used Greek)

1.  Boil the spaghetti in lightly salted water until done.  Drain. 

2.  Meanwhile, with a mortar and pestle or small food processor, crush the garlic with salt and then add the cilantro.  Mash up or process in the food processor until combined well.  In a small skillet, heat some olive oil and quickly cook the garlic- cilantro mixture for 30 seconds or until fragrance is noticeable. 

3.  In a large serving bowl, mix the cilantro pesto with the yogurt, and then stir in the spaghetti.  Taste for salt.  Sprinkle on the pine nuts and serve. 

**This post and photos are property of http://dishingwithdish.blogspot.com/ **

Wednesday, November 28, 2012

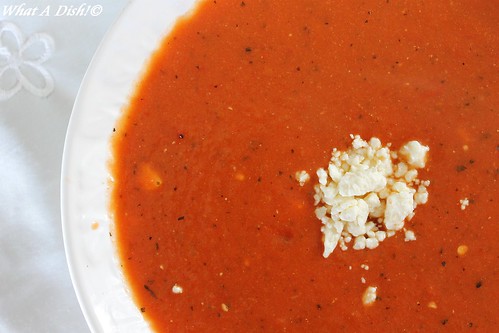
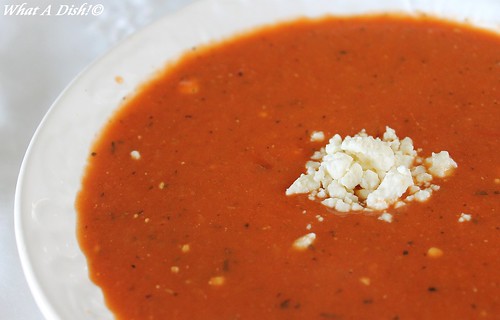
Feta Tomato Soup


I'm always up for trying a new homemade tomato soup recipe.  They are always good!!  We had this a long time ago; lol, I'm always backed up on recipes to blog about.  We probably had these with grilled cheese and Caesar Salad, if I know myself very well (and I think I doooo!)
 
This is one that's nice for winter because it uses canned tomatoes. Most people probably always have the ingredients on hand to make this.  It's good without the feta, too, if you don't have that.  A tip for feta: you can freeze it and just use it straight from the freezer.  The already-crumbled is most convenient and easiest to use right out of the freezer. 
 
To get that extra little bit of creaminess, I stirred 1/2 cup almond milk into this before serving.  I love using almond milk for soups; it makes them creamy with hardly any extra fat or calories.  :)
 
Feta Tomato Soup
adapted from Food
 
2 tablespoons extra virgin olive oil
2 garlic cloves, chopped small
1 medium onion, chopped small
2 tablespoons all-purpose flour
1 tablespoon tomato paste
2 cups chicken broth/stock or 2 cups vegetable broth/stock
1 (28 fluid ounce) canned diced tomatoes
1 tablespoon chopped fresh oregano or 1 teaspoon dried oregano
1 tablespoon chopped fresh basil or 1 teaspoon dried basil
1 pinch sugar
1/2 teaspoon salt
1/4 teaspoon black pepper
1/2 cup plain unsweetened almond milk, optional
1/2 cup crumbled feta cheese, for garnish
 
1.  In a large saucepan, heat olive oil over medium heat.  Add garlic and onion and saute until very tender, about 5 minutes.  Mix in flour and tomato paste; stir well and cook for 1 to 2 minutes, stirring slowly constantly.  Pour in stock and mix well.  Add tomatoes including liquid, oregano, basil and sugar and simmer for 12 to 15 minutes, stirring occasionally. 
 
2.  Puree the soup mixture in batches in a food processor or blender until smooth, then return to the saucepan.  Bring back to simmer.  Add optional almond milk.  Season with salt and pepper or to taste.  When serving, sprinkle some feta cheese on top as a garnish.
 

**This post and photos are property of http://dishingwithdish.blogspot.com/**/

Monday, November 5, 2012

El Salvadorian Pupusas de Queso con Curtido

A few years ago, my husband and I were talking about the foods he ate in New York City while he lived there as a missionary for our church.  He started describing Pupusas and I have never heard of anything like them before.  We had this conversation about 5-6 years ago, and I tried looking up recipes online back then, but didn't find much at all.  Well, a few weeks ago, I spotted this recipe, through Tastespotting.com, I believe.  I was so excited!  Then I Googled pupusas and there are a lot more recipes out there now!  Thank goodness for the internet and food blogs.  :) 
I was eager to try this recipe because it was so straight-forward and simple.  The pictures of the process made it easy to understand, as well.  I'm happy to say these turned out really well!  I served this with Curtido (cabbage slaw) and I wasn't crazy about the curtido.  I would just not make it next time, but serve the pupusas with some veggies or salad.  Also, my husband was remembering as we were eating- he said he remembered eating these with some beans and some kind of meat.  So beans, at least, will be on the menu for next time! 

Note: I'm putting this in the "Tacos" category, even though I know  they're not!  Just kinda similar.  :)

Pupusas de Queso con Curtido
adapted from Simply Life

Pupusas:
2 cups masa harina (found in the flour or ethnic section of store)
Pinch of salt
1 1/3 cup warm water
1 cup grated Monterey Jack cheese (or other preferred cheese)
1-2 tbs. oil, plus more for keeping hands oiled
 
Curtido:
1/2 head cabbage, shredded
1 large carrot, grated (use a vegetable peeler)
1 bell pepper, sliced
1/2 cup apple cider vinegar
1/4 cup water
1/2 tsp. salt
1/2 tsp. brown sugar
1 tsp. dried oregano
Pinch red pepper flakes
 
For the Pupusas:
1. Mix together masa harina, salt and water. Knead to form a smooth, moist dough (if the mixture is too dry, add a touch more water; if the mixture is too sticky, add a touch more masa harina). Cover the bowl with a cloth and let stand for 10 minutes.
 
2. With lightly oiled hands, form the dough into 8 balls that are about 2 inches in diameter. Using your thumb, make an indentation into one of the balls, forming a small hole. Fill the hole with 1 tablespoon of cheese and wrap the dough around the filling to seal it. Pat the dough back and forth between your hands to form a round, flattened disk about 1/4-inch thick. Repeat with the remaining balls, making sure to keep your hands lightly oiled throughout the entire process.
 
3. Heat 1 tbs. oil in skillet over medium-high. Cook the pupusas for about 3 minutes per side until golden brown, adding additional oil to skillet if needed. Serve warm with curtido (recipe below) on the side, or beans, and enjoy!
 
For the Curtido:
1. Combine the cabbage, carrot, and pepper in a bowl. Combine the remaining ingredients in a separate bowl and then pour over the cabbage mixture and toss together. Refrigerate for at least 30 minutes, serve and enjoy!

**This post and photos are property of http://dishingwithdish.blogspot.com/ **

Sunday, October 21, 2012

Butternut-Tomato Bisque

Here's a new (to me, anyway) take on classic tomato soup- add some roasted butternut squash!!  I really enjoyed this Butternut Squash soup I made before, and I already know I love plain ol' tomato soup, so what a good idea to combine the two!!  The original recipe called for non-fat half and half, which to me, is a food paradox, so I never use it, lol!  I used 2/3 cup cream, 1/3 cup almond milk and loved it.  I bet even just plain almond milk and no cream would be good- storebought almond milk is pretty creamy.  I love using it in soups. 

Butternut-Tomato Bisque
adapted from Mel's Kitchen Cafe

1/2 medium butternut squash
1 tablespoon butter
1/4 cup finely diced onion
3 cloves garlic, finely minced
1 can (14.5 ounces) Italian-style stewed tomatoes (or 1 can tomatoes with 1 ½ teaspoons Italian seasoning)
1 cup chicken stock
salt, to taste
pinch sugar
1 teaspoon dried basil
1 cup half-and-half, cream and almond milk, or just almond milk

1.  Prepare the butternut squash by preheating the oven to 350 degrees.  Place squash, cut-side down, in a 9X13-inch pan. Add enough water to come about 1/4-inch up the sides of the squash. Cover with foil and bake for about an hour. Test with a fork to make sure the squash is very tender when pierced with the fork in several places. If the flesh doesn’t easily give to the pressure of the fork, continue cooking in ten minute increments, and testing again, until the squash is tender. Remove the pan from the oven and transfer the squash to a large cutting board or plate. Let it cool about 15 minutes before scooping out the flesh. If preparing the day before, scoop out the flesh and place in a tupperware. Let cool completely. Cover and refrigerate until using it in the soup.

2.  While the squash is cooking, in a medium saucepan, melt the butter and saute the onion until soft and translucent. Add the minced garlic and cook, stirring constantly, until fragrant, about 30 seconds. Scoop the squash into the pan with other ingredients.  Add the canned tomatoes and chicken stock, salt, sugar, and basil to the pan.  Using an immersion blender, blend the soup until smooth.  Heat over medium-low heat or until soup is warm.  Add the half and half or cream or almond milk and heat until just heated through (do not boil).  Serve. 
**This post and photos are property of http://dishingwithdish.blogspot.com **

Thursday, May 24, 2012

Turkish Garden Salad

I love this salad- LOVE it.  I've made it about 5 times in the last few weeks.  It's from this Turkish cookbook I've mentioned before- which has been renewed from the library the maximum amount of times and now is scarily overdue, ooops!!  I'm scared to show my face in the library right now. 

Anyway, I love this salad.  It is so simple- a mix of good lettuce, tomato, fresh onion, and feta cheese.  Then a simple lemon and olive oil dressing.  The mix of flavors, though, simple as they may be, are just amazing!  They remind me of a Greek salad, which makes sense, since the countries border each other.  Make sure to use a fresh lemon.  I've made this salad both with baby spinach and Mache, or French Lamb's Lettuce, and both ways are very good.  The original recipe calls for Arugula, and although I can find it here sometimes, it never looks very fresh. 
Turkish Garden Salad
adapted from The Turkish Cookbook

Salad:
1 bag Lamb's Lettuce (Mache), Arugula, or baby spinach
1 small Spanish or red onion, peeled, sliced into thin rings
1/2-1 cup diced feta or firm ricotta-salata
About 15 cherry tomatoes, halved
Kalamata Olives

Dressing:
1 fresh lemon, juice
3 cloves garlic, minced
1 teaspoon Dijon mustard
1/4 cup extra-virgin olive oil
sea salt, to taste
freshly ground pepper, to taste

1.  Wash lettuce leaves and remove any large stems, if needed.  Dry and arrange the arugula/lettuce in a salad bowl.  Add the onions rings, cheese, tomatoes and olives.

2.  In a bowl, whisk together the lemon juice, garlic, mustard, olive oil, and salt and pepper.  Pour the dressing over the salad and toss well. 
**This post and photos are property of http://dishingwithdish.blogspot.com/ **

Monday, May 7, 2012

Roasted Garlic-Parmesan Cauliflower

This was absolutely delicious.  Delicious, easy, and healthy- what more could you want?  ;)  We had this before our Germany trip with a salad.... and I forgot what else; it's been too long!  This wasn't my boys' favorite, but what can you do- they are both kind of picky off and on.  My daughter ate some and liked it, I think, but my husband I and ate the rest.  It was so good!  And I don't even really like cauliflower other times I've had it.  Except for this soup- actually, I made both recipes with the same head of cauliflower, since it was such a ginormous head.  Over four pounds, I believe.

Roasted Garlic-Parmesan Cauliflower
adapted from Our Best Bites

3-4 Tbs olive oil
3-4 cloves garlic, minced
1 smallish head cauliflower
kosher salt and fresh pepper
2-3 tablespoons grated Parmesan cheese

1.  Preheat oven to 400 degrees F. Place olive oil and garlic in a small glass or ceramic bowl. Heat in microwave for about 20 seconds and set aside.

2.  Remove stem and leaves from cauliflower head and trim into large florets. Slice each floret into 1/4 inch slices and place on a foil-lined baking sheet (or just a well-greased glass 9x13, like me). Drizzle with oil and garlic mixture and sprinkle with kosher salt and black pepper. Use a spatula to toss to coat. Add more olive oil if needed. Bake for 15 minutes and then toss with spatula. Bake 10 more and then toss with Parmesan cheese. Continue baking for 5-10 minutes until golden brown on edges.  (Pierce one with a fork to make sure it is tender enough).
**This post and photos are property of http://dishingwithdish.blogspot.com/**/

Tuesday, May 1, 2012

Mexican Molletes (Moyetes)

This is a delicious, simple dish.  These are Mexican Moyetes, sometimes spelled Molletes.  A friend from Mexico taught a group of ladies from my church how to make these.  I think if Bolillos are available, those are what is typically used, but over here, thick loaves of Italian bread suffice.  You take slices of bread, spread some softened butter over them, and brown them, butter side-down, on a griddle.  Then you spread refried beans over them, top that with cheese, and bake until the cheese melts.  These are then topped with Crema (make your own by mixing a small amount of milk into regular sour cream) and Pico de Gallo

My kids LOVE these!  Well, so do I (and my husband).  I tried to make homemade beans when I tried these at home, but I think my beans were old, because I soaked them overnight, cooked them FORever, and they were still not tender enough!  Next time, I am just going to use storebought refried beans. 

The recipe below is just rough measurments, since that's what I did when I made them.  :)  This makes quite a lot if you use the whole loaf of bread.
Mexican Molletes (Moyetes)
from my Friend A.P.

1 large loaf Italian or French bread (not a baguette)
Soft butter
Refried beans, one or two cans (or homemade)
Shredded cheese; I used a Mexican blend
About 1 cup sour cream
1-2 Tablespoons milk
Fresh Pico de Gallo, for serving

1.  Preheat the oven to 350 F.  Slice the loaf of bread lengthwise first, and then cut into individual-sized pieces.  (So they look like boats).  Pre-heat a large skillet or counter-top griddle to about 350.  Spread softened butter over the cut, flat sides of the bread.  Brown the bread slices, butter side down, until a bit browned and crispy.

2.  Remove the bread slices onto baking sheets, buttered-side-up.  Spread the browned surfaces with refried beans, and top that with cheese.  Add as much or as little as you want.  Bake for 5-10 minutes, or until the beans are warmed through and the cheese is melted.

3.  Meanwhile, whisk the milk into the sour cream.  Start with 1 Tablespoon, or even less, and then add milk, if needed, to get a slightly runny, but still thick, consistency.  This is your Crema. 

4.  When the Molletes are done, serve with the Crema and Pico do Gallo for topping.  Some of my kids love both the crema and Pico, or they can choose just the Crema or even eat one "plain".  These are yummy, and versatile! 
**This post and photos are property of http://dishingwithdish.blogspot.com/ **

Friday, March 23, 2012

Strawberry Avocado Salad

This is a lovely spring salad.  Local strawberries are not in season here yet, and won't be until about June, (and only then for a few weeks), but I'm content with imported ones to get my strawberry fix.  I love strawberries, and we get pretty good ones from Spain over here.  The local organic farm has fresh baby spinach once again, so we picked some up last Saturday and actually had this salad as an item on our St. Patrick's Day menu!  :) 

This salad is easy, pretty, delicious, quite healthy, and it's also vegan!  The vinaigrette takes no time at all to whip up.  The original recipe calls for fresh lime juice, but I only had lemons on hand, so I used those. 
Strawberry Avocado Salad
adapted from The Flourishing Foodie
Makes 4 salads- Recipe easily cut in half

4 cups baby spinach
1 avocado, diced
2 cups strawberries, halved
2 - 3 shallots, sliced
1/2 cup olive oil
1/4 cup fresh lime OR lemon juice
1 tbsp sugar
2 tbsp Dijon mustard
1/2 tsp salt
cracked pepper
1/4 cup sliced or slivered almonds

1. In a large serving bowl, add the spinach and top with avocado, strawberries, and shallots.

2. In a small jar with a lid, combine the olive oil, lime juice, sugar, mustard, salt, and pepper. Cover and shake.

3. Drizzle the dressing over the salad, and sprinkle on the almonds.
**This post and photos are property of http://dishingwithdish.blogspot.com**

Friday, January 27, 2012

Pasta with Mascarpone, Lemon, Spinach & Pine Nuts

We loved this pasta dish.  Even my two boys loved it and ate a ton.  Even my pickiest eater!  He thought the greens were parsley and said they didn't taste like anything.  (That's a good thing, coming from him!)  The photo above is of the leftovers, so you can't really see how creamy it was.  The photo below is of the night I made it (but the lighting is bad).  We had this with grilled chicken and roasted asparagus too.... sooo good!
I had to use frozen spinach, since I haven't been able to find any fresh here lately.  I thawed it out overnight in the fridge.  To get the water out, I stuck it in a fine-meshed strainer over a large bowl and smashed the heck out of it with the back of a large serving spoon.  I always thought frozen spinach had a funky taste and texture, but it doesn't, and it was perfect in this dish!  Plus, I think I paid only like $.80 or less for a package.  I'm excited to use more frozen spinach now in soups and pasta dishes. 

I used a new-to-me pasta that I found on Amazon.  It is called Fusilli Bucati, and it is SO cute- like little curly corkscrews.  They are round-ish, and actually have a small hole going through the middle of the pasta.  I love them- can't wait to try mac and cheese and more dishes using this shape. 

The original recipe calls for Meyer lemons, but I have never seen those here, so I just used the juice of a regular lemon.  It was perfect.  I also subbed pine nuts for hazelnuts, and I added Parmesan and garlic powder (too lazy to chop up real garlic!)  I will make this dish again- we really liked it.  For any locals (are you out there?!) I'm able to find the Mascarpone at Continente- it's the store brand.
Pasta with Mascarpone, Lemon, Spinach & Pine Nuts
adapted from the Kitchn

1 teaspoon Meyer (or regular) lemon zest
juice from one Meyer lemon (about 1/4 cup) (or use a regular lemon)
1/2 cup mascarpone cheese
1/2 teaspoon sea or Kosher salt
a few grinds of fresh pepper
garlic powder, to taste
1/4 teaspoon freshly grated nutmeg (optional- I left this out)
1/2 pound favorite pasta (8 oz.)
5 cups (loosely packed) fresh spinach, washed, spun dry, and roughly chopped, OR one 10 oz. pckg. frozen spinach, thawed, and excess juices removed :)
1/4-1/2 cup toasted pine nuts
1-2 Tablespoons grated Parmesan cheese

1.  Bring a pot of water to boil and add a little salt.  Cook the pasta according to package directions.  Undercook just slightly, but about a minute.  Drain, reserving about 1/2 cup of the pasta water.

2  Combine the lemon zest, lemon juice, mascarpone cheese, salt, pepper, garlic powder, and optional nutmeg in a bowl.  Whisk to combine.

3.  Return the pasta to the pot, and set over low heat.  Stir in the mascarpone sauce.  Add the spinach and toss so that the spinach begins to wilt.  Add about 1/8-1/4 cup of the pasta water (more if necessary) to keep the sauce creamy and loose but not watery.  Continue to cook and toss until the spinach is cooked and wilted down.  Add the parmesan and pine nuts and stir to combine.  Serve immediately.
**This post and photos are property of http://dishingwithdish.blogspot.com**

Saturday, January 14, 2012

Roasted Garlic Tomato Soup

I'm always up for trying new Tomato Soup recipes.  We had grilled cheese for dinner and I tried this new recipe to go with it.  The soup was super thick, but you could always thin it down with some milk or broth.  I wanted this to go further, so I doubled the tomatoes.  I was able to try San Marzano tomatoes for the first time (I can buy those here- yay!)

Obviously, this soup contains roasted garlic.  You can use as much as you want, and I chose to roast and use the whole head.  Roasting really mellows out garlic, so this soup was not too strong at all.  I'll include directions for roasting garlic after the recipe, below.

Roasted Garlic Tomato Soup
adapted from Homesick Texan

2, 28 oz. can of crushed tomatoes (like San Marzano)
1 head of garlic, roasted (instructions below)
2 tablespoons fresh basil
1/4 of a large onion, diced
1 celery rib, diced
1 carrot, diced
2 pieces of cooked bacon (optional)
1 tablespoon butter
1 teaspoon sugar
Salt and pepper to taste
2 cups half-and-half
3 tablespoons of hard cheese such as Parmigiana, Romano or Asiago

1.  In a large soup pot with a lid, melt butter, and cook onions, celery, carrot, and one piece of bacon (chopped) for 10-15 minutes.  Add tomatoes, sugar and basil and other piece of bacon to pot.  Bring to a boil and then simmer, covered, for 20-30 minutes.

2.  Squeeze roasted garlic out of its skin and add as many cloves as desired to the soup.  (I used the whole head).  Stir in cheese.  Simmer, covered for another half hour.

3.  Using an immersion blender, puree the soup right in the pot.  If you don't have an immersion blender, let the soup cool a bit, and then puree carefully, in batches, in a regular blender.  Vent the lid and cover with a kitchen towel so heat can escape. 

4.  Put the soup back onto the stove, on low heat, and stir in the half-and-half.  Add milk, or broth, if desired, to thin it out, or leave it as-is for a thick soup. 
How to roast garlic:  Heat the oven to 350 F.  Lay out a small sheet of foil.  Take a head of garlic and slice off the top, exposing all the cloves just slightly.  Place garlic head on the foil.  Drizzle with a bit of olive oil, about 1/2 Tablespoon.  Wrap up the garlic loosely in the foil.  Set in a small ramekin or on a small baking sheet.  Roast in the oven for about 1 hour or until garlic is tender, browned, and looks like the garlic below.  Let cool, and when desired, squeeze individual cloves out of garlic skins to use in recipes. 
**This post and photos are property of http://dishingwithdish.blogspot.com/ **

Thursday, November 10, 2011

Creamy Pesto Pasta

We had this super easy, tasty pasta dish last week.  I love dishes where the only "cooking" is boiling some pasta.  You do need your blender for this.  When adding the broth to the cream cheese (Neufchatel) mixture, start with 1/2 cup and add more as needed; mine was a bit thin with the whole cup in there.  Also, next time I'd do 14oz. or so of pasta instead of a full pound, so there's more sauce. 

If you want meat with this, some lemon-garlic grilled chicken would be good.  We just had it with steamed, lemony-buttery broccoli.  I used the last of my beloved wagon-wheel pasta for this.  The kids loved this, and had the leftovers for lunch the next day.  I also used some homemade pesto I had stashed in the freezer.  See the original recipe for a fresh tomato topping recipe; we just topped ours with plain chopped tomatoes because of lazyness on my part. 

Creamy Pesto Pasta
adapted from A Little Less Meat

14 oz (or so) favorite short pasta shape (wagon wheels, radiatore, mini shells, etc)
1 cup veggie or chicken broth
6 Tablespoons (more or less) prepared basil pesto
8 oz. Neufchatel cream cheese (softened)

1.  Boil pasta according to package directions and drain.

2.  Meanwhile, combine the broth (start with a half cup; add more if desired), pesto, and softened Neufchatel in a blender and blend until smooth.  Pour the sauce over the cooked pasta and toss to combine.  Top with fresh tomatoes if desired.

**This post and photos are property of http://dishingwithdish.blogspot.com/**/

Friday, October 14, 2011

Orzo with Tomatoes, Basil, and Blue Cheese

I've had this recipe saved to make forever and I finally made it sometime last week.  Sadly, (so sadly), I cannot get Gorgonzola here.... or at least I haven't seen any.  But I can find regular blue cheese.  This time, it came from Bavaria, Germany and it's really good.  I buy a small amount at a time, because I'm the only one in the fam that eats it.  I avoided it while pregnant, but am getting my share of it now.  It is sooooo good and I love it so much!  Tonight, my husband threw some onto the Grilled Naan Pizzas he made for me (the rest of the fam just had provolone and pepperoni on theirs. 

Anyway, back to this recipe.... it was good, and my husband and I loved it.  The rest of the fam just had Parmesan on theirs, since they don't like blue cheese.  Anytime my kids see orzo, they think it should be this recipe; it's like a crime if I try to do something new with orzo.  They LOVE that Parmesan/Basil one.... really, really love it.  They're always disapointed if they see orzo on the table and it's not their fave orzo.  Makes it hard to try new orzo recipes!  I even gave them a few warnings during the day.  "Hey guys, I'm making a new orzo recipe tonight.  It's not the one we usually have; it's new, ok?"  But they still didn't seem to get it, come dinnertime!  They were all like "Is this the one we like?"  Hello!  Sheesh!  I think they think the word "Orzo" means "Parmesan/Basil Orzo".  Ha ha!  Anyway, here is the recipe.

PS:  You could use Feta instead of Blue Cheese- that would be really good.  I was actually going to pick some up for the Blue Cheese haters, but my store was out of the crumbled stuff, and I was feeling too lazy to crumble a block myself.  :)

Orzo with Tomatoes, Basil, and Blue Cheese
adapted from Allrecipes

1 tablespoon olive oil
1 cup uncooked orzo pasta (I used half white and half whole wheat)
1 small red onion, chopped
1 clove garlic, minced
1 1/4 cups vegetable broth
                  
1 pint cherry tomatoes, halved
12 leaves fresh basil, chopped
1 clove garlic, minced
1 tablespoon olive oil
crumbled Gorgonzola or Blue cheese (or Feta), to taste

1.  Heat 1 tablespoon of olive oil in a saucepan over medium heat. Stir in the orzo pasta; cook and stir until the orzo has lightly browned, 3 to 4 minutes. Stir in the onion, and cook until the onion begins to soften, about 3 minutes. Add 1 clove of garlic; cook until fragrant, about 30 seconds. Pour in the vegetable broth, and bring to a boil over high heat. Reduce heat to medium-low, and cover; simmer until the orzo is tender yet still a little firm to the bite, 12 to 14 minutes.

2.  In a mixing bowl, combine cherry tomatoes, 1/2 of the fresh basil, garlic, and remaining olive oil.               

3.  Spoon the cooked orzo into a serving bowl. Top with tomato mixture, and sprinkle with Gorgonzola and remaining basil.               

**This post and photos are property of http://dishingwithdish.blogspot.com/ **

Monday, October 10, 2011

Baked Black Bean Burritos

I like the title "Baked Black Bean Burritos".  :)  These are really good, and so easy, and pretty healthy, too.  I made them twice in one week.  The decision to add cheese is up to you- without cheese, these are vegan.  I've been really into beans lately.  (And even made another new black bean recipe today- I'll post that some other time).  The whole fam, including the kids, liked these.  I used whole wheat tortillas to make them a little healthier.

Baked Black Bean Burritos
adapted from Vittles and Bits

1 tsp. olive oil
1 clove garlic, minced
1 15 oz. can black beans, rinsed & drained
1/2 tsp. onion powder
1 tsp. chili powder
1 Tbs. chopped fresh cilantro
1 10 oz. can mild Rotel diced tomatoes & chiles, drained -save juice!
1/2 cup or so Monterey or Colby Jack cheese (I used one small, thin slice per burrito)
5-6 10" flour tortillas (I used whole wheat)
olive oil, for brushing

1.  Heat oil in skillet over medium heat. Add garlic and cook about 1 minute until fragrant.  Add the reserved Rotel juice along with beans, onion powder, chili powder and cilantro.   Reduce heat to medium low and simmer about 10 minutes until most of the liquid is evaporated.

2.  Remove pan from heat and smash some of the beans with back of spoon until mixture is thickened but still chunky, with some whole beans left. Stir in Rotel.  Preheat oven to 425 degrees. Coat baking sheet with cooking spray, or line with nonstick foil (I just sprayed regular foil- it helped them brown on the bottom).

3.  Microwave tortillas in 10 second intervals until soft & pliable. Spoon a heaping 1/3 cup mixture in a line down center of each tortilla and place cheese on top.  Fold in sides on either end of the line, and then roll tortilla tightly around filling.  (Here is a helpful YouTube vid on folding burritos).  Set on baking sheet with seam side down.

4.  Using a pastry brush, lightly brush the tops of the burritos with oil and place baking sheet in oven until crisp and browned, about 10 minutes. Serve with guacamole, sour cream, and/or salsa.
**This post and photos are property of http://dishingwithdish.blogspot.com/**