Showing posts with label Easter. Show all posts

Friday, April 2, 2021

Easter Egg Nests

These were a cute little fun project for right before Easter.  They came together super quickly and are pretty tasty, too.  They're really sweet- I think making them in mini muffin tins would be a better serving size, but then you'd have to find mini-mini Cadbury eggs (maybe they exist, in the US?)  I did find the metallic eggs which looked really nice.  
Easter Egg Nests
adapted from Dixie Crystals

1 package (11 oz) white chocolate chips (or chopped white chocolate)
2 tablespoons powdered sugar
3/4 cup creamy peanut butter
1 can (8 oz) chow mein noodles
Cadbury Easter Candy Coated Mini Eggs (about 48)

1.  Spray two standard size muffin tins with non-stick spray. Set aside.  (I got only about 16 from this recipe).

2.  In a heavy saucepan, melt white chocolate chips and peanut butter together over low heat.  Alternatively, you can microwave in a large, uncovered, microwave-safe bowl on medium high power for 1 minute; stirring until smooth. If necessary, microwave at additional 10- to 15-second intervals, stirring just until chips are fully melted.

3.  Stir in powdered sugar until well blended and smooth. Fold in chow mein noodles and fold until all ingredients are coated.

4.  Drop by rounded tablespoon into muffin tin and press down gently in center to make a “nest.”  Place 3 chocolate eggs in center of nest.  Refrigerate until hardened, about 20 minutes, then pop out of muffin tins and serve. Can store for up to a week in an air tight container.

**This post and photos are property of http://dishingwithdish.blogspot.com/ **

Sunday, March 27, 2016

Happy Easter!

We love the sweet breads available here in Italy for holidays like Easter and Christmas.  They are very similar to Portuguese Massa Sovada, which I was sad to leave behind when we left the Azores. We get it here once in a while and make delicious french toast with it.   This particular bread we used this time is Fugassa Venetian- or a type of sweet, high-rising bread from the local Veneto region here.


Sweet Italian Bread French Toast

1 loaf Italian sweet Easter bread
6 eggs
1/2 cup milk
vanilla and almond extracts
pinch sugar, if desired

1.  Preheat your griddle or pan on the stove.  Slice your bread a little on the thick side, but not too thick.  Mix the eggs, milk, extracts, and sugar together.  Grease your griddle or use non-stick spray. Dip the bread into the egg mixture, one by one, and place onto the griddle.  Cook pieces until browned on one side and flip over.


**This post and photos are property of http://dishingwithdish.blogspot.com/ **

Sunday, April 20, 2014

Carrot Patch Cupcakes

cc8W
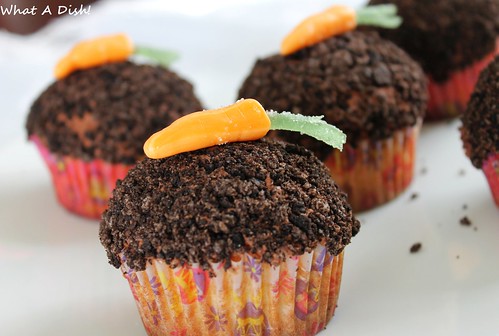
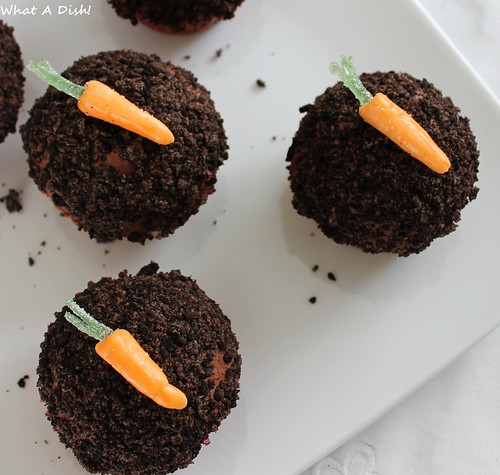
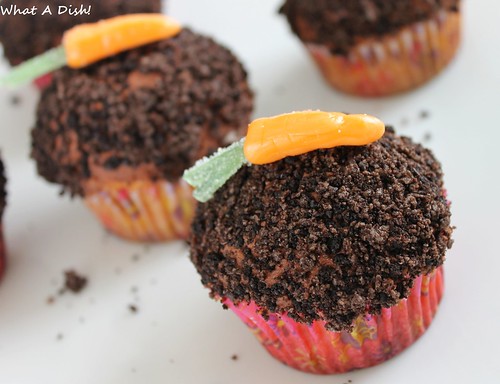
Happy Easter!  I wanted to make these cute cupcakes as a cute Easter/Spring dessert.  The logical choice would be to use carrot cake cupcakes, but I just used my fave vanilla Greek yogurt recipe.  (Scroll down for recipe.)
cc1aW

cc7W
Carrot Patch Cupcakes
idea from Our Best Bites

Favorite cupcakes- any flavor (vanilla, chocolate, carrot cake, etc)
Chocolate Frosting
Crushed Oreos (crush in a food processor)
Orange Starbursts (1/2 piece for each carrot)
Green licorice

1.  Place crushed Oreos in a deep bowl.  Frost cupcakes.  Immediately after frosting each cupcake, dip into bowl of crushed Oreo "dirt" and press crumbs into frosting, making sure to get the sides.  Set on a serving platter until all of the cupcakes are frosted and covered in crumbs.

2.  Unwrap orange Starbursts, cut in half, and microwave for 5-10 seconds, until slightly softened.  Rolling in your hands, form into a carrot shape, with a tapered end.  Take a small paring knife and press "notches" into the sides of carrots.  Using a wooden skewer, press a hole into the non-tapered end.  Cut licorice into two or more pieces and stick into the holes in the carrot.  Top cupcakes with candy carrots. Serve.
cc6W
**This post and photos are property of http://dishingwithdish.blogspot.com/ **

Friday, April 18, 2014

Chocolate Peanut Butter Eggs

pb5W
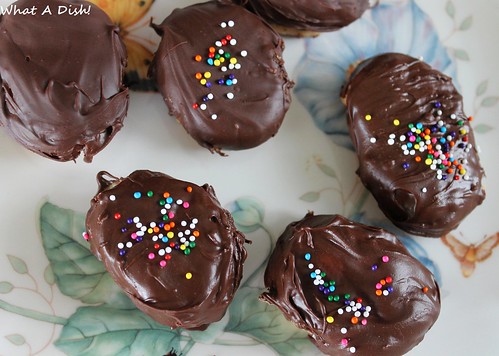
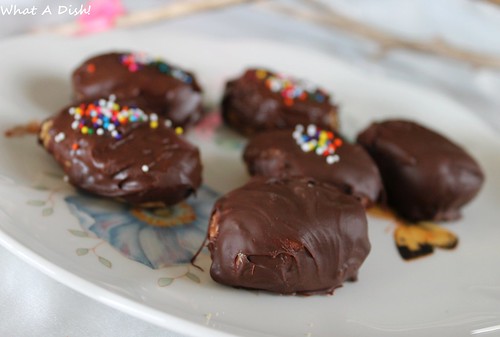
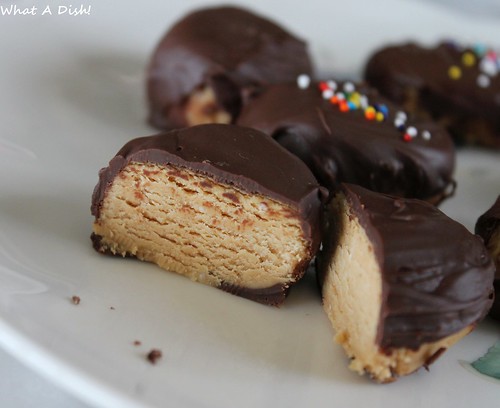
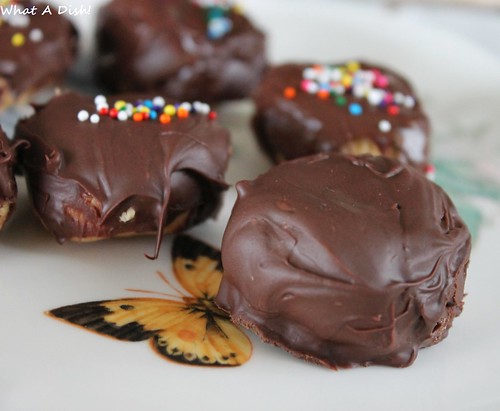
I've always wanted to make these for Easter, and finally did today!  I was super tired for some reason but did it anyway.  My 7-year old helped me shape the peanut butter mixture into eggs and I dipped them later, which was very messy and the hardest part, by far.  After the first one, I didn't bother dipping the bottoms at all.  They're too big and awkward to move around.  You can see my chocolate is hardly smooth and perfect. They are delicious though; taste like Reese's PB Eggs, and makes a lot more, which is both and good and a bad thing.
pbW

pb9W
Chocolate Peanut Butter Eggs (Homemade Reese's Eggs)
adapted from Food

4 cups powdered sugar
1 1/2 cups creamy peanut butter
1/4 cup butter
2 -3 tablespoons milk
3 cups semi-sweet chocolate chips
1 1/2 tablespoon shortening (I used organic- coconut oil would probably work too)

1. Mix together powdered sugar, peanut butter and butter.  Add milk, one tablespoon at a time until it becomes a nice workable dough.  It will be like play dough and easy to work with.  If it is crumbly at all, add more milk; just drops at a time until it comes together, and is smooth with no crumbling when pressed into a ball.  Form dough into egg shapes and place in freezer for 1 hour.

2.  Place chocolate chips in and shortening in a glass measuring cup.  Microwave 1 minute at a time, stirring in between, until melted.  (Can use a double broiler if you prefer; this is what I did.)  Dip each egg in the melted chocolate and place on waxed paper until set.  Trim any excess chocolate off that may pool with a paring knife.  If you wish to decorate with sprinkles, add them immediately, when the chocolate is still wet.  
pb6W
**This post and photos are property of http://dishingwithdish.blogspot.com/**/

Sunday, March 31, 2013

Dinosaur Eggs (for Easter)

Dino Eggs
Happy Easter!  We made these super-cool eggs last night.  I misread the directions on these; the colored vein-y lines are supposed to be very dark and pronounced.  I thought you were just supposed to lightly crack eggs and dye as usual, then refrigerate overnight.  Well, you are supposed to lightly crack the eggs, and then LEAVE them in the liquid dye overnight.  To see how they should have looked, go over to Our Best Bites.  They look amazing.  Oh well, this just gives us an excuse to do it again next year and do it right next time (then maybe update this post with new photos!)
Dino Eggs
The kids LOVED making these and even my one-year-old helped gently crack the eggs.  They also loved peeling them and seeing the designs.  The ones pictured here are the darkest ones; some of them were so faint there was hardly any color.  But that's all because we did it wrong! 

These made fun deviled eggs.  :)

Dinosaur Eggs
from Our Best Bites

hard-boiled eggs (brown eggs are fine for this!)
egg dye (can use this method using food coloring)

1.  Get a cup for each egg.  We like the little Ikea cups.  I'm not sure if Dixie cups would work, because they have to be left full of liquid overnight.  Either way, I'd put the cups into a 9x13 pan (if they all fit).  We do a dozen eggs.

2.  Gently crack each egg shell all over without breaking pieces off.  You can tap on the counter and then squeeze, or whatever way works for you.  Do not peel; just crack the shell all over.

3.  Fill the cups with dye according to package directions.  Submerge an egg in each cup, and place in a 9x13 pan.  Then, refrigerate the eggs in their cups of dye overnight.  In the morning, rinse each egg off and peel.  You should have a very cool design on each hard-boiled egg. 
Dino Eggs

**This post and photos are property of http://dishingwithdish.blogspot.com/ **

Sunday, April 15, 2012

Spring in Germany

We spent a few days in Germany last week and had a wonderful time.  Germany is so beautiful, especially in the Spring.  We saw so many tulips and other flowers.  These are my Dad's flowers.  He has tulips and daffodils, and a lot more. 
They love Easter in Germany.  Cute little decorations are everywhere.  Below is my parents' "Easter Egg Tree".  Below that is a neighborhood Easter Egg tree, from a house in my parents' village, on a type of evergreen.

We love my parents' across-the-street neighbors.  They own a wonderful restaurant in another village and have always been so nice to us when we visit.  In the summer, they've brought over sweet cherries from their tree for our "kinder".  :)  This time around, on Easter Sunday, she brought over a cute plate full of Easter goodies for our kids, including delicious Kinder eggs, painted Easter eggs, easter cookies, and some candy.  A few days later, she brought over some jars of sour cherry preserves from her trees, for our "Kinder" again.  I was able to bring one jar home with me! 

Soon, I will have to post about all the wonderful food we ate.  I always come back with some extra poundage.  So many carbs, so little time. 
**This post and photos are property of http://dishingwithdish.blogspot.com/**/

Thursday, April 5, 2012

Spring Carrot Patches

These little carrot pots are sooooo cute.  I had seen this idea a long time ago, I think on the Family Fun website, but had forgotten about them until I saw these on another food blog.  Not only are these cute, but they are easy, too.
For the dip, I used hummus, like the recipe suggested.  However, next time I make these, I will choose something else, because my kids haven't had hummus in a few years and now they think it looks "weird".  They used to like it, back when they were too young to care if something looked "weird" or not.  My husband and I love hummus, though.  We enjoyed these with both carrots and some store-bought pita chips.  I also used store-bought hummus for this, gasp!

If you make these and choose not to use hummus, make sure you use some kind of dip that is quite thick.  It needs to be able to hold carrot sticks firmly in place.  Next time, I plan on using Greek yogurt mixed with dry Ranch dressing mix, to make a Ranch dip.  I might even try straining the Greek yogurt to make it thicker, OR one could mix it with some Neufchatel cheese.  (Neufchatel is the cream cheese that boldly says "1/3 less fat than cream cheese!" on the package, FYI). 
So, here's all you need for these babies:  a thick dip, baby carrots, curly-leafed parsley, and food-safe pots OR little baking cups or tiny plastic cups to fit inside your pots.  The pastel pails I used are NOT food-safe.  (They're from Oriental Trading, BTW).  Since they are not food-safe, I needed to put the actual dip in something else.  I chose to use those cute little silicone cupcake "pots", above, given to me by a friend.  They were PERFECT!!  They held the dip well and fit snugly inside my evil, not-food-safe pastel buckets.  I had a blast making these. 

Spring Carrot Patches
adapted from Taste & Tell

hummus
baby carrots
curly parsley
small pots or pails

1.  Spoon hummus into small plastic cups that will fit inside the pots.

2.  Shortly before serving, poke a hole in the carrots using a toothpick or clean kitchen scissors and insert a small piece of parsley. You’ll want 3 to 4 carrots per pot.  “Plant” the carrots in the pot by putting the carrots in the hummus. 

**This post and photos are property of http://dishingwithdish.blogspot.com/**/

Monday, April 5, 2010

Easter Brownie Bites

I didn't have time to post this recipe yesterday, but these little babies were our Easter dessert.  I wanted to do something like I did last year, but cuter.  Thinking of the brownie bites I made in January, I decided to use that brownie batter as the base of this recipe.  The brownie batter contains both white and brown sugar, and they are chewy and delicious.  Since I wanted to make little brownie cupcakes with frosting, I didn't include a peanut butter cup in them this time.  I just made brownies in my mini-muffin tin, frosted them with simple green butter frosting, and finally decorated each one with a Whopper speckled egg candy.  These were easy and fun to make, and gone in no time!!  This recipe made a ton too; about 50 brownie bites.  You'll have a bit of frosting leftover, but it's better to have too much than too little. 

Brownie Bites Batter
from Savory Sweet Life

3/4 cup butter, melted
3/4 cup white sugar
3/4 cup brown sugar, packed
2 teaspoons vanilla extract
2 eggs
3/4 cup all-purpose flour
1/2 cup unsweetened cocoa powder
1/2 teaspoon salt

1.  Preheat oven to 350 degrees F. Line mini muffin pan with mini paper liners.

2.  In a medium bowl, mix melted butter, sugars and vanilla. Beat in eggs one at a time. Gradually add flour, cocoa, and salt and mix until combined. Fill each paper liner about 2/3 full.

3.  Bake in preheated oven for 11-15 minutes or until done. Allow the brownie bites to cool for 5 minutes before removing from the muffin pan.


Butter Frosting
1/2 cup butter, softened
1 package (16 ounces) confectioner's sugar
2-4 tablespoons milk
1 1/2 teaspoons vanilla extract
green food coloring

Whopper egg candy, or any egg-shaped candy

1.  In large bowl, with mixer at medium-low speed, beat butter, sugar, 2-3 tablespoons milk, and vanilla until smooth and blended. Beat in additional milk as needed for easy spreading consistency. Increase speed to medium-high; beat frosting until light and fluffy, about 1 minute. Makes about 2 1/2 cups.

2.  Frost brownie bites.  I used my Wilton 1M tip to make the tops swirly.  Top with an egg candy very soon after frosting, before it sets. 
**This post and photos are property of http://dishingwithdish.blogspot.com/ **

Sunday, April 4, 2010

Happy Easter!

This year, we didn't buy one of those grocery store egg-coloring kits for Easter.  Instead, we used ingredients already in our pantry and produced some of the brightest, most beautiful eggs I'd ever seen.  We were in a hurry, so we only did four colors- red, yellow, blue, and green.  I'm excited to make new and different colors next year.  All you need for this is liquid food coloring, vinegar (I used cider vinegar) and boiling water.  Oh, and hard-boiled eggs.  :)  I followed the instructions on my McCormick food coloring box.  I also found the instructions online here

Easter Eggs
from McCormick

1 dozen large eggs
McCormick® Assorted Food Colors and Egg Dye
Vinegar

1.  Hard boil the eggs:  Gently place eggs in single layer in large saucepan. Add enough cold water to cover eggs by 1 inch. Cover. Bring just to boil on high heat. Remove from heat. Let stand 15 minutes. (Adjust time up or down by 3 minutes for each size larger or smaller.)

2. Pour off hot water and rapidly cool eggs by running them under cold water (or place in ice water) until completely cooled.

3. Mix 1/2 cup boiling water, 1 teaspoon vinegar and 10 to 20 drops food color in a cup to achieve desired colors. Repeat for each color. Dip hard-cooked eggs in dye for about 5 minutes. Use a slotted spoon, wire egg holder or tongs to add and remove eggs from dye. Allow eggs to dry.

**This post and photos are property of http://dishingwithdish.blogspot.com/ **

Saturday, April 3, 2010

A Portuguese Easter

Easter is a big holiday around here- there are many traditional celebrations and food items.  Here are just two I've noticed.  Pictured above are almond candies, or amĆŖndoas.  There are many different kinds- most are chocolate-covered almonds. My fave are the white-chocolate covered almonds; on the left.  The light purple ones are almonds coated in milk chocolate, then a candy coating, kinda like a huge almond M&M.  The pastel ones in the back are coated with a very hard, thick, sugar coating.  No chocolate, and I didn't realize this when I bought them.... or I wouldn't have.  Ha ha.  This coating is like a jaw-breaker coating, and I can't stand them.  Oh well.  We'll have to find someone to give them away to.  :)

Pictured below is some massa sovada bread with a cute little egg baked right into the loaf.  These are everywhere here right now- you can buy them with multiple eggs baked in, too.  We haven't actually tried this bread yet; I think I'll make french toast with it tomorrow.  I'm not sure what we'll do with that egg!  :)  (BTW, I was disappointed to see that this bread has margarine instead of butter...come on!!  It's supposed to be rich with butter, not margarine!)
**This post and photos are property of http://dishingwithdish.blogspot.com/ **

Monday, April 13, 2009

Lemon Tart with Almond Crust

Our other Easter dessert was a lemon tart with an almond crust. It was very easy to make and tasted wonderful- I used fresh lemons, and the flavor was zesty and bright and tart- I love tart. The filling was easy to put together since you just whisk it all at the same time- no tempering of eggs. Since you don't temper the eggs, it's very important to strain the mixture before pouring into the pasty shell. I didn't think I had any cooked egg whites in mine, but when I strained it, there were quite a few! Luckily, straining takes care of that problem.

This is a Taste of Home Recipe, but you can find the recipe on Recipezaar. Note: it took over 8 minutes for mine to thicken; somewhere between 10 and 15, probably. But it does get there!

I'm excited to eat this tart for dessert again tonight. ;)

Lemon Tart with Almond Crust

Ingredients:
1 cup flour
1/2 cup sliced almonds
1/4 cup sugar
6 tablespoons cold butter
1/2 teaspoon almond extract
1/4 teaspoon salt
2-3 tablespoons cold water

Filling:
1 cup sugar
3/4 cup lemon juice
3 eggs
3 egg yolks

2 tablespoons grated lemon peel
1 dash salt
6 tablespoons butter, cubed
Place the flour, almonds, sugar, butter, extract and salt in a food processor. Cover and pulse until blended. Gradually add water, 1 T. at a time, pulsing until mixture forms a soft dough. Press onto the bottom and up the sides of a greased 9 inch fluted tart pan with a removable bottom. Bake at 400 for 15-20 minutes or until golden brown. Cool on a wire rack.
In a large heavy saucepan, whisk the first six filling ingredients until blended. Add butter; cook and stir over low heat for 7-8 minutes or until thickened. Strain; pour into crust. Bake at 325 for 8-10 minutes or until set. Cool on a wire rack. Refrigerate leftovers.

Sunday, April 12, 2009

Happy Easter!


Happy Easter, everyone! For Easter dinner, I made two desserts. One was a lovely lemon tart, which I'll post about later. I wanted to show you the Easter brownies today! I saw the idea for these brownies over at this blog. How cute are those? I had to improvise with a few things, though. I don't have a cute mini-brownie pan, so I just made a 9x13 pan and cut them into squares. Also, I couldn't find those big Easter malt ball eggs over here, so I used Easter pb m&m's, which are larger than the regular pb ones. And I just used a simple brownie recipe instead of a mix.

Here's what I did. First, make brownies in a 9x13. Let cool completely while you finish other Easter-dinner-making tasks. When you're ready, cut into squares and place on a large serving tray. Make green frosting (I used a little less powdered sugar this time). Using a small star tip (the Wilton grass tip (233) would have been cool, but I don't own it), pipe "grass" onto the top of cut brownies. Then, place your egg-shaped chocolate candy on top.

Best Brownies from Allrecipes.com (I doubled this)

1/2 cup butter
1 cup white sugar
2 eggs
1 teaspoon vanilla extract
1/3 cup unsweetened cocoa powder
1/2 cup all-purpose flour
1/4 teaspoon salt
1/4 teaspoon baking powder

Preheat oven to 350 degrees F (175 degrees C). Grease and flour an 8 inch square pan.
In a large saucepan, melt 1/2 cup butter. Remove from heat, and stir in sugar, eggs, and 1 teaspoon vanilla. Beat in 1/3 cup cocoa, 1/2 cup flour, salt, and baking powder. Spread batter into prepared pan. Bake in preheated oven for 25 to 30 minutes. Do not overbake.

Tuesday, March 25, 2008

Easter Season

Happy late Easter everyone! The Easter bunny came yesterday and left the babies too much candy, as usual. On Friday we all dyed Easter eggs together, after attending an Easter party held by a friend in the neighborhood. Everyone had fun! The weather is beautiful now and we can enjoy walks outdoors when the wind doesn't want to blow us away to oblivion. (You could argue that we are already in oblivion, but that's another post.)

For Easter dinner, we had Lemon-Thyme Cornish Game Hens, this Roasted Asparagus, potatoes, and a baguette (the par-baked ones from the grocery store that you take home and bake for a few minutes- we all love those!). We also had a strawberry pie. I love strawberry pies, especially the first of the season strawberry pies. I hate rolling traditional pie crusts, so I started making an easy, pat-in-the-pan shortbread crust for my strawberry pies. This crust is extremely crumbly, and does not present very well because of that. It's hard to get a peice on your plate without the crust cracking and crumbling. But it tastes so delicious that it is worth it! The photo I'm including shows how messy-looking (um, rustic) the pie is. Sometimes I'll do what my mom does, and put a layer of cream cheese between the crust and berries, but I forgot that yesterday. If you don't use salted butter, add a little salt (less than 1/4 tsp) to the dough. This recipe would probably work as a tart also. Here is my recipe:

Strawberry Pie with Shortbread Crust

Crust:
1/2 cup salted butter, slightly softened
1/2 cup all-purpose flour
1/2 whole-wheat pastry flour
1/4 cup light brown sugar
1/3 cup chopped walnuts, optional


Strawberry Filling:
1 cup crushed or pureed strawberries
1-1 1/2 quarts strawberries, hulled and sliced
3/4 cup water
1/2 cup white sugar
2 1/2 tablespoons cornstarch


1. Preheat oven to 375 degrees. For the crust, blend butter, flour and sugar until crumbs form (using a food processor or a pastry blender). Stir in nuts. Press mixture into a greased 9-inch pie plate. Prick all over with a fork. Bake for 10-12 minutes or until golden brown.
2. For the filling, combine the crushed strawberries, water, sugar and cornstarch in a medium saucepan. Cook, stirring constantly until mixture thickens; cool slightly. Arrange remaining strawberries in baked pastry shell; pour cooled strawberry glaze over fresh fruit. Chill until serving time. Serve with vanilla ice cream or whipped cream.