Showing posts with label zucchini. Show all posts

Friday, December 22, 2023

Risotto with Zucchini & Smoked Pancetta


I've wanted to make risotto at home lately ever since I made some at a recent cooking class. I haven't made any at home for a while. I was able to use some special rice an Italian friend gifted me. I used 2 medium-small zucchini and a little container of smoked pancetta. We all had this for lunch a few days ago. It's nice to have more time over the Christmas break to actually cook. I feel like I haven't done any cooking in a really long time. 
Risotto with Zucchini & Smoked Pancetta 
adapted from here 

2 medium-small zucchini, sliced 
2 Tbs. olive oil
1/2 medium yellow onion, finely chopped
1/2 cup (more or less) cubed, smoked prosciutto (can sub chopped ham, bacon or Canadian bacon)
4-6 cups chicken broth
2 cups water 
(2 cups- about 377 grams) arborio, vialone nano, or carnaroli rice 
1 oz. (2 Tbs.) butter, cut into 4 pieces
1/2 to 1 cup finely grated Parmigiano-Reggiano or Grana 
Kosher salt and freshly ground black pepper

1. In a wide heavy-duty 5- to 6-quart pot, heat the olive oil over medium-low heat. Add the onion and chopped prosciutto and cook, stirring occasionally (a wooden spoon is best), until soft and translucent, 5 to 8 minutes. After you get this set up, in a skillet, heat some olive oil and cook the zucchini slices until crisp-tender. Stir occasionally so they don't burn. 

2. Meanwhile, in a 3-quart saucepan, bring the broth and water to a bare simmer over medium-low heat.

3. Add the rice to the onion and stir with a wooden spatula until the grains are coated with oil, slightly translucent around the edges, and opaque in the center, 2 to 3 minutes.

4. Using a large ladle, add about 3/4 cup of the broth. Stir, mixing any rice sticking to the pot’s sides back into the mixture, until most of the broth is absorbed, the rice no longer seems loose when you shake the pot, and a wide trail forms when you run the spatula across the bottom of the pot.

5. After about 10 minutes, add your cooked zucchini. Continue to add broth in 3/4-cup increments, stirring constantly and scraping around the edge of the pot, until the rice is al dente (still a bit firm to the bite but without a hard or crunchy center) and most of the broth is absorbed, 18 to 22 minutes. (You may or may not use all of the broth; if you run out, use hot water.) (If you want the risotto a little softer, go ahead and cook it longer, adding extra liquid if needed.) 

6. Immediately turn off the heat. Add another bit of broth and the butter, Parmigiano-Reggiano, and salt and pepper to taste, and stir quickly. Cover with a tight-fitting lid and let sit for 5 minutes. Stir again and serve. (I skipped the resting period and we just dug in immediately... lol). 

**This post and photos are property of http://dishingwithdish.blogspot.com/ **

Wednesday, October 12, 2022

Grilled Zucchini Salad


I loved this zucchini side dish. (I LOVE ZUCCHINI!! Anyways....)  Slices of zucchini are grilled (over a gas or charcoal grill) and then tossed with lemon juice, herbs, and feta. The grill adds such great flavor to this. I make a similar side dish just on the stove; the grill really takes it up a notch. The original recipe has you cutting the zucchini in a weird way, so it doesn't fall through the grill grates. Even better: just skewer the zucchini or use a veggie grilling basket if you have one. I used metal skewers. Summer has been over for a bit, but this recipe still works for fall.
Grilled Zucchini Salad
adapted from The Kitchn

3 pounds medium green zucchini or yellow summer squash
5 tablespoons olive oil, divided
Finely grated zest of 1 medium lemon
2 tablespoons freshly squeezed lemon juice (I used all the juice from my lemon)
1/4 teaspoon dried oregano
1 1/4 teaspoons kosher salt, divided
Freshly ground black pepper
1 cup crumbled feta cheese (about 4 1/2 ounces)
1 tablespoon coarsely chopped fresh mint or basil leaves

1. Heat a grill pan or outdoor grill to high (450°F to 550°F). Meanwhile, prepare the zucchini and dressing.

2. Cut the zucchini into slices; place in a large bowl and set aside. If using skewers, threat all of the zucchini onto skewers. They can be semi-close together. Place 3 tablespoons of the oil, lemon zest, lemon juice, oregano, and 1/4 teaspoon of the salt in a small bowl. Season with pepper and whisk to combine; set aside.

3. When the grill is ready, drizzle the zucchini with the remaining 2 tablespoons of oil, sprinkle with the remaining 1 teaspoon of salt and pepper, and toss to combine. Place in a single layer on the grill (using a veggie basket or skewers.) (Reserve the bowl; no need to wash). Cover and grill, turning occasionally, until charred in spots and crisp-tender, about 8 minutes total.

4. Transfer the squash back to the reserved bowl, drizzle with the dressing, and toss to combine. Set aside to cool to just warm or room temperature, at least 15 minutes. Add the feta and mint or basil and gently toss to combine.
**This post and photos are property of http://dishingwithdish.blogspot.com/ **

Sunday, August 7, 2022

Zucchini Gratin


Yum- I loved this so much. In fact, I ate most of it myself over the course of a few days. My kids were scared of it and kept calling it "That Zucchini Thing". My husband liked it, but not as much as I did. I'd still make it again just for myself- lol. I've never made a zucchini gratin before. The recipe called for Gruyere cheese, but I had some Provolone Piccante on hand, so I used that, and it was perfect. I assume one could use Gruyere, Provolone, or even white Cheddar. (I didn't have quite enough Provolone on hand, so I ended up using just a bit of regular cheddar in this). 
Zucchini Gratin
adapted from the Kitchn

2 pounds zucchini (about 4 medium or 8 small)
2 medium shallots or 1 red small red onion
2 cloves garlic or 1/2 teaspoon dried minced garlic
4 ounces Gruyere cheese, Provolone, white Cheddar, or another cheese
3/4 cup panko bread crumbs
2 tablespoons grated Parmesan
1 1/2 teaspoons kosher salt, divided
6 tablespoons unsalted butter
3 tablespoons all-purpose flour
1 1/4 cups whole or 2% milk
1/4 teaspoon freshly ground black pepper

1. Arrange a rack in the middle of the oven and heat the oven to 400°F. Coat an 8- or 9-inch square or other 2-quart baking dish with cooking spray or butter.

2. Trim the ends from 2 pounds zucchini and cut crosswise into 1/4-inch thick rounds. Thinly slice 2 shallots. Mince 2 garlic cloves. Grate 4 ounces Gruyere cheese (about 1 1/2 cups) on the large holes of a box grater.

3. Combine 3/4 cup panko bread crumbs, 2 tablespoons grated Parmesan cheese, and 1/4 teaspoon of the kosher salt into a medium bowl. Stir to combine.

4. Melt 6 tablespoons unsalted butter in a Dutch oven or large pot over medium heat. Transfer 2 tablespoons into the breadcrumb mixture. Stir to coat the breadcrumbs.

5. Add the shallot, garlic, and 1/4 teaspoon of the kosher salt to the remaining butter in the Dutch oven and cook over medium heat, stirring occasionally, until softened, 2 to 3 minutes. Sprinkle with 3 tablespoons all-purpose flour and stir constantly for 1 minute to cook out the floury taste. While stirring constantly, slowly pour in 1 1/4 cups whole or 2% milk and stir until no lumps remain and the flour is completely dissolved. Bring just to a full simmer over medium heat, stirring frequently. Add the Gruyère, the remaining 1 teaspoon kosher salt, and 1/4 teaspoon black pepper, and stir until the cheese is melted and the sauce is bubbling. The sauce will be thick and will thin out during baking. Remove the pot from the heat. 

6. Add the zucchini and stir to coat, making sure to separate any stuck together slices. Transfer to the prepared baking dish and spread in an even layer. Sprinkle the gratin with the breadcrumb mixture. Bake until the gratin is golden-brown on top and bubbling around the edges, 28 to 30 minutes. Let cool for 5 minutes before serving.

                                            **This post and photos are property of http://dishingwithdish.blogspot.com/ **

Sunday, July 31, 2022

Pasta with Zucchini, Ricotta and Basil

I love zucchini and am always cooking with it, especially in the summer. I tried this recipe from the NY Times and enjoyed the results. Leftovers are good too. A great dish for summer!
Pasta with Zucchini, Ricotta and Basil
adapted from NT Times via here

Extra-virgin olive oil
1 small onion, finely diced
2 pounds zucchini, sliced into 1/4-inch-thick pieces (for larger zucchini, cut in half lengthwise before slicing)
Salt and pepper
2 garlic cloves, minced
1 ounce basil, about 2 cups loose leaves
1 pound ziti or other dry pasta
8 ounces ricotta, about 1 cup 
Pinch of crushed red pepper, optional
Zest of 1 lemon
2 ounces grated Parmesan, pecorino or a mixture, about 1 cup, plus more for serving

1. Put a pot of water on to boil. In a large skillet over medium-high heat, cook the onions in 2 tablespoons olive oil until softened, 5 to 8 minutes. Reduce heat as necessary to keep onions from browning. Add zucchini, season generously with salt and pepper, and continue cooking, stirring occasionally until rather soft, about 10 minutes. Turn off heat.

2. Meanwhile, use a mortar and pestle to pound garlic, basil and a little salt into a rough paste (or use a mini food processor, like I did). Stir in 3 tablespoons olive oil. (**Can also use a few spoonfuls of pesto here if you have it- instead of garlic, basil, and salt**)

3. Salt the pasta water well and put in the pasta, stirring. Boil per package instructions. Drain pasta, reserving 1 cup of cooking water.

4. Add cooked pasta to zucchini in skillet and turn heat to medium-high. Add 1/2 cup cooking water, then the ricotta, optional crushed red pepper and lemon zest, stirring to distribute. Check seasoning and adjust. Cook for 1 minute more. Mixture should look creamy. Add a little more pasta water if necessary. Add the basil paste and half the grated cheese and quickly stir to incorporate. Spoon pasta into warm soup plates and sprinkle with additional cheese. Serve immediately.
**This post and photos are property of http://dishingwithdish.blogspot.com/ **

Friday, April 10, 2020

Fried Zucchini Blossoms

A few years ago, I made these Stuffed Zucchini Blossoms.  I wanted to make Zucchini Blossoms again, but this time, not stuffed.  I didn't have anything to stuff them with and I wanted to see what they were like just plain. I've had them at local food fests, but covered in sugar as a dessert.  I didn't want that, either; I wanted savory. Here in Italy, one can buy trays of just zucchini blossoms this time of year. I love them! I also love the baby zucchinis with the flower attached, to use in pasta.
I found a few recipes online and combined parts of them.  I mostly used an Epicurious recipe, and added a few beaten egg whites folded in for lightness.  I used sparkling water, and that combined with the whipped egg whites made the batter so incredibly light and fluffy; these were SO good, and fun to make too.  After we ate these we dipped other random things in the batter and fried and ate them all (basil leaves, pickles, Oreos.... strawberries.....)

Eat these right away... they start to get all weird and soggy if they sit too long.

Fried Zucchini Blossoms
adapted from Epicurious

Sunflower or Vegetable oil (for frying)
1 1/4 cups all-purpose flour
1 teaspoon kosher salt
12 ounce sparkling water, club soda or beer
2-3 egg whites, stiffly beaten (optional, but I recommend)
Zucchini blossoms, rinsed (stamens removed; about 2 dozen)
Sea salt

1.  In a large pot, heat about 2" oil (I used a small saucepan to reduce the amount of oil used... I also don't' know if I used 2 inches) over medium heat until a deep-fry thermometer reads 350°. Combine flour and salt in a medium bowl, then whisk in water or beer until almost smooth (some small lumps are welcome—don't overwhisk or you'll deflate the batter). Fold in the egg whites.

2.  One by one, dredge the blossoms in batter, shaking off the excess; gently lay them in the oil, without crowding the pan. Cook, flipping once with a slotted spoon, until golden brown, 2-3 minutes total. Transfer to paper towels to drain. Sprinkle with sea salt and devour while hot.
**This post and photos are property of http://dishingwithdish.blogspot.com/**

Sunday, September 9, 2018

One-Pot Creamy Tomato Basil Pasta

I loved this pasta!  It was so easy too!  Right now I'm buying wonderful grape tomatoes often from the Sicilian guy on the side of the road. :)  He sells produce from Sicily and it's all delicious, and cheap.  I got the zucchini from him too (just saute it on the stove with olive oil and your favorite herb mix, and salt if needed. Add feta if desired.) His tomatoes were wonderful in this. Of course if you grow your own, that would be even better.  We grow our own basil!!  Lol.

I used my white non-stick (I think ceramic-coated) soup pot for this recipe and it was perfect.  If you have an enamel Dutch oven that would be great.

One-Pot Creamy Tomato Basil Pasta
adapted from Mel's Kitchen Cafe

2 cups milk
2 3/4 cups chicken broth (low sodium)
1 pound (16 ounces) spaghetti, broken in half
4 cups (about 20 ounces) cherry or grape tomatoes, halved (can add more- I did)
3 cloves garlic, finely minced (about 1 heaping teaspoon)
1 teaspoon dried oregano
1 teaspoon salt
1/4 teaspoon pepper
1/2 to 1 cup fresh basil leaves, torn into pieces
1/2 cup (about 1.5 ounces) freshly grated Parmesan cheese

1.  In a large pot (5- to 6-quarts), combine the milk, broth, spaghetti, garlic, oregano, cherry tomatoes, salt, and pepper. Bring to a boil over medium-high heat, then reduce the heat and gently simmer for 10-12 minutes, stirring often so the pasta doesn’t stick. Adjust the heat accordingly especially at the end. Cook until the pasta is tender and most of the liquid is absorbed. (At the end, I threw in a few tablespoons of cream I had on hand that needed to be used. It was great, but not needed. If the pasta is not cooked through and the liquid is gone, add extra broth or milk as needed until pasta is tender.)

2.  Off the heat, stir in the basil leaves and the Parmesan cheese. Serve immediately (if you want it slightly thicker, let it rest 5-10 minutes; it will thicken as it stands).
**This post and photos are property of http://dishingwithdish.blogspot.com/ **

Monday, June 25, 2018

Summer Minestrone

My husband and I loved this veggie-packed soup.  It felt so good and flavorful and healthy.  I loved all the ingredients and especially the fresh basil.  And what a good way to use some of the Parmesan rinds I had in the freezer.

Summer Minestrone
adapted from NY Times

1 tablespoon olive oil
1 medium onion, chopped
2 medium carrots, peeled and chopped
1 celery stalk, chopped
Salt
4 large garlic cloves, minced or pressed
1 (14-ounce) can chopped tomatoes, with liquid
1 medium turnip or potato, peeled and diced
¾ pound zucchini, diced
A bouquet garni consisting of 1 Parmesan rind, 1 bay leaf, 3 sprigs parsley and 3 sprigs thyme, tied together with kitchen string or tied into a piece of cheesecloth
1 (15-ounce) can cannellini or borlotti beans, drained and rinsed
6 ounces green beans, cut into 1-inch lengths
½ cup soup pasta, such as elbow macaroni, little shells, ditalini, or broken spaghetti
¼ cup slivered fresh basil leaves
Freshly grated Parmesan for garnish

1.  Heat the olive oil over medium-low heat in a large, heavy soup pot or Dutch oven and add the onion, carrots, and celery. Cook, stirring, until beginning to soften, about 3 minutes, and add 1/2 teaspoon salt. Continue to cook, stirring often, until tender, about 5 more minutes. Add the garlic, stir together for about a minute, and stir in the tomatoes. Cook, stirring, until the tomatoes have cooked down and smell fragrant, about 5 minutes. Stir in 2 quarts water, the turnip or potatoes, zucchini, and the bouquet garni, and bring to a simmer. Add 1-2 teaspoons salt (start with 1 and you can add more later), reduce the heat to low, cover and simmer 35 minutes. Add the green beans, and cook about 10 minutes longer.  Stir in the canned beans. Taste and adjust salt. Remove the bouquet garni.

2.  Add the pasta to the soup and simmer another 10 minutes, or until the pasta is cooked al dente.  Grind in some pepper and taste and adjust seasonings, including salt. It should be savory and rich-tasting.  Stir in the basil. Serve in wide soup bowls, with a sprinkling of Parmesan over the top.

**This post and photos are property of http://dishingwithdish.blogspot.com/ **

Wednesday, September 20, 2017

Ground Pork & Zucchini Stir-Fry

This was a quick and easy recipe that was also delicious.  The original recipe called for sambal oelek, which is similar to Sriracha sauce.  I used a sweet Thai chili-garlic sauce instead, so the kids would enjoy this more.  But feel free to use sambal oelek, or Sriracha in this.
Ground Pork & Zucchini Stir-Fry
adapted from The Kitchn

For the sauce:
3 tablespoons tamari or soy sauce
1 tablespoon grated or minced fresh ginger
1 tablespoon sambal oelek, Sriracha, or Asian chili-garlic sauce (can use sweet)
2 teaspoons Asian sesame oil

For the stir-fry and serving:
1 pound zucchini (about 3 medium)
2 tablespoons canola or vegetable oil, divided
1 pound ground pork (NOT sausage)
Salt
Freshly ground black pepper
1/4 cup thinly sliced scallions
Cooked white or brown rice, for serving

1.  Make the sauce: Stir all the ingredients together in a small bowl and set aside.

2.  Make the stir-fry: Slice each zucchini in half lengthwise, then slice each half into 1/2-inch-thick half-moons.

3.  Heat a flat-bottomed wok or large frying pan over medium-high heat until a drop of water vaporizes immediately on contact. Drizzle 1 tablespoon of the oil around the pan, add the ground pork, and season with salt and pepper. Let cook undisturbed for 30 seconds, then break the pork into small, bite-sized pieces and continue stir-frying until it's cooked through and golden-brown, about 5 minutes. Transfer the pork to a paper towel-lined plated and drain the pan of excess fat.

4.  Drizzle the remaining 1 tablespoon of oil in the pan, spread the zucchini out in one even layer, and let cook undisturbed for 30 seconds. Stir-fry the zucchini until browned and just tender, about 5 minutes more.

5.  Return the pork to the skillet, add the sauce, and stir-fry until the sauce is well-incorporated and the zucchini begins to look glossy, about 30 seconds more. Garnish with the scallions and serve over rice. (Serve extra chili-garlic sauce at the table.)
**This post and photos are property of http://dishingwithdish.blogspot.com/ **

Wednesday, January 25, 2017

Zucchini-Potato Soup

Back in November, our neighbors had us over for dinner and it was wonderful again.  They made this soup, and then salad, curry chicken and roast potatoes.  I brought them this Cranberry Cake and they LOVED it.  Anyway, we loved the soup, especially my 5-year old.  I asked how they made it and the answer was "just cook potatoes and zucchini in chicken broth, use the immersion blender, and then add some Parmigiano-Reggiano cheese."  So a little while later, I made this soup at home.  It was easy and very flavorful.  One could add other flavors in, like garlic or onions, but I wanted to keep this simple, like my neighbor's version.  I was very happy with it.
Zucchini-Potato Soup

4-6 small to medium zucchini, chopped coarsely (dont' peel) (use to taste- no wrong amount)
1 large potato, peeled (I used a yellow-fleshed potato)
4 cups chicken broth
salt and pepper
Grana or Parm-Reg cheese

1.  Combine all ingredients in a large soup pot, except cheese and salt and pepper.  Bring to a boil and then reduce to a simmer until veggies are tender.  Using an immersion blender, blend until smooth.  If it's too thick, add more broth.  Add the cheese, about 1/2 cup, and then add salt and pepper to taste. Serve with croutons and extra grated cheese.
**This post and photos are property of http://dishingwithdish.blogspot.com/ **

Sunday, October 2, 2016

Early Autumn Roast Veggies

I've been super busy lately, and also not cooking anything new.  So I haven't been around.  But I'm back today with this post that isn't even really a "recipe".  I saw it on The Kitchn's Facebook page. They posted a little how-to video on roasting any veggie.  I picked the same veggies they used and added a red onion.  I loved the red onion; it was my favorite part of this dish.  I think everyone knows how to roast veggies, but maybe this will inspire someone.  Go to The Kitchn to see the video (and read the helpful article, especially if it's your first time).  Next time, I'll just do sweet potatoes and red onion, because those were really good together.

Early Autumn Roast Veggies
from The Kitchn

1 to 2 pounds any vegetable (I used sweet potato, zucchini, yellow summer squash, and red onion)
1 tablespoon olive oil (more if needed)
1 teaspoon salt
1/4 teaspoon black pepper

Equipment:
Mixing bowl
Measuring spoons
Spatula
Baking sheet, oven-safe skillet, or baking dish

1.  Heat the oven to 425°F with a rack in the middle position.

2.  Chop up the vegetables: Cut the vegetables into uniform pieces so they cook evenly. Smaller pieces will cook more quickly; larger pieces will take a bit longer to cook. If your vegetables still have some moisture after washing, be sure to pat them as dry as possible; the more dry the vegetable, the better it will roast.

3.  Toss the vegetables with olive oil and salt: Transfer the vegetables to a mixing bowl. Toss with olive oil, salt, and pepper. Add more olive oil if the vegetables still look dry or don't seem evenly coated.

4.  Spread onto a baking sheet: Spread the vegetables out onto a baking sheet, into an oven-proof skillet, or into a baking dish. Make sure they are in a single layer with a little space in between; if they are too crowded, your vegetables will steam instead of roast.

5.  Estimate your cooking time: In general, softer vegetables, like green beans and cauliflower, will cook in 10 to 20 minutes, and tough, hard vegetables, like squash and potatoes, will take 30 minutes or longer. Large pieces will also take longer to cook than smaller pieces.

6.  Roast the vegetables until tender: Place the vegetables in the oven and begin roasting. Check and stir the vegetables every 10 to 15 minutes. Continue roasting until the vegetables are easily pierced with a fork or knife and they are showing crispy, charred bits at the tips and edges.

7.  Serve immediately: Transfer the vegetables to a serving dish and taste; sprinkle with additional salt or pepper if needed. Serve while still hot.
**This post and photos are property of http://dishingwithdish.blogspot.com/ **

Monday, August 15, 2016

Grilled Balsamic Zucchini

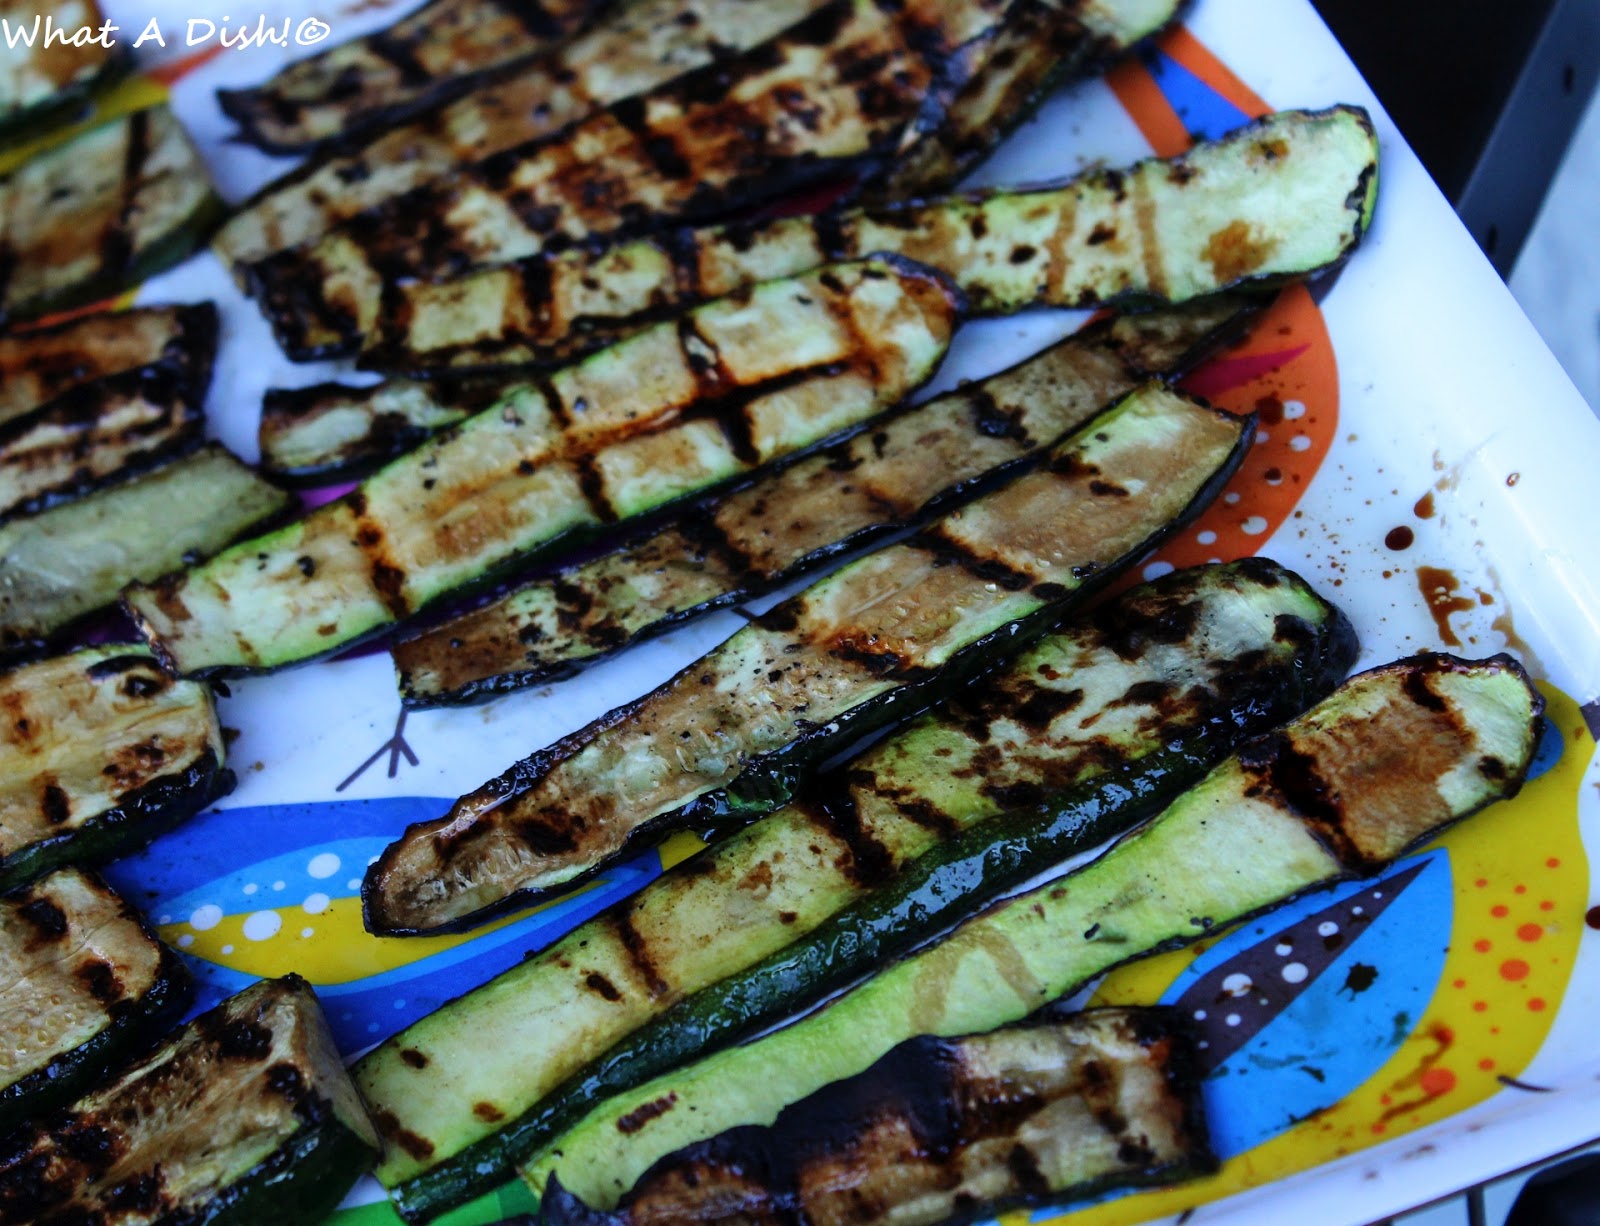
When we grill lately, we've been grilling this zucchini to go with whatever we're grilling, and it's almost always my favorite part of the meal.  It's so flavorful, plus super easy and healthy.  We had these when we grilled the Serbian Sausages recently.


Grilled Balsamic Zucchini
by What a Dish!

zucchini
olive oil
balsamic vinegar (I've used both thin regular and thicker aged)
salt
freshly ground pepper

1.  Rinse zucchini and trim off ends.  Slice lengthwise, not too thick and not too thin.  Lay on a platter and drizzle with oil and vinegar.  Then sprinkle with salt and pepper.  Grill on a hot grill, turning once, until they get dark and a little crispy on the edges.

**This post and photos are property of http://dishingwithdish.blogspot.com/ **

Friday, June 10, 2016

Orzo & Roasted Veggie Salad


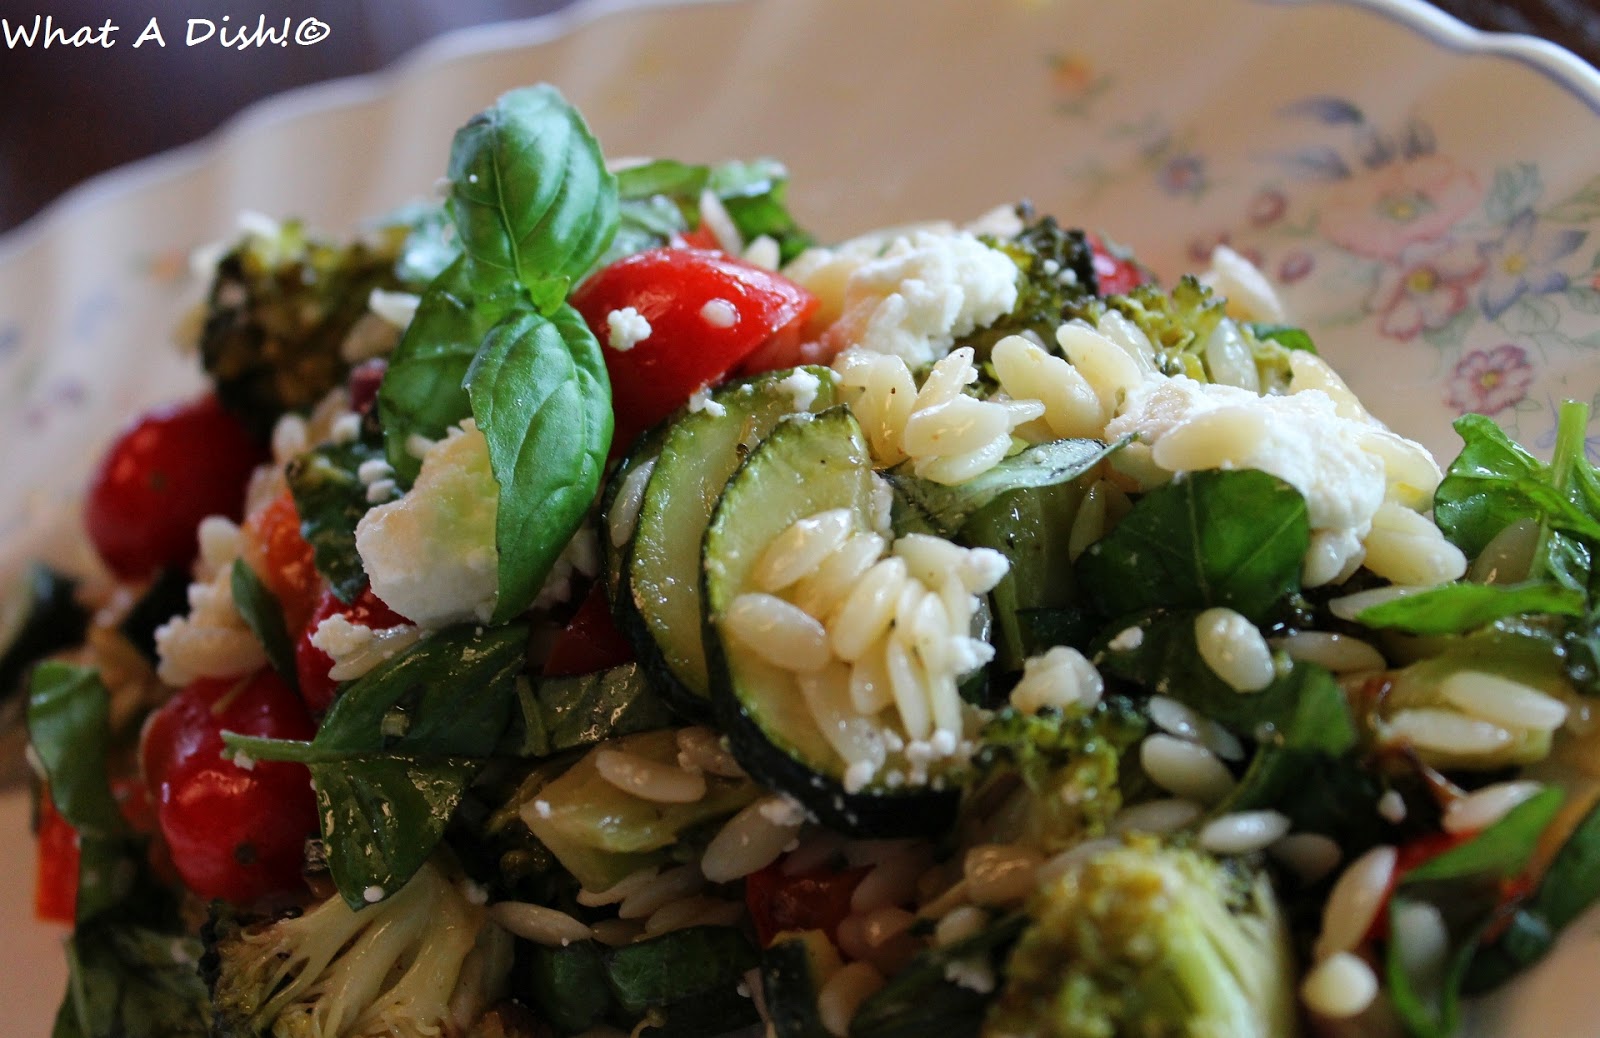
This is a great dish for summer, especially a potluck or barbecue.  You do have to use the oven to roast the veggies, but that's not that bad.  If you can somehow grill them, that would be even better.

Orzo & Roasted Veggie Salad
adapted from Mel's Kitchen Cafe

Lemon Vinaigrette:
3 tablespoons red wine vinegar
1 tablespoon fresh lemon juice
1/2 teaspoon sugar or honey
1/4 cup olive oil
1/4 teaspoon salt
Pinch of black pepper

Vegetables:
2 cups broccoli florets in bite-size pieces (one small head)
2 medium zucchini, diced in bite-size pieces
1 red pepper, seeded, stemmed and diced
1 tablespoon olive oil
Salt and pepper to taste

Salad:
8 ounces orzo pasta
1 to 2 cups cherry tomatoes, halved
1/4 to 1/2 cup torn or chopped fresh basil
1/4 cup feta cheese, crumbled
1/4 to 1/2 cup toasted pine nuts or sunflower seeds

1.  For the vinaigrette, whisk together the vinegar, lemon juice, sugar or honey, olive oil, salt and pepper until emulsified and well-combined. Set aside (this can be made several days in advance and refrigerated - just whisk together again before using).

2.  Preheat the oven to 425 degrees.  Toss the vegetables with the olive oil and a couple pinches of salt and pepper. Roast in the oven for 10 minutes; give them a good stir and cook for 10-15 minutes more until tender.

3.  While the vegetables cook, bring a pot of lightly salted water to a boil and cook the orzo until al dente. Immediately after cooking and draining, add the orzo to a serving bowl, drizzle on half of the vinaigrette dressing and toss to combine.

4.  Scrape the roasted vegetables into the bowl with the orzo and give it a good stir. Add the cherry tomatoes and fresh basil and toss to combine. Add the rest of the vinaigrette and stir until everything is evenly coated. Sprinkle the feta cheese and pine nuts on top. Serve immediately at room temperature.
**This post and photos are property of http://dishingwithdish.blogspot.com/ **

Monday, November 23, 2015

Smoked Salmon Chowder (Hybrid)


I have two salmon chowder recipes on here that I loved and made often in the past.  They had differences (smoked vs. un-smoked chowder,  half & half vs. using flour to thicken, different veggies, cheddar cheese vs. no cheese).  I decided to combine my favorite elements from both recipes to create this recipe, which I really enjoyed.  After this summer, we are loving smoked salmon so much (well, even more than we were).  (If you live in the States, Costco has great smoked salmon that would be wonderful in this.)  Note: This is pretty much the only recipe I used canned creamed corn for.

**Note: I've made this twice with frozen salmon from Ikea when I couldn't get any smoked salmon. It's really good that way too! I just cook 4 small Ikea fillets in the broth after the veggies are tender, and before adding the evaporated milk. When the whole fillets are done cooking, I just break them up into large pieces with two forks.**
Smoked Salmon Chowder (Hybrid)
adapted from here and here

2 tablespoons butter
1 tablespoon olive oil
1 onion, chopped
1/2 cup chopped celery
1 garlic cloved, minced
2 cups diced potatoes
2 carrots, diced
1 small zucchini, chopped
handful of fresh green beans, chopped, optional
4 cups low-sodium chicken broth
1/2 teaspoon ground black pepper
1 teaspoon dried dill weed
1 teaspoon dried tarragon
1 teaspoon dried thyme
1/2 teaspoon smoked paprika
smoked sea salt, to taste
hot sauce, to taste
8 ounces (or more!) smoked salmon, cut into 1/2 inch pieces
1 (12 fluid ounce) can evaporated milk
1 (15 ounce) can creamed corn
1/2 cup frozen corn
1 cups shredded sharp Cheddar cheese
fresh parsley for garnish
2 TBS flour + 2 TBS cold water, to use if not thick enough

1. Melt butter and oil in a large pot over medium heat. Saute onion, celery, and garlic until onions are tender. Stir in other veggies, broth, pepper, dill, tarragon, thyme, paprika, smoked salt and hot sauce. Bring to a boil, and reduce heat. Cover, and simmer 20 minutes or until everything is tender.

2. Stir in salmon, evaporated milk, and corn. Cook until heated through.  If it looks thick enough now, add the cheese and serve.  If not thickened enough at this point, shake together the flour and cold water in a lidded jar.  Make sure the soup is simmering, and whisk the flour slurry into the soup. Whisk constantly and cook until it is thickened.  Serve with fresh parsley if you want.
**This post and photos are property of http://dishingwithdish.blogspot.com/ **

Friday, September 4, 2015

Zucchini & Sweet Corn with Feta


This dish is very similar to this zucchini dish, but with some additional ingredients like corn and lemon juice.  Both are very good, and have tastes just different enough to try them both, especially if you enjoy these flavors.  I can't get fresh sweet corn here, so I just used frozen.  I'm sure it would be even better with fresh!
Zucchini & Sweet Corn with Feta
adapted from Valerie's Kitchen

2 tablespoons olive oil
2 zucchini, chopped into 1/2" pieces
1 yellow zucchini or other yellow summer squash, chopped into 1/2" pieces
1 ear of sweet corn (or about one cup frozen corn)
2 cloves minced garlic
1 teaspoon Italian seasoning
Salt and fresh ground pepper, to taste
1/2 lemon, juiced
1/8 cup crumbled feta cheese

1.  Heat oil in a large skillet over medium-high heat. Add zucchini, yellow squash, corn, and garlic. Cook and stir until zucchini is crisp tender, about 3 to 4 minutes. Sprinkle with Italian seasoning and salt and pepper. Cook and stir for another minute. Remove pan from heat and stir in the lemon juice. Sprinkle with crumbled feta and allow to sit for a minute to allow feta to begin to melt. Serve.

**This post and photos are property of http://dishingwithdish.blogspot.com/**