Showing posts with label eggs. Show all posts

Friday, March 21, 2025

Risotto Carbonara

This risotto recipe was SO good. The fam enjoyed this one. The photos are of the leftovers, and I think all of the pancetta was picked out by that point, lol. So it doesn't look very carbonara-y, but it is. (You can use either smoked pancetta or guanciale for this.) 

This was a bit too salty with all that cheese, but delicious. Next time, I'd use unsalted broth and add a bit of salt to taste. Also, there are onions in this recipe. If you are a Carbonara purist, this probably isn't for you, anyway. :) They sell eggs in Italy that have extra-yellow yolks for homemade pasta and other things. I did not use them for this recipe because I didn't have them on hand, but I would next time. 


Risotto Carbonara 

adapted from Delicious Australia

2-4 Tablespoons extra virgin olive oil, as needed
1 onion, finely chopped
1 garlic clove, finely chopped
200g smoked pancetta OR guanciale, finely chopped
2 eggs, plus 3 yolks
2 cups (160g) finely grated parmesan, plus extra to serve
250g arborio rice
5 cups (1.25L) low-sodium chicken stock* 
freshly ground black pepper, to taste

1.  Heat oil in a large non-stick saucepan over medium heat. Add onion, garlic and bacon and cook, stirring, for 15 minutes or until onion is completely translucent and bacon is fragrant and the fat has rendered.

2.  While the onion is cooking, combine eggs, yolks and parmesan in a bowl. Season with freshly ground black pepper.

3.  Stir rice into onion mixture and cook for 1 minute to coat the grains, then add stock*, 1 ladleful at a time, stirring at each addition, for 20 minutes or until all the stock has been used and rice is al dente. Remove from heat and cool for 2 minutes, then add egg mixture and stir for 2-3 minutes to create a rich, creamy risotto. Return to low heat for 1 minute, then remove from the heat. If you used unsalted stock, taste for salt and add some if necessary. Scatter over extra parmesan and freshly ground black pepper to serve.

Note: To reheat any risotto, use a nonstick pan on the stove on medium-low heat. Add some water or broth (or milk, if you want it creamier) and stir with a silicone spatula until heated. Add more liquid as the risotto soaks it up, until the risotto is warm enough. You want it to remain creamy. 

*This was too salty for me even with the reduced-sodium stock, and I even used 4 cups broth, 1 cup water. It was because of the amount of cheese. I would either reduce the cheese next time (gasp!) OR use more water with my stock, OR unsalted stock and then add salt to taste. 
**This post and photos are property of http://dishingwithdish.blogspot.com/ **

Sunday, October 16, 2022

Tortilla Breakfast Wrap (TikTok Inspired)


I made these recently after seeing them online. They were tasty and the method would be great for other wraps with different ingredients. The wrap folds up easily with just one cut (use a pizza cutter). You place 4 different ingredients in the 4 quadrants, then fold up. See the original post for more details and a vid. Natasha's Kitchen


Tortilla Breakfast Wrap
adapted from Natasha's Kitchen
Makes 1 wrap- increase for more servings

1 large tortilla, 10” or burrito size
1 1/2 strips Cooked Bacon, 3 half strips
1/2 avocado
1 large egg
Salt and Pepper to taste
1/4 cup Shredded Cheese, Mozzarella or Mexican Cheese
1 tsp unsalted butter, to sauté

1. Cook the bacon- use the microwave, stove, oven, or buy pre-cooked bacon strips and warm up in the microwave.  Scramble an egg– Crack an egg into a bowl, season with salt and pepper, and beat with a fork. Sauté on a buttered non-stick skillet just until cooked through. OR, fry an egg- my preferred method. Mash 1/2 avocado in a bowl with a fork and season with salt and pepper.

2. Cut a slit into the side of the tortilla closest to you, cutting just up to the center. Arrange ingredients into 4 quadrants on the tortilla (Bottom right: Eggs, Top Right: Bacon, Top Left: Avocado, Bottom Left: shredded cheese).

3. Fold tortilla – fold the bottom right quadrant up, then proceed to fold the quadrants over each other to form a triangle.

4. Sauté – Heat the same nonstick skillet over medium heat and melt in some butter. Sauté the folded tortilla until golden brown and crispy on both sides, adding more butter for the second side.

**This post and photos are property of http://dishingwithdish.blogspot.com/ **

Thursday, August 18, 2022

Classic Potato Salad

This delicious potato salad from Mel's Kitchen Cafe tastes just like my mom's. It's an old-fashioned style with mayo, mustard, and pickles. (Actually, the original recipe had olives instead of pickles, but I swapped the olives for pickles. I also added some pickle juice and increased the mustard.) We had this with fried chicken we picked up from a local chicken restaurant, and other sides like watermelon. I made it ahead of time and we ate it after a full day at the pool. Good times!

Note: I made this again today 6/29/26, I just added the ingredients all together instead of setting some dressing aside. I think it's the same. I also made it the morning of instead of the night before. I also used Trader Joe's Pickle Mustard and a teaspoon of their Pickle Seasoning. 
Classic Potato Salad
adapted from Mel's Kitchen Cafe
Recipe is cut in half- still makes a ton

1 cup mayonnaise 
1/3 cup buttermilk
1 teaspoon dried parsley
3/4 teaspoon salt
1/2 teaspoon onion powder
1/2 teaspoon garlic powder
1/2 teaspoon seasoned salt
1/2 teaspoon ground black pepper
TJ's Pickle Seasoning, optional (1/2 tsp to 1 tsp)
2 tablespoons pickle brine (from the pickle jar)
2-3 tablespoons yellow mustard, to taste (I like more-try TJ's Pickle Mustard)
2 1/2 pounds potatoes 
1/2 - 3/4 cup diced dill pickles (add more or less to taste)
4-5 diced hard-boiled eggs
Paprika, optional

1. For the dressing, whisk all dressing ingredients (up to and including yellow mustard). 

2. For the salad, peel (optional- I didn't peel), dice, and boil potatoes until tender but not mushy (I cut my potatoes into bite-size pieces and boil for about 8-10 minutes). Drain potatoes well and pour into a large bowl.

3. Add pickles and hard-boiled eggs. Pour dressing over warm potatoes until desired “dressing-level” is reached. Can make this salad the night before and pour a thin coating of dressing over the potatoes, pickles and eggs while they rest in the fridge overnight.

4. Before serving the next day, add the rest of the dressing and mix until it looks right. Most importantly be sure and taste so you can add extra salt and pepper if needed! Sprinkle with paprika, if desired. 

**This post and photos are property of http://dishingwithdish.blogspot.com/ **

Thursday, April 23, 2020

Spinach Salad with Warm Bacon Dressing

This is an Alton Brown recipe.  I'm getting it from Food.com, though since FN blocks me, living in Italy.  For some reason! I made this using pancetta, and it didn't make enough grease for the dressing, so I added olive oil to make up the difference.
Spinach Salad with Warm Bacon Dressing
adapted from Alton Brown, via Food


8 ounces fresh baby spinach
2-3 large eggs, hard boiled
8 pieces thick-sliced bacon (or one pack of chopped, smoked pancetta)
3 tablespoons reserved bacon/pancetta great (use olive oil to make up the difference if using pancetta)
3 tablespoons red wine vinegar
1 teaspoon sugar
1⁄2 teaspoon Dijon mustard
1 pinch kosher salt
black pepper, freshly ground
3 ounces red onion, very thinly sliced (1 small)

1.  Shell the eggs and slice each into 8 slices.  Set aside. 

2. In a skillet, cook the bacon or pancetta until crisped to your liking.  Remove to paper towels, and measure out 3 tablespoons of the rendered fat.  (If not enough, you'll use olive oil to make up the difference later.) Set aside.  Slice the bacon in 1/2" pieces and set aside.

3. You can use the same skillet to make the dressing, or a small saucepan.  If using a new saucepan, transfer the bacon fat (and olive oil, if using) to the small saucepan set over low heat and whisk in the red wine vinegar, sugar and Dijon mustard. Season with a small pinch each of kosher salt and black pepper. Do the same if using the bacon skillet. 

4.  Add the spinach and sliced onion to a salad bowl and toss.  Add the dressing and toss.  Top with sliced egg and reserved bacon/pancetta.  Serve immediately. 

**This post and photos are property of http://dishingwithdish.blogspot.com/**/


Wednesday, January 24, 2018

Gingery Poached Egg Soup


This was a quick, easy, and nourishing light meal I made on a Sunday afternoon.  My husband and youngest son enjoyed it with me.  I really liked all the flavors together.  I added some fresh lemongrass.  I think this was my first time using Bok Choy.  I used the whole bunch of it.  It weighed less than 12 oz, but it was fine.
Gingery Poached Egg Soup
adapted from The Kitchn

1 tablespoon toasted Asian sesame oil or vegetable oil
5 (1/4-inch-thick) slices fresh ginger
2 cloves garlic, very thinly sliced
6 cups low-sodium chicken or vegetable broth
2 tablespoons soy sauce
12 ounces regular bok choy, Shanghai bok choy, or Napa cabbage
4 large eggs
Thinly sliced scallions, for garnish (optional)

1.  Heat the oil in a Dutch oven or wide pot over medium-high heat until shimmering. Add the ginger and garlic and cook, stirring constantly, until the garlic is just golden-brown around the edges, about 1 minute.

2.  Carefully add the broth and soy sauce (it may sputter) and bring to a boil. Meanwhile, trim the stem ends from the bok choy or cabbage. If using Napa cabbage or large bok choy, cut into 1 1/2-inch pieces.

3.  Add the bok choy or cabbage to the boiling soup, stir to combine, and bring back to a boil. Lower the heat to maintain a simmer and crack the eggs into the soup, keeping the eggs as far apart from each other as possible. Simmer undisturbed until the whites are set but the yolks are still runny, 3 to 4 minutes. Serve immediately, topped with scallions if desired.
*This post and photos are property of http://dishingwithdish.blogspot.com/ **

Saturday, July 8, 2017

Thai Basil Chicken


I loved this dish so much.  I found some Thai Basil at my Italian grocery store.  It's just regular Thai basil- not Thai Holy Basil, which you're supposed to use in this dish, but it worked out wonderfully anyway.  I found this recipe online after asking my Thai friend what I should do with the Thai basil plant.

We loved the crispy fried egg with this! I forgot to buy chilies, so I used my Italian chili oil to fry the eggs in and add a little spicy.


Thai Basil Chicken
adapted Eating Thai Food

1 egg
2 tablespoons of oil for frying (I used hot pepper oil)

For the basil chicken:
1 chicken breast (or any other cut of boneless chicken, about 200 grams)
5 cloves of garlic
4 – 10 Thai chilies – when you fry the chilies, they aren’t as spicy
1 tablespoon oil for frying
1 teaspoon of oyster sauce
1/2 teaspoon light soy sauce
1 splash of dark sweet soy sauce
1/2 teaspoon sugar
1 handful of Thai holy basil leaves
Hot cooked jasmine rice, for serving

1.  First, fry the egg:
Heat about 2 tablespoons of oil in a wok or frying pan on high-medium heat.  When the oil is hot and sizzling, drop in the egg. Let it sizzle and bubble up, and at the same time, splash some of the hot oil onto the top of the egg (don't flip the egg, unless you really want to).

After the egg looks about right to your cooked likeness (I like mine runny), take it out, drain the excess oil, and put it on a plate for later.

2.  Basil chicken:
Cut the chicken into small bite sized pieces.

Rinse and peel the garlic and chilies, and pound them in a mortar and pestle (alternatively you can just mince them with a knife). They don't need to be super fine, you just want to bring out the oils and flavors from the garlic and chilies.

Pluck a good sized handful of holy basil leaves off the stems.  

Heat your wok on high heat, and add about 1 tablespoon of oil to the pan.  When the oil is hot, add the chilies and garlic. Stir fry them for about 20 seconds or so until they get really fragrant, but don't let them burn or get too dry.

Toss in your chicken. Keep stir frying continuously. At this stage you want to continue to stir and cook your chicken until it's just about fully cooked all the way through (depending on the size pieces of chicken and how hot your fire is, it should take about 2 - 3 minutes). If it starts to get dry, add just a tiny splash of water.

Add 1 teaspoon of oyster sauce, ½ teaspoon light soy sauce, ½ teaspoon sugar, and finally a splash of dark soy sauce. Keep stir frying for about another 30 seconds.

Grab a handful of holy basil, toss it into the pan, fold it into the chicken, and then immediately turn off the heat (if you're using an electric stove, you'll want to remove the pan from the burner). The holy basil really only needs to cook for about 5 seconds, and it will continue to wilt and cook from the existing heat of the chicken. This step is important because if you cook the basil for too long, it loses some of its glorious flavor and gets slightly chewy.  Serve over cooked rice.


**This post and photos are property of http://dishingwithdish.blogspot.com/ **

Monday, March 30, 2015

Avocado-Egg BLT

I've had this bookmarked for over a year and then made it about a month ago, and I'm now finally posting it!  This was delicious and filling.  I forgot the lettuce, so I guess it's not a BLT anymore, but oh well.  Things kept sliding off this as I was eating, so I think lettuce would have made it even more slide-y.

I found baby San Marzano tomatoes and they were pretty good, even for this time of year.  (I found some grown-up ones today that were NOT that good, BTW.  Lol.  Can't wait for summer produce!)
Avocado-Egg BLT
adapted from Our Best Bites
Makes one open-faced sandwich

1 slice favorite whole grain bread
2 tablespoons mashed ripe avocado
dash garlic powder
2 slices cooked bacon
a few slices red onion
handful of greens, or lettuce leaf (optional)
2-3 slices tomato
1 hard boiled egg, sliced
kosher salt and fresh cracked pepper
optional: flavored olive oil, for drizzling over top

1.  Toast your bread. Meahwhile, mash avocado with garlic powder and spread on bread as it comes out of the toaster. Place bacon and onion slices on top of avocado. Top with greens, sliced tomato and egg. Sprinkle with salt and pepper and if desired drizzle with olive oil.  
**This post and photos are property of http://dishingwithdish.blogspot.com/**

Monday, November 17, 2014

Japanese Dry Curry

My friend and I were chatting online a few weeks ago and she mentioned she was making "Dry Curry" for dinner.  I had no idea what that was, so I asked.  She is Japanese, and I have so many good recipes from her.  Yakisoba, Croquettes, Sushi, and she also taught me how to make Lumpia.  I'm missing her today, so I thought I'd post this recipe.  This is called a "dry" curry in that it's not saucy like a regular curry.  It's simple to make and a good weeknight dinner.
Japanese Dry Curry
adapted from Japanese Cooking 101 and my friend H.S.

1 tsp oil
1 lb (450g) ground beef
1 1/2 cup onion (minced)
1 cup green bell peppers (minced)
1 cup carrot (minced)
2 cloves garlic (minced) (Can mince all veggies together in food processor- easy and saves time.)
1-2 tbsp curry powder
1 can whole tomatoes (28 oz = 800g)
1 tbsp Worcester sauce
1 tsp soy sauce
salt, to taste
1/2 tsp sugar
1/4 tsp black pepper
2 bay leaves
1/2 cup raisin
Steamed Rice
4 hard boiled eggs (peeled & chopped)

1.  Heat oil in a pot and brown ground beef.  Add minced vegetables and saute for 5 minutes. Add curry powder and saute for another 2 minutes.  Add the rest of the ingredients (except rice and eggs) and bring to a boil. Simmer for 15 minutes.

2.  Serve it over rice and top with chopped hard boiled eggs.
**This post and photos are property of http://dishingwithdish.blogspot.com/ **

Thursday, October 2, 2014

Potato Salad with Pesto & Quail Eggs

One of my local grocery stores had quail eggs the last time I was there, which I thought were so cool, so of course I bought some.  (BTW, in my town alone there are at least 3 well-stocked grocery stores!! Within 1-3 kilometers from my house!  It's awesome.  Italian food... everywhere.)  They sat in my fridge for a while before I decided to finally use them.  I just didn't know what to do with them! Browsing the internet, I somehow came across this recipe.
This is a British recipe, and it's in grams.  I just used my food scale, and didn't bother to convert anything.  I'll leave the grams as-is. Owning a food scale is a really good idea for any kitchen!  :) The recipe calls for a British potato called Jersey Royal, but I believe those are hard to get outside of England, so I used a local, waxy yellow potato that worked well.  I enjoyed this recipe while still warm. Refrigerated, it was good, but the flavors mellowed out.  So enjoy this freshly-made if you can.  Oh, I also cut the recipe in half because my kids don't like potato salad.  
See how tiny quail eggs are?  They are SO small.  That's my three-year old's small hand next to the container of quail eggs.  He was quite fascinated by them.  If you can't get quail eggs, use regular eggs; they taste the same to me.
Potato Salad with Pesto & Quail Eggs
adapted from The Guardian 
I cut this in half, and it still seemed to make a lot

15-18 quail eggs
800g yellow potatoes, cleaned but not scrubbed/peeled
20g basil leaves
20g parsley leaves, plus extra for garnishing
60g Parmesan, grated
60g pine nuts or walnuts
2 cloves garlic, crushed
200ml olive oil
150g frozen petit pois, thawed on counter (petite green peas)
½ tsp white-wine vinegar
Salt and pepper

1.  Put the eggs in a saucepan, cover with cold water and bring to a boil: simmer for 30 seconds (semi-soft) to two minutes (hard-boiled), according to taste. Refresh in cold water and peel.

2.  Cook the potatoes for 15-20 minutes until soft but not falling apart. Meanwhile, put the basil, parsley, Parmesan, pine nuts and garlic in a food processor and blitz to a paste. Add the oil and pulse until you have a runny pesto.

3.  As soon as they are cool enough to handle, cut the potatoes in bite-size chunks (they will absorb more flavour when hot) and toss with the pesto, peas, and vinegar. Mix well, even crush the potatoes slightly, so all the flavours mix. Taste and adjust the seasoning, being generous with the pepper. Cut the eggs in half and fold into the salad. Garnish with parsley.
**This post and photos are property of http://dishingwithdish.blogspot.com/ **

Tuesday, September 2, 2014

Scrambled Eggs with Feta, Ham, Tomatoes & Basil

Moving is hard.  We're still not fully unpacked and still waiting for some of our furniture to arrive.  I haven't really found my cooking mojo since we got here and am just making easy things or old favorites when I do cook.  Since I haven't been cooking much, we don't usually have leftovers for me to eat for lunch.  So I've been making this flavorful scrambled egg dish a few times a week at lunchtime.  I know people don't need "recipes" like this but it's all I've got right now.  :)  Lol!! Maybe it can at least provide some inspiration to someone out there.
Scrambled Eggs with Feta, Ham, Tomatoes & Basil
by What A Dish!

2 eggs
splash of milk
a bit of salt and pepper
olive oil
2 pieces deli ham, chopped (this is good without, too)
handful of grape tomatoes, rinsed and halved
1-2 tablespoons crumbled Feta cheese
3-4 basil leaves, washed and chopped or snipped

1.  Heat a small non-stick skillet over medium heat and add a bit of olive oil.  (I usually use stainless steel or cast-iron cookware, but will only use nonstick for eggs.)

2.  In a small bowl, crack the eggs and whisk with a fork.  Whisk in the milk.  Pour mixture into the hot pan, and let set for a little bit, and then scramble.  A small silicone spatula is the best tool for this. Add the ham and cook for a minute, then add the Feta.  Turn off the heat, and add the tomatoes. Place mixture on a plate and add basil on top.  Enjoy.

                                                                 **This post and photos are property of http://dishingwithdish.blogspot.com/ **

Sunday, June 15, 2014

Sushi

sushi3W
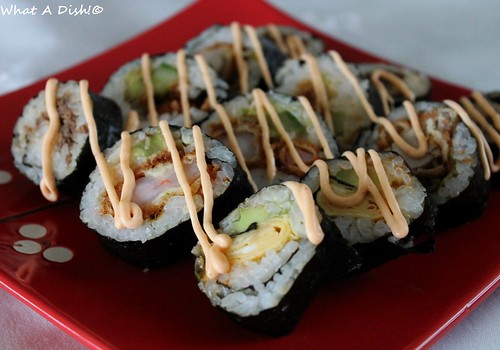
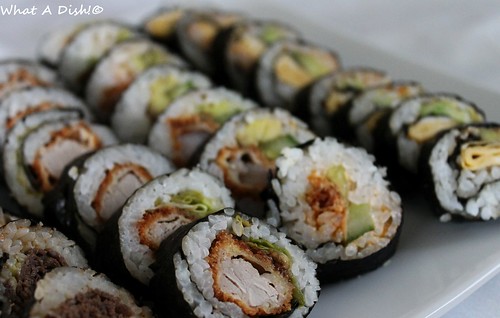
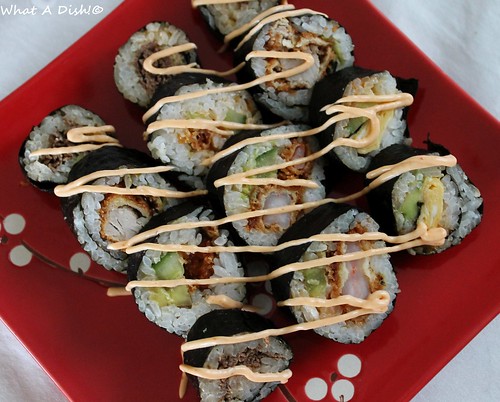
Back in May, my good friend came over and showed me how to roll sushi.  This is the same friend who showed me how to make lumpia, pancit, yakisoba, and Japanese croquettes.  She just moved on Friday, and I'll miss her.  I'm glad I have these recipes to remember her by, though. 
sushi1W

sushi5W
This isn't really a recipe; more of a method.  I still need a lot of practice; I was flinging sticky rice everywhere.  Also, my friend brought over a rice cooker, which made everything easier.  I don't own one.  First, we made the rice and prepared the fillings.  We prepared a lot of fillings!  If I was doing it alone, I would have just stuck with one or two.  But we made: fried pork cutlets, fried shrimp, cut cucumber, cut avocado, thin egg omelets, cut lettuce, raw tuna in a sauce, and a ginger-beef mixture (she had already made that at home).  We also mixed together mayo and Sriracha sauce to include inside the sushi rolls and to dip into.  

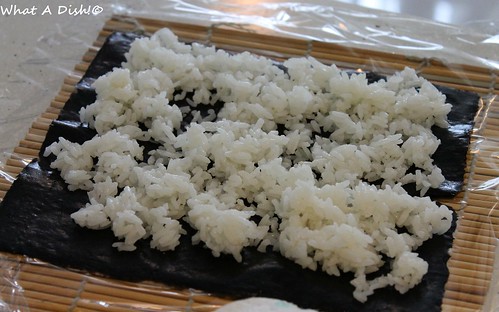
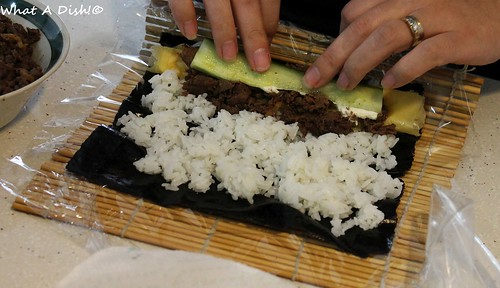
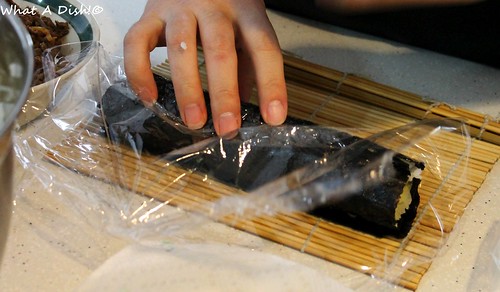
I picked about two fillings for each roll.  I loved the friend shrimp and pork cutlet.  To fry these, dip in flour, egg and panko, and fry in oil (I think! lol).  Then just set aside until needed.  To roll sushi, I'll include some photos of my friend rolling, because that's easier than explaining.  But I will try a little.... start with a bamboo sushi mat, covered with plastic wrap, covered with a sheet of nori.  With wet hands, gently pat down a thin layer of sticky rice on top; add your toppings in a single line, and roll, pressing roll gently so it sticks together. Here come the photos!
sushi8W

sushi9W

sushi9bW

sushi9cW
Sushi

Sushi Rice (can multiply; we did x5 to make a ton of rolls)
1 cup of rice
20 grams sugar
20 grams rice vinegar
salt, to taste (or add none)

Other ingredients:
Nori sheets

Toppings:
raw tuna + mayo mixed together with green onion
Panko-fried shrimp
Panko- fried pork loin
shredded, seeded and chopped cucumbers
sliced avocado
lettuce
thin egg omelet (like a crepe)
any leftovers you want to throw in
(mix and match from above or do you own thing)

Soy Sauce
Mayo + Sriracha sauce

1.  To make sushi rice, cook rice in a rice cooker or on the stove.  In a small pot on the stove, add the rice vinegar and sugar together and heat gently until sugar is dissolved.  Pour over cooked rice.  Let cool a little before making sushi.  

2.  To roll sushi, start with a bamboo sushi mat, covered with plastic wrap, covered with a sheet of nori. With damp hands (have a small bowl of water handy), gently pat down a thin layer of sticky rice on top; add your toppings (2-3) in a single line, and roll, pressing roll gently so it sticks together. This part may take practice, or look up a few Youtube vids.  :)  

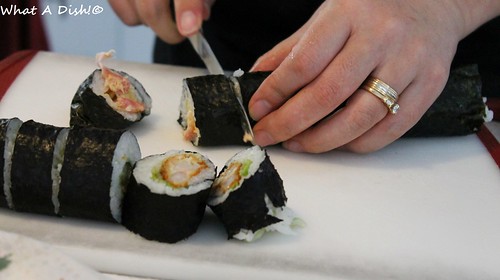
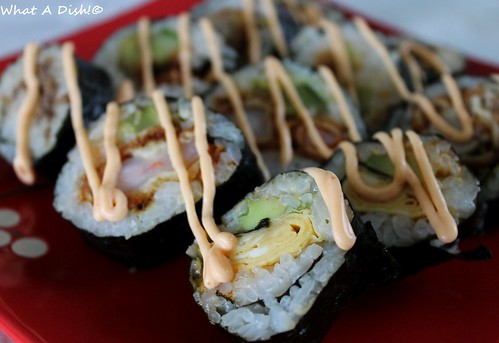
3.  When rolled, transfer to a cutting board and cut with a very sharp knife.  We used a serated knife and it worked well.  Serve with either soy sauce or mayo mixed with a little Sriracha sauce for dipping, if desired.  
*Gluten-free if you stick with gluten-free fillings; Panko contains gluten.
sushi6W
**This post and photos are property of http://dishingwithdish.blogspot.com/ **

Friday, April 25, 2014

Scrambled Eggs with Smoked Salmon

eggs4W
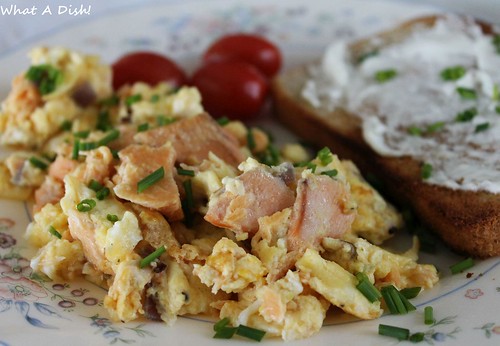
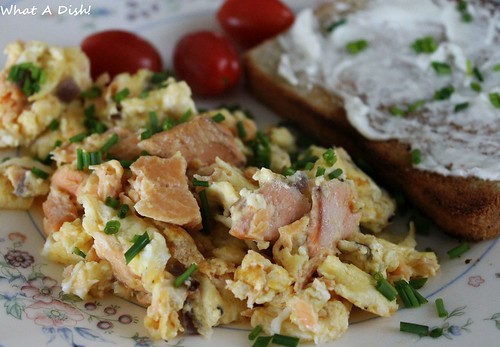
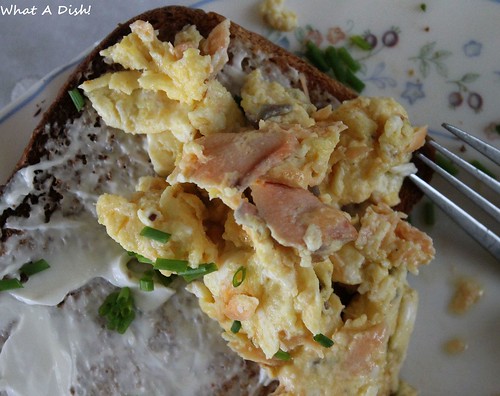
These scrambled eggs were delicious!!  We really, really loved them.  Well, it was just me, my husband, and my two-year old who enjoyed these, but they were very enjoyable to us!  I'll have to do this again sometime.
eggs1W
Scrambled Eggs with Smoked Salmon
adapted from Aggie's Kitchen

4 eggs
splash of milk
1 teaspoon oil or butter
half of small onion, chopped
2-4 oz smoked salmon, sliced
good pinch coarse salt and freshly ground pepper
a couple of tablespoons freshly chopped chives

1.  In a small bowl, whisk eggs well. Add a splash of milk and whisk some more.

2.  Heat a nonstick skillet over medium heat. Add oil or butter to pan and melt. Add your chopped onions and cook for about 3-5 minutes, until soft.  Add whisked eggs to pan. Using a wooden spoon or rubber spatula, gently stir the eggs until they start to firm up. Add your smoked salmon to the pan and continue to gently stir until eggs are completely cooked. Season well with salt and pepper. Sprinkle freshly chopped chives over eggs and serve.
eggs5W
**This post and photos are property of http://dishingwithdish.blogspot.com/ **