Showing posts with label make-ahead. Show all posts

Sunday, December 15, 2024

Classic Pecan Pie

I have good recipes for Maple Pecan Pie and Pecan Bars on here, but I've never done a classic Pecan Pie. I finally did for this year's Thanksgiving, and really loved it. I'm not sure why I've never made one before! I was able to find a good-quality frozen pie crust that tasted just like homemade (to me) so that saved me some work this year. (I made 4 desserts the Wednesday before Thanksgiving.) 

Classic Pecan Pie 

adapted from Cooking Classy

1 single-crust pie crust, unbaked*
2 cups (214g) Fisher Pecan Halves, divided
1 cup (220g) packed light-brown sugar
1/2 tsp fine sea salt
1/8 tsp ground cinnamon
1/3 cup (73g) unsalted butter, melted and cooled to lukewarm
3/4 cup Karo Light Corn Syrup
3 large eggs
1 1/2 tsp vanilla extract

1.  For the filling: Chop 1 cup of the pecans then sprinkle evenly into pie crust. Sprinkle 1 cup whole pecans over chopped layer. Set aside. (I could only find chopped pecans and threw them all in there together.) In a mixing bowl whisk together brown sugar, salt and cinnamon. Mix in butter, corn syrup, eggs and vanilla extract (there should be no streaks of egg).

2.  Pour mixture evenly over pecan layer in crust. Transfer pie to a baking sheet. Bake in lower portion of the oven, covering edges or tenting entire top of pie with foil as needed. Bake until pie is set, about 45 - 55 minutes (it should appear set when you nudge the baking sheet, a very light jiggle is fine). Transfer to a wire rack and cool completely. Store in refrigerator until ready to serve.

*I used a frozen pie crust and did not do any pre-baking. If you are using homemade, you will want to blind bake it first for 15 minutes at 400 degrees, using pie weights.
**This post and photos are property of http://dishingwithdish.blogspot.com/ **

Saturday, November 28, 2020

Pistachio Fluff Salad

My mom made this often growing up, especially for holidays like Christmas and Thanksgiving.  Last time we were with my parents for Christmas, my mom made it and my kids really loved it.  I don't think I've ever made it myself, but I finally did a few days ago for Thanksgiving when my kids requested it.  It was gone too fast.  Most people use Cool Whip for this, but my mom just whips cream and it's so good that way.  I used 2 containers of European shelf-stable cream, which ends up being about 1.5 cups.  You can use just one cup or 1.5 cups.  It's good either way.  Also, it needs to be made the day before for best results, or the pudding mix doesn't seem to fully incorporate smoothly.  
Pistachio Fluff Salad
from my mom

2 boxes (3.4 oz each) Jell-O Instant Pistachio pudding mix
1 can (20 oz) crushed pineapple (in juice)
1 can (15 oz) mandarin oranges, drained
1 1/2 cups heavy whipping cream (can use just 1 cup, can probably use 2 cups as well)

1.  Whip the heavy cream- I use a stand mixer but you can use a hand mixer, as well.  After it's whipped to soft peaks, fold in the dry pudding mix (do not add any milk).  Then, fold in the crushed pineapple (you can drain a bit of the juice, but leave some).  Fold in the drained mandarin oranges.  Transfer to an airtight container, cover, and refrigerate, overnight, if possible.  
**This post and photos are property of http://dishingwithdish.blogspot.com/ **

Sunday, May 17, 2020

No-Knead Bread

This bread is so satisfying to make!!  You just take 5 minutes the night before to stir together the ingredients- no kneading.  (I used Italian yeast for this- it's very different-looking than American, but it worked great.) It has a long, slow rise on the counter top, then you flop it onto a parchment- lined baking sheet, let it rise while the oven again preheats, and bake. The original NY Times No-Knead bread is baked inside a covered pot, but I don't have the perfect pot for it.  I finally saw a baking sheet method on Cooking Classy and I was happy- it still turns out great and makes it even easier, for me.  My friend makes a version of this with some whole wheat and all kinds of seeds.  I tried that and it was delish too. (Note: it's ok if it doesn't look "risen" but more flat after the second rise.  It usually rises in the oven. If it doesn't rise much, it's still delish.)


No-Knead Bread
adapted from the NY Times via Cooking Classy

3 cups (15 oz) all-purpose flour (preferably unbleached, scoop and level to measure)
1 1/2 tsp salt
1/2 tsp active dry yeast, instant yeast, or rapid rise yeast
1 1/2 cups warm water (about 110 degrees)

1.  In a large mixing bowl, whisk together flour, salt and yeast. Pour in warm water and stir mixture with a wooden spoon or rubber spatula until a shaggy ball forms (you can add a little more water or a little more flour if you feel it needs it).

2.  Cover bowl with plastic wrap and allow to rise for 12 - 18 hours (on the counter at room temperature).

3.  Line a large baking sheet (or pizza pan) with a sheet of parchment.  Turn the dough out of the bowl onto the baking sheet.  Mine always comes out in an oval shape.  Cover with a large bowl or greased plastic wrap. (If using plastic wrap, cover the dough gently so it can still rise.  Remove the plastic wrap slowly after rising, so the dough doesn't fall.) Let dough rise again for 30 minutes while oven is preheating. (Note: it's ok if it doesn't look "risen" but more flat after the second rise.  It usually rises in the oven. If it doesn't rise much, it's still delish.)

3.  Heat oven to 450 degrees. Once oven has reached 450 degrees, place the bread inside.  Quickly close oven door, and bake for 25-30 minutes or until nicely golden brown.  Let cool before slicing. 
*************************
***Directions below for the traditional NY Times method- using an enameled, lidded, cast-iron pot.  (Dutch oven size). Continue from after step 2, above.***

3.  Preheat oven to 450.  Place an enameled cast iron pot covered with lid into preheated oven, heat pot for 30 minutes.

4.  Meanwhile, turn dough out onto a well floured surface, or onto a floured sheet of parchment paper (oven safe to 450) then shape dough into a ball. Cover shaped dough with an extra large bowl and allow to rest while pot is heating, about 30 minutes.

5.  Remove pot from oven and with floured hands, or holding the corners of the parchment paper, carefully drop dough into hot pot (you don't need to grease the pot). Immediately cover with lid, then return pot to oven and bake 30 minutes (at 450 degrees).

6.  After 30 minutes, remove lid from pot and bake uncovered for 12 - 15 minutes until nicely golden brown. Remove from oven and allow bread to cool on a cooling rack before slicing.
**This post and photos are property of http://dishingwithdish.blogspot.com/ **

Friday, April 24, 2020

Strawberry Tiramisu

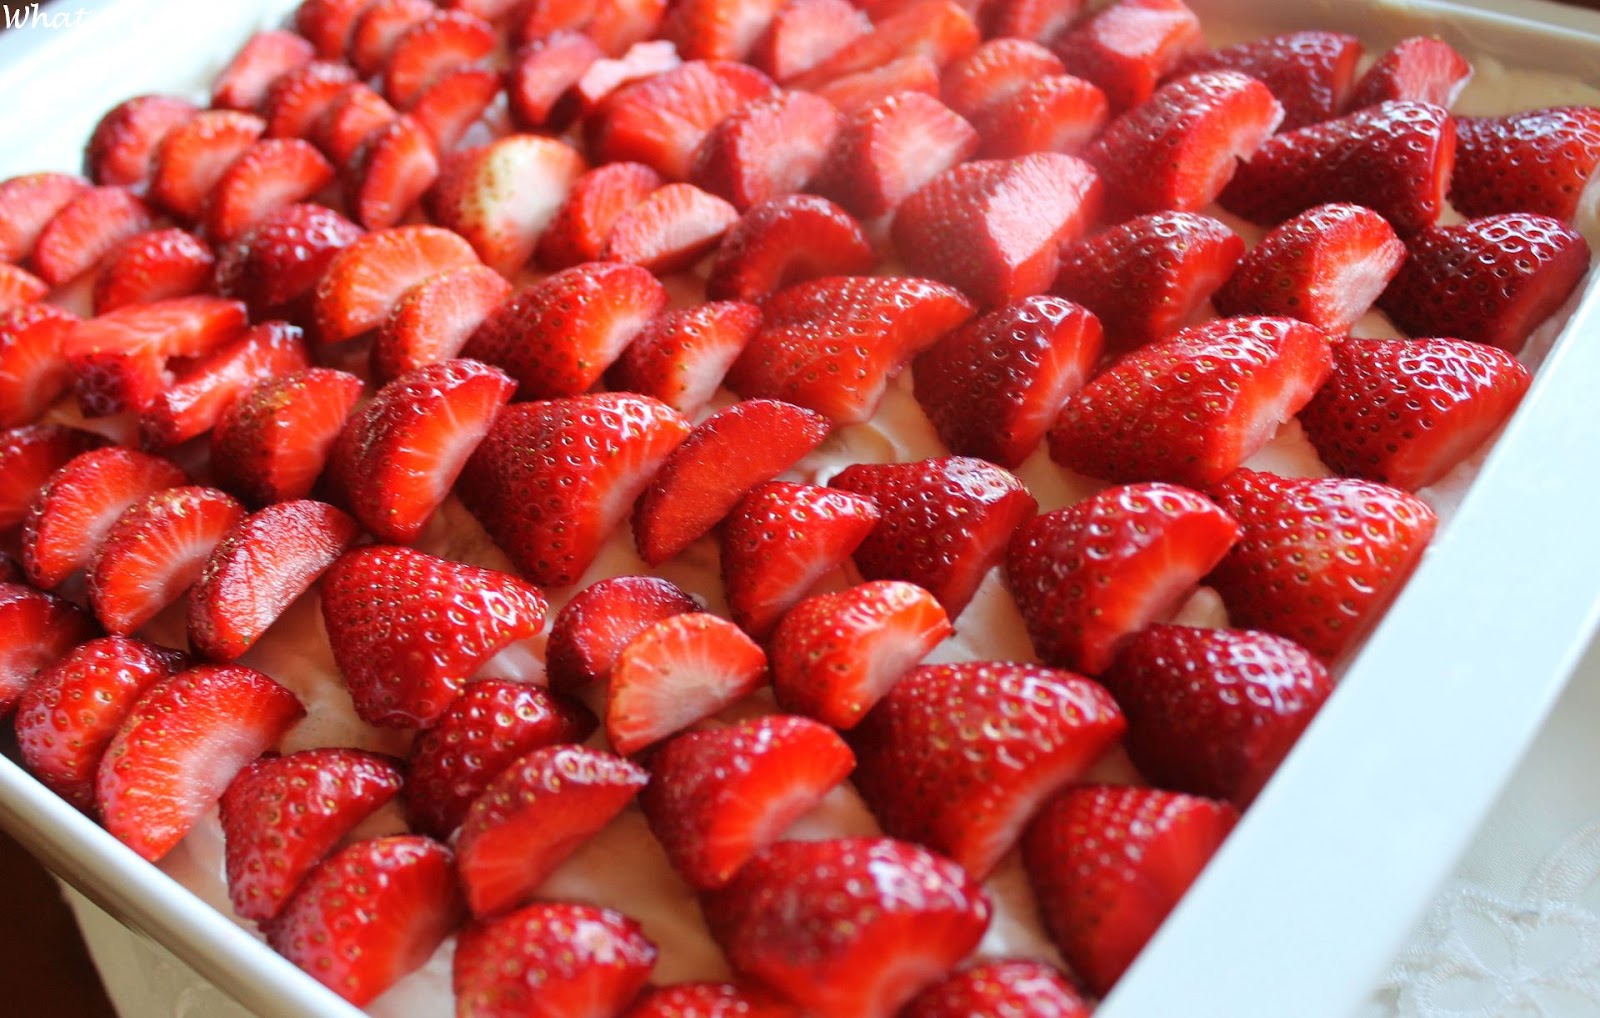
I love Strawberry Tiramisu.  I first made it in a cooking class, and I finally made it at home recently, twice.  Lol.  For the liquid, instead of the coffee that's in usual Tiramisu, I used an Italian red multi-fruit juice.  I also cooked the egg yolks and sugar together in a double boiler until it reached 160 degrees F, to quell any raw-egg fears.  Although... I think European eggs/chickens are vaccinated against salmonella so it would have been fine.  But anyway... it worked well.  I just did it first so it could cool off before adding to other ingredients. 

This makes a lot!!  It filled up a giant 9x13 pan.  It wouldn't work in a regular one, I think. You need a pan with deep sides, for sure. 

Strawberry Tiramisu
from myself :)

5 egg yolks
1 cup granulated sugar
750 grams mascarpone cheese (about 1.5 pounds), room temperature
1 1/2 packages lady fingers (estimated... buy 2 packages, you might need more or less)
1 1/2 cups heavy cream
1/4 cup powdered sugar
1 teaspoon vanilla extract
1 1/2 kilo strawberries, rinsed, hulled and sliced in half (3-4 grocery store packages)
1/2 cup or more of any red multi-fruit juice (not cranberry) or orange juice or lemoncello, if you want

1.  In a double boiler, cook egg yolks and granulated sugar, whisking constantly, until it reaches 160 degrees F.  Set aside off the heat to cool slightly.

2. Beat egg mixture with mascarpone until light and fluffy.

3.  In a separate bowl, beat heavy cream until soft peaks form.  (I used my stand mixer for the cream, and my hand mixer for the egg mixture.)  Carefully fold the egg mixture into the cream with a silicone spatula. 

4.  Dip ladyfingers in juice quickly, on both sides.  You want the liquid to seep into them but not too much.  You don't want them to be soggy, or too dry.  You can dip one first and bite into it to test, if you've never done this before.  As you dip, lay the dipped lady fingers in the bottom of a large (deep) 9x13 pan in a single layer.  Top with half of the mascarpone cream mixture.  Top with an even layer of halved strawberries.  Repeat layers- dipped ladyfingers, mascarpone cream mixture, strawberries.  Best refrigerated for a few hours; overnight is best. 
**This post and photos are property of http://dishingwithdish.blogspot.com/**/

Saturday, April 18, 2020

Buttermilk Cinnamon Rolls with Caramel Icing


I made these a few weeks ago for a special breakfast.  My daughter loves cinnamon rolls but I only bake them once or twice a year, lol.  Luckily I bought a fresh jar of yeast right before this craziness started, and my local store still had flour regularly until a few days ago.  I'm sorry for those who can't get these things right now. (I can't find any more yeast to buy now, though... hope there is more when I need it!)

Anyway.... these cinnamon rolls were so good! I took a recipe from Mel's Kitchen Cafe for the rolls themselves and used my own caramel icing.  I loved this combo.  The buttermilk cinnamon rolls were so fluffy and tender.  I think I'll use this as my base for cinnamon rolls from now on and just change up the icing.

Buttermilk Cinnamon Rolls with Caramel Icing
adapted from Mel's Kitchen Cafe and Here

ROLLS:
3/4 cup buttermilk, warm (try pouring the buttermilk in a glass liquid measuring cup and microwave for 1 minute on 50% power)
6 tablespoons butter, melted and cooled
3 large eggs
1/4 cup (1 3/4 ounces) sugar
1 tablespoon regular* or instant yeast
1 1/4 teaspoons salt
3 1/2 to 4 1/2 cups flour

FILLING:
1/4 cup (1/2 stick) butter, softened to room temperature
1 cup brown sugar
2 teaspoons cinnamon

Caramel Icing:
1/2 cup butter
1/2  cup brown sugar
1/2 tsp salt
1/3 cup heavy whipping cream (can just use milk, too)
2 tsp vanilla
1 1/3 cups powdered sugar

1.  For the dough, add the warmed buttermilk and butter to a stand mixer fitted with the dough hook (or you can use a large bowl and mix with a wooden spoon). With the mixer running, add the eggs, sugar, yeast, salt and 1 cup of the flour. *If using regular (non-instant) yeast, proof in a bowl first with warm buttermilk and a pinch of sugar- then continue on. 

2.  Continue adding flour, just until the dough pulls away from the sides of the bowl. It should be very soft but not so sticky that it leaves a ton of residue on your fingers. Let it knead for just 1-2 minutes until it has come together in a soft, tacky ball.

3.  Place the dough in a large, lightly greased bowl and cover the top tightly with plastic wrap. Let the dough rise in a warm place until doubled, around 2 to 2 1/2 hours, depending on the warmth of your kitchen (you can speed up the rising by placing the covered bowl of dough in a very lightly warmed oven).

4.  Meanwhile, lightly grease a 9X13-inch baking dish   In a small bowl, mix the brown sugar and cinnamon together. Set aside.

5.  When the dough is ready, turn it out onto a lightly greased counter and press it into a 16 by 12-inch rectangle.  Gently spread the softened butter over the rectangle, using an offset spatula or rubber spatula or just your fingers.

6.  Sprinkle on the brown sugar mixture, leaving a 1/2-inch border along the top and bottom edges. Lightly use the palms of your hands to press the brown sugar mixture into the butter, adhering it to the dough.
Lift the longest edge closest to you and begin rolling the dough into a tight log. Pinch the seam closed and roll the log so it is seam side down. Gently stretch the log to be 15- or so inches in length with an even diameter all the way throughout and pat the ends to even them up.

7.  Using a serrated knife, (or a piece of thread or floss) slice the log into 12 evenly sized rolls (or more if you like your rolls thinner). Arrange the rolls cut side down on the prepared baking pan and cover with lightly greased plastic wrap. Let the rolls rise in a warm place until doubled, 1 to 1 1/2 hours; it's really important to let them rise well or else they won't be light and fluffy after they've baked. (You can put them in the fridge overnight here.... works out perfectly.  Just remove from the fridge while the oven preheats in the morning.)

8.  Bake at 350 degrees for 22-25 minutes, until the rolls are very lightly golden on top and cooked through but not overly browned.

9.  While rolls are baking, prepare the caramel icing: Melt butter in a saucepan over low heat. Add the brown sugar and salt and stir until combined. Continue cooking over low heat for another 5 minutes or until sugar is dissolved, stirring constantly. Add the heavy whipping cream or milk and stir to combine. Remove from heat and add vanilla. Whisk in the powdered sugar until nice and smooth. (I always have lumps in my icing because I'm too lazy to sift the powdered sugar.... but you can if you want.)

7. Remove rolls from oven and pour on icing immediately, or let them cool a few minutes and then pour on. Let cool slightly and serve.

**This post and photos are property of http://dishingwithdish.blogspot.com/**/

Saturday, March 30, 2019

Honey BBQ Pulled Pork


I really loved this pulled pork, and it was easy too.  Just place the pork in the crockpot in the morning; you can even do it before going to work.  Try to make the coleslaw the day before.  If you can't, try to make it at least 2 hours before eating.  That's what I did, and it worked out well.  Take your fave store-bought BBQ sauce and add a few extra ingredients.  (Don't be scared of the amount of Balsamic vinegar; it works out fine.)  Then I served this on Hawaiian rolls.  (The pics are with the small rolls, but when I made this a few days ago we used the Hawaiian sub rolls.)  SO delicious!

For the coleslaw, I just made a half recipe of this Buttermilk Coleslaw, using a pre-packaged mix of sliced white and red cabbage + carrots.  It was very good and easy.  The leftovers turned purple overnight in the fridge. 

Honey BBQ Pulled Pork 
adapted from Mel's Kitchen Cafe

3 to 4 pounds boneless pork sirloin roast or pork shoulder
1 teaspoon salt (smoked salt, if possible)
1/2 teaspoon black pepper (I use coarsely ground)
1 teaspoon garlic powder
2 tablespoons liquid smoke
2 cups low-sodium chicken broth

BBQ SAUCE:
3/4 cup balsamic vinegar
3/4 cup favorite BBQ sauce
1/3 cup honey
2 tablespoons Worcestershire sauce
1/4 teaspoon garlic powder
1/4 teaspoon salt, optional (I didn't add)
1/4 teaspoon pepper

Hawaiian rolls or subs, or other rolls, for serving
Coleslaw, for serving, optional

1.  Place the pork in a 5- or 6-quart slow cooker and season it evenly with salt, pepper and garlic powder.  Pour in the liquid smoke and 2 cups broth. Cook on low for 8-9 hours.

2.  For the BBQ sauce, combine all the ingredients in a medium non-stick saucepan and heat, stirring often, until simmering. Simmer for 15-20 minutes until slightly reduced and thickened. Season to taste with salt and pepper, if needed. The sauce can be made a week in advance and refrigerated. If refrigerated, heat before tossing with the pork.

3.  Shred the pork (I suggest draining most of the excess cooking liquid) and toss with the BBQ sauce. Serve on buns (coleslaw optional). The pork (once tossed with the sauce) can be kept warm in the slow cooker for several hours before serving. (PS: Keep at least some of the extra cooking liquid in the fridge.  When warming up leftovers, I cooked the meat in a small non-stick saucepan and added some of this cooking liquid, plus a bit of regular BBQ sauce from the fridge.)


**This post and photos are property of http://dishingwithdish.blogspot.com/**/

Saturday, December 1, 2018

Overnight Dinner Rolls

These rolls were so buttery and delicious.  They are similar to my mom's roll recipe for Butterhorns, which isn't posted here (someday) but you make the dough and let it sit in the fridge overnight (or up to 4 days!).  This was perfect for Thanksgiving; I made the dough the night before and then used half of it to make rolls for Thanksgiving.  The next day, I used the remainder of the dough to make fresh rolls to go with our Thanksgiving leftovers.  Everyone loved these rolls.  This recipe is from Mel's Kitchen Cafe- I'm starting a new tag since I use so many of her recipes.

Overnight Dinner Rolls
adapted from Mel's Kitchen Cafe

1 cup warm water
3/4 cup evaporated milk
1/3 cup (2.5 ounces) granulated sugar
1 tablespoon instant or active dry yeast
1 1/2 teaspoons salt
1 large egg
1 cup + 4 cups all-purpose flour (25 ounces total)
1/4 cup (4 tablespoons, 2 ounces) butter, melted
1/2 cup (8 tablespoons, 4 ounces) butter, chilled
Melted butter for brushing dough and baked rolls

1.  In a medium bowl or 4-cup liquid measuring cup, whisk together the water, evaporated milk, sugar, yeast, salt, egg, and 1 cup of the flour. Add the melted butter and mix until a smooth batter forms. Set aside.

2.  In a large bowl, add the remaining 4 cups flour. Using the large holes of a box grater, grate the 1/2 cup chilled butter into the flour. Toss the flour and butter together until evenly combined. Alternately, you can cut the butter into cubes and cut it into the flour using a pastry blender/cutter or two butter knives (or forks) until the butter is in pea-sized pieces. (I opted for the pastry cutter- it wasn't that hard at all.)

3.  Pour the yeast mixture over the flour/butter and use a fork or spatula to mix until the dough starts to come together. Mix just until the dough forms a rough, lumpy ball and the flour is evenly moistened.  (Click on link for original recipe, above, under the recipe title, for more info and a tutorial.)

4.  Cover the bowl and refrigerate the dough for at least 4 hours and up to 3-4 days.

5.  When ready to make rolls, divide the chilled dough into 4 equal pieces. Roll each piece (or one at a time, depending on how many rolls you want to make – the remaining dough can go back in the fridge) into an 11- or 12-inch circle about 1/4-inch thick or slightly less than. (I use a large glass cutting board lightly coated with cooking spray for the rolling.)  It should be fairly thin. Brush the dough circle with a tablespoon or two of melted butter.

6.  Cut the circle into 8 equal pieces, using a pizza cutter. Roll each wedge into a crescent shape starting at the wide end. Place the rolls on a parchment-lined baking sheet a few inches apart. At this point I brush the rolls with a bit of melted butter.  Cover lightly with a towel or greased plastic wrap and let rise until doubled in size, about 2 hours.

7.  Preheat the oven to 350 degrees F. Bake the rolls for 12-15 minutes until golden and baked through. Remove from the oven and brush the tops with melted butter, if desired.


Friday, November 9, 2018

Baked Steel Cut Oats

This recipe is great because you prepare it overnight and let it sit in the fridge.  Then, the next morning, you just bake it.  It's hearty and healthy.  I love another baked oatmeal recipe, and that one used a lot of butter.  It's good, but I feel better about eating this one.

When you make this, it won't be pretty.  Lol.  It's because of the blueberries (I just used a whole bag of frozen blueberries, I think it was 12 oz.)  But, it will taste and smell great!
Baked Steel Cut Oats
adapted from Mel's Kitchen Cafe

1 cup steel cut oats
3/4 cup sliced almonds or chopped walnuts
1 1/4 teaspoons baking powder
1 1/2 teaspoons cinnamon
1/8 teaspoon nutmeg
1/8 teaspoon salt
2 2/3 cups almond milk (or cow's milk)
1 teaspoon vanilla
2 eggs
1/3 cup pure maple syrup (or brown sugar)
1 tablespoon coconut oil or butter, melted
1 – 2 cups fresh or frozen blueberries (can use a bit more if you want)

1.  In a medium bowl mix the oats, almonds, baking powder, cinnamon, nutmeg, and salt together.

2.  In another bowl or in a liquid measuring cup, whisk the milk, vanilla, egg, maple syrup or brown sugar and coconut oil (or butter) together until smooth. It’s ok that the coconut oil/butter will solidify and form small clumps.  Pour the wet ingredients over the oatmeal mixture and stir to combine.

3.  Lightly grease a 9X9-inch baking dish (can use a similar sized baking dish of any shape – 9X9-inch or larger but smaller than a 9X13-inch).

4.  Toss the blueberries over the bottom of the dish. Give the oatmeal mixture a final stir and pour over the top of the blueberries (if using frozen blueberries, the oatmeal will definitely take on more of a blue-ish hue than if using fresh). Cover with plastic wrap and refrigerate overnight (8-12 hours).

5.  In the morning, preheat the oven to 350 degrees, uncover the baking dish and bake for 55-60 minutes until the mixture is set and oats are tender but still slightly chewy. Stir to combine, if desired, or just scoop out in portions as is. Serve with additional milk (to stir into the oatmeal), if desired.

**This post and photos are property of http://dishingwithdish.blogspot.com/**

Monday, September 24, 2018

Marinated Tomatoes


This is my mom's recipe.  She used regular-sized sliced tomatoes, but I had all of these good grape tomatoes (datterino) that needed used up.  So I just sliced them in half and put the marinade over them.  They were very good.  This would be a good thing to take to a pot-luck.  It's a change from the usual carbs, you can make it ahead, and it can sit out for a long time. I'd like to try this with regular tomatoes, too.
Marinated Tomatoes 
recipe from my Mom

6 regular tomatoes or about 2 cups grape tomatoes
1 clove garlic, minced fine
1/2 tsp. dried thyme or 2 Tablespoons fresh
1/4 cup green onions or a few Tablespoons fresh chives, sliced
1/4 cup minced parsley, or a little bit dried
1/2 tsp. salt
1/4 tsp. black pepper
1/4 cup red wine vinegar
1/3 cup sunflower, canola or olive oil

1. Cut tomatoes in 1/2 inch thick slices (peel first, if desired).  If using grape tomatoes, rinse and halve them.  Place in a bowl or shallow dish.

2.  In another bowl, combine garlic, thyme, green onions or chives, parsley, salt, and pepper.  Sprinkle mixture over tomatoes.

3. Combine oil and vinegar in a jar, shake to blend well.  Pour over tomatoes.  Cover; refrigerate at least 2 hours.  Spoon marinade over tomatoes from time to time.

**This post and photos are property of http://dishingwithdish.blogspot.com/ **

Wednesday, March 7, 2018

White Chocolate Macadamia Nut Cookies


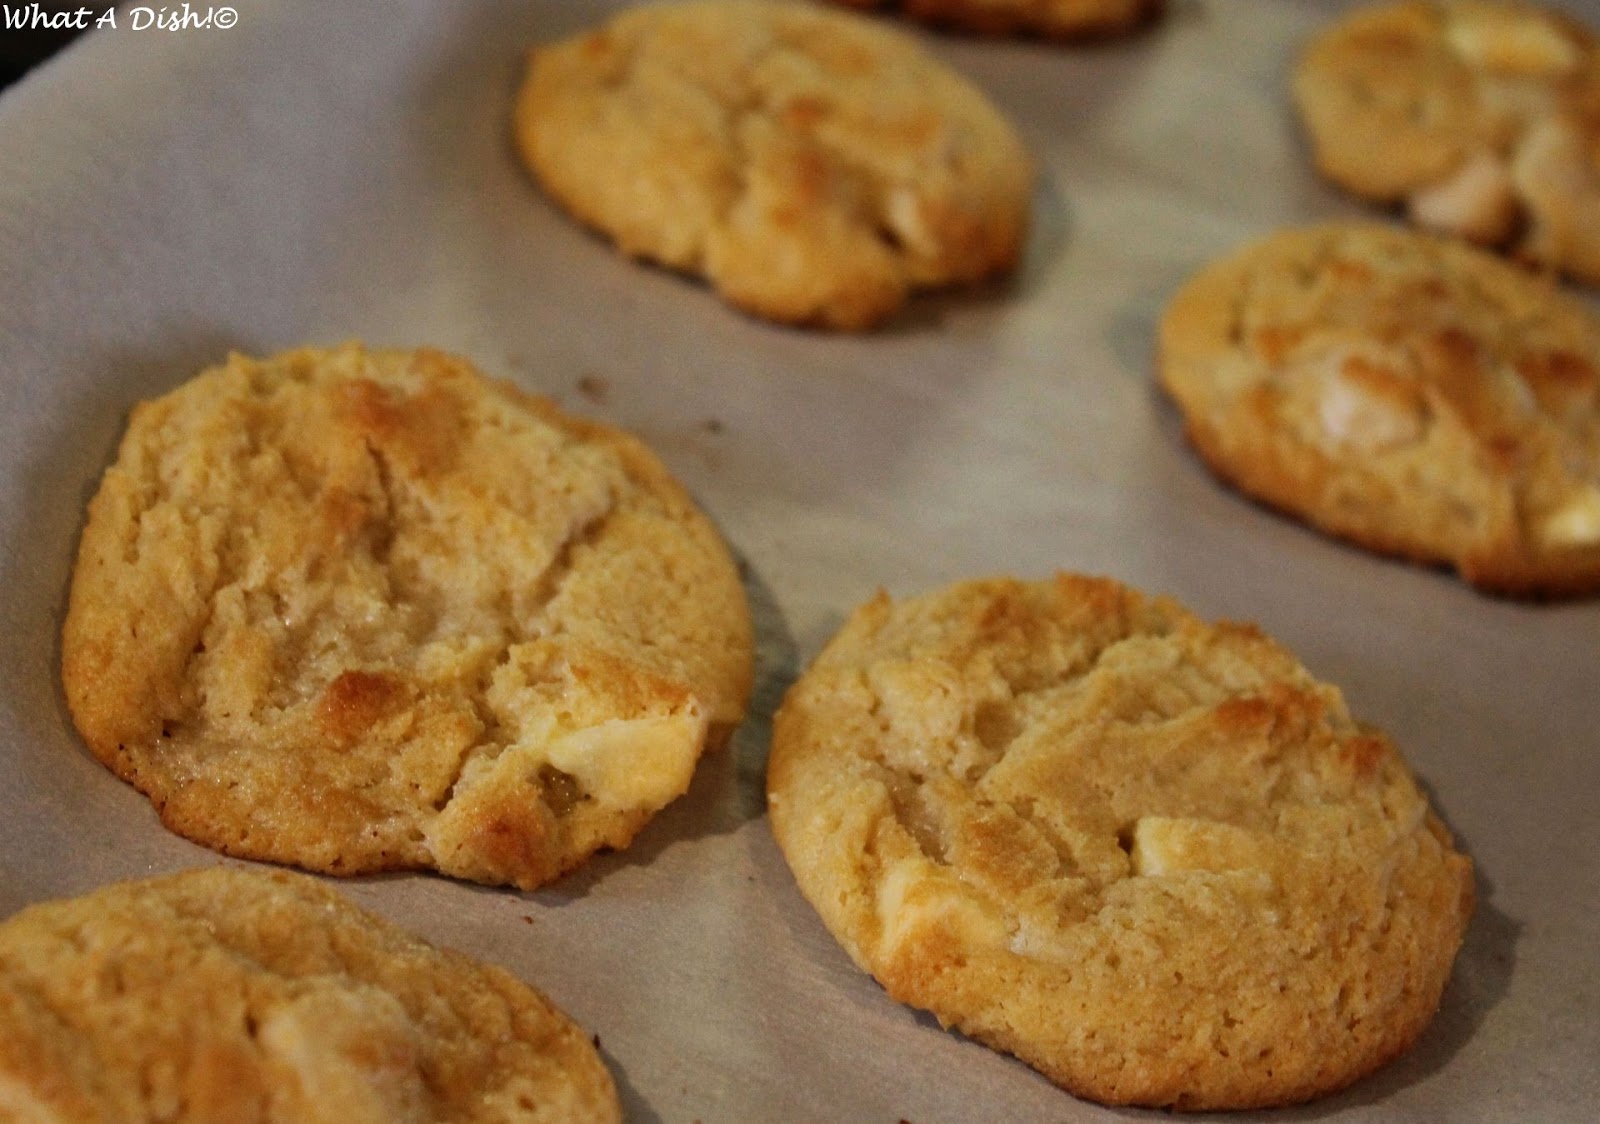
White Chocolate Macadamia Nut cookies are some of my favorite cookies ever.  I've tried a few recipes in the past, and they've all been good, but not wow.  I tried this recipe recently, from Joy the Baker, and have finally found my go-to recipe for these cookies.  These are soooo good!!  I made them with my daughter during a snow day last week and it was so nice to have these warm cookies baking while it was snowing outside.  These cookies contain some things usually not found in these types of cookies: cream cheese, browned butter, and dry milk powder.  Joy the Baker is a baking genius; if you love White Choc Mac cookies, you need to try this recipe! Note: I only had salted butter and used it, and it was fine.


White Chocolate Macadamia Nut Cookies
adapted from Joy the Baker
Makes about 4 dozen

8 oz. (1 block) cream cheese, well softened
1/2 cup (1 stick) unsalted butter, softened to room temperature (I used all salted; decreased the salt a tiny bit)
1/2 cup (1 stick) unsalted butter, melted to browned and cooled slightly (brown it; dont' burn)
1 cup light brown sugar, packed
1 cup granulated sugar
2 large eggs
2 teaspoons pure vanilla extract
3 cups all-purpose flour
1 cup instant (dry) milk powder
1 1/2 teaspoon baking soda
3/4 teaspoon baking powder
1 teaspoon salt
1 1/2 - 2 cups coarsely chopped macadamia nuts
2 cups coarsely chopped white chocolate

1.  In the bowl of stand mixer fitted with the paddle attachment, beat together the cream cheese and softened butter until light and creamy, about a minute. Make sure that both the cream cheese and butter are very well softened. Add the browned butter and sugars and beat until well combined. Add the eggs and vanilla extract and beat on medium-low speed for 3 minutes until pale and fluffy. In a medium bowl whisk together flour, milk powder, baking soda, baking powder, and salt until well combined.

2.  Add in the dry ingredients and mix until combined. Fold in the chopped nuts and white chocolate.
Wrap the dough in plastic wrap (or cover the bowl in plastic wrap) and refrigerate for at least 1 hour, or overnight.

3. Remove the dough before baking- about one hour early if refrigerated overnight.  Place a rack in the center and upper third of the oven and preheat oven to 350F. Line a baking sheet with parchment paper.

4.  Spoon out dough balls, a heaping 2 tablespoons of dough for each cookie. Place on the prepared baking sheets, providing at least 1 1/2 inches between each cookies. Bake the cookies for 9-12 minutes, until edges begin to brown but the middle is still a bit gooey. Cool before serving to allow them to hold their shape.
**This post and photos are property of http://dishingwithdish.blogspot.com/**

Saturday, January 6, 2018

Overnight Eggnog French Toast


We had this for dinner on New Year's Day.  I knew we wouldn't be awake enough to have it for breakfast, and I was too tired New Year's Eve night to prepare it anyway.  (It should be refrigerated for 8 hours before baking.) It was a nice breakfast-for-dinner thing to do on New Year's.  We had so many appetizers the night before, nobody felt like a big fancy meal anyway.  This would make a great Christmas breakfast, too.

I loved the eggnog flavor of this! Eggnog is probably almost gone from stores by now, but this is a great send-off for it.  I hope everyone had wonderful holidays.

Note: I used Pandoro bread/cake for this.  It's like Panetonne but has no dried fruit inside, and it comes from Verona.  It was perfect for this.
Overnight Eggnog French Toast
adapted from The Kitchn

1 loaf challah, brioche, Portuguese Sweet bread, Panetonne or Pandoro (about 16 ounces), cut into 1-inch-thick slices
6 large eggs
3 cups eggnog
1 cup whole or 2% milk
1/4 cup granulated sugar
2 teaspoons vanilla extract
1/8 teaspoon salt
Powdered sugar, ground cinnamon, and warm maple syrup, for serving

1.  Arrange a rack in the middle of the oven and heat to 350°F. Spread the bread slices in a single layer on a baking sheet. Toast until dry and very lightly golden-brown, about 8-10 minutes. Set aside to cool slightly.

2. Grease a 3-quart or 9x13-inch baking dish.  Cut or tear the bread slices into roughly 1-inch pieces and place them in the prepared baking dish in an even layer.

3.  Whisk the eggnog, milk, eggs, sugar, vanilla, and salt together in a large bowl. Pour evenly over the bread cubes and gently press down with your hands to make sure all of the bread gets saturated. Cover the dish with aluminum foil and refrigerate for a few hour or overnight.

4.  To bake, arrange a rack in the middle of the oven and heat to 350°F.

5.  Uncover the french toast. Bake until a tester inserted in the center comes out clean and the tips of the bread are lightly toasted, 45 to 50 minutes in a metal pan or up to 55 minutes in a glass or ceramic pan. If the crust seems like it's getting dark before the custard is done, tent the dish loosely with foil. (I left the foil on for the first 30 minutes and then uncovered it.  It worked very well.)

6.  Transfer the bread pudding to a wire rack and let stand at least 10 minutes before serving. Sprinkle with powdered sugar and cinnamon and serve with warm maple syrup.
**This post and photos are property of http://dishingwithdish.blogspot.com/ **

Tuesday, October 3, 2017

Hungarian Meatballs

I've had this recipe bookmarked forever, and finally made it when the weather started changing to fall.  We all enjoyed these tasty Hungarian meatballs.  These make me want to try other Hungarian foods. I used veal, which is readily available here, but one could use beef, or a mix of beef and pork. We had these over homemade German Spaetzle.

Hungarian Meatballs
adapted from The Daring Gourmet

For the Meatballs:
1 pound ground veal (or beef, or meat of your choice)
1 egg
⅓ cup plain breadcrumbs
2 tablespoons fresh chopped parsley
2 tablespoons fresh chopped dill
1 teaspoon salt
¼ teaspoon freshly ground black pepper
1 teaspoon sweet Hungarian paprika
2 tablespoons sunflower oil for frying

For the Sauce:
1 tablespoon oil
1 medium yellow onion, chopped
1 clove garlic, minced
8 ounces mushrooms, sliced, optional
3 tablespoons butter
4 tablespoons all-purpose flour
2 cups beef broth
1 cup cream (lower calories: substitute evaporated milk)
1/2 teaspoon salt, or to taste
¼ teaspoon freshly ground black pepper
2 tablespoons sweet Hungarian paprika
1½ tablespoons fresh chopped dill
½ cup sour cream

1.  Place all the meatball ingredients in a medium-sized bowl and knead to thoroughly combine. Shape the mixture into 1-inch balls or whatever size you prefer. (*You can form the meatballs ahead of time and place them on a dinner plate.  Cover with plastic wrap and cook when ready.)

2.  Heat some oil in a skillet and once hot add the meatballs, browning on all sides. Transfer the meatballs to a plate and discard all but a tablespoon or so of grease.

3.  Add the onions to the skillet and fry until translucent and golden brown. Add the garlic and fry for another minute (don't fry garlic too long or it becomes bitter). Add the mushrooms, if using, and fry until they've released their juices and they're mostly evaporated. Transfer the onion mixture to a bowl and set aside.

4.  Add the butter to the skillet and melt it. Add the flour and whisk until dissolved. Continue whisking vigorously for another minute or two until the flour mixture is a deep golden brown. 

5.  Pour in the hot broth while continually whisking to prevent clumping. Continue to whisk while bringing the mixture to a simmer. Add the cream and whisk until combined. Continue to simmer for another minute or so until the sauce is thickened. Return the onion mixture to the sauce and add the pepper, salt and paprika. Stir in the sour cream and dill.

6.  Return the meatballs to the sauce, stirring to coat them, and simmer covered for about 10 minutes, stirring occasionally.

7.  Serve over hot buttered egg noodles, SpƤtzle, potatoes or rice.  Garnish with some chopped fresh dill if desired.
**This post and photos are property of http://dishingwithdish.blogspot.com/ **

Friday, April 21, 2017

Twice-Baked Potatoes

I made these for Valentine's Day, and we liked them so much I made them again a few weeks later.  I had never made them before that.  I don't remember ever eating them before, either.  On Valentine's Day, we grilled steaks, and had salads, etc, but it was too much food.  So the second time, I made these as our main dish.


Twice-Baked Potatoes
adapted from the Kitchn

4 medium russet potatoes* (3 1/2 to 4 pounds total)
Olive oil
6 tablespoons butter, at room temperature
1 cup full-fat sour cream, divided
1/3 cup whole or 2% milk
1 1/4 cups shredded cheddar cheese, divided
1/4 cup scallions, green parts only, thinly sliced
2 tablespoons finely chopped fresh chives
1 teaspoon garlic powder (no-salt)
1 teaspoon kosher salt, plus more for seasoning
1/4 teaspoon freshly ground pepper, plus more for seasoning

1.  Arrange a rack in the middle of the oven and heat to 425°F.

2.  (*I can't get Russets here, so I just used large yellow potatoes.) Scrub the potatoes well and pat dry. Rub the potatoes all over with a thin coating of oil and season with salt and pepper. Wrap each potato in aluminum foil and place directly on the oven rack. Bake until fork-tender, flipping halfway through, 50 to 60 minutes total.

3.  Place the potatoes on a wire rack. Open the foil packets and let the potatoes sit for about 5 minutes, until they're cool enough to handle but still very warm. Reduce the oven temperature to 350°F.

4.  Cut the potatoes in half lengthwise. To make them easier to handle if still hot, hold in a clean dish towel. Carefully scoop the flesh into a medium bowl, leaving about 1/4-inch of potato and skin as the shell. Place the potato skins skin-side down on a rimmed baking sheet; set aside.

5.  Add the butter and 1/4 cup of the sour cream to the bowl with the potato flesh. Use a fork or potato masher to mash together until soft and well-combined. Do not overwork the potatoes. Fold in the remaining sour cream, milk, 1 cup of the cheese, scallions, chives, garlic powder, salt, and pepper. Divide the filling among the shells, then sprinkle with the remaining 1 cup cheese.

6.  Bake until the cheese is melted and the peaks of the mashed potatoes are crispy, 15 to 20 minutes (with an additional 5 to 10 minutes for potatoes that were made ahead). Serve immediately.

Recipe Notes: 
Make ahead: The potatoes can be baked and filled up to 1 day in advance and stored in a covered container in the refrigerator until ready to bake the second time. Add an additional 5 to 10 minutes to bake time when made ahead.
Storage: Leftovers can be stored in an airtight container in the refrigerator for up to 3 days.
 **This post and photos are property of http://dishingwithdish.blogspot.com/ **