Showing posts with label vanilla bean. Show all posts

Friday, September 25, 2015

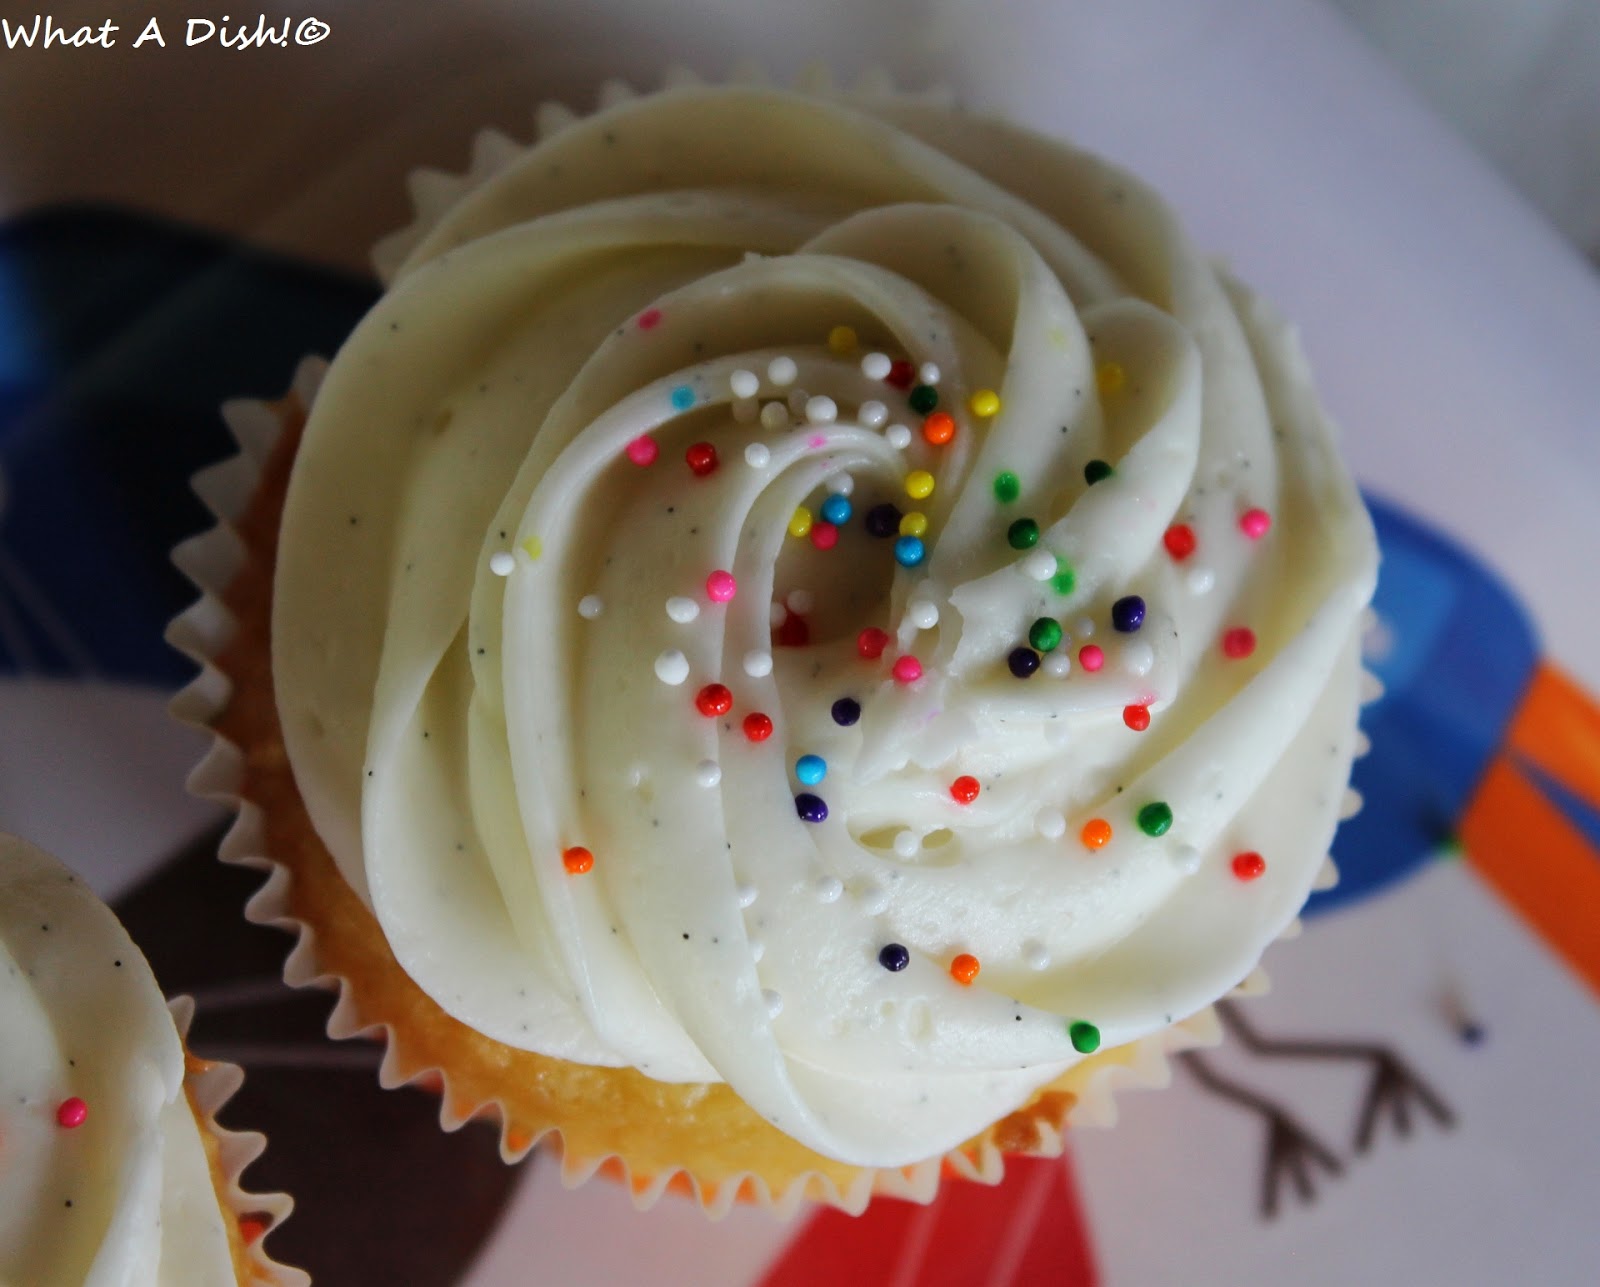
Vanilla Bean Mascarpone Frosting


I had some leftover mascarpone cheese after making this zucchini mascarpone dish.  I had to make cupcakes for a function, so I decided to use the rest in the frosting.  Mascarpone is an Italian sweet, fresh cheese that is super creamy and delicious.  It's wonderful in both savory and sweet dishes.  For fall, try this with these Pumpkin Cupcakes (instead of the cream cheese frosting). When I made this, I just used vanilla cupcakes and loved that combo.
Vanilla Bean Mascarpone Frosting 

1/2 cup (or so) mascarpone cheese
1/4 cup salted butter, room temp
2-3 cups powdered sugar
1 teaspoon vanilla extract
1/2 or 1 vanilla bean, seeds scraped, optional
milk, as needed (a few tablespoons)

1. In a bowl using electric beaters or a stand mixer, mix mascarpone and butter together until smooth. Add the powdered sugar.  Use 2 cups first, and if that doesn't look like enough, add another cup.  Add vanilla extract and vanilla bean seeds.  Then, use milk to thin to desired (spreading) consistency.  Frost cupcakes or cake.  (I use a Wilton 1M to frost the swirls.)


**This post and photos are property of http://dishingwithdish.blogspot.com/ **

Thursday, March 26, 2015

Salted Caramel Hot Chocolate

It's been rainy, windy and chilly here lately, and this drink was the perfect thing the other day.  (Last week we had beautiful spring weather, so hopefully this rain passes soon.)  Recipe like this are popular on the internet, and I've never been to Starbucks and had theirs.  I mainly wanted to use up the last bit of store-bought caramel sauce I had in the fridge after making this pie for Pi Day.  This was so good as it was- I can't even imagine how good it'd be with homemade caramel sauce.
I only had enough caramel sauce to make one serving, and my three-year old practically stole this out of my hands and drank most of it.  He really, really enjoyed this.  Lol.

I used some of our homemade Azorean Sea Salt in this, and it added the perfect flavor.  It doesn't taste salty; rather, it brings out the flavors of chocolate in this.
Salted Caramel Hot Chocolate
idea from the Internet; this is my version

1 cup whole milk
1 oz. good quality dark chocolate (I used Ritter Sport)
1-2 tablespoons caramel sauce
1/4 teaspoon good sea salt, or to taste
1/2 vanilla bean, scraped (save pod for other use; vanilla sugar or extract)
whipped cream, optional

1.  In a small saucepan on the stove, heat everything together over low heat until everything is melted and incorporated together and hot.  (Add 1 Tbsp. of caramel sauce first, then taste and see if you need the rest.)  Serve with whipped cream, optional, and extra caramel sauce drizzled over the top.
**This post and photos are property of http://dishingwithdish.blogspot.com/**/

Monday, March 10, 2014

Strawberries & Cream Macarons

I love making macarons, and have done so a handful of times over the last two years or so.  They've always turned out pretty well for me, until this last time I made them.  :)  Some turned out ok; I saved the best ones for the photos, but the "feet" aren't very pronounced at all, and a lot of them cracked, and many more had little "peaks" that didn't go down with the resting period.  I think this is due to two problems: this recipe called for more egg whites than I was used to; I aged 3 egg whites and I didn't realize it wasn't enough until I was making the macarons.  Also, I think I didn't mix these enough, hence the peaks that didn't flatten.  
For the first time, I tried a fruit flavor for the shells. To do this, I had to pulverize freeze-dried strawberries.  My oven browns macarons so much; these were such a pretty pink before baking, but oh well!  They tasted amazing.  The filling is vanilla bean cream cheese.  I do want to attempt another fruit-shell recipe, maybe with dried blueberries next time.  :)
I actually "taught" a friend how to make these; it was my first time making them with someone else besides my daughter.  I should have chosen a more basic macaron recipe!!  Lol.  It was disappointing to have most of them not come out right when I was supposed to be teaching someone else how to make these.  To redeem myself and restore my self-confidence, I made more macarons yesterday, using a much simpler recipe.  They turned out great- will share those ones sometime later.  They had pronounced feet and everything.  Note:  You'll need a kitchen scale for this recipe, able to measure both grams and ounces.
Strawberries & Cream Macarons
adapted from Tutti Dolci

Shells:
3/4 ounce freeze dried strawberries
115g almond flour
230g powdered sugar
144g egg whites, at room temperature overnight
72g sugar
2g (1/2 tsp) salt
red powdered food coloring, optional

Cream Cheese Filling:
4 Tbsp butter, at room temperature
4 ounces cream cheese, softened (can use reduced-fat)
pinch of salt
1 1/3 cups powdered sugar, or more to taste
1 vanilla bean, optional

1.  Fit a large disposable pastry bag with a round tip. Line two-three baking sheets with parchment paper. On a third sheet of parchment paper or plain white paper, trace out 24 1.5-inch circles (use a round cookie cutter or stencil as a guide), spaced 1 inch apart. Set aside as a master guide.

2.  Process freeze dried strawberries and almond flour in a food processor until finely ground. Use a fine mesh sieve or sifter to sift strawberry-almond flour mixture and powdered sugar together twice; use a firm spatula to push any large particles through or just discard. Set aside.

3.  Combine egg whites, sugar, and salt in a large mixer bowl fitted with wire whip attachment. Whip on medium speed (4 on a KitchenAid), until egg whites begin to foam. Increase speed to medium-high (7 on a KitchenAid) and whip until meringue forms soft peaks. Increase speed to 8 and whip for another few minutes. Turn off mixer and add food coloring; whip another minute on high speed to evenly distribute color until meringue is stiff. The meringue should clump in the center of the wire whip attachment; knock against mixer bowl to release.

4.  Add dry ingredients to meringue all at once. Use a rubber spatula to fold dry mixture into meringue.  After 25 folds, your mixture may still look lumpy. Continue to fold about 10 to 12 more times, checking texture after each fold. The batter is ready when it holds its shape when spooned onto itself and slowly flattens out and "ribbons" after 15 to 20 seconds. If the batter is stiff and doesn’t flatten out, it’s undermixed. If the batter is runny and fluid, it’s overmixed and won’t hold a shape.

5.  Transfer half the batter to pastry bag. Slide master guide of circles between baking sheet and parchment paper. Hold piping bag vertically and pipe batter to within 1/8″ from the edge of the circle. Carefully remove master guide from underneath piped circles and transfer to second baking sheet, repeating with remaining batter. Remove guide and save for future use. Tap pans sharply on counter; rotate 90 degrees and tap two more times (to deflate air bubbles and prevent cracked shells).

6.  Let shells sit out at room temperature about one hour to harden.  After 40 minutes, preheat oven to 280°F.  Bake for 12-20 minutes, until you can cleanly peel the parchment paper away from the macaron. Place pans on wire racks and cool completely before removing shells*. For the cream cheese frosting, beat butter, cream cheese and salt in a large mixer bowl on medium speed until light and fluffy. Reduce speed to low; gradually add powdered sugar 1/3 cup at a time and beat just until smooth.  Add seeds from vanilla bean and mix, optional.

7.  When ready to assemble, fit a large disposable pastry bag with a round tip and fill with frosting. Pipe about a tablespoon of frosting onto the bottom of half the shells, then sandwich with remaining shells. Store in an airtight container in the refrigerator up to three days. Bring to room temperature before serving.

*My oven bakes hot and browns these quickly.  If I leave them on until they easily peel away, they will be way too brown and hard.  So I take them out when the bottoms are still a little sticky, and then let them rest a few minutes on the baking sheet.  Then I use a brownie server and firmly scrape them off the parchment without ruining the feet.
Yield – 64 shells, 32 macarons

**This post and photos are property of http://dishingwithdish.blogspot.com/ **

Friday, February 14, 2014

Easy Vanilla Frozen Yogurt

I LOVE this frozen yogurt.  It's so incredibly easy, and just delicious, and only three ingredients.  This is so much better than any store-bought stuff with all the weird ingredients.  I made this twice in one week.  My kids loved it too.  We topped it off with strawberry mochi from Nuts.com....... SO GOOD!!!  (I love their mochi!  It's deliciously soft.)  (PS: Happy Valentine's Day; we're having chocolate lava cakes later but it will be too dark to take pics.  So I'm posting this delicious fro-yo... I said fro-yo again!)
This is a David Lebovitz recipe, and you know any frozen treat from his has got to be good.  I have his ice cream book and love it; I've made quite a few recipes from there.  This one is as easy as mixing up 3 cups of whole milk yogurt (I used Greek whole milk yogurt), adding some sugar, and vanilla.  To give this one a little extra boost, I also added the seeds from one vanilla bean.  You just stir it together, stick it in the fridge for an hour, and then pour into your ice cream maker.  
For any local readers, three cups of yogurt is 5, 150 gram containers of the good, German-made, Greek yogurt we can get here (lol!).  So it's 750 grams (or 3 cups) of yogurt total.  (The one I used is pictured below; that is good stuff to use for this if you can get it!)
Easy Vanilla Frozen Yogurt
adapted from David Lebovitz

3 cups (about 750 grams) plain Greek yogurt (I used full-fat)
3/4 cup sugar
1 teaspoon vanilla extract
1 vanilla bean, scraped, optional

1.  Stir together the yogurt, sugar, vanilla, and optional vanilla bean seeds.  Stir until sugar is fully dissolved.  Refrigerate for one hour.

2.  Freeze in your ice cream maker according to manufacturer's directions.  I love this ice cream "soft-serve", or right out of the ice cream maker.  If frozen, let it soften a bit before serving, or it will kind of chip out.  
*This post and photos are property of http://dishingwithdish.blogspot.com/ **

Monday, November 4, 2013

Pumpkin Kiss Cookies

These cookies were very popular with most of my kids and some people we shared them with.  They taste just like pumpkin pie, and since I don't love pumpkin pie, I didn't love these, but did enjoy eating a few of them.  These contain mascarpone cheese.  You'll only use about half of the tub- make this delicious pasta with the rest.  :)  (Instead of prosciutto one could use bacon or even deli ham.)

Pumpkin Kiss Cookies
adapted from Buttercream Blondie

1 stick (1/2 cup) unsalted butter, room temp
1 cup white sugar

1/2 cup light brown sugar
1 egg
1 teaspoon vanilla bean paste, vanilla extract, or seeds from 1 vanilla bean
1 Tablespoon Bourbon (or extra teaspoon vanilla extract)
1/2 cup mascarpone cheese
2 & 3/4 cup white flour
1 teaspoon ground cinnamon
1/4 teaspoon ground nutmeg
1 teaspoon baking powder
1/2 teaspoon baking soda
1/2 teaspoon salt
1 bag Hershey's Pumpkin Kisses

1.  Cream butter and sugars till light and fluffy.  Add egg, extract or vanilla bean seeds, and bourbon.  Mix in mascarpone.

2.  Sift dry ingredients together & mix into butter mixture until combined; don't overmix.  Scoop cookies using a half ounce cookie scoop.  Chill cookies for at least 30 minutes before baking.

3.  Bake at 350 degrees for 8-12 minutes, rotating halfway through. While they're baking, unwrap the Kisses.  As soon as you remove cookies from oven, place them on a cooling rack and press a pumpkin kiss into the center of each one.

**This post and photos are property of http://dishingwithdish.blogspot.com/ **

Friday, October 4, 2013

Golden Oreo Ice Cream


After making the simple vanilla bean ice cream recently, I thought that recipe would be a really good base for a Cookies and Cream ice cream.  I bought the ingredients to make it, not bothering to buy Oreos, because I usually keep some on hand for cooking with (I don't like to eat Oreos unless it's in ice cream, or Oreo truffles sometimes).  Well, I didn't have any regular Oreos, but I did have a package of Golden Oreos.  My husband suggested that they'd be just as good as the regular in an ice cream recipe, so I gave it a go.  This ice cream was delicious!  (Well, what ice cream isn't.... really?)  

Golden Oreo Ice Cream
adapted from this recipe (base recipe from David Lebovitz)

1 cup whole milk
¾ cup granulated sugar
2 cups heavy cream, divided

Pinch of salt
1 vanilla bean, split in half lengthwise
6 egg yolks
¾ teaspoon vanilla extract
15 (or so) Golden Oreos, coarsley chopped

1. Warm the milk, sugar, 1 cup of the heavy cream and the salt in a medium saucepan over low heat, stirring until the sugar is dissolved.  Scrape the seeds from the vanilla bean into the milk mixture and add the bean to the mixture as well.  Cover, remove from the heat and let steep at room temperature for 30 minutes.
2. Pour the remaining 1 cup heavy cream into a large bowl and place a fine-mesh sieve on top. Whisk the egg yolks in a medium bowl (I use my KitchenAid).  Slowly pour the warmed milk mixture into the egg yolks, whisking constantly.  Scrape the mixture back into the saucepan.
3. Place the saucepan over medium heat and stir constantly with a rubber spatula, being sure to scrape the bottom of the pan as you stir, until the mixture thickens and coats the back of the spatula, a few minutes.  The mixture should register 170 to 175 degrees F on an instant-read digital thermometer.
4. Pour the custard through the fine-mesh sieve and stir it into the cream.  Place the vanilla bean into the custard, stir in the vanilla extract, and place the bowl over an ice bath.  (I skip the ice bath.) Stir occasionally, until the mixture is cool. Cover and transfer the custard to the refrigerator until completely chilled, at least 8 hours or overnight.
5. When ready to churn the ice cream, remove the vanilla bean from the custard and freeze the mixture in your ice cream maker according to the manufacturer's instructions. Transfer to a freezer-safe container, and stir in the Oreos.  Store in the freezer (if you don't store in the freezer for a few hours, and eat right away, the Oreos will be crunchy instead of soft and melty like they should be). 
**This post and photos are property of http://dishingwithdish.blogspot.com/ **

Monday, September 16, 2013

Vanilla Bean Ice Cream


Vanilla Bean ice cream is a basic, yet fancy-ish ice cream and everyone should have a recipe for it.  I've shared one or two recipes for this in the past, but I much prefer this one for how simple it is, plus the rich and creamy flavor.  This is another perfect recipe from David Lebovitz.  

Vanilla Bean Ice Cream
adapted from David Lebovitz

1 cup whole milk
¾ cup granulated sugar
2 cups heavy cream, divided
Pinch of salt
1 vanilla bean, split in half lengthwise
6 egg yolks
¾ teaspoon vanilla extract
1. Warm the milk, sugar, 1 cup of the heavy cream and the salt in a medium saucepan over low heat, stirring until the sugar is dissolved.  Scrape the seeds from the vanilla bean into the milk mixture and add the bean to the mixture as well.  Cover, remove from the heat and let steep at room temperature for 30 minutes.
2. Pour the remaining 1 cup heavy cream into a large bowl and place a fine-mesh sieve on top. Whisk the egg yolks in a medium bowl (I use my KitchenAid).  Slowly pour the warmed milk mixture into the egg yolks, whisking constantly.  Scrape the mixture back into the saucepan.
3. Place the saucepan over medium heat and stir constantly with a rubber spatula, being sure to scrape the bottom of the pan as you stir, until the mixture thickens and coats the back of the spatula, a few minutes.  The mixture should register 170 to 175 degrees F on an instant-read digital thermometer.
4. Pour the custard through the fine-mesh sieve and stir it into the cream.  Place the vanilla bean into the custard, stir in the vanilla extract, and place the bowl over an ice bath.  (I skip the ice bath.) Stir occasionally, until the mixture is cool. Cover and transfer the custard to the refrigerator until completely chilled, at least 8 hours or overnight.
5. When ready to churn the ice cream, remove the vanilla bean from the custard and freeze the mixture in your ice cream maker according to the manufacturer's instructions. Transfer to a freezer-safe container and store in the freezer.

**This post and photos are property of http://dishingwithdish.blogspot.com/ **

Friday, May 10, 2013

Vanilla Orange Almond Cookies

Almond Cloud Cookies
I LOVED these cookies.  LOVED.  They were so good- chewy and soft, wonderful flavors all combining together (vanilla, almond, orange); texture of Pignoli Cookies or Spanish Panellets.  I love cookies made with almond paste or almond meal.  These cookies are also gluten-free and butter-free!  I brought some almond paste back with me on my last trip to Germany.  If you can't find it in a store, you can buy it online (I think Nuts.com has some) or make it at home (bottom of post).  
Almond Cloud Cookies
You're supposed to make a three-fingered imprint on these cookies, but they were too small to fit all my fingers up in there, and my fingers aren't huge or anything!  I used my smallest cookie scoop, which is about a Tablespoon, so maybe they were supposed to be bigger.  I liked the small size, though.  Anyway, I just used two fingers for the design.  

When making cookies like this, sometimes the batter can be too wet if using all the eggs.  So, I always start out adding about half and see how the texture is.  It should be like cookie dough; not really spreading at all.  If it's too dry, add more of the egg.  If it's too wet, add some almond meal/flour.  I don't remember if I ended up using all the egg whites in this recipe; I don't think I needed them all.  Make sure to beat them well so they don't all gelatinous-ly plop into the bowl at once.  
Almond Cloud Cookies
Vanilla Orange Almond Cookies
adapted from Joy the Baker
18-21 cookies

1 cup white sugar
2 teaspoons fresh orange zest
1 vanilla bean, seeds scraped
10 ounces almond paste
1/4 teaspoon salt
2 large egg whites, lightly beaten
1/4 teaspoon almond extract
powdered sugar

1.  Place two racks in the center and upper third of the oven and preheat oven to 325 degrees F.  Line two baking sheets with parchment paper and set aside.

2.  In a small bowl, mix together granulated sugar, orange zest, and scraped vanilla seeds.  Use your fingers to works the zest and vanilla into the sugar, creating a fragrant, moist sugar.

3.  Place sugar in the bowl of an electric stand mixer fitted with a paddle attachment.  Add the almond paste and salt.  Beat on medium speed creating a crumbly sugar and almond mixture.

4.  While almond mixture is combining in the mixer, place two egg whites in a small bowl.  Whisk  with a fork until loose and frothy.  (This will help in pouring the egg whites into the mixer.  If the eggs are unbeaten, they’ll just plop into the mixing bowl and not pour in.)

5.  With the mixer on medium speed, gradually pour the egg whites in to the crumbly almond and sugar mixture.  Do not pour all of the egg whites in at first; it might make it too loose.  You want a thick dough that is like cookie dough, not loose.  Beat until a smooth paste is formed.  Add the almond extract and beat to combine.

6.  Spoon or scoop batter by the heaping tablespoonful onto the prepared baking sheet.  I used my smallest cookie scoop and it was perfect.  Sprinkle generously with powdered sugar.  Using the tips of two or three of your fingers, make indentations in each cookie.

7.  Bake cookies for 15 to 25 minutes or until cookies are lightly browned on top.  Remove from the oven and allow to cool on the pan.  Store cookies in an airtight container at room temperature for up to 5 days.  
Almond Cloud Cookies
**This post and photos are property of http://dishingwithdish.blogspot.com/ **

Wednesday, April 10, 2013

(Vanilla Bean) Fudge Ripple Ice Cream

Fudge Ripple Ice Cream
This recipe is from David Lebovitz's ice cream book.  I made his Vanilla Philadelphia-Style Ice cream and swirled in a half recipe of his fudge ripple sauce.  It was a delicious combo.  I was scared to do the swirl, but I've done it before with this strawberry cheesecake frozen yogurt.  It's not that bad.  PS:  This ice cream is called Philadelphia-Style because of the lack of egg yolks in the recipe.  This recipe is still cooked to dissolve the sugar, though, so it needs to chill thoroughly (like overnight) in the fridge.

Fudge Ripple Ice Cream
(Vanilla Bean) Fudge Ripple Ice Cream
adapted from David Lebovitz

2 cups heavy cream
1 cup whole milk
3/4 cup sugar
pinch of salt
1 vanilla bean, split in half lengthwise
3/4 teaspoon vanilla extract
Fudge Ripple, recipe below

1.  Pour 1 cup of the cream into a medium, heavy-bottomed saucepan and add the sugar and salt.  Scrape the seeds from the vanilla bean into the saucepan and add the vanilla pod to the pot.  Cook over medium heat, stirring, until the sugar is dissolved.

2.  Remove from the heat and add the remaining 2 cups liquid (cream and milk) and the vanilla extract. 

3.  Chill thoroughly (overnight is good) in the refrigerator.  When ready to churn, remove the vanilla bean (rinse and save for another use or discard), then freeze the mixture in your ice cream maker according to the manufacturer's instructions.  After freezing, layer 1/2 to 1 cup of Fudge Ripple into the freshly churned ice cream.  Do this in layers, and do not swirl around too much or mixture will become muddy.  Fudge recipe below.

Fudge Ripple
adapted from David Lebovitz

1/2 cup sugar
1/3 cup light corn syrup
1/2 cup water
6 tablespoons unsweetened cocoa powder
1/2 teaspoon vanilla extract

1.  In a medium saucepan over medium heat, whisk together all ingredients except vanilla.  Whisk until mixture begins to bubble at the edges and comes to a low boil.  Cook for one minute, whisking frequently.  Remove from the heat, stir in vanilla, and cool.  Chill in the fridge before using. 
Fudge Ripple Ice Cream
**This post and photos are property of http://dishingwithdish.blogspot.com/ **

Wednesday, February 6, 2013

Raspberry-White Chocolate Ice Cream

raspic4W
This is a perfect ice cream for Valentine's Day!  I made this about a month ago for some guests, and it was a hit with them as well as our fam.  I concocted this recipe using a few other recipes on my blog, namely this White Chocolate recipe and this Chocolate Raspberry one.  You can make it even more festive-looking by incorporating a raspberry puree swirl.  I thought of it, but already had too many other things to do.  Borrowing an idea from the David Lebovitz Choc-Raspberry recipe (link above), I added raspberries (frozen) and fully incorporated them into the mixture, then strained it to remove any seeds.
raspic3W
Raspberry-White Chocolate Ice Cream
by What a Dish! with inspiration from David Lebovitz

2 cups half and half
1 2/3 cups heavy cream
1/3 cup vanilla sugar, divided
1 vanilla bean
3 egg yolks
12 ounces good-quality white chocolate, chopped
1 1/2 cups frozen raspberries, slightly thawed
1 teaspoon vanilla extract

1. Pour the cream and half-and-half into a heavy medium-size saucepan along with about half the sugar. Split vanilla bean and scrape the seeds out with the dull edge of a knife. Add vanilla bean seeds to the milk and half-and-half, and drop in the empty pod. Bring mixture to a simmer.

2. In the meantime, place egg yolks and remaining sugar in a heavy-duty stand mixture and beat at a medium-low speed until lightened and smooth. With mixer running, remove milk mixture from the heat (after it has been brought to a simmer) and slowly beat into the the eggs. If you mix it too quickly, the eggs will scramble. Pour all of the mixture back into the pan and put over low heat.

3. Stir constantly with a wire whisk until the custard slightly thickens. Be very careful at this point- stir constantly and do not let mixture come to a boil. Add the slightly thawed raspberries and whisk. Let mixture come to 160 degrees F, stirring constantly.  If raspberries do not break up enough, you can use an immersion blender to puree them.

4. Have ready a large glass bowl with a fine-mesh strainer fitted over the top. Place the chopped white chocolate into the bottom of the bowl. Remove the raspberry-custard mixture from the heat and pour it through a mesh strainer into the bowl over the white chocolate. It will take a while to filter down. Discard the seeds leftover in the strainer. Stir in the vanilla extract. Whisk very well until all the white chocolate is melted and incorporated. Cover and refrigerate until cold or overnight.

5. Stir the chilled mixture; freeze in an ice cream maker according to the manufacturer's directions.
raspic7W
**This post and photos are property of http://dishingwithdish.blogspot.com/ **

Friday, December 28, 2012

Vanilla & Cinnamon Sunflower Butter


Sunflower Butter
It's always fun to make your own nut butters at home.  I try to stick with sunflower butters now, because using peanuts of other nuts are too hard on my food processor.  Sunflower seeds are much gentler.  This sunflower butter is infused with vanilla bean and roasted cinnamon.  This was good- I used salted sunflower seeds though, and it was a little too salty because of this.  Next time, I would use non-salted (and add a pinch of salt) or just lightly salted.  And, do not add any additonal salt if using salted seeds!  Another fun recipe to try is this Chocolate Sunflower Seed Butter

Sunflower Butter

Vanilla & Cinnamon Sunflower Butter
adapted from 101 Cookbooks

2 cups / 225 g raw sunflower seeds*
1/4 cup / 60 ml sunflower oil, divided
1/2 teaspoon fine grain sea salt, plus more as needed (do NOT add salt if using salted seeds)
2 tablespoons vanilla bean paste (OR seeds scraped from 2 vanilla beans)
3 teaspoons ground cinnamon (I used roasted)
zest of 1/2 a lemon, or to taste, optional

1.  Toast the sunflower seeds in a 325F / 165C oven, on a rimmed baking sheet, until fragrant and golden.  Stir them once or twice to ensure even roasting. Let cool for ten minutes.

2.  Puree the seeds in a food processor along with 1 tablespoon sunflower oil, and the sea salt (if using). As the motor runs drizzle in another 2 tablespoons of sunflower oil. Scrape down the sides once or twice along the way, you're aiming for an even, creamy consistency, and it may take some time. Once the mixture starts to look smooth, add the vanilla paste and cinnamon, and pulse to incorporate. At this point, evaluate the consistency, if your sunflower seed butter is on the thick side, drizzle in the remaining tablespoon of oil while the processor is running. Taste, and add more salt if needed (and the lemon zest. if using), as well.  Makes about 1 1/2 cups / 380 g.

*If sunflower seeds are already roasted, skip this step.

**This post and photos are property of http://dishingwithdish.blogspot.com/**


Friday, September 21, 2012

Roasted Nectarines with Vanilla & Cardamom

I saw the link to this recipe on the sidebar of a friend's blog, and knew I had to make it very soon!  For two reasons: it looked delicious, and nectarine season is just about over.  So I whipped these up the other night, and they exceeded my expectations!  The juices almost turn caramel-y, and the flavors of fruit, cardamom and vanilla mixed with the sweet ice cream is to die for.

This is so easy, too.  If you love nectarines and cardamom and vanilla, make this!  Today is the last day of summer; this recipe is appropriate because the flavors taste like a blend of summer and fall.

Roasted Nectarines with Vanilla & Cardamom
adapted from Simply Scratch
easily cut in half

4 Ripe Nectarines
1/4 cup Vanilla Sugar* {can be substituted with regular sugar or honey}
1/2 teaspoon Ground Cardamom
1/8 teaspoon Fresh Nutmeg, grated
1/4 cup Orange Juice
3/4 teaspoon Real Vanilla Extract
1 tablespoon Butter
Vanilla Bean Ice Cream

1.  Preheat the oven to 400 degrees F.  Cut the nectarines in half like you would an avocado, starting at the stem and circle around. Remove the pits and any remaining stem, discard and then add place the nectarines, cut side up, in an oven-safe dish.

2.  Combine the vanilla sugar, cardamom and nutmeg in a small bowl, set aside.  Add the 3/4 teaspoon of vanilla to the orange juice and stir.  Pour the vanilla orange juice over top of the halved nectarines.  Sprinkle with the cardamom sugar.

3.  Place the nectarines into your preheated oven and roast for 10 minutes.  Remove and dot each nectarine with a little piece of butter. Return the nectarines back to the oven and roast for 10 more minutes.  Remove and let cool for a few minutes and serve with a scoop of vanilla ice cream and drizzle a little (or a lot) of the glaze over top.

*Note- to make vanilla sugar, combine new or used vanilla beans with white sugar; shake, and store in an airtight container.  I've had mine going for a few years.
Vanilla Sugar
**This post and photos are property of http://dishingwithdish.blogspot.com/ **

Monday, August 13, 2012

Stawberry Vanilla Lemonade

This lemonade was delicious- I made it a few weeks ago.  I could really taste the vanilla flavor in this; I thought it would have been covered up by the other flavors but it wasn't.  I loved this!  A friend pinned this on Pinterest a few months ago and I'm so glad I saw it!

Stawberry Vanilla Lemonade
adapted from Hrrthrr

Simple Syrup Recipe
1 cup sugar
1 cup water
1 vanilla bean (cut in half lengthwise, seeds removed, pod reserved)
8-10 cut strawberries

2-3 cups freshly squeezed lemon juice, from 8-10 lemons (or more)

1.  Place the strawberries and vanilla in a pot along with the water and sugar. Bring to a boil, lower heat, and simmer until the strawberries break down, the sugar dissolves and the sauce thickens slightly (about 5 minutes). Strain out the strawberry chunks and place syrup in the refrigerator to cool.

2.  Squeeze your lemons till you get about 2-3 cups of juice (strained).  Mix up the lemonade: start with 2 cups of lemon juice, 3 cups of water and 1 cup of simple syrup.  Then add more of each to taste.  Depending on how you like your lemonade, you can add additional juice, water, or simple syrup to your liking. Stick in the refrigerator to cool and enjoy over ice!
**This post and photos are property of http://dishingwithdish.blogspot.com/ **

Tuesday, June 26, 2012

Vanilla Bean Macarons with Raspberry Mascarpone Filling

These Macarons were supposed to be pure white, but I had a hard time getting them cooked through and not browning them at all.  I found it pretty much impossible, even though the oven temp was low.  I even took some out too soon, but later I realized I shouldn't have done that, because they were all sticky.  Oh well.  The powdered food coloring I ordered is here, so next time, I want to make some brightly colored ones! 
For the filling, I just combined Mascarpone cheese with a good-quality, seedless raspberry jam.  Then I stuck it in the fridge to firm up a bit before piping.  These were fun to make.  They are my second macaron attempt, and they turned out just as good as the first

Next I want to try a pistachio with maybe white chocolate filling.  These are so fun!

PS:  I'm SO tired of people saying "Yes please!" all the time.  As in "Two something for the price of one?  Yes please!"  Or something similar; my brain is too fried by the Yes Please's to think of more examples.  It's all over FB and blogs.  If you don't know what I'm talking about, you are one of the lucky ones.  I've seen it so much that it gives me word rage now.  Please stop saying it, people!!

Vanilla Bean Macarons with Raspberry Mascarpone Filling
shells adapted from Pink Parsley; filling from a few ideas I saw on the web

Shells:
110 g almonds meal/flour
200 g powdered sugar
seeds from 1 vanilla bean
50 g granulated sugar
100 g egg whites (about 3 egg whites), aged a day at room temperature

1.  Line 2 baking sheets with parchment paper or silicone mats.

2.  Pulse almond flour and powdered sugar in a food processor until evenly mixed.  Split the vanilla bean in half lengthwise, and scrape the seeds out using a paring knife. Add the seeds to the granulated sugar and whisk to combine.

3.  In the bowl of a stand mixer fitted with a whisk attachment, whip the egg whites until foamy, then gradually add the granulated sugar and continue to whip until a shiny, glossy meringue forms (but not dry).

4.  Remove the bowl from the stand mixer, and add the almond mixture. Using a rubber spatula, briskly and quickly fold the almond meal into the egg whites. After a few brisk strokes, slow down and then gently incorporate the rest into the batter.You want a batter that flows and "ribbons" for at least 5 seconds.

5.  Pour the batter into a pastry bag fitted with a large round tip. Pipe the batter into 1 1/2-inch rounds, spacing them about 1-inch apart.  Whack the baking sheets on the counter a few times, then allow to sit at room temperature for about 1 hour, or until a hard shell forms.

6.  Meanwhile, preheat the oven to 300 degrees. Bake the macarons 8-10 minutes, depending on size. Allow to cool completely on the pan before using a small spatula to remove them. Match the cookies according to size and pipe filling on half, using the other half to form a sandwich.

Raspberry Mascarpone Filling:
1 cup (about) mascarpone cheese, room temp
2-4 tablespoons good-quality, seedless raspberry jam

1.  Stir ingredients together until well-combined.  Add more or less jam to taste, and to get the consistency you want.  Refrigerate until thickened a little.  Let sit at room temp again for about 10-15 minutes to soften enough to pipe.  Fill a ziplock bag with the filling, snip a small hole in the corner, and pipe it out onto the macaron shells.
**This post and photos are property of dishingwithdish.blogspot.com/ **

Saturday, September 17, 2011

Nectarine Freezer Jam (With Cinnamon & Vanilla Bean) (Two Recipes)

I've been obsessed with making my own freezer jams lately.  About a month ago, I made a batch of strawberry and later that same day, I tried strawberry-nectarine.  Well, the nectarines I've had this last summer were sooo good; I wanted to preserve some of that flavor.  I made this a few weeks ago- we're still getting nectarines, but they're not as good as they were at the beginning of September, when I made this.  If you are still getting good ones, I encourage you to make this!  You don't even have to peel them- it's very quick to put together.  The recipe I used included a bit of cinnamon, and I added the insides from one vanilla bean, as well, to get those yummy little vanilla-bean specks.  This smells like warm peach or nectarine crisp with vanilla ice cream.... it is so good!

The bread product in these pictures is the Portuguese version of English muffins.... Bolo Levedo.  They are very good- way bigger than our English muffins too.  Here's a beautiful picture I found on Flickr.  I love them.
Like most freezer jam recipes, don't reduce the sugar here..... it's a lot of sugar, but it is needed for the jam to set up properly and be preserved properly.  You can find reduced-sugar pectin, but I can't really get that here (and the recipe would be different).  I just used the regular (yellow box) Sure Jell full-sugar pectin.  They also make a lower-sugar pectin in a pink box.  This link has a few different types; this recipe uses the one at the top.  Don't try to make this recipe with a different type of pectin because I'm not sure it will work. 

Note:  September 2012 I tried the recipe from the box of Sure Jell Pectin; it actually is the recipe for peach jam (but I used nectarines) and includes a little more fruit and less sugar than the first recipe listed here on this post.  It turned out just as good and looked the same; I still added cinnamon and vanilla bean to it.  I will post that recipe below my original one, below. 
Nectarine Freezer Jam (With Cinnamon & Vanilla Bean)
from Cooks.com

2 1/4 cups finely chopped or lightly pureed nectarines (about 2 lb.)
5 cups sugar
1 tsp. fresh grated lemon peel, optional
3 tbsp. lemon juice
1/4 to 1/2 tsp. cinnamon
1 vanilla bean, split and seeds scraped out
1 (1 3/4 oz.) box powdered pectin (Like Sure-Jell yellow box)
3/4 cup water

1.  In large bowl, mix nectarines, sugar, optional lemon peel, lemon juice, cinnamon, and vanilla bean seeds; let stand 10 minutes.

2.  In small saucepan, stir pectin and water over medium heat until mixture boils; boil 1 minute, stirring constantly. Stir into nectarine mixture; stir 3 minutes.

4.  Ladle into plastic freezer containers or hot sterilized jars. Cover tightly. Let stand at room temperature until set; may take up to 24 hours. Store in freezer for one year or in the fridge for about 3 weeks.  Makes about 3 pints.

Recipe 2: Nectarine Freezer Jam with Cinnamon & Vanilla Bean
adapted from KraftRecipes

3 cups prepared fruit (about 2 lb. fully ripe nectarines)

4-1/2 cups sugar, measured into separate bowl
one vanilla bean, split and scraped
1/2- 1 teaspoon ground cinnamon (I used roasted cinnamon)


2 Tbsp. fresh lemon juice

3/4 cup water

1 box SURE-JELL Fruit Pectin
1.  RINSE clean plastic containers and lids with boiling water. Dry thoroughly. 
   
2.  SLICE and pit nectarines. Finely chop or grind fruit. Measure exactly 3 cups prepared nectarines into large bowl. Add sugar, lemon juice, vanilla beans and cinnamon; mix well. Let stand 10 min., stirring occasionally.
    
3.  MIX water and pectin in small saucepan. Bring to boil on high heat, stirring constantly. Boil and stir 1 min. Add to nectarine mixture; stir 3 min. or until sugar is dissolved and no longer grainy. (A few sugar crystals may remain.) 
   
4.  FILL all containers immediately to within 1/2 inch of tops. Wipe off top edges of containers; immediately cover with lids. Let stand at room temperature 24 hours. Jam is now ready to use. Store in refrigerator up to 3 weeks or freeze extra containers up to 1 year. Thaw in refrigerator before using.


**This post and photos are property of http://dishingwithdish.blogspot.com/**/

Sunday, August 21, 2011

Homemade Vanilla Pudding

I made this about three weeks ago but haven't been able to post about it 'till now.  I'm trying blogging-while-holding-a-sleeping-newborn today for the first time.  It's slow going; only being able to use my left hand at the moment.  :)

This was actually a triple-vanilla pudding because I used my homemade vanilla sugar, homemade vanilla extract, and the seeds from one vanilla bean.  :)  If you don't have all of those things on hand, though, this will be just fine & dandy using only vanilla extract, even if it is store-bought.  :)

This did take a long time to get thick enough- just keep stirring.  I increased this recipe by quite a bit in order to use up the 4 egg yolks leftover from making Pavlova.  If you want fewer servings, look at the recipe link (below) and change the serving amount.  We ate it warm with chopped milk chocolate on top, so that the chocolate melted down into the pudding.  Soooo good!  The whole family loved this!
Homemade Vanilla Pudding
from Allrecipes

1/2 cup sugar (try using vanilla sugar!)
1/4 cup cornstarch
1/2 teaspoon salt
4 cups 2% milk
4 egg yolks, lightly beaten
2 tablespoons butter
2 teaspoons vanilla extract
1 vanilla bean, scraped, optional

1.  In a small saucepan, combine the sugar, cornstarch and salt. Gradually stir in milk. Cook and stir over medium heat until thickened and bubbly. Reduce heat; cook and stir 2 minutes longer. Remove from the heat.               

2.  Stir a small amount of hot filling into egg yolks; return all to the pan, stirring constantly. Bring to a gentle boil; cook and stir 1 minute longer. Remove from the heat. Gently stir in butter and vanilla.               

3.  Cool for 5-10 minutes, stirring occasionally. Transfer to dessert dishes.  Eat warm, right away, or cover and refrigerate for 1-2 hours and eat cold.


**This post and photos are property of http://dishingwithdish.blogspot.com/ **