Showing posts with label Valentine's Day. Show all posts

Thursday, February 14, 2019

Big Fat Sugar Cookies

Happy Valentine's Day! I made these cookies for my daughter's bake sale two days ago, and they were SUPER popular.  I almost wish I'd made them smaller so they would have gone farther.  But they were good this way.  I used my biggest cookie scoop which holds 3 Tablespoons.  They are so big and fat; so good.  People were really excited about them- lol!  Next time, if I made these for my fam, I'd use a regular cookie scoop and make them a little smaller- eating a big one was like a whole meal!!

Big Fat Sugar Cookies
adapted from Mel's Kitchen Cafe

1 cup butter (8 ounces, 16 tablespoons), softened
3/4 cup neutral-flavored oil, like sunflower, avocado, or canola
1 1/4 cups (9.25 ounces) granulated sugar
3/4 cup (3 ounces) powdered sugar
1/2 teaspoon baking soda
1/2 teaspoon cream of tartar
1/2 teaspoon salt
2 tablespoons sour cream
2 large eggs
1 teaspoon vanilla extract 
5 1/2 cups (27.5 ounces) all-purpose flour (I use unbleached)
Granulated sugar for pressing the cookies

FROSTING:
3/4 cup (6 ounces, 12 tablespoons) butter, softened
2 tablespoons sour cream
1 teaspoon vanilla extract
6 cups (24 ounces) powdered sugar
1-2 tablespoons cream or milk

1.  Preheat the oven to 350 degrees F (or 325 degrees F for convection bake) and line several half sheet pans with parchment paper.

2.  In the bowl of a stand mixer fitted with the paddle attachment (or in a bowl using a handheld electric mixer), add the butter, oil, granulated sugar and powdered sugar. Sprinkle the baking soda, cream of tartar, and salt across the top of the sugars (don't add the baking soda and cream of tartar in one lump or it might clump while mixing). Mix until well-combined and super creamy, 1-2 minutes, scraping down the sides of the bowl as needed.

3.  Add the sour cream, eggs and vanilla and mix until well-combined, 1-2 minutes, again scraping down the sides of the bowl as needed.  Add the flour and mix until no dry streaks remain and the mixture is evenly combined; don't overmix.

4.  Scoop the dough into about 3-tablespoon sized portions (I use my biggest cookie scoop and got around 32 cookies) and roll into balls. Place several inches apart on the prepared baking sheets. (They WILL spread a bit! I could only really put 9 or less on each baking sheet.)  Add about 1/3 cup granulated sugar to a shallow dish or bowl. Lightly spray the bottom of a flat-bottomed glass with cooking spray and dip the bottom of the glass into the sugar. Press each cookie into an even thickness dipping the bottom of the glass into the sugar between each press (no need to spray it again with cooking spray after the first time). The edges of the cookie will ruffle out a bit. Press them between 1/4- and 1/2-inch thick.

5.  Bake the cookies for 8-10 minutes until just set. Try not to let them get golden on the edges or very much on the bottom - that means they've baked too long and they may be dry and crumbly.  

6.  Let the cookies cool for a few minutes on the baking sheets before removing to a cooling rack to cool completely.

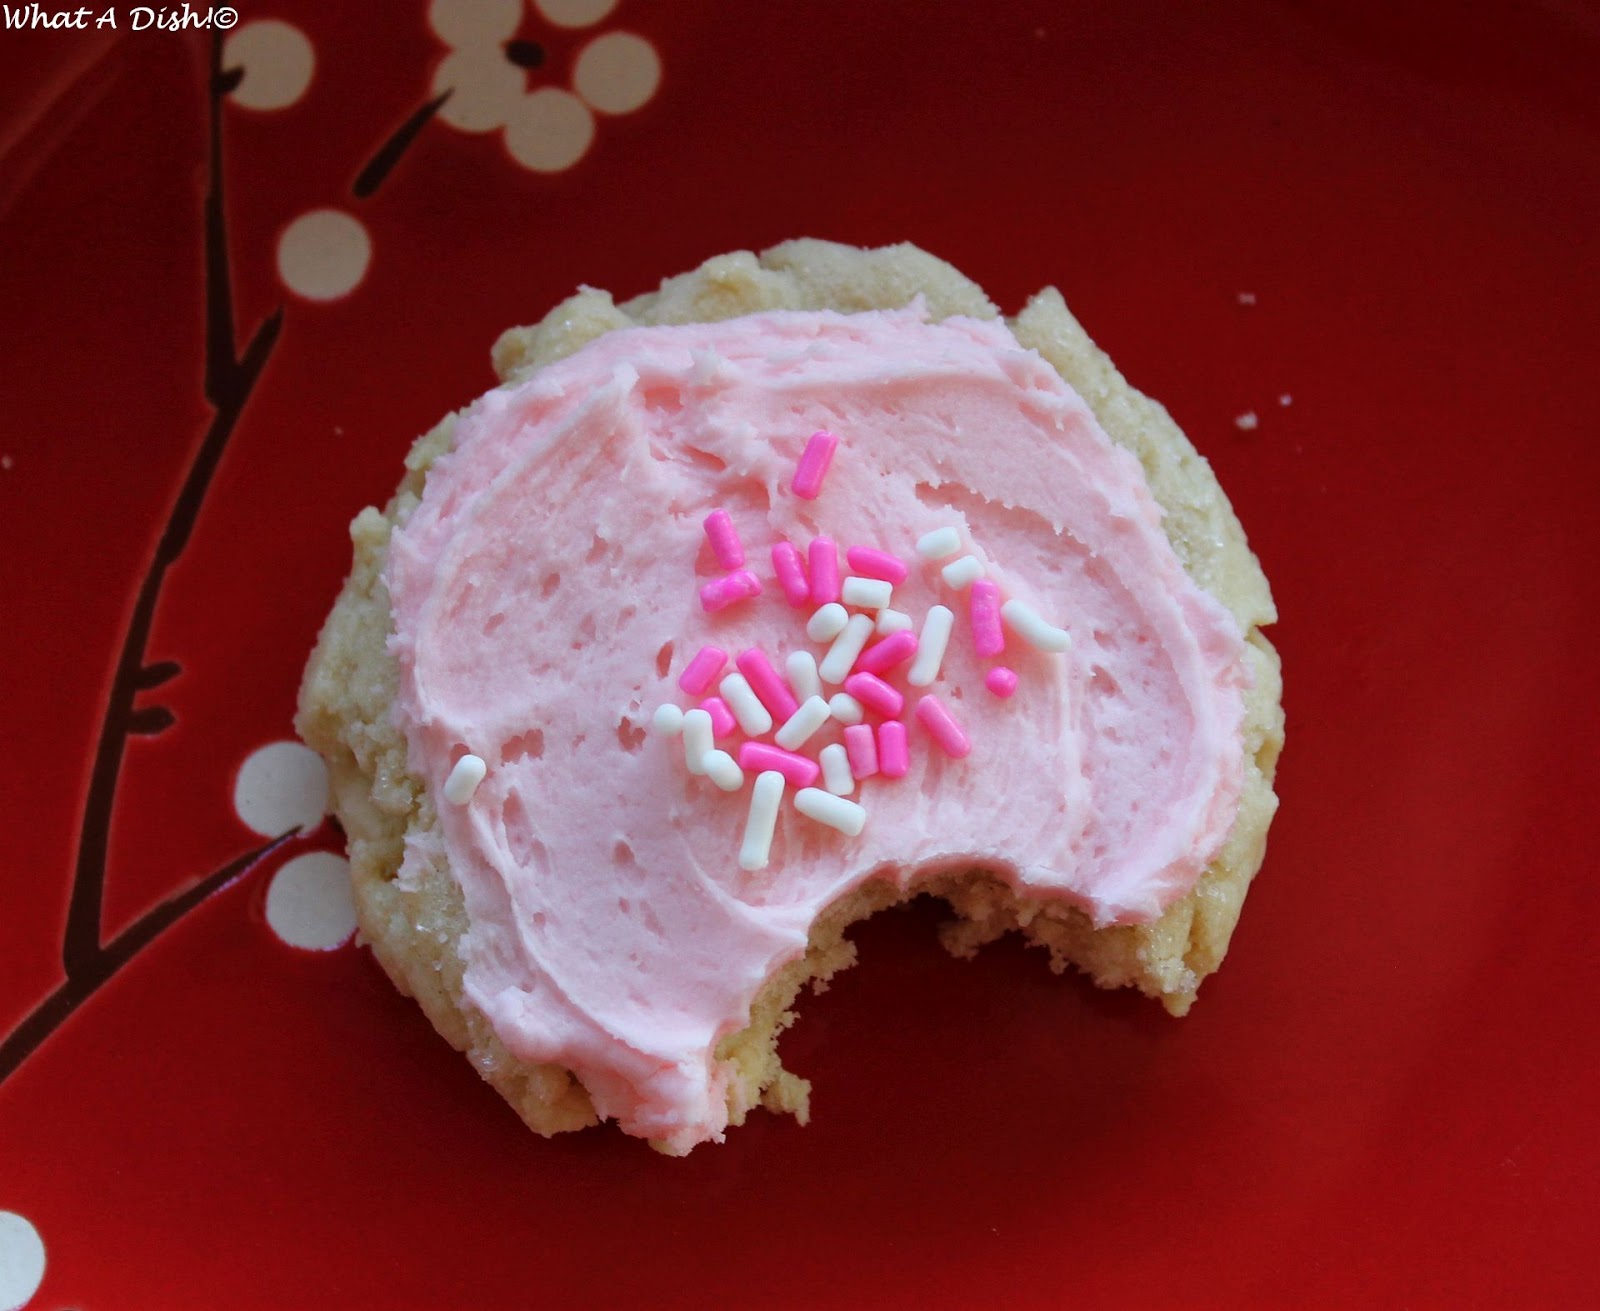
7.  For the frosting, in a medium bowl (can use a handheld or stand mixer) combine the butter, sour cream and vanilla. Mix until thick and smooth and creamy, 1-2 minutes. Add the powdered sugar and cream (or milk) and mix until well-combined and creamy, scraping down the sides of the bowl as needed. Add additional cream/milk, if needed, to adjust the consistency of the frosting so it is thick but still soft and spreadable.  Frost the cooled cookies and decorate with sprinkles, if desired.
**This post and photos are property of http://dishingwithdish.blogspot.com/**

Saturday, February 13, 2016

Caramelized White Chocolate Hot Chocolate

This recipe is interesting- you bake white chocolate in the oven until it caramelizes.  It turns dark brown and then is stirred into warm milk.  I think this could have used more milk- it was so sweet. But I still enjoyed it.  Happy Valentine's Day!

Caramelized White Chocolate Hot Chocolate
adapted from the Kitchn
makes 3, 1-cup servings or 4 servings with less

6 ounces white chocolate (about)
3 cups milk
Vanilla extract, a few drops
Salt, to taste

1.  Preheat the oven to 300°F and put the white chocolate in a glass or ceramic baking dish. No need to chop. Toss it in the oven and roast, stirring every 10 minutes or so. The white chocolate will be lumpy and crumbly, but that’s okay. Keep going until it takes on a peanut butter-like color, about 20-30 minutes total.

2.  Meanwhile, bring the milk to a simmer in a small pot.  When the white chocolate comes out of the oven, scrape it into the hot milk-mixture and whisk until smooth. Season with a pinch of salt and the vanilla extract.  Ladle into mugs and enjoy.
**This post and photos are property of http://dishingwithdish.blogspot.com/ **

Friday, February 14, 2014

Easy Vanilla Frozen Yogurt

I LOVE this frozen yogurt.  It's so incredibly easy, and just delicious, and only three ingredients.  This is so much better than any store-bought stuff with all the weird ingredients.  I made this twice in one week.  My kids loved it too.  We topped it off with strawberry mochi from Nuts.com....... SO GOOD!!!  (I love their mochi!  It's deliciously soft.)  (PS: Happy Valentine's Day; we're having chocolate lava cakes later but it will be too dark to take pics.  So I'm posting this delicious fro-yo... I said fro-yo again!)
This is a David Lebovitz recipe, and you know any frozen treat from his has got to be good.  I have his ice cream book and love it; I've made quite a few recipes from there.  This one is as easy as mixing up 3 cups of whole milk yogurt (I used Greek whole milk yogurt), adding some sugar, and vanilla.  To give this one a little extra boost, I also added the seeds from one vanilla bean.  You just stir it together, stick it in the fridge for an hour, and then pour into your ice cream maker.  
For any local readers, three cups of yogurt is 5, 150 gram containers of the good, German-made, Greek yogurt we can get here (lol!).  So it's 750 grams (or 3 cups) of yogurt total.  (The one I used is pictured below; that is good stuff to use for this if you can get it!)
Easy Vanilla Frozen Yogurt
adapted from David Lebovitz

3 cups (about 750 grams) plain Greek yogurt (I used full-fat)
3/4 cup sugar
1 teaspoon vanilla extract
1 vanilla bean, scraped, optional

1.  Stir together the yogurt, sugar, vanilla, and optional vanilla bean seeds.  Stir until sugar is fully dissolved.  Refrigerate for one hour.

2.  Freeze in your ice cream maker according to manufacturer's directions.  I love this ice cream "soft-serve", or right out of the ice cream maker.  If frozen, let it soften a bit before serving, or it will kind of chip out.  
*This post and photos are property of http://dishingwithdish.blogspot.com/ **

Monday, February 10, 2014

Strawberry Shortcake Cupcakes

These would be great cupcakes for Valentine's Day!  A vanilla cupcake is topped with strawberry-flavored frosting.  You flavor and color the frosting by using pulverized freeze-dried strawberries.  These can be bought at grocery stores (if you live Stateside, lol), or online.  I got mine at Nuts.com.  If you order from Nuts.com and live in the States, the shipping is super super fast.  For another way to make natural strawberry frosting, one can use freezer jam.

cup8W

Strawberry Shortcake Cupcakes

1 cup + 2 Tbsp all-purpose flour
2 Tbsp cornstarch
1 1/4 tsp baking powder
1/4 tsp salt
3/4 cup granulated sugar
2 large eggs, at room temperature*
1 1/4 tsp vanilla extract
1/4 cup butter, melted and cooled slightly
1/4 cup vegetable oil
1/2 cup whole milk, at room temperature*
1 recipe Strawberry Buttercream Frosting, recipe below
12 small fresh strawberries or strawberry slices, for decoration

1.  Preheat oven to 350 degrees. In a mixing bowl, whisk together flour, cornstarch, baking powder and salt for 30 seconds, set aside. In a separate large mixing bowl, using an electric hand mixer or stand mixer, set on medium-high speed, whip together eggs, sugar and vanilla until mixture is very pale, fluffy and thickened slightly, about 3 minutes. Mix in melted butter and vegetable oil. Working in three separate batches, beginning and ending with flour, add 1/3 of the flour mixture followed by 1/2 of the milk, blending until well combined after each addition.

2.  Pour batter into 12 paper lined muffin cups, filling each cup 2/3 full. Bake in preheated oven 15-20 minutes, until toothpick inserted into center of cupcake comes out clean. Cool completely on a wire rack, then frost with Strawberry Buttercream Frosting (recipe below) and top with a small whole fresh strawberry or fresh strawberry slices.

*To bring the eggs to room temp quickly, simply submerge in a bowl of warm water for 5 - 10 minutes. To bring milk to room temperature quickly, simply heat in microwave on high powder in a microwave safe dish for 15 - 20 seconds until no longer cold.
Strawberry Buttercream Frosting

3/4 cup butter, at room temperature
1 cup (15g) freeze dried strawberries
2 1/2 Tbsp heavy cream or whole milk
2 cups (230g) powdered sugar

1.  In the bowl of an electric stand mixer, fitted with paddle attachment, whip butter on medium-high speed until very pale and fluffy 6 - 8 minutes, frequently scraping down sides and bottom of bowl. Meanwhile, pulverize freeze dried strawberries in a food processor** until finely ground (wait about 10 second before opening food processor allowing the powder in the air to settle a bit. There should be 3 1/2 Tbsp of the strawberry powder). Transfer strawberry powder to whipped butter and blend mixture until combined. Stir in heavy cream followed by powdered sugar and whip mixture 4 - 5 minute longer on medium-high speed, until very pale and fluffy, frequently scraping down sides and bottom of bowl.  Frost cupcakes.

**If you don't own a food processor, you can place the strawberries in a resealable bag, seal bag and crush to fine powder with a rolling pin.
                                                        *This post and photos are property of http://dishingwithdish.blogspot.com/ **

Thursday, February 14, 2013

Valentine's Day Doughnuts!!


don7W
It's been almost a year since my last doughnut-making experience.  I decided to make them for Valentine's Day this year.  It wasn't as much fun making them this time, as my mom wasn't here to help like last time, but I still got it all done.  I decided to make a double batch, because if I was going to go to all that trouble, and use all that oil, I'd better make it worth it!  I was frying for a long time, and my oil kept getting too hot and making my doughnuts too brown, but they still taste great. 
don5W
I made half of the doughnuts pink using the same glaze from last year's recipe (just tinting it pink), and I dipped the rest of them in a chocolate glaze.  I used a Joy the Baker recipe for the doughnuts this year. 
donW

don2W
During kneading (with my Kitchenaid) I added quite a bit of extra flour, and the dough was still very soft and sticky.  I didn't want to add too much, though, so I just followed her directions of lightly flouring the top of the dough before rising for two hours, and when I went to roll it out, it was perfect- just a teeny bit sticky but not sticking to my hands or anything.  A little bit of flour on my Silpat did the trick for rolling. 
don9dW
With the recipe doubled, this made 24 doughnuts and about 70-80 doughnut holes; I'm not kidding!!  They were everywhere!!  Joy says not to re-roll the scraps, so first, with the scraps, I cut out as many doughnut holes as I could.  Then, I did gather the scraps together, lightly knead them, and rolled them out again, cutting a few doughnuts and as many doughnut holes as I could.  I'm not sure why we're not supposed to re-roll the scraps, but nothing terrible seemed to happen when I did.  To cut the doughnuts, I used this round cookie cutter set from Ateco- the 1 inch for the holes, and the 3 inch for the doughnuts. 

Valentine's Day Doughnuts
adapted from Joy the Baker
Makes 12 doughnuts and 30-40 holes
Easily doubled for 24 doughnuts and 60-70 holes
(do not have to double the oil! :))

1 (1/4-oz) package active dry yeast (2 1/2 teaspoons)
2 tablespoons warm water (105–115°F)
3 1/4 cups all-purpose flour plus additional for sprinkling and rolling out dough
1 cup whole milk at room temperature
1/2 stick (1/4 cup) unsalted butter, softened
3 large egg yolks
2 tablespoons sugar
1 1/2 teaspoons salt
1/2 teaspoon cinnamon (optional; I added just a sprinkle)
About 8-10 cups vegetable oil for deep frying


1.  Stir together yeast and warm water in a small bowl until yeast is dissolved. Let stand until foamy, about 5 minutes. (If yeast doesn’t foam, discard and start over with new yeast.)

2.  Mix together flour, milk, butter, egg yolks, sugar, salt, cinnamon, and yeast mixture in mixer at low speed until a soft dough forms. Increase speed to medium-high and beat 3 minutes more.  If dough is incredibly wet and sticky, add more flour until it is only a little bit sticky.  Scrape dough down side of bowl (all around) into center, then sprinkle lightly with flour (to keep a crust from forming). Cover bowl with a clean kitchen towel (not terry cloth) and let dough rise in a draft-free place at warm room temperature until doubled in bulk, 1 1/2 to 2 hours.  I use the turned-off oven with the light on.  (Alternatively, let dough rise in bowl in refrigerator 8 to 12 hours.)

3.  Turn dough out onto a lightly floured surface and roll out with a lightly floured rolling pin into a 12-inch round (1/2 inch thick). Cut out as many rounds as possible with 3-inch cutter, then cut a hole in center of each round with 1-inch cutter and transfer doughnuts to a lightly floured large baking sheet or cutting board(s). Cover doughnuts with a clean kitchen towel (I skipped the towel covering) and let rise in a draft-free place at warm room temperature until slightly puffed, about 30 minutes (45 minutes if dough was cold when cutting out doughnuts).  With the scraps, cut as many doughnut holes as possible from them.  Then, gather the remainder, knead lightly, pat out again and cut doughnuts and holes again. 

4.  Heat 2 1/2 inches oil in a deep 4-quart heavy pot until it registers 350°F on thermometer. Fry doughnuts, 2 at a time, turning occasionally with a wire or mesh skimmer or a slotted spoon, until puffed and golden brown, about 2 minutes per batch. Transfer to paper towels to drain. (Return oil to 350°F between batches.)  Glaze with glaze of your choice, or either the pink or chocolate glaze recipes below.
don9W
Pink Glaze
adapted from Allrecipes

1/3 cup butter
2 cups confectioners' sugar
1 1/2 teaspoons vanilla
4 tablespoons hot water, or as needed
pink food coloring

1.  Melt butter in a saucepan over medium heat. Stir in confectioners' sugar, vanilla and food coloring until smooth. Remove from heat, and stir in hot water one tablespoon at a time until the icing is somewhat thin, but not watery. Set glaze aside until doughnuts are ready to glaze.  Add sprinkles to wet glazed doughnuts.

Chocolate Glaze
from Alton Brown via Joy the Baker
a half-recipe is enough for one batch


1/2 cup unsalted butter
1/4 cup whole milk, warmed
1 tablespoon light corn syrup
2 teaspoons vanilla extract
4 ounces bittersweet chocolate, chopped
2 cups confectioners’ sugar, sifted
1.  Combine butter, milk, corn syrup, and vanilla in medium saucepan and heat over medium heat until butter is melted. Decrease the heat to low, add the chocolate, and whisk until melted. Turn off heat, add the powdered sugar, and whisk until smooth. Place the mixture over a bowl of warm water and dip the doughnuts immediately. Add sprinkles, if desired.  Allow glaze to set for 30 minutes before serving.
**This post and photos are property of http://dishingwithdish.blogspot.com **

Wednesday, February 6, 2013

Raspberry-White Chocolate Ice Cream

raspic4W
This is a perfect ice cream for Valentine's Day!  I made this about a month ago for some guests, and it was a hit with them as well as our fam.  I concocted this recipe using a few other recipes on my blog, namely this White Chocolate recipe and this Chocolate Raspberry one.  You can make it even more festive-looking by incorporating a raspberry puree swirl.  I thought of it, but already had too many other things to do.  Borrowing an idea from the David Lebovitz Choc-Raspberry recipe (link above), I added raspberries (frozen) and fully incorporated them into the mixture, then strained it to remove any seeds.
raspic3W
Raspberry-White Chocolate Ice Cream
by What a Dish! with inspiration from David Lebovitz

2 cups half and half
1 2/3 cups heavy cream
1/3 cup vanilla sugar, divided
1 vanilla bean
3 egg yolks
12 ounces good-quality white chocolate, chopped
1 1/2 cups frozen raspberries, slightly thawed
1 teaspoon vanilla extract

1. Pour the cream and half-and-half into a heavy medium-size saucepan along with about half the sugar. Split vanilla bean and scrape the seeds out with the dull edge of a knife. Add vanilla bean seeds to the milk and half-and-half, and drop in the empty pod. Bring mixture to a simmer.

2. In the meantime, place egg yolks and remaining sugar in a heavy-duty stand mixture and beat at a medium-low speed until lightened and smooth. With mixer running, remove milk mixture from the heat (after it has been brought to a simmer) and slowly beat into the the eggs. If you mix it too quickly, the eggs will scramble. Pour all of the mixture back into the pan and put over low heat.

3. Stir constantly with a wire whisk until the custard slightly thickens. Be very careful at this point- stir constantly and do not let mixture come to a boil. Add the slightly thawed raspberries and whisk. Let mixture come to 160 degrees F, stirring constantly.  If raspberries do not break up enough, you can use an immersion blender to puree them.

4. Have ready a large glass bowl with a fine-mesh strainer fitted over the top. Place the chopped white chocolate into the bottom of the bowl. Remove the raspberry-custard mixture from the heat and pour it through a mesh strainer into the bowl over the white chocolate. It will take a while to filter down. Discard the seeds leftover in the strainer. Stir in the vanilla extract. Whisk very well until all the white chocolate is melted and incorporated. Cover and refrigerate until cold or overnight.

5. Stir the chilled mixture; freeze in an ice cream maker according to the manufacturer's directions.
raspic7W
**This post and photos are property of http://dishingwithdish.blogspot.com/ **

Monday, February 13, 2012

Valentine's Day Chex Mix

Like most Chex Mix recipes, this was fun and easy to make.  It combines melted peanut butter and white chocolate and to coat Chex cereal.  The recipe calls for candy-coated chocolate candies, so I chose to use some Valentine-themed peanut butter M&M's I had on hand (hard to get here- I was so excited to see them!).  This turned out sooo good; it's been hard for us to stop eating it!

Valentine's Day Chex Mix
adapted from Chex
9 cups Rice Chex cereal
1 cup real white chocolate chips or chopped white chocolate
1/2 cup creamy peanut butter
1/4 cup butter
3/4 cup powdered sugar
1/2 cup Valentine's Peanut Butter M&M's
1/4 cup red sprinkles, optional

1.  Place cereal in a large bowl.  In a good-quality saucepan over very low heat, melt white chocolate, butter, and peanut butter together until mostly smooth, stirring frequently.  Pour over cereal, stirring with a rubber or silicone spatula until coated. 

2.  Place 1/2 of cereal in a large covered container (Rubbermaid container or large ziplock bag).  Add powdered sugar, and shake container until cereal is well-coated. 

3.  Meanwhile, stir candies and sprinkles into remaining cereal mixture.  Spread on wax paper to cool and set; about 15-20 minutes.  Combine both cereals in the covered bowl and store covered. 
**This post and photos are property of http://dishingwithdish.blogspot.com**


Wednesday, July 13, 2011

Molten Chocolate Cakes (Chocolate Lava Cakes)

These cakes were so fun to make, eat, and photograph.  What's not fun is the butter content.... but we can just ignore that for now.  I excused it because we were celebrating Father's Day like a month late... my husband was gone on Father's Day.  (I first wrote "Fake Father's Day" but then that sounded like the Father was fake, not the day, and the might have been confusing to some of you.  Sorry). 

This is a recipe I've had my eye on forever, but was recently nudged to make it by the delish-looking photos posted on Eating, Etc.  When I started making these, I thought I had some caramel sauce in the fridge, but I didn't, so we just had these with plain vanilla ice cream.  Still so good, though! 
After baking these, I called everyone down so they could watch me un-mold them.  The kids were totally fascinated by the first one I did... it broke upon impact, releasing hot fudgy goodness.  Then they watched me unmold the rest and were still fascinated, asking how I made the chocolate lava inside, etc.  Try this recipe, at least once!  It's such a cool recipe to make and SOOOO good!!  If you do not own ramekins, you can make this recipe in 8 extra-large muffin cups, or 12 regular ones (just bake for less time). 
Molten Chocolate Cakes
adapted from Allrecipes and Eating, Etc.

1 cup unsalted butter*
8oz semisweet chocolate chips
5 large eggs
1/2 cup sugar

pinch of salt
4 tsp all-purpose flour
6-8 small ramekins
cooking spray
whipping cream or ice cream


1) Preheat oven to 450°F.  (I was more comfy with 400 F, because my oven is crazy). 

2) Melt butter & chocolate in double boiler or medium heat-proof bowl over a saucepan of simmering water; remove from heat.

3) In a separate medium bowl, with a hand mixer, beat eggs, sugar, & salt until sugar dissolves.

4) Mix egg mixture into chocolate until smooth.

5) Stir in flour until just combined.

6) Spray bottom & sides of 6-8 ramekins with cooking spray.

7) Divide batter among ramekins.  May place ramekins on cookie sheet if desired.

8) Bake on middle rack until batter puffs but center is not set. This can vary from 8-12 minutes, depending on size of your ramekins. Mine were done in about 10, I think.

9) Carefully lift cakes from ramekins and serve, inverted, on dessert plates.

10) Top with whipped cream and drizzle with caramel sauce. Serve warm.

*If you use salted butter (like I had to; my store was out of unsalted), just omit the salt, or else the cakes will be too salty.


**This post and photos are property of http://dishingwithdish.blogspot.com/**/

Saturday, February 12, 2011

Chocolate Sugar Cookie Cut-Outs

Happy Valentine's Day!  I wanted to make something different than the usual vanilla sugar cookies this year, so I chose these chocolate ones.  I've made them before and have been very happy with them.  The dough takes a bit to come together, but then you have a wonderful, firm dough that rolls out well (with the help of flour and wax paper) and keeps its shape after baking, but most importantly, tastes awesome.  Since these don't spread during baking, you can space them close together on the cookie sheet.  I sandwiched them together with pink frosting, but you could leave them plain, or just frost singles. 

I was going to give a lot of these away, so I increased the recipe by 50% in order to have enough.  It was SO much dough it was overflowing my KitchenAid.  This made almost 80 cookies..... and I didn't get started till later in the day, so it was a very long night by the time I had finished baking and frosting them all!  Whew!  Once I got a system down for the rolling and baking though, things flowed pretty smoothly, and then I just sat at a stool at the kitchen counter with some good music while I frosted them all.

I really like this recipe for chocolate sugar cookies- I'm sticking with this one.  :)  I do increase the cocoa powder and decrease the flour a bit- I'll post my way below, and I'll also post the original recipe, not the one that is increased by 50%.  :)  Another thing I do is just use softened butter- the original recipe has you cutting in cold butter, but I think that is totally unnecessary.  They turn out wonderfully using softened butter.

Chocolate Sugar Cookie Cut-Outs
adapted from Allrecipes

2 cups confectioners' (powdered) sugar
3/4 cup Dutch process cocoa powder
3 1/4 cups all-purpose flour
1/2 teaspoon salt
1 1/2 cups unsalted butter, softened to room temperature
1 1/2 teaspoons pure vanilla extract
2 eggs

1.  Preheat oven to 350 degrees F (175 degrees C).

2.  In a large bowl, stir together the confectioners' sugar, cocoa, flour and salt until well blended. In a stand mixer, cream the butter. Add eggs and vanilla, and mix in the dry ingredients until a stiff dough forms. It may take a minute to come together.

3.  On a lightly floured surface (I roll between sheets of wax paper, using flour if needed), roll out dough to 1/4 inch thickness and cut into desired shapes using cookie cutters. If the dough is too sticky, chill for a little bit. Place cookies onto an ungreased baking sheet.

4.  Bake for 7 to 10 minutes in the preheated oven, or until the surface appears dry. Allow cookies to cool for a couple minutes on the baking sheet before removing to wire racks to cool completely.
 
5.  Frost, if desired, or make into sandwich cookies with your choice of frosting.
 
**This post and photos are property of http://dishingwithdish.blogspot.com/ **

Wednesday, February 17, 2010

Chocolate Raspberry Cheesecake

For Valentine's Day this year, I made our family this cheesecake from the newest Taste of Home magazine.  It was good, especially if you're a chocolate lover.  I can't take too much chocolate at once, so this was almost too much for me, even thought it was part vanilla cheesecake, part chocolate.  I still enjoyed it though- just in small portions (which is a good idea with cheesecake anyway!).  I really don't like dark or semisweet chocolate at all (sorry, rest of the world!) so I cut back on the amount of chocolate in the batter, and I used milk chocolate for the ganache. 

I thought that there would just be small, delicated little blobs of chocolate batter in this, but it ended up being almost half chocolate.  It was still good, just not what I was expecting from the picture in the magazine. 

I have a tiny, Easy-bake-sized, European oven, and the heating element is on the top (roof).  I should have kept this in mind when I put this very tall cheesecake in the oven, on the middle rack.  Sadly, I didn't take that into consideration, and when I checked the cheesecake at 50 minutes, the whole top was black, and even smoking.  Nice!!  There was really nothing I could do at that point; it wasn't fully baked yet, so I just turned the heat down a tiny bit and moved the oven rack to the lowest position.  No worries though- after it was done, my husband helped me carefully peel off the burned layer (we were cheesecake doctors!), and it looked and tasted fine underneath.  The chocolate ganache helped to cover any ugliness. 

Chocolate Raspberry Cheesecake
from Tasteofhome.com

1-1/2 cups cream-filled chocolate sandwich cookie crumbs (Oreos, people)
2 tablespoons butter, melted
4 packages (8 ounces each) cream cheese, softened
1-1/4 cups sugar
1 cup (8 ounces) sour cream
1 teaspoon vanilla extract
3 eggs, lightly beaten
9 ounces semisweet chocolate, chopped (I used 7 oz)
1/2 cup seedless raspberry preserves

6 ounces milk or semisweet chocolate, chopped
1/3 cup heavy whipping cream
Fresh raspberries and whipped cream, optional

Place a greased 9-in. springform pan on a double thickness of heavy-duty foil (about 18 in. square). Securely wrap foil around pan. Combine cookie crumbs and butter; press onto the bottom of prepared pan. (I never bother to wrap in foil or do a water bath, but the directions are here in case you want to). 

In a large bowl, beat cream cheese and sugar until smooth. Beat in sour cream and vanilla. Add eggs; beat on low speed just until combined. Set aside 1-1/2 cups; pour remaining batter over crust.

In a microwave, melt chocolate; stir in preserves until blended. Stir in reserved batter just until blended. Drop by tablespoonfuls over the plain batter (do not swirl). Place springform pan in a large baking pan; add 1 in. of hot water to larger pan.

Bake at 325° for 65-75 minutes or until center is just set and top appears dull. Remove springform pan from water bath. Cool on a wire rack for 10 minutes. Carefully run a knife around edge of pan to loosen; cool 1 hour longer.

For topping, place chocolate in a small bowl. In a small saucepan, bring cream just to a boil. Pour over chocolate; whisk until smooth. Cool slightly. Spread over top of cheesecake. Refrigerate overnight. Garnish with raspberries and whipped cream if desired. Yield: 16 servings.

**This post and photos are property of http://dishingwithdish.blogspot.com/ **

Wednesday, February 18, 2009

My Valentine's Day Cake

Back in January, I took a short (2-day) cake decorating class. We learned how to frost a cake smoothly, do borders, ruffles, bows, etc., and make roses. In the class, we used an icing made of shortening and powdered sugar. This type of icing is great for decorating, especially making roses, but not so great for eating. It tastes like gritty shortening- yuck. So I wanted to make an all-butter version. I did for my Valentine's Day cake. It was fine for doing everything but roses. It was too soft to do roses, and my roses came out all schlumpy and melty-looking. Then, I placed them akwardly on the cake; not close enough together, so that part was wierd. However, the cake tasted way better than the one I brought home from cake decorating class.

I used my fave yellow cake recipe and added the seeds from one vanilla bean to the batter- it was heavenly. I cut the cake recipe in half- this made a single-layer cake; double the recipe for an 8-inch, 2-layer cake. Using wax paper to line your cake pan is an easy way to make sure your cake doesn't stick to the pan. Take the cake pan you are going to use, and place it on a sheet of wax paper. Trace around the pan, and cut that shape out. Place in your greased and floured pan, and then grease the top of the wax paper.

Favorite Vanilla-Yellow Cake
adapted from Allrecipes

1/2 cup unslated butter, softened
3/4 cup white sugar
4 egg yolks
1/4 cup and 2 tablespoons milk
1 teaspoon pure vanilla extract
1 cup cake flour
1 teaspoon baking powder
1/4 teaspoon salt
1 vanilla bean, split, seeds scraped out

1.  Preheat oven to 350 degrees F (175 degrees C). Butter and flour one 8-inch round pan, or a heart-shaped pan. Line bottom with waxed paper and butter the wax paper. Whisk together the flour, baking powder and salt. Set aside.

2.  In a large bowl of a stand mixer, cream together the butter and sugar until light and fluffy. Beat for 3-5 minutes to get a nice, light and fluffy cake. Beat in the egg yolks one at a time, then stir in the vanilla and vanilla bean seeds. Beat in the flour mixture alternately with the milk, mixing just until incorporated. Pour batter into prepared pan. Tap pan on countertop a few times to get rid of air bubbles.

3.  Bake in the preheated oven for 25 to 30 minutes, or until top springs back when lightly tapped, or toothpick comes out clean. Cool 15 minutes before turning out onto cooling rack.

**This post and photos are property of http://dishingwithdish.blogspot.com/ **