Showing posts with label dessert. Show all posts

Tuesday, June 2, 2026

Spanish Magdalena Muffins

I had these lemon-scented muffins sometimes growing up in Spain, and as an adult, I was able to find them in Portugal for my kids. Now in Italy, I get them during "Spanish Week" at Lidl, lol. But they're not always available, so when they're not, here is a great, easy recipe for them. They do use a lot of olive oil. That's not a problem for me here; since good-quality olive oil is so inexpensive, and I always have a lot on hand. If you're in the US, a cheaper olive oil would probably work fine. 

Note: Batter must be chilled before baking. 

Spanish Magdalena Muffins
adapted from The Mediterranean 

1 3/4 cups all-purpose flour (210g)
1 3/4 teaspoons baking powder
1/4 teaspoon kosher salt
3 large eggs, at room temperature
3/4 cup granulated sugar (150g), plus extra for sprinkling
Zest from 1 lemon
2/3 cup extra virgin olive oil (160ml)
1/4 cup whole or 2% milk (80ml)
1 teaspoon vanilla extract

1. Combine the dry ingredients: In a medium bowl, whisk together the flour, baking powder, and salt.
Beat the eggs. In a large bowl with a hand mixer, or the bowl of a stand mixer fitted with the whisk attachment, beat the eggs, sugar, and lemon zest on medium-high speed until pale and doubled in volume, about 3 minutes.

2, Add the wet ingredients: While continuing to beat the eggs on medium-high speed, pour in the olive oil in a slow, steady stream. Pour in the milk and vanilla extract, and mix on low until incorporated.
Fold in the dry ingredients. Add the flour mixture and carefully fold with a rubber spatula until the mixture is combined and no dry lumps of flour remain, making sure to scrape the bottom and sides of the bowl.

3. Chill the batter- cover the bowl and let it rest in the refrigerator for 1 hour. About 20 minutes before the muffin batter is done resting, preheat the oven to 425°F. Line a standard muffin pan with muffin tin liners. Scoop or pour the batter into the prepared muffin pan, dividing it evenly among the 12 wells. Sprinkle the top of each muffin with a pinch of granulated sugar.

4. Bake the muffins: Set the muffin pan in the oven and reduce the oven temperature to 400°F. Bake for 15 to 18 minutes, or until a toothpick inserted into the center of a muffin comes out clean.

5. Let the muffins cool in the pan for 10 minutes, then turn them out onto a wire rack to cool before serving. Serve warm or at room temperature. The muffins will keep in an airtight container for up to 4 days.
**This post and photos are property of http://dishingwithdish.blogspot.com/ **

Saturday, March 14, 2026

Pistachio Cookie Cups

These pistachio cookie cups are SOOOOO good. They're a great use for pistachio paste, which is widely available here in Italy, and something I often send friends and family back in the States. You need a mini muffin tin for this, plus the pistachio paste and some other ingredients you may have to specially buy. But these are worth it! They are delicious and also very impressive-looking. 

PS: Happy Pi Day! I made these a few weeks ago, not for Pi Day, but one could make them for Pi Day since they kind of look like little pies. Lol. 
Pistachio Cookie Cups
adapted from Food and Wine

1/2 cup (1 stick) butter
1 1/2 cups all-purpose flour
1/2 teaspoon baking powder
1/2 teaspoon kosher salt
1/4 teaspoon baking soda
1/2 cup packed dark brown sugar
1/4 cup granulated sugar
1 large egg
1 teaspoon vanilla extract
1/4 cup chopped white chocolate (from 1 [4.4-ounce] bar)
1/4 cup chopped salted roasted pistachios, plus more for sprinkling
1/2 cup chopped dark chocolate (about 70% cacao), divided (from 1 [3.5-oz.] bar)
1/2 cup pistachio cream paste/spread 

1. Melt butter in a small saucepan over medium-low. Cook, stirring occasionally, until butter is foamy and milk solids at the bottom of saucepan turn brown, about 5 minutes. (You're making browned butter here.) Immediately pour into a small heatproof bowl; cover and refrigerate until solidified, 45 minutes to 1 hour.

2. Meanwhile, preheat oven to 350°F. Sift together flour, baking powder, kosher salt, and baking soda in a medium bowl and set aside.

3. Beat chilled browned butter, brown sugar, and granulated sugar with an electric mixer (if working with a stand mixer, use the paddle attachment) on medium-high speed until light and fluffy, about 3 minutes. Add egg and vanilla; beat on medium speed until well combined, about 15 seconds. With mixer running on low speed, gradually add flour mixture, beating just until combined, about 1 minute. Fold in chopped white chocolate, chopped pistachios, and 1/4 cup of the chopped dark chocolate until evenly distributed. Portion dough into 24 pieces, about 1 tablespoon each; roll dough into 1-inch balls and place in a 24-cup non-stick mini muffin tray. (I used a cookie scoop for this part- if there is still leftover dough after filling the tray, just divide the rest of the dough between the existing dough balls.)

4. Bake in preheated oven until edges are set, but centers are still slightly soft, 8 to 12 minutes. (May need more time- my oven bakes very fast.) Using a rounded 1-teaspoon measuring spoon, press down center of each cookie to create a well. Let cool in muffin tray on a wire rack for 15 minutes. Loosen edges with a knife and carefully remove cookie cups from muffin tray. Let cool completely on wire rack, 20 to 30 minutes.

5. Microwave remaining 1/4 cup dark chocolate in a small microwave-safe bowl on HIGH until chocolate is mostly melted, 45 to 55 seconds, and stir until chocolate is completely melted. (I just melt on a small pan on the stove, or in a double boiler.) Set aside. Spoon pistachio cream into cooled cookie cups, about 1 teaspoon each. Drizzle melted chocolate over filled cookie cups. Sprinkle with pistachios. Refrigerate, uncovered, until chocolate is set, about 5 minutes. Store in an airtight container at room temperature for up to 1 week.


**This post and photos are property of http://dishingwithdish.blogspot.com/**

Monday, October 13, 2025

Almond Croissants- Croissants aux Amandes

These are so good! And I had no idea how easy they were to make until I read David Lebovitz's newsletter and accompanying recipe. You just need day old croissants and a few other ingredients. Luckily for me, day-old croissants are super cheap at one of my local stores. I made 6 of these and they were gone in no time. I really need to make them again soon. 


Croissants aux Amandes 
Syrup
1/2 cup (125ml) water
1/4 cup (50g) granulated sugar
2 tablespoons dark rum, amaretto, or kirsch (optional)

Frangipane
1/2 cup (50g) almond flour 
1/4 cup (50g) granulated sugar
1 large egg, at room temperature
3 1/2 tablespoons (50g) butter, at room temperature
A few drops pure almond extract (I used a little more than 1/4 tsp)
Pinch of salt
4 day-old croissants
1/2 cup (40g) sliced almonds
Powdered sugar

1.  Make the syrup by heating the water and sugar in a medium saucepan until the mixture comes to a boil, stirring occasionally. When the sugar is dissolved, remove from heat, let cool to room temperature, then add the liquor, if using.

2.  Preheat the oven to 375ºF (190ºC). Line a baking sheet with parchment paper or a silicone baking mat.

3.  Make the frangipane by beating the almond flour, sugar, egg, butter, almond extract, and salt in the bowl of a stand mixer fitted with the paddle attachment (or by hand) at medium-to-high speed until the frangipane is light and fluffy, about 3 minutes.

4.  Slice each croissant in half horizontally, stopping just before you reach the other side, so it can open like a book. Place them on the prepared baking sheet. Liberally brush the insides, both top and bottom, with the syrup. You want to make sure both sides are completely saturated with the syrup. Don’t be shy- you really want to saturate the croissants. 

5.  Spread the inside of each croissant with 2 tablespoons of the frangipane. Press down firmly on each croissant so the top is relatively flat. Spread the remaining frangipane over the tops of each croissant.

6.  Sprinkle each croissant with 2 tablespoons of sliced almonds and bake the croissants until golden brown, about 15 minutes, but check them a few minutes before the recommended baking time. Let them cool a few minutes, then sprinkle them with powdered sugar. Serve warm or at room temperature.


**This post and photos are property of http://dishingwithdish.blogspot.com/ **

Thursday, June 26, 2025

Cherry Crisp


This cherry crisp was so delicious! And easy. It uses frozen cherries so you can make it anytime. I loved the almonds in here. I also added a bit of almond extract to the cherries. 
Cherry Crisp
adapted from Valerie's Kitchen 

36 ounces frozen dark cherries, no sugar added, thawed (3 12-ounce bags)
1 tablespoon fresh lemon juice
1 teaspoon pure vanilla extract
1/4 to 1/2 teaspoon almond extract, optional
3/4 cup granulated sugar
1 ½ cups all-purpose flour, divided
3/4 cup old fashioned oats
1/2 cup light brown sugar
1/2 cup sliced almonds, divided
1/2 teaspoon salt
3/4 cup butter, cut into 1-inch slices

1.  Preheat oven to 375 degrees F. Lightly coat a 9- x 13-inch baking dish with non-stick cooking spray.
In a large bowl, toss cherries with lemon juice, vanilla and optional almond extract. Add granulated sugar and ¼ cup flour and stir to combine. Pour into the prepared baking dish.

2.  In a medium bowl, combine remaining 1 ¼ cups flour, oats, brown sugar, ¼ cup sliced almonds, and salt. Work in the butter with a pastry blender or fork until the mixture resembles coarse crumbs. Sprinkle over the fruit. Sprinkle with remaining almonds.

3.  Bake in preheated oven for 45 to 50 minutes, or until topping is golden brown.
**This post and photos are property of http://dishingwithdish.blogspot.com/ **

Monday, October 28, 2024

Chewy Almond Blondies

Yum- I think these are some of the best blondies I've ever made. They use a "Frangipane"- a mix of almond flour, butter, and sugar that's used to fill desserts, like almond croissants in France. The original recipe author was inspired by French almond croissants and came up with this recipe. I absolutely love the almond filling mixed with buttery blondie batter. My fam enjoyed these too. I need to make them again soon! Note: This recipe called for unsalted butter but I just used regular, salted butter. 


Chewy Almond Blondies  
adapted from An Edible Mosaic

Frangipane:
4 tablespoons butter, melted
6 tablespoons granulated white sugar
3/4 cup almond flour
1/4 teaspoon salt
1 large egg
3/4 teaspoon almond extract
1/4 teaspoon pure vanilla extract

Blondies:
10 tablespoons butter
1/2 cup granulated white sugar
1/4 cup light brown sugar lightly packed
1 large egg
1/2 tablespoon pure vanilla extract
1/4 teaspoon almond extract
1 cup all-purpose flour
1/4 teaspoon salt

Topping:
6 tablespoons sliced almonds
1 tablespoon powdered sugar for garnish

1. For the Frangipane: Add all ingredients to a blender or food processor, and process until smooth.

2. For the Blondies: Preheat the oven to 350F. Line an 8 by 8-inch baking pan with parchment paper so it hangs over all 4 sides. (I skipped this because we just eat them right out of the pan.) 

3. Heat the butter, white sugar, and brown sugar in a large microwave-safe bowl in the microwave, or in a double boiler on the stovetop. Once the butter is melted, stir until the sugar is fully dissolved and mixture is thick like caramel (this takes about 2 minutes). Stir in the egg, vanilla extract, and almond extract. Then stir in the flour and salt, being careful not to over-mix.

4. Spread the blondie batter evenly into the bottom of the prepared baking dish. Drizzle on the frangipane. Sprinkle on the sliced almonds. Bake until the outside is golden and the center is puffed, about 20 to 30 minutes. Be careful not to over-bake! Less time is better so you don't dry these out. 

5. Cool to room temperature, and then dust the top with powdered sugar, cut, and serve.

Storage: You can store these bar cookies in an airtight container at room temperature for up to 3 days, in the fridge for up to 1 week, or in the freezer for up to 3 months.
**This post and photos are property of http://dishingwithdish.blogspot.com/**

Friday, March 26, 2021

Dulce de Leche Cheesecake Bars

The whole fam really enjoyed these cheesecake bars.  I actually made them back in December and am just getting around to putting them on here- lol.  I wasn't super happy with the way the pics turned out but I'm going with them anyway.  
Dulce de Leche Cheesecake Bars

CRUST:
2 cups (8 ounces) graham cracker crumbs (about 16-17 rectangles)
2 tablespoon granulated sugar
1/4 teaspoon ground cinnamon
10 tablespoons (5 ounces) butter, melted

CHEESECAKE BATTER:
3 (8-ounce) packages cream cheese, softened to room temperature
1 cup (7.5 ounces) granulated sugar
1/3 cup sour cream
1/2 cup dulce de leche 
2 teaspoons vanilla extract
3 large eggs

GLAZE:
2/3 cup dulce de leche
1 tablespoon heavy cream or whole milk

1.  Preheat the oven to 350 degrees F. Line a metal 9X13-inch pan with aluminum foil or parchment paper (for easy lifting of the bars after they cool and easier cutting). Lightly grease with nonstick cooking spray.

2.  For the graham cracker crust, combine the graham crackers, granulated sugar, and cinnamon. Add the butter and stir until the crumbs are evenly moistened. Press the crumb mixture into the bottom of the prepared pan. Bake for 10 minutes until lightly golden around the edges. Cool while mixing the cheesecake batter.

3.  With an electric mixer (stand or handheld), mix the cream cheese, granulated sugar and sour cream together until light and creamy, 1-2 minutes. Add the dulce de leche and mix until well-combined. Add the vanilla and eggs and mix until just combined (don't overmix or the cheesecake may crack while baking).

4.  Spread the cheesecake batter evenly over the crust and bake for 30-35 minutes until the edges are puffed and center is soft-set (not firm but no longer jiggly). Cool completely.

5.  In a microwave-safe bowl, add the dulce de leche and heavy cream. Heat for 20-second intervals, stirring in between, until pourable. (You can also use a small saucepan on the stove.)  Add additional milk/cream if the mixture is too thick. (The exact amount of milk/cream will depend on the brand of dulce de leche.) Spread the glaze over the cooled cheesecake. Refrigerate until chilled.

**This post and photos are property of http://dishingwithdish.blogspot.com/ **

Friday, January 29, 2021

Cinnamon Roll Cheesecake Bars

I made these awhile ago- I think when it was still summer weather.  Lol.  The original recipe calls for making it in a blender, but I thought that was unnecessary and I was right- I just used my stand mixer.   

Cinnamon Roll Cheesecake Bars
adapted from Oh Sweet Basil

Crust:
1.5 Cups Graham Cracker Crumbs
1/4 Cup Brown Sugar
6 Tablespoons Butter melted
1 Teaspoon Cinnamon

Filling
16 Ounces Cream Cheese 2 packages, softened
1/2 Cup Sour Cream room temperature
2/3 Cup Sugar
2 Large Eggs room temperature
1 Tablespoon Vanilla

Cinnamon Swirl
4 Tablespoons Butter melted
1 Cup Dark Brown Sugar
1 Teaspoon Cinnamon
1/4 Cup Flour

1.  Crust: Preheat an oven to 350 degrees.  In a bowl, combine the melted butter, graham crackers, brown sugar and cinnamon until it appears to be wet sand.  Press into an 8x8" baking dish and bake for 8 minutes. Remove to cool.

2.  Filling:  Turn the oven down to 325.  Using a blender, stand mixer, or hand mixer, combine the cream cheese, sugar and vanilla until smooth.  Add the sour cream and beat until smooth again.  Add the eggs, one at a time until smooth.  Pour half of the filling over the crust, dot with cinnamon swirl (directions below) and carefully swirl with a knife.  Repeat filling and swirling one more time.  Bake at 325 for 30-40 minutes or until the middle doesn't jiggle too much.  (Don't overbake- you want a *little* jiggling.)  Refrigerate two hours to set.

3.  Cinnamon Swirl:  Stir the flour, brown sugar, cinnamon and butter together until smooth.

**This post and photos are property of http://dishingwithdish.blogspot.com/ **

Thursday, July 30, 2020

Homemade Churros

These were so much fun to make!  We made them back during our "Spring Break" while we were locked down.  We ended up making three batches that first day, lol!  Then I had to make them again, since we ate them so fast that first time that I never got a pic.  We did use a churro maker for this.  Supposedly one can use a pastry bag, but I didn't want it to burst everywhere, so I got a "Star Blue" churro maker from Amazon. It works very well!  And has a lot of different tip designs for the nozzle.  If you choose to use a pastry bag, I'd view some Youtube videos first to get the gist of what to do.  

These were easier to make than I thought.  You cook together a simple dough on the stove and then pipe it out.  We didn't pipe these out right into hot oil, but rather piped them onto a sheet of parchment paper (a few pics down) so we could lift them up and into the oil when we were ready.  It worked out well; they didn't stick to the paper at all.  The hardest part of these is cleaning up any mess you might make from deep-frying.  (Not my fave thing at all, but worth it every once in a while... like once or twice a year.  Lol.)

We coated these in just sugar, like in Spain (no cinnamon there), or ate them plain; my fave way to eat them when I was a kid in Spain.  We served these with thick Italian hot chocolate; similar to the Spanish version.


Homemade Churros
adapted from Star Blue's Churro Cookbook

1 cup water
2 1/2 tablespoons sugar
1/2 teaspoon salt
2 tablespoons canola, sunflower, or vegetable oil
1 cup all-purpose flour
2 quarts (more or less, depending on what pan you use) oil for frying
1/2 cup white sugar, to taste
1 teaspoon cinnamon, to taste (optional; we left it off)

1.  In a small saucepan over medium heat, combine water, 2 1/2 tablespoons sugar, salt, and 2 tablespoons oil.  Bring to a boil and remove from heat.  Stir in flour until mixture forms a ball.  

2.  Heat oil for frying in deep-fryer or deep skillet or saucepan to 375 F.  (190 C).  Pipe strips of dough onto sheets of parchment paper and lift into oil when ready, OR pipe directly into hot oil using a churros maker or piping bag.  Fry until golden; drain onto paper towels.  

3.  Place sugar (and optional cinnamon) in a shallow bowl.  Roll drained churros in sugar and serve.  
**This post and photos are property of http://dishingwithdish.blogspot.com/ **

Wednesday, May 13, 2020

Blueberry Cobbler (Using Frozen Blueberries!)


This cobbler was so good!!  It reminds me of a recipe my Aunt used to make- you layer fruit, batter, and then pour boiling water on top of the whole thing and bake.  It sounds weird but it turns into this delicious combo.  Plus, using frozen berries makes it super easy (and pretty cheap, too).  I used 2, 12 oz. of frozen blueberries for this.  My baking dish was pretty deep, though, and while it was really good this way, I wonder what adding one more bag of blueberries would do- I want to try that next time and I'll update.  We had this in lieu of dinner tonight with some vanilla ice cream.  :)

Update: I made this again with 3, 12-oz bags of frozen blueberries for my deeper-dish 9x13 and it was a good amount. For a regular, more shallow 9x13, I'd use 2 bags. 

Blueberry Cobbler (Using Frozen Blueberries!)
adapted from Reluctant Entertainer

5-7 cups frozen blueberries, or fresh (I used 2 or 3, 12 oz. bags of frozen*)
1 lemon juiced
6 Tbsp butter melted
1 cup milk
1 cup sugar
1/2 tsp salt
2 tsp baking powder
2 cups flour
1/2 tsp vanilla extract
1/2 cup sugar
2 Tbsp cornstarch
2 cups boiling water

1.  Preheat oven to 375 degrees.  Spray a 9x13 pan with cooking spray. Lay the blueberries on the bottom,  and squeeze juice of 1 lemon over the berries.

2.  In a medium bowl, mix together the melted butter, milk, sugar, salt, baking powder, flour, and vanilla. Pour over the berries.

3.  In the same bowl, add the remaining 1/2 cup of sugar and 2 Tbsp cornstarch. Mix together and sprinkle on top of the cobbler mixture.

4.  Pour 2 cups of boiling water over the entire cobbler. Bake for about 1 hour. (Check at 45-50 minutes. Biscuit topping should be golden brown, like pictured.) Let cool a few minutes and serve warm with vanilla ice cream.

**This post and photos are property of http://dishingwithdish.blogspot.com/ **

Friday, April 24, 2020

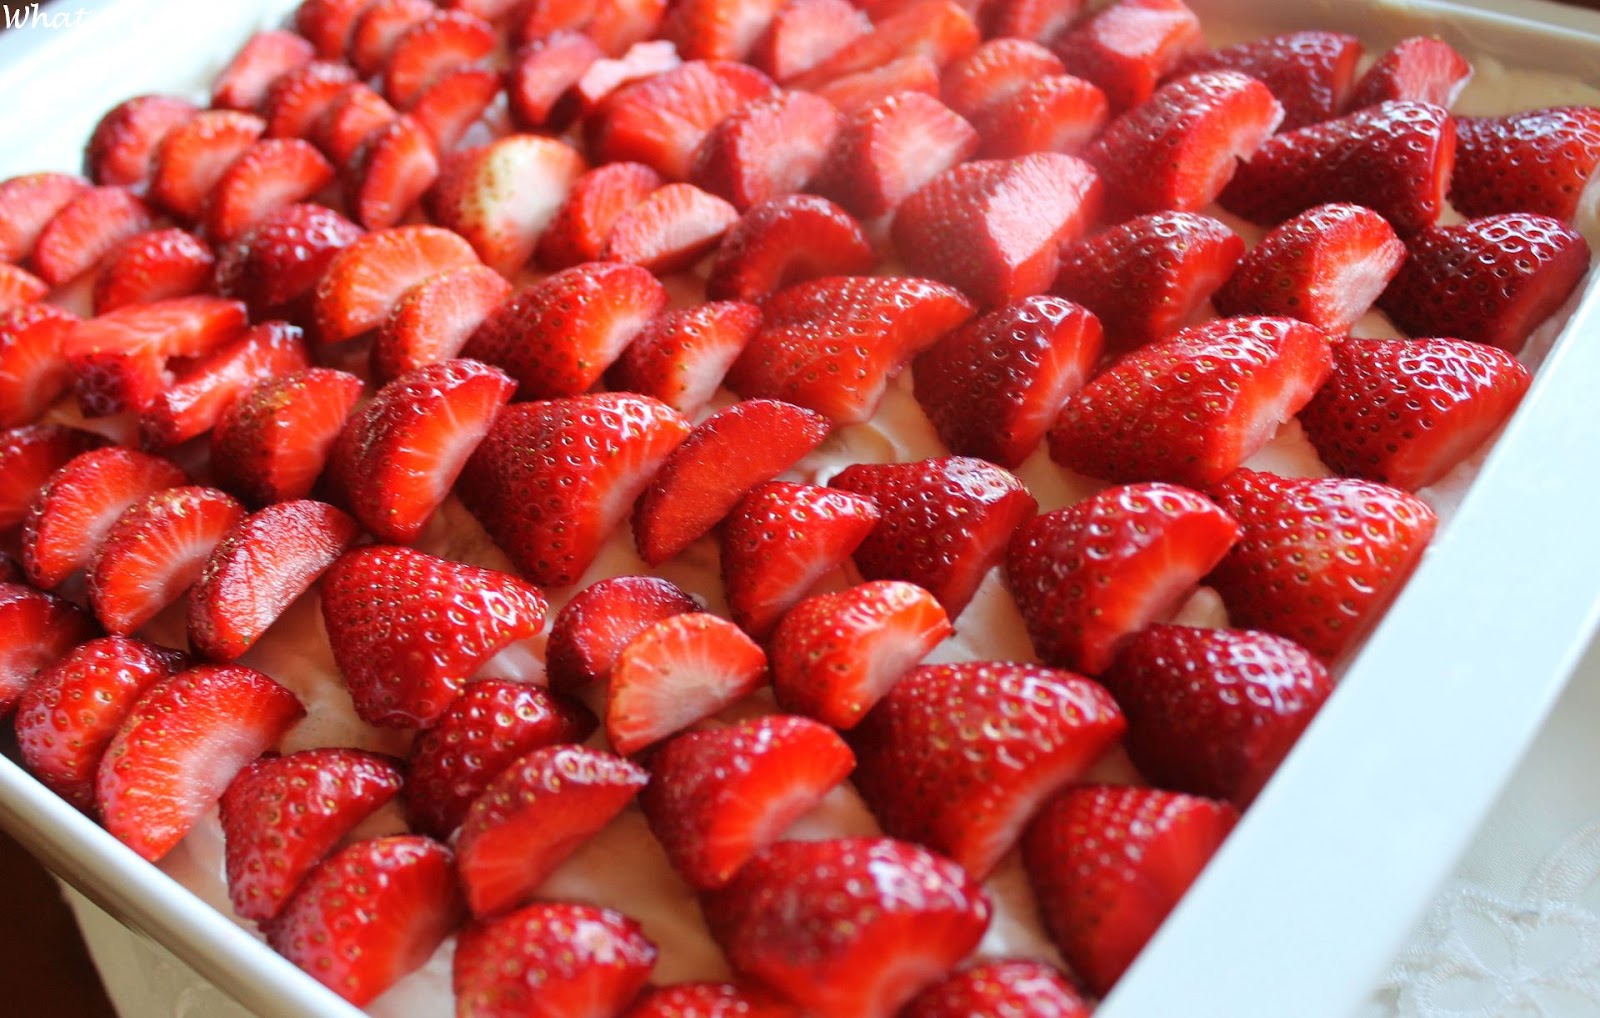
Strawberry Tiramisu

I love Strawberry Tiramisu.  I first made it in a cooking class, and I finally made it at home recently, twice.  Lol.  For the liquid, instead of the coffee that's in usual Tiramisu, I used an Italian red multi-fruit juice.  I also cooked the egg yolks and sugar together in a double boiler until it reached 160 degrees F, to quell any raw-egg fears.  Although... I think European eggs/chickens are vaccinated against salmonella so it would have been fine.  But anyway... it worked well.  I just did it first so it could cool off before adding to other ingredients. 

This makes a lot!!  It filled up a giant 9x13 pan.  It wouldn't work in a regular one, I think. You need a pan with deep sides, for sure. 

Strawberry Tiramisu
from myself :)

5 egg yolks
1 cup granulated sugar
750 grams mascarpone cheese (about 1.5 pounds), room temperature
1 1/2 packages lady fingers (estimated... buy 2 packages, you might need more or less)
1 1/2 cups heavy cream
1/4 cup powdered sugar
1 teaspoon vanilla extract
1 1/2 kilo strawberries, rinsed, hulled and sliced in half (3-4 grocery store packages)
1/2 cup or more of any red multi-fruit juice (not cranberry) or orange juice or lemoncello, if you want

1.  In a double boiler, cook egg yolks and granulated sugar, whisking constantly, until it reaches 160 degrees F.  Set aside off the heat to cool slightly.

2. Beat egg mixture with mascarpone until light and fluffy.

3.  In a separate bowl, beat heavy cream until soft peaks form.  (I used my stand mixer for the cream, and my hand mixer for the egg mixture.)  Carefully fold the egg mixture into the cream with a silicone spatula. 

4.  Dip ladyfingers in juice quickly, on both sides.  You want the liquid to seep into them but not too much.  You don't want them to be soggy, or too dry.  You can dip one first and bite into it to test, if you've never done this before.  As you dip, lay the dipped lady fingers in the bottom of a large (deep) 9x13 pan in a single layer.  Top with half of the mascarpone cream mixture.  Top with an even layer of halved strawberries.  Repeat layers- dipped ladyfingers, mascarpone cream mixture, strawberries.  Best refrigerated for a few hours; overnight is best. 
**This post and photos are property of http://dishingwithdish.blogspot.com/**/

Saturday, April 18, 2020

Buttermilk Cinnamon Rolls with Caramel Icing


I made these a few weeks ago for a special breakfast.  My daughter loves cinnamon rolls but I only bake them once or twice a year, lol.  Luckily I bought a fresh jar of yeast right before this craziness started, and my local store still had flour regularly until a few days ago.  I'm sorry for those who can't get these things right now. (I can't find any more yeast to buy now, though... hope there is more when I need it!)

Anyway.... these cinnamon rolls were so good! I took a recipe from Mel's Kitchen Cafe for the rolls themselves and used my own caramel icing.  I loved this combo.  The buttermilk cinnamon rolls were so fluffy and tender.  I think I'll use this as my base for cinnamon rolls from now on and just change up the icing.

Buttermilk Cinnamon Rolls with Caramel Icing
adapted from Mel's Kitchen Cafe and Here

ROLLS:
3/4 cup buttermilk, warm (try pouring the buttermilk in a glass liquid measuring cup and microwave for 1 minute on 50% power)
6 tablespoons butter, melted and cooled
3 large eggs
1/4 cup (1 3/4 ounces) sugar
1 tablespoon regular* or instant yeast
1 1/4 teaspoons salt
3 1/2 to 4 1/2 cups flour

FILLING:
1/4 cup (1/2 stick) butter, softened to room temperature
1 cup brown sugar
2 teaspoons cinnamon

Caramel Icing:
1/2 cup butter
1/2  cup brown sugar
1/2 tsp salt
1/3 cup heavy whipping cream (can just use milk, too)
2 tsp vanilla
1 1/3 cups powdered sugar

1.  For the dough, add the warmed buttermilk and butter to a stand mixer fitted with the dough hook (or you can use a large bowl and mix with a wooden spoon). With the mixer running, add the eggs, sugar, yeast, salt and 1 cup of the flour. *If using regular (non-instant) yeast, proof in a bowl first with warm buttermilk and a pinch of sugar- then continue on. 

2.  Continue adding flour, just until the dough pulls away from the sides of the bowl. It should be very soft but not so sticky that it leaves a ton of residue on your fingers. Let it knead for just 1-2 minutes until it has come together in a soft, tacky ball.

3.  Place the dough in a large, lightly greased bowl and cover the top tightly with plastic wrap. Let the dough rise in a warm place until doubled, around 2 to 2 1/2 hours, depending on the warmth of your kitchen (you can speed up the rising by placing the covered bowl of dough in a very lightly warmed oven).

4.  Meanwhile, lightly grease a 9X13-inch baking dish   In a small bowl, mix the brown sugar and cinnamon together. Set aside.

5.  When the dough is ready, turn it out onto a lightly greased counter and press it into a 16 by 12-inch rectangle.  Gently spread the softened butter over the rectangle, using an offset spatula or rubber spatula or just your fingers.

6.  Sprinkle on the brown sugar mixture, leaving a 1/2-inch border along the top and bottom edges. Lightly use the palms of your hands to press the brown sugar mixture into the butter, adhering it to the dough.
Lift the longest edge closest to you and begin rolling the dough into a tight log. Pinch the seam closed and roll the log so it is seam side down. Gently stretch the log to be 15- or so inches in length with an even diameter all the way throughout and pat the ends to even them up.

7.  Using a serrated knife, (or a piece of thread or floss) slice the log into 12 evenly sized rolls (or more if you like your rolls thinner). Arrange the rolls cut side down on the prepared baking pan and cover with lightly greased plastic wrap. Let the rolls rise in a warm place until doubled, 1 to 1 1/2 hours; it's really important to let them rise well or else they won't be light and fluffy after they've baked. (You can put them in the fridge overnight here.... works out perfectly.  Just remove from the fridge while the oven preheats in the morning.)

8.  Bake at 350 degrees for 22-25 minutes, until the rolls are very lightly golden on top and cooked through but not overly browned.

9.  While rolls are baking, prepare the caramel icing: Melt butter in a saucepan over low heat. Add the brown sugar and salt and stir until combined. Continue cooking over low heat for another 5 minutes or until sugar is dissolved, stirring constantly. Add the heavy whipping cream or milk and stir to combine. Remove from heat and add vanilla. Whisk in the powdered sugar until nice and smooth. (I always have lumps in my icing because I'm too lazy to sift the powdered sugar.... but you can if you want.)

7. Remove rolls from oven and pour on icing immediately, or let them cool a few minutes and then pour on. Let cool slightly and serve.

**This post and photos are property of http://dishingwithdish.blogspot.com/**/

Sunday, April 12, 2020

Lemon Curd Bars


Happy Easter!! I was going through old magazines for my son's at-home art project the week before last.  I came across a few Cook's Illustrated magazines and got sidetracked looking at them.  I enjoy the magazines but haven't really make much from them.  I decided on these Lemon Bars.  After making them, I realized they are really lemon curd bars- not traditional lemon bars I'm used to.  They reminded me of these Cranberry Curd Bars, in both texture and in the way they're prepared.  You prepare a lemon curd on the stove, then bake it on the par-baked crust a few minutes until set. 

Lemon Curd Bars
adapted from Cook's Illustrated

Crust:
1 cup (5 ounces) all-purpose flour
1/4 cup (1 3/4 ounces) granulated sugar
1/2 teaspoon salt
8 tablespoons butter , melted

Filling:
1 cup (7 ounces) granulated sugar
2 tablespoons all-purpose flour
2 teaspoons cream of tartar
1/4 teaspoon salt
3 large eggs plus 3 large yolks
2 teaspoons grated lemon zest plus 2/3 cup juice (4 lemons)
4 tablespoons butter , cut into 8 pieces
confectioner's sugar, optional

1. For the crust: Adjust oven rack to middle position and heat oven to 350 degrees.  Spray a an 8-inch baking pan with cooking spray. 

2.  Whisk flour, sugar, and salt together in bowl.  Add melted butter and stir until combined.  Transfer mixture to prepared pan and press into even layer over entire bottom of pan- do not wash bowl.  Bake crust until dark golden brown, 15-20 minutes, rotating pan halfway through baking.  

3. For the filling: While crust bakes, whisk sugar, flour, cream of tartar, and salt together in now-empty bowl. Whish in eggs and yolks until no streaks of egg remain.  Whisk in lemon zest and juice.  Transfer mixture to saucepan and cook over medium-low heat, stirring/whisking constantly, until mixture thickens and registers 160 degrees, 5-8 minutes.  Remove from heat; stir in butter.  Strain mixture through a fine-mesh sieve set over bowl.  (Straining removes the lemon zest and any accidental cooked egg bits.)

4.  Pour filling over hot crust and tilt pan to spread evenly.  Bake until filling is set and barely jiggles when pan is shaken; 8-12 minutes.  Let bars cool completely, at least 1.5 hours.  Before serving, dust bars with confectioners sugar, if desired.  
**This post and photos are property of http://dishingwithdish.blogspot.com/**