Showing posts with label casserole. Show all posts

Thursday, March 5, 2026

King Ranch Tortilla Casserole

I really like this recipe- I've made it about 4-5 times in the last few months. It's rich, flavorful, and makes a lot. (The leftovers are great.) It actually makes a large 9x13 pan (I use my deep dish pan for this). You can cut it in half and make 2 9x9 pans. I did that last time so we could save one for later.

King Ranch Tortilla Casserole

3 tablespoons unsalted butter (can use half olive oil)
1 red bell pepper, stemmed, seeded, and chopped (about 1 2/3 cups)
1 yellow/white onion, chopped (about 1 1/2 cups)
1 tablespoon chili powder
2 teaspoons ground cumin
3 1/2 cups chicken broth
1/4 cup all-purpose flour
3 cups shredded rotisserie chicken (about 1 rotisserie chicken)
1 (10-ounce) can diced tomatoes and green chiles (such as Rotel)
1 (4-ounce) diced green chiles (I use Hatch)  
3/4 cup heavy cream
3/4 cup sour cream, plus more for garnish
1 teaspoon kosher salt
2 cups shredded Pepper Jack cheese (about 8 ounces), divided (may need a bit less)
12 (5 1/2-inch) white corn tortillas, warmed, divided
Sliced avocado, chopped tomatoes, and fresh cilantro leaves, for garnish, optional

1. Preheat oven to 425°F. Grease a deep-dish 9x13 baking dish. Melt butter in a 12-inch cast-iron skillet or large pot over medium-high. Add bell pepper and onion; cook, stirring occasionally, until softened, about 6 minutes. Add chili powder and cumin, and cook, stirring often, until fragrant, about 1 minute. Add chicken broth; bring to a boil over high, stirring occasionally. Boil until broth is reduced by about one-third, 8 to 10 minutes.

2. Reduce heat to low, and gradually whisk in flour; cook, whisking constantly, until broth mixture thickens slightly, about 1 minute. Remove from heat; stir in chicken, diced tomatoes and green chiles, heavy cream, sour cream, salsa macha verde, and salt until well combined.

3. Spoon 2 cups chicken mixture into prepared baking dish; spread in an even layer. Top evenly with 1/2 cup cheese and 6 tortillas, overlapping slightly and tearing as needed to fit. Repeat layering process with chicken mixture and cheese. Top with remaining 6 tortillas, remaining 2 cups chicken mixture, and remaining 1 cup cheese. Sometimes I don't use all of the cheese. 

4. Bake casserole in preheated oven until bubbly and cheese is browned in spots, 15 to 20 minutes. Garnish with sliced avocado, cilantro, and sour cream. 

**This post and photos are property of http://dishingwithdish.blogspot.com/**

Sunday, August 7, 2022

Zucchini Gratin


Yum- I loved this so much. In fact, I ate most of it myself over the course of a few days. My kids were scared of it and kept calling it "That Zucchini Thing". My husband liked it, but not as much as I did. I'd still make it again just for myself- lol. I've never made a zucchini gratin before. The recipe called for Gruyere cheese, but I had some Provolone Piccante on hand, so I used that, and it was perfect. I assume one could use Gruyere, Provolone, or even white Cheddar. (I didn't have quite enough Provolone on hand, so I ended up using just a bit of regular cheddar in this). 
Zucchini Gratin
adapted from the Kitchn

2 pounds zucchini (about 4 medium or 8 small)
2 medium shallots or 1 red small red onion
2 cloves garlic or 1/2 teaspoon dried minced garlic
4 ounces Gruyere cheese, Provolone, white Cheddar, or another cheese
3/4 cup panko bread crumbs
2 tablespoons grated Parmesan
1 1/2 teaspoons kosher salt, divided
6 tablespoons unsalted butter
3 tablespoons all-purpose flour
1 1/4 cups whole or 2% milk
1/4 teaspoon freshly ground black pepper

1. Arrange a rack in the middle of the oven and heat the oven to 400°F. Coat an 8- or 9-inch square or other 2-quart baking dish with cooking spray or butter.

2. Trim the ends from 2 pounds zucchini and cut crosswise into 1/4-inch thick rounds. Thinly slice 2 shallots. Mince 2 garlic cloves. Grate 4 ounces Gruyere cheese (about 1 1/2 cups) on the large holes of a box grater.

3. Combine 3/4 cup panko bread crumbs, 2 tablespoons grated Parmesan cheese, and 1/4 teaspoon of the kosher salt into a medium bowl. Stir to combine.

4. Melt 6 tablespoons unsalted butter in a Dutch oven or large pot over medium heat. Transfer 2 tablespoons into the breadcrumb mixture. Stir to coat the breadcrumbs.

5. Add the shallot, garlic, and 1/4 teaspoon of the kosher salt to the remaining butter in the Dutch oven and cook over medium heat, stirring occasionally, until softened, 2 to 3 minutes. Sprinkle with 3 tablespoons all-purpose flour and stir constantly for 1 minute to cook out the floury taste. While stirring constantly, slowly pour in 1 1/4 cups whole or 2% milk and stir until no lumps remain and the flour is completely dissolved. Bring just to a full simmer over medium heat, stirring frequently. Add the Gruyère, the remaining 1 teaspoon kosher salt, and 1/4 teaspoon black pepper, and stir until the cheese is melted and the sauce is bubbling. The sauce will be thick and will thin out during baking. Remove the pot from the heat. 

6. Add the zucchini and stir to coat, making sure to separate any stuck together slices. Transfer to the prepared baking dish and spread in an even layer. Sprinkle the gratin with the breadcrumb mixture. Bake until the gratin is golden-brown on top and bubbling around the edges, 28 to 30 minutes. Let cool for 5 minutes before serving.

                                            **This post and photos are property of http://dishingwithdish.blogspot.com/ **

Wednesday, May 20, 2020

Chicken Cordon Bleu Casserole


Yum- I loved this recipe.  It was by far the easiest Chicken Cordon Bleu shortcut recipe I've tried, and the tastiest.  I've never made *actual* chicken cordon bleu- lol!!  I don't want to or need to after this.  (Check out the other recipes I've tried in the link above.)  I increased the sauce on this by 50%, and it was probably too much, but I loooove sauce.  Lol!  It's probably not necessary for normal, non-loving sauce people to increase the sauce.  You decide!  Recipe below is original way with no increases. I served this with rice so I could pour that sauce on.  You know it.

Chicken Cordon Bleu Casserole
adapted from Closet Cooking
(can increase the sauce by 50% if you're feeling extra saucy)

3 tablespoons butter
3 tablespoons flour
1 cup chicken broth
1 cup milk
1 tablespoon lemon juice
1 tablespoon dijon mustard
1 tablespoon grainy mustard
1/2 teaspoon smoked paprika
salt and pepper taste
4-6 boneless, skinless chicken breasts
1/4 pound deli sliced ham (2 slices per breast)
1/4 pound deli sliced swiss cheese (2 slices per breast)
2 tablespoons butter
1 cup panko breadcrumbs
1/4 cup parmigiano reggiano (parmesan), grated

1.  Preheat the oven to 350 F and grease a 9x13 or similar sized baking dish.  Melt the butter in a saucepan over medium heat and cook until it just starts to brown, before sprinkling in the flour, mixing and cooking until it just starts to brown, about 2-3 minutes.

2.  Add the chicken broth and milk, bring to a boil, reduce the heat and simmer until the sauce thickens, about 2-3 minutes, before mixing in the lemon juice, mustards, paprika, salt and pepper and removing from the heat.

3.  Place the chicken breasts in a single layer in a baking pan, top with the ham (2 slices) followed by the cheese (2 slices), and the sauce.

4.  Melt the butter, mix in the breadcrumbs followed by the parmesan and sprinkle it over the chicken in the pan. Bake in a preheated 350F/180C oven until the chicken is cooked through, the breadcrumbs are golden, and the sides are bubbling, about 30-40 minutes.
**This post and photos are property of http://dishingwithdish.blogspot.com/ **

Friday, April 20, 2018

Greek-Style Lemon Chicken & Orzo Bake

A friend posted this on Facebook and I knew I had to make it right away- I love lemon, greek flavors, orzo, and simple combo meals like this (pasta + chicken bakes together).  The chicken is coated in a spice mixture of ground coriander and black pepper (hence the coloring of it).  The whole family loved this, and I made it a few times.  We had this with Turkish Garden Salad and it was perfect.

Greek-Style Lemon Chicken & Orzo Bake
adapted from Food Network

3 cups chicken stock
3 tablespoons melted butter
1 teaspoons kosher salt
1 teaspoon cornstarch
1 teaspoon dried oregano (or fresh)
2 lemons, zested and juiced
1 clove garlic, minced
2 cups orzo

Chicken:
2 teaspoons ground coriander
1 teaspoons kosher salt
2 teaspoons freshly ground black pepper
4-6 small to medium boneless, skinless chicken breasts
1 lemon, sliced into 1/4-inch-thick slices
1 tablespoon chopped fresh parsley

1.  Preheat the oven to 375 degrees F.

2.  For the orzo: Whisk together the stock, butter, salt, cornstarch, oregano, lemon zest and juice and garlic in a bowl. Mix in the orzo.

3.  For the chicken: In a separate bowl, mix together the coriander, salt and pepper. Coat the chicken all over with the seasoning. (If using 6 chicken breasts, you won't have enough spice to coat both sides, so just do one.)

4.  Pour the stock/orzo mixture into a lightly greased glass 9-by-13-inch baking dish. Add the chicken breasts, laying them at an angle so all but the tops of the breasts are submerged. Shingle the lemon slices in between the chicken breasts.

5.  Bake, uncovered, until the chicken registers an internal temperature of 165 degrees F, 35 to 40 minutes (check to make sure it's not drying out). Let rest for 5 minutes. Top with the chopped parsley before serving.
**This post and photos are property of http://dishingwithdish.blogspot.com/ **

Monday, October 16, 2017

One-Pot Creamy Chicken & Rice Casserole


I really liked this dish- it was very creamy and comforting.  There's chicken in here- I used some rotisserie chicken, but I could have actually done without it.  (One could omit the chicken and use veggie broth to make this vegetarian.)  My husband liked the chicken, but I thought it just got in the way of the delish creamy rice.  I might make this again and leave it out.  I think it'll be good either way.  This is kind of like a combo between mac & cheese and risotto.  Although, it's a lot less hands-on than risotto since you don't have to constantly stir.
One-Pot Creamy Chicken & Rice Casserole
adapted from The Kitchn

2 tablespoons butter
1 medium yellow onion, finely chopped
1/2 teaspoon dried thyme, or 1 teaspoon fresh thyme leaves
1 teaspoon kosher salt, divided, plus more for seasoning (or to taste)
1 1/2 cups long-grain white rice
1 clove garlic, minced
2 cups low-sodium chicken broth
1 3/4 cups whole or 2% milk
Freshly ground black pepper
1 cup cooked chicken, cut into bite-sized pieces
1 cup fresh or frozen peas
1 1/2 cups shredded sharp cheddar cheese, divided

1.  Melt the butter in a large heavy-bottomed pot or Dutch oven over medium heat. Add the onion, thyme, and 1/2 teaspoon of the salt, and cook, stirring occasionally, until the onion is softened, about 8 minutes.

2.  Add the rice and garlic and cook, stirring occasionally, until they smell toasty, about 1 minute. Add the broth, milk, and remaining salt, and season with pepper. Bring to a boil, stirring occasionally so that the rice doesn't stick to the pot. Add the chicken, stir to combine, and bring back to a boil. Reduce the heat to medium-low, cover, and simmer until the liquid is absorbed and the rice is tender, about 15 minutes. (Add water as needed if the rice absorbs it all before tender.)

3.  Remove from the heat. Stir in the peas and 1 cup of the cheese. Taste and season with more salt as needed. Sprinkle with the remaining 1/2 cup cheese, then cover again and let sit for the cheese to melt and the rice to steam, about 5 minutes. Serve immediately.
**This post and photos are property of http://dishingwithdish.blogspot.com/ **

Thursday, April 2, 2015

Slow Cooker Beef for Enchiladas

Most of the fam was fan of these enchiladas.  I loved them, myself.  I don't like canned enchilada sauce, so I never make enchiladas.  But the homemade sauce from this recipe is so good, easy, and flavorful.  A friend made this and it looked so good (and easy!) I decided to make it too.
You can make this recipe ahead of time- even cooking your meat overnight, then assembling the enchiladas in the morning, sticking them in the fridge, and then into the oven in the evening when you're ready for dinner.  That's what I did.  (And why I have no pics of the baked enchiladas; it was totally dark outside when we finally got to eat these.)  The meat alone is very good too, and would be good in tacos, taco salad, or a burrito bowl too.  I omitted the salt from this recipe; there is plenty of salt from the broth, salsa, and cheese.
Slow Cooker Beef for Enchiladas
adapted from Mel's Kitchen Cafe

1 (2-3 pound) chuck or sirloin beef roast
2 cups low-sodium beef broth (I just used one regular can)
2 tablespoons apple cider vinegar
1 cup (8 ounces) salsa
1 teaspoon ground cumin
1 teaspoon chili powder
1 teaspoon onion powder
1 teaspoon garlic powder
1/2 teaspoon pepper
2 tablespoons cornstarch or flour
10 6- or 7-inch flour or corn tortillas
1 cup shredded sharp cheddar cheese
1 1/2 cups shredded Monterey Jack cheese
Fresh cilantro (optional)

1.  In a 4- or 5-quart slow cooker, add the beef roast. Whisk together the broth, vinegar, salsa, cumin, chili powder, onion powder, garlic powder, salt and pepper. Pour over the roast, cover the slow cooker, and cook on low for 8-10 hours until the beef is tender and shreds easily. (I cooked on low overnight, then assembled the enchiladas in the morning, stuck in the fridge, and baked in the evening for dinner.)

2.  Remove the roast from the slow cooker and place in a large bowl or shallow pan (like a 9x13).
Pour the mixture from the slow cooker into a saucepan and bring to a simmer. In a small bowl, whisk together the cornstarch (or flour) with about 2-3 tablespoons water (a bit more water if using flour). Whisk the slurry into the simmering liquid and cook, stirring constantly, until the mixture is thickened slightly, 4-5 minutes. Add additional salt and pepper to taste, if needed.

3.  Pour about 1/2 cup sauce in with the beef and toss. Spread another 1/2 cup sauce on the bottom of a 9x13-inch pan. Toss the cheddar and Monterey Jack cheeses together.  Fill each tortilla with some of the beef mixture and a sprinkle of cheese. Roll up and place in the pan. (I had one row length-wise and one width-wise.)

4.  Pour the remaining sauce over the enchiladas (you may not need to use all the sauce if you feel like it will be too much. I didn't use all the sauce.)  Top with any remaining cheese and bake at 350 degrees for 20-30 minutes until bubbly and hot. Let the enchiladas rest for 5-10 minutes before serving.  Sprinkle with fresh cilantro, if desired, and serve.
**This post and photos are property of http://dishingwithdish.blogspot.com/**

Wednesday, February 11, 2015

Chicken Cordon Bleu Casserole


We recently enjoyed Chicken Cordon Bleu when my mom made it for us around Christmas time. (My 8-year old especially enjoyed it!)  When we got back home, I was inspired to make this recipe I'd had pinned forever, but never made.  This is a nice recipe in that you can prepare it in the morning, stick it in the fridge, and then bake when you're ready to eat.  You can also use rotisserie chicken.  Here in Italy, the chickens are so small that I used two for this recipe.  If you have huge American chickens, one is probably enough.  (Always simmer the carcass with some veggies and herbs to make a great broth after removing the meat!)  
The original blog has this just served as-is, but I thought it was weird not to put it over rice or something.  So we had it over rice, and I loved it!

Chicken Cordon Bleu Casserole
adapted from Full Fork Ahead

1 whole cooked chicken, bones removed, meat diced or shredded (like rotisserie chicken, should have 5-6 cups)
1/2 pound very thinly sliced deli-style honey ham, rough chopped
1/4 pound thin sliced baby Swiss cheese

For the sauce:
4 tablespoons butter*
4 tablespoons flour
3 1/4 cups milk
2 tablespoons fresh squeezed lemon juice
1 tablespoon dijon mustard
1/2 teaspoon smoked paprika
1/4 teaspoon pepper

For the topping:
4 tablespoons salted butter
1 1/2 cups panko bread crumbs
1 1/2 teaspoons crushed dried parsley
salt and pepper to taste
Cooked Rice, for serving

1.  Preheat oven to 350 F. Butter a 9- x 13-inch baking dish.  Put cooked shredded or diced chicken on the bottom of the baking dish. Rough chop the ham and scatter it over the top of the chicken. Lay the Swiss cheese on top of the ham.

2.  To make the sauce: Melt the butter in a large sauce pot over medium heat. When butter is melted, quickly stir in the flour to form a smooth roux.  Once the roux is smooth and bubbly, slowly pour in the cold milk while stirring briskly to make a smooth sauce. Cook over medium heat, stirring constantly until the sauce thickens. Stir in the lemon juice, Dijon mustard, salt, smoked paprika and white pepper. Bring sauce just back to a low boil and turn off heat. Pour sauce evenly over the casserole, being certain to get some of the sauce around the edges of the pan.

3.  To make the topping: Melt the butter in a small saucepan on the stove, turn off the heat, and stir in the panko bread crumbs, pepper, and crushed dried parsley. Sprinkle over the top of the casserole.**

4.  Bake casserole uncovered for 30-45 minutes until hot and bubbly throughout and topping has turned a light golden brown. Remove from oven and allow to cool for 5-10 minutes prior to serving.

*If you are worried about salt, you can use unsalted butter and then add salt if needed.  The rotisserie chicken, and especially the ham and cheese, contain quite a bit of salt already.  I used salted butter and added no extra salt.

**At this point, you can stick the whole thing in the fridge, covered in plastic wrap.  When ready to bake, take out of the fridge and set on counter while oven preheats.  Bake for 40 minutes or until heated through and bubbly and topping is browned.
**This post and photos are property of http://dishingwithdish.blogspot.com/ **

Monday, January 26, 2015

Lasagne alla Bolognese


I took another local cooking class in November.  (The last one was tomatoes in August.)  We learned how to make an authentic lasagna, fried calzones, chocolate salami, and pumpkin spice cappuccinos.  (I just had pumpkin-spiced sweet warm milk; I was thinking of adding white chocolate at home one time to make a pumpkin-spice white hot chocolate.)  Since the class was in the evening, my pics didn't turn out super well, so all of the pictures on this post are of the lasagna I made myself, just recently, using the same recipe that we learned in the class.
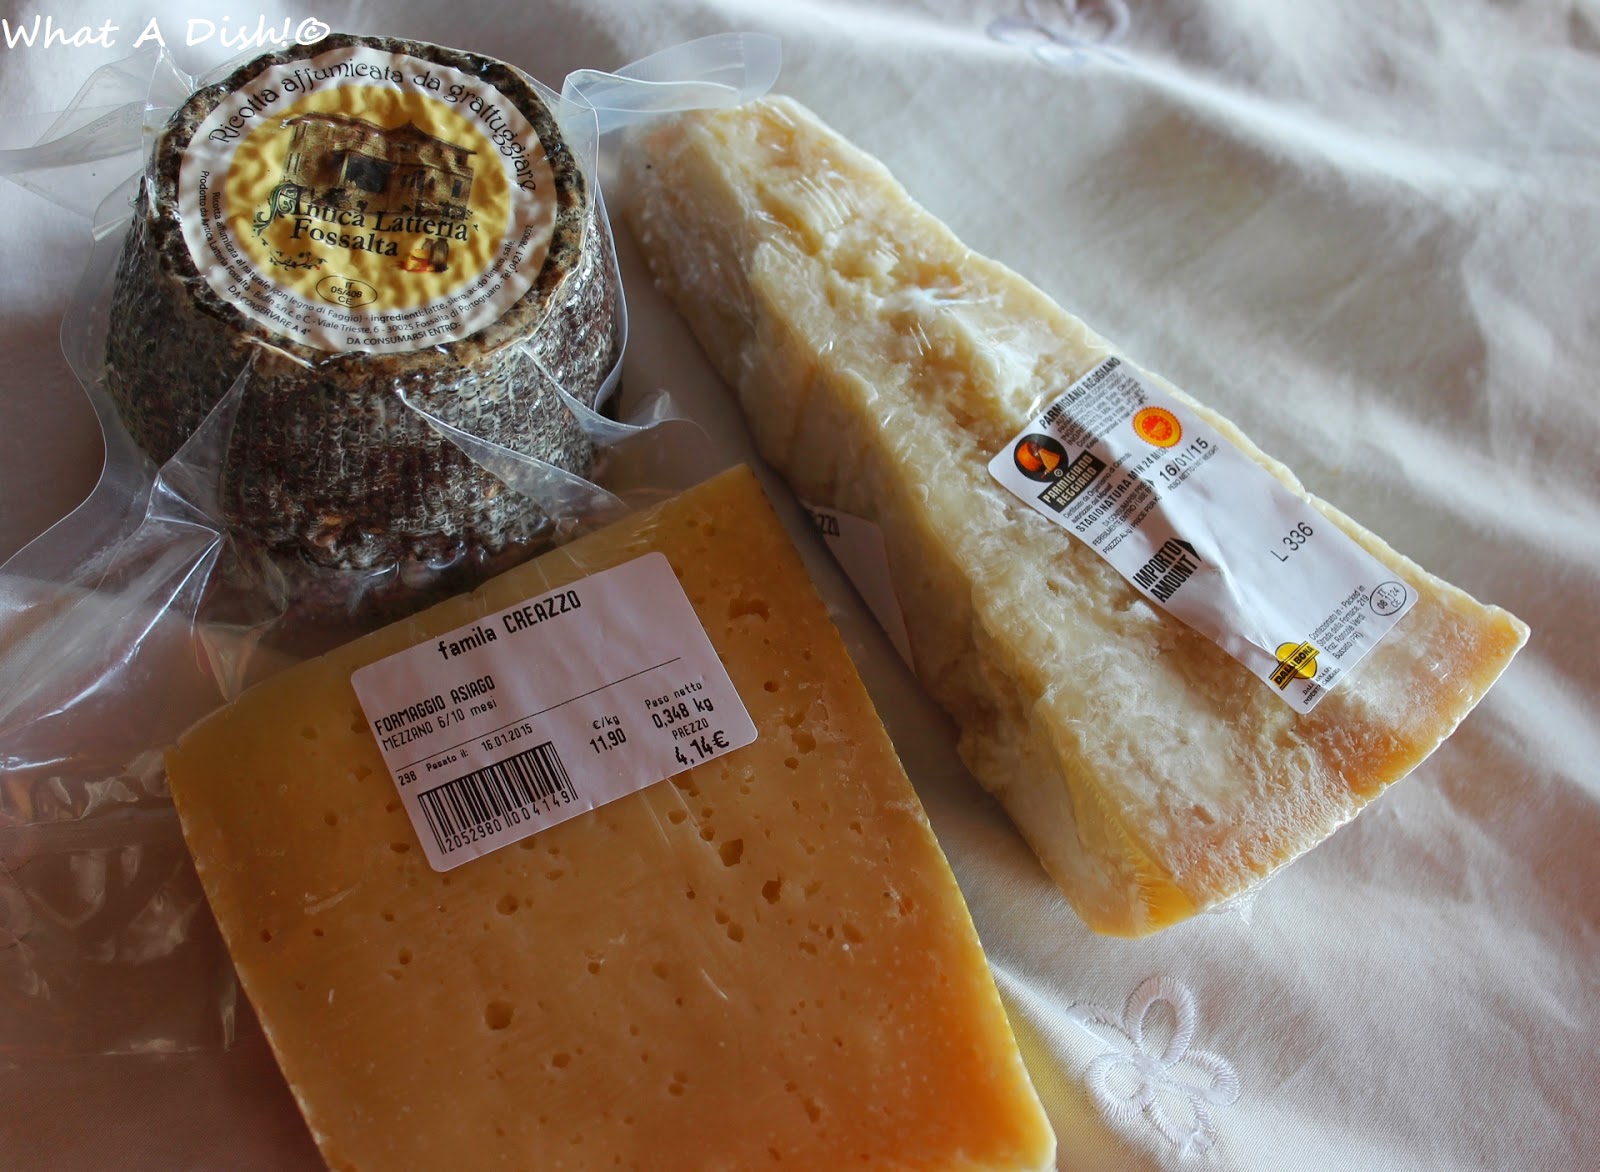
I'm lucky in that I live in Italy (understatement) and can just go to any local grocery store and buy the ingredients to make this dish (and they don't cost and arm and a leg). You can use any hard cheese you want; I used Parm-Reg, an aged Asiago, and an aged smoked ricotta.   I loved the combo.  In class we used similar cheeses; I think subbing Grana Padano for the Parm-Reg.
Italian lasagna differs from its American counterpart in that Italians don't use ricotta cheese or ground beef in lasagna.  Instead of ricotta, we made a cheese-infused bechamel (white) sauce, and ground pork, veal, and pancetta instead of ground beef.  All the meats were easy for me to find here at my butcher counter.  I didn't even know ground pancetta was a thing, but they ground it right there for me.  I've never bought veal before, but it was worth it to make this dish.  You could probably sub with more ground pork.
Lasagne alla Bolognese
adapted from Cooking with Lucas

Meat Ragu:
3-5 tablespoons extra-virgin olive oil
3 tablespoons butter
1 carrot, finely, diced
1 medium onion, diced
1 rib celery, finely diced
1 clove garlic, sliced
500g veal, ground (about 1 pound)
500g pork, ground (about 1 pound)
1/4 pound pancetta or slab bacon, ground (about 115 grams)
1/2 tube tomato paste
1 cup milk
1 cup dry white wine or good-quality chicken broth (may need more)
Kosher salt and freshly ground black pepper
Parmigiano-Reggiano, for grating

Bechamel Sacue:
5 tablespoons butter
4 tablespoons flour
3 cups milk
2 teaspoons salt
1/2 teaspoon freshly grated nutmeg
8 ounces Parmigiano-Reggiano, for grating (or a mix of fave hard cheeses)

1 package fresh lasagna noodles
Optional: whole chopped almonds and sliced green olives (used in class but not at home)

1. For the ragu bolognese: In a 6 to 8-quart, heavy-bottomed saucepan, heat the olive oil and butter over medium heat. Add the onions, celery, and garlic and sweat over medium heat until the vegetables are translucent and soft but not browned, about 10 to 15 minutes. Add the veal, pork, and pancetta and stir into the vegetables. Add the meat over high heat, stirring to keep the meat from sticking together until browned. Add the tomato paste, milk, and wine or broth and simmer over medium-low heat for 1 to 1 1/2 hours. Season with salt and pepper, to taste, and remove from heat. (Should not be very "saucy".  If it dries out though, add more wine or broth.)

2.  For the besciamella: In a medium saucepan, heat butter until melted. Add flour and stir until smooth. Over medium heat, cook until light golden brown, about 6 to 7 minutes.  Meanwhile, heat milk in separate pan (or microwave) until just about to boil. Add milk to butter mixture 1 cup at a time, whisking continuously until very smooth and bring to a boil. Cook 30 seconds and remove from heat. Season with salt and nutmeg and set aside.  Add freshly grated Parmigiano-Reggiano and any other cheeses you want.  Taste and add more salt or cheese if necessary.

3.  For assembly: Preheat the oven to 375 degrees F. In a lasagna pan, assemble the lasagna; beginning with a layer of the meat ragu, a sprinkling of grated Parmigiano, layer on the lasagna noodles (single layer), a layer of bechamel, a layer of ragu, a sprinkling of grated Parmigiano etc. until all sauce and pasta are used up. The top layer should be pasta with bechamel over it. (I ran out of bechamel and had to make a tiny batch just to cover the top.... lol).  Top the lasagne with grated Parmigiano-Reggiano and bake in the oven for 30 to 40 minutes, until the edges are browned and the sauces are bubbling. Remove and allow to cool for 30 minutes before slicing. (Or 5-10..... if you're like we are... lol!)

**This post and photos are property of http://dishingwithdish.blogspot.com/ **

Wednesday, January 21, 2015

Chicken Pot Pie Crumble

I made this back in November but am just getting into blogging again after the holidays, my Mother-in-Law's passing away, illnesses, and trips away.  Actually, I'm just getting to feeling like cooking again after all of that.  I haven't tried many new recipes lately, but am starting to want to again.
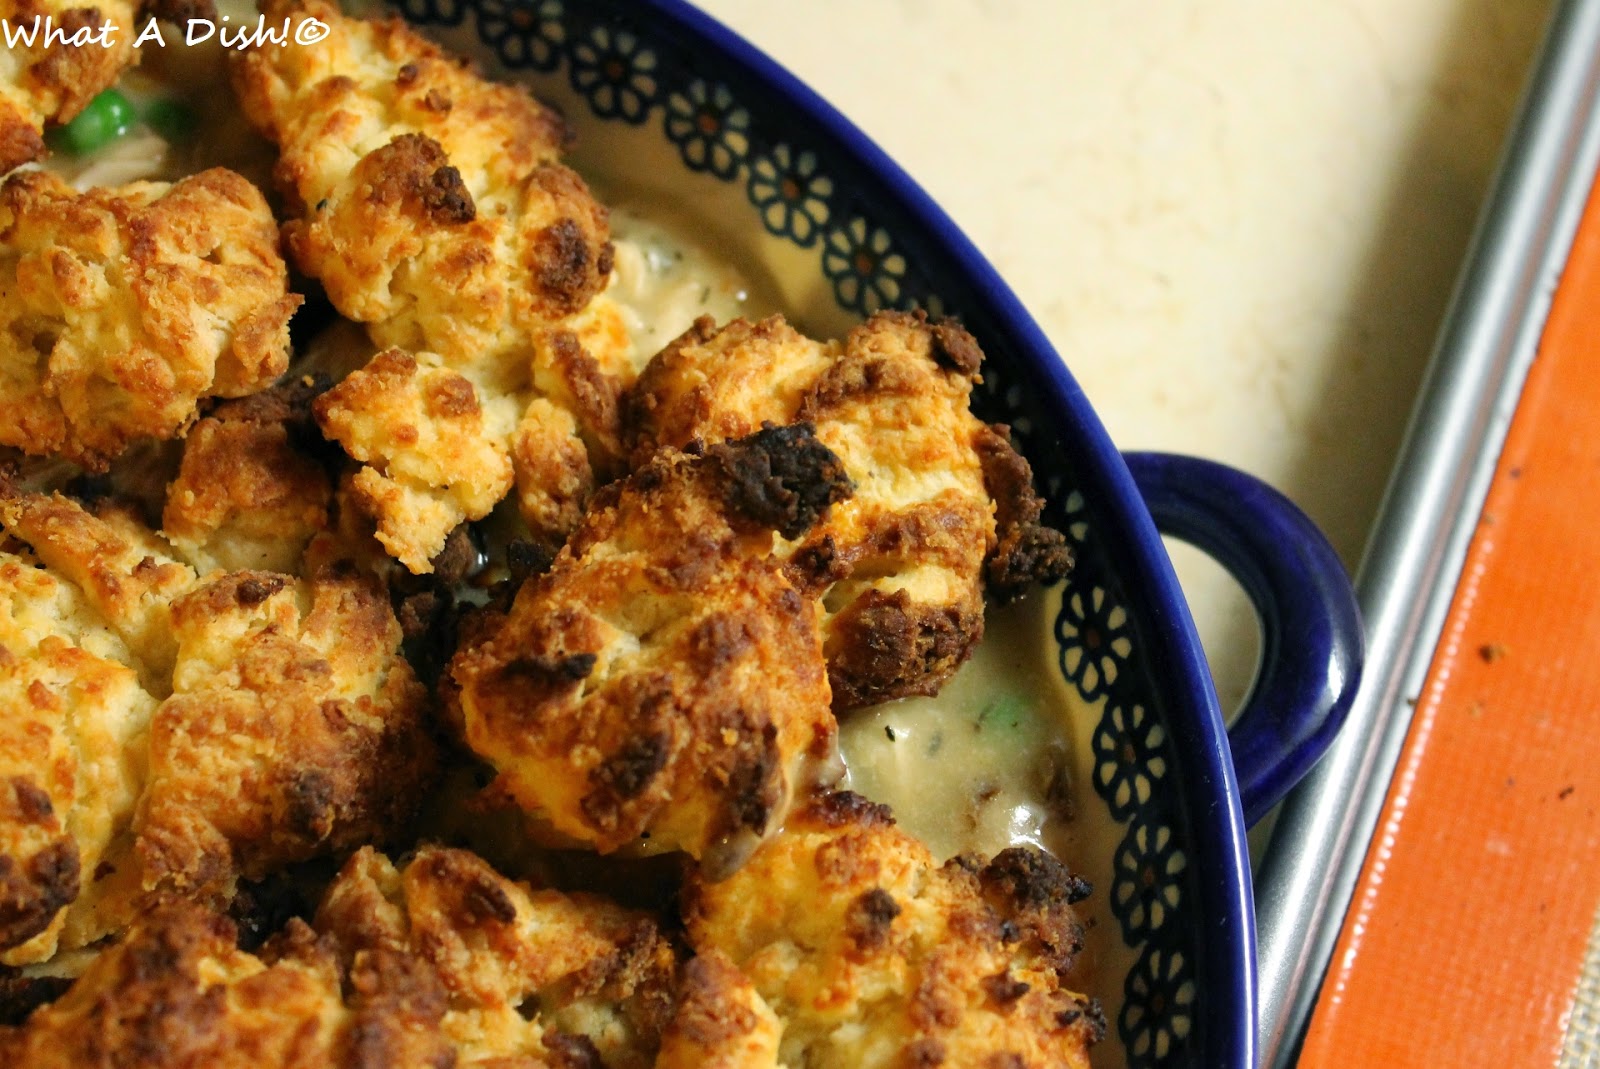
The adults in the house loved this, but the kids were weird about it.  I have no idea why; the chicken, veggies and gravy had a wonderful flavor, and the biscuits on top had a great texture and flavor, too! I just used a small store-bought rotisserie chicken, got the chicken off of it, then used the bones and boiled them with some veggies to make a broth (in place of the 2 chicken breasts + can of broth in the original recipe.)
Chicken Pot Pie Crumble
adapted from Cooking Classy

20 oz. boneless skinless chicken breast halves (about 2 large)
1 (14.5 oz) can low-sodium chicken broth
(OR one small rotisserie chicken; see instructions)
1 Tbsp olive oil
1 cup peeled and diced carrots (about 2 large carrots)
3/4 cup diced celery (about 2 large stalks)
3/4 cup finely diced yellow onion (about 1/2 medium onion)
2/3 cup frozen peas
3 Tbsp butter
1/3 cup all-purpose flour
3/4 cup milk
1 tsp lemon juice
1 1/2 tsp dried parsley
1/4 tsp dried thyme or rosemary

For the crumble:
1 1/2 cups all-purpose flour
1 1/2 tsp baking powder
1/2 tsp salt
1/4 tsp freshly ground black pepper
1/4 tsp garlic powder (use 1/2 tsp for a slightly stronger garlic flavor)
1/8 tsp cayenne pepper (optional)
1/4 cup butter, cold and diced into small cubes
2 oz. finely shredded Parmesan cheese (about 1/2 cup packed)
3/4 cup + 2 Tbsp heavy cream

1.  Place chicken in a slow cooker, pour chicken broth over chicken. Cover with lid and cook on low heat about 5 - 6 hours until chicken is cooked through. Remove chicken from slow cooker, dice and set aside. Strain broth from slow cooker through a fine mesh strainer into a bowl and reserve broth (if you don't have a fine mesh strainer just try to remove the pieces of fat). If using a rotisserie chicken, remove meat from bones and chop.  Take the bones and cover with 2 cups of water.  Add some veggies, if desired, to the broth.  Simmer, covered, for an hour or longer; strain the broth, and measure out 14.5 ounces, or the amount of one can of chicken broth.  Liquid measuring cups should have ounces on the side.)

2.  To prepare crumble:  Preheat oven to 450 degree. In a mixing bowl, whisk together flour, baking powder, salt, pepper, garlic powder and optional cayenne pepper. Using a pastry cutter, cut butter into mixture until mixture resembles coarse crumbs. Stir in Parmesan cheese. Pour in heavy cream and mix just until combined. Break and drop mixture into 1 - 2-inch pieces onto a Silpat lined baking dish (or use parchment paper on a baking sheet). Bake in preheated oven for 10 minutes until golden. Remove from oven and set aside.

3.  To prepare filling:  Heat olive oil over medium high heat. Once hot, add diced carrots, onion and celery. Saute vegetables, stirring occasionally until lightly golden and tender, about 5 - 6 minutes. Pour vegetables into a bowl and set aside. Reduce heat to medium, melt butter in saucepan, then add in flour and cook, stirring constantly for about 20 seconds (it will be very thick). While stirring, slowly add in milk followed by reserved chicken broth, lemon juice, parsley, thyme and season with salt and pepper to taste. Bring mixture just to a boil, then slightly reduce heat and allow to cook about 1 minute longer until thickened, stirring constantly. Remove sauce from heat and add sauteed vegetables, frozen peas and diced chicken to sauce, then toss to evenly coat. Pour mixture into a 9-inch pie dish and sprinkle with baked crumble topping (mine fit perfectly in my pie dish but if yours is coming close to the top edge you may want to sit it on top of a cookie sheet to prevent spills in your oven). Bake in 400 degree oven until nicely golden about 12 - 14 minutes. Serve warm.
**This post and photos are property of http://dishingwithdish.blogspot.com/ **

Friday, December 20, 2013

Hot Chicken Salad

My mom made something similar to this when I was in high school and I really liked it.  I made this recipe about 7-8 years ago and my husband and I enjoyed it very much, but I haven't made it since- I just kind of forgot about it.  Right after Thanksgiving, I made this to use up the bulk of what was left of our turkey.  It was a pleasant surprise to remember how much we liked it!  So I made it again last week to take pics.  Instead of all the mayo in here, I use 2/3 or 3/4 cup Greek yogurt and 1/3 or 1/4 cup mayo.  The Greek yogurt goes really well with the flavors in here- along with the lemon juice, it adds a pleasant tangy-ness.
Hot Chicken Salad
adapted from Allrecipes

2 cups chopped cooked chicken or turkey
1 cup chopped celery
1/2 cup cashews
2/3 cup plain Greek yogurt
1/3 cup mayonnaise (traditional way is to use all mayo- no yogurt)
1 small onion, grated or minced
1/4 teaspoon salt, optional (I would taste mixture before adding)
2 tablespoons lemon juice
1/2 cup shredded Cheddar cheese (or a few slices)
1 cup crushed Ritz crackers or potato chips

1.  Preheat the oven to 400 degrees F (200 degrees C).  In a medium bowl, mix together the chicken, celery, cashews, yogurt,  mayonnaise, onion, salt and lemon juice. Transfer the mixture to a casserole dish, then top with shredded cheese and potato chips or crackers.

2.  Bake, uncovered for, 15-20 minutes in the preheated oven, or until heated through and bubbly.

** This post and photos are property of http://dishingwithdish.blogspot.com/ **

Saturday, June 15, 2013

Overnight Blueberry French Toast

I love overnight french toast.  This one is a lot prettier than that old one, lol.  Berries always help with that.  Also, this one looks a lot better just because you cube the bread.  I really like this recipe.  Many years ago, I tried a similar recipe with cream cheese and blueberries, but it called for way too many eggs, and that totally ruined it.  So I haven't tried a blueberry recipe for many years, until I saw this recipe on Cooking Classy.  I'm glad I tried it- it was so good!
When I made this, I just made a half-recipe, since I knew most of my kids wouldn't eat it.  The leftovers heat up really well.  I used frozen berries- blueberries for the recipe, and raspberries for garnish.  

Overnight Blueberry French Toast
adapted from Cooking Classy
makes a large 9x13 dish; easily cut in half (use an 8x8)

1 loaf day old french bread
12 oz. Neufchatel cheese or cream cheese
1/4 cup powdered sugar
1 1/2 tsp vanilla, divided
2 cups fresh or frozen blueberries (no thawing necessary if frozen)
10 large eggs
2 cups milk
5 Tbsp granulated sugar, divided

  • 1.  Cut 1/2-inch off both ends of bread and discard (or eat). Cut loaf into 1-inch slices then cut each slice into 1-inch cubes (Cut the loaf in half first then keep the cubes from each half separate so it would be easier to determine half). Spread half of the bread cubes into an even layer in a buttered 13 by 9-inch baking dish, set aside remaining bread cubes.
  • 2.  In a small bowl, using an electric hand mixer, blend together Nuefchatel or cream cheese, powdered sugar and 1/2 tsp vanilla.  Using a rubber spatula and a clean fingertip, spread Nuefchatel cheese mixture over bread cube layer in baking dish. Sprinkle blueberries over Nuefchatel cheese layer. Spread remaining bread cubes into an even layer over top of blueberries.
  • 3.  In a blender, (or just with a bowl and whisk) blend together eggs, milk, granulated sugar and remaining 1 tsp vanilla on low speed until well blended, about 10 seconds. Slowly pour mixture evenly over top of bread cubes in baking dish. Cover with plastic wrap and refrigerate 8 hours or overnight.
  • 4.  The following morning, remove baking dish from refrigerator and allow to rest at room temperature for 30 minutes. Preheat oven to 350 degrees during the last 10 minutes of resting.
  • 5.  Remove plastic wrap. Cover baking dish with aluminium foil and bake in preheated oven 30 minutes, then remove foil and continue to bake 25 - 35 minutes, until golden brown (if it is becoming too golden brown but isn't cooked through then you can cover with foil again during the last few minutes of baking). Allow to rest 5 minutes, then cut into servings and serve warm topped with maple syrup.
**This post and photos are property of http://dishingwithdish.blogspot.com/ **

Monday, February 4, 2013

Cheesy Broccoli-Quinoa Bake

quin2W
My husband and I really loved this one.  For some reason, quinoa in any form is a hard sell with my kids, even if it is covered in cheese.  I don't make it nearly often enough, and maybe that's why.  Although, we were making quinoa (occasionally) years ago before it was popular!  My husband worked in a natural food store in high school and became familiar with quinoa and other "health foods".  He sometimes makes a breakfast quinoa; I will have to share that recipe sometime. 
quin3W
Cheesy Broccoli-Quinoa Bake
adapted from Annie's Eats

1½ cups quinoa
1 head broccoli, cut into small florets
3 tbsp. unsalted butter
3 tbsp. all-purpose flour
2 shallots, diced
2 cups milk (low-fat is fine)
¼ tsp. garlic powder
¼ tsp. dry mustard
¼ tsp. cayenne pepper
Salt and pepper, to taste
8 oz. sharp cheddar cheese, shredded*
2 cups shredded cooked chicken

1.  Cook the quinoa according to the package directions. Meanwhile, steam the broccoli using a steamer basket, until the broccoli is crisp-tender.  Set aside.

2.  Preheat the oven to 400˚ F. To make the cheese sauce, melt the butter in a medium saucepan over medium heat. Whisk in the flour, shallots, garlic powder, dry mustard and cayenne. Continue whisking the mixture until it is light golden, about 1-2 minutes. Slowly whisk in the milk. Allow the sauce to simmer, stirring frequently, until the mixture bubbles and thickens, 5-8 minutes. Remove from the heat. Whisk in the cheddar until melted and smooth. Season with salt and pepper to taste. In a large bowl, combine the cooked quinoa, broccoli florets, shredded cooked chicken and the cheese sauce. Fold together gently until evenly combined.  (Or you can mix all ingredients right in your large casserole dish.)

3.  Transfer the mixture to a lightly greased casserole dish. Bake until the top is lightly browned, about 20-25 minutes. Serve warm.

*For best results, always use freshly shredded cheese. Pre-shredded cheese comes coated in things such as flour, cornstarch to prevent clumping and results in an unpleasant, gritty texture when melted. 
quin1W

**This post and photos are property of http://dishingwithdish.blogspot.com/**/

Wednesday, October 12, 2011

Poppyseed Chicken Casserole

I made this over a month ago and am just now getting around to posting it.  This is a casserole baked in a creamy soup type recipe, and I hardly ever make such things, but this is a nostalgic recipe for me; shortly after my now 5-year old was born, someone brought us dinner one night, and it was Poppyseed Chicken with Rice.  I loved it soooo much; it tasted so good to me, and I've always wanted to make it, but have shied away because of the use of Cream of Chicken soup, which I don't ever like to use.  I know there are good homemade cream soup recipes one can use, but after my little guy was born this last August, I feel like I don't have a ton of time to devote to cooking, and making my own soup + the casserole seemed too daunting to me.  Well, enter in a new food product at my grocery store: an all-natural, good-tasting, non-scary cream of chicken soup!  It's by Pacific foods, and the ingredients are all good things, and it's actually tasty!  There's a cream of mushroom one, as well.  It's in a small 12-oz box, in the soup section of the store.
I have three more boxes of this, since I never know when my store will suddenly stop carrying certain items.  I want to try a crock-pot recipe next.  I usually skip over recipes containing cream-of-whatever, but now I can finally partake!

Anyway, this Poppyseed Chicken is very rich & caloric, so I won't be making it all the time.  I did use light sour cream, and half the butter called for.  I also served this over brown rice with steamed broccoli on the side!  For the chicken, I just cooked a bunch of (about 10 frozen) chicken tenders in a non-stick skillet with olive oil & garlic salt.  I let them cool slightly and then chopped them up. 

This dish was delicious, easy, and the whole fam even loved it.  I bet it might freeze well, too.

Poppyseed Chicken Casserole
adapted from Allrecipes

4-5 cups chopped cooked chicken
1 (12 ounce) box natural condensed cream of chicken soup
1 cup light sour cream
1 1/2 cups crushed buttery round crackers (I just used one sleeve)
1-2 tablespoons poppy seeds
1/4 cup butter, melted

1.  Preheat the oven to 350 degrees F (175 degrees C).               

2.  Place the chicken into a 9x13 inch baking dish. In a medium bowl, stir together the condensed soup and sour cream. Pour over the chicken. In a separate bowl, stir together the crushed crackers, poppy seeds and melted butter. Sprinkle over the chicken and sauce.               

3.  Bake for 30 minutes in the preheated oven, until the top of the casserole is browned and the sauce is bubbly.
**This post and photos are property of http://dishingwithdish.blogspot.com/**/

Saturday, May 14, 2011

Baked Chicken-Bacon Alfredo Penne

This was really, really good, and not too hard to make!  I assembled this in the early afternoon and my husband put it in the oven while I was at the gym.  Dinner was ready when I got home!  :)  We had this salad on the side.  Instead of green onions, I used a lot of fresh chives from my plant.  The kids were a little wary of it at first, because of the chives, I think, but after the initial bite, they couldn't stop eating it.  This was a big hit with everyone.  For the sauce base, you use an easy, lower-fat homemade Alfredo, which would be great on its own over any kind of pasta.  Thanks to Our Best Bites for another great recipe!!  This will be a repeat for us.
Baked Chicken-Bacon Alfredo Penne

8 oz. penne or bowtie pasta (I used mezze penne, which is smaller)
1 recipe Guiltless Alfredo Sauce (recipe below)
2 chicken breasts, grilled and chopped (about 2 cups chopped chicken, give or take a bit)
5-6 slices cooked bacon, chopped
1 14-oz. jar marinated artichoke hearts, drained and chopped
1/2 cup chopped green onions or fresh chives
1 cup shredded mozzarella cheese, divided
Salt and pepper, to taste

1.  Preheat oven to 350.  Prepare pasta according to package directions.

2.  While pasta is cooking, prepare Guiltless Alfredo sauce in a large, non-stick skillet. When pasta is done, drain and add to the sauce. Toss with chopped chicken, bacon, artichoke hearts, green onions, and 1/2 c. mozzarella. Season to taste.

3.  Transfer mixture to an 8×8″ or 9x9" baking dish and sprinkle with remaining 1/2 c. mozzarella cheese. Cover with aluminum foil and bake at 350 for 20 minutes or until heated through and cheese is bubbly.

*This can be made ahead and either refrigerated or frozen until you’re ready to serve it. If you don’t plan on baking it immediately, cover tightly with plastic wrap and aluminum foil (if not freezing it, you don't need the plastic wrap). If you cook it from the refrigerator, preheat oven to 400 and bake for 45 minutes or until cheese is melted and bubbly and the pasta is heated through (covered with foil). If you’re cooking it from the freezer, bake at 400 for about 90 minutes (remove plastic wrap but leave foil on).  You may need to remove the foil the last few minutes of baking to help it cook through and brown the cheese on top, if desired.

Guiltless Alfredo Sauce Recipe
from Our Best Bites

2 cups low-fat milk (I used 1% with great results)
1/3 cup (3 oz) low fat cream cheese (Neufchatel)
2 tablespoons flour
1/2-1 teaspoon salt (I used only 1/2 tsp- add more to taste.  Remember Parm is salty)
1 tablespoon butter
3 garlic cloves
1 cup grated Parmesan cheese

1.  Toss the milk, cream cheese, flour, and salt in a blender.  Process until smooth and set aside. 

2.  In a non-stick sauce pan, melt butter on med-high heat and add garlic.  Let the garlic saute for about 30 seconds; you don’t want to burn it.  Then, add milk and cream cheese mixture to the pan. Stir constantly for about 3 or 4 minutes or until it just comes to a simmer. Keep stirring and let it cook for a few minutes more- do not let it boil. It should be much thicker now. 

3.  When it's nice and thick, remove the pan from the heat.  Stir in the Parmesan cheese, and then cover the pan.  Let stand for at least 10 minutes before using (unless you are using it as another part of a recipe).  It will continue to thicken upon standing. 


**This post and photos are property of http://dishingwithdish.blogspot.com/ **