Showing posts with label white chocolate. Show all posts

Saturday, September 13, 2025

Biscoff White Chocolate Bars

Wow- these bars were one of the yummiest things I've made recently. I wasn't expecting them to be SO good- I just was wanting an easy recipe to use up some biscoff that I'd had open for awhile. I bought a giant jar of it and we weren't going through it fast enough. This was the perfect use for it. (I did use my kitchen scale to meausure out 14 oz.) These bars were gone way too fast and there are only 4 of us here. I want to make them again soon.


Biscoff White Chocolate Bars

from Cooking with Karli

1 cup salted butter
1 cup brown sugar
1/2 cup granulated sugar
1 egg
1 tsp vanilla
2 1/4 cup all-purpose flour
1 tsp baking soda
1/2 tsp salt
1 cup white chocolate chips
14 oz creamy biscoff spread

1. Preheat the oven to 350° F (180·C). Spray a 9×13 pan with non-stick spray and set aside.

2. In the bowl of a stand mixer or with an electric hand mixer, cream together the butter, brown sugar, and granulated sugar until light in color and fluffy in texture. This will take about 2 minutes. Scrape down the sides and add in the egg and vanilla. Mix until well combined.

3. Next, add the dry ingredients (flour, baking soda and salt). Mix until incorporated and add the white chocolate chips. Once a soft dough has formed, you will press half of the dough into the bottom of the prepared pan. Using a spatula or spoon, spread the Biscoff cookie butter on top of the cookie dough in the pan. (I put the biscoff in a bowl first and microwaved it about 20-30 seconds to soften it slightly. This made it easier to spread. If you do this, watch it as my microwave is very weak and you may need less time.) 

4. On top of the biscoff layer, crumble the remaining cookie dough and press it in slightly. (This part is really hard because the dough is sticky. I didn't get it perfect edge-to-edge because as it bakes it spreads and fills in a bit. So try not to stress. It doesn't need to be perfect.) Bake at 350°F (180°C) for 15-17 minutes. Allow the bars to cool completely before cutting and serving. Enjoy!

**This post and photos are property of http://dishingwithdish.blogspot.com/ **

Friday, April 2, 2021

Easter Egg Nests

These were a cute little fun project for right before Easter.  They came together super quickly and are pretty tasty, too.  They're really sweet- I think making them in mini muffin tins would be a better serving size, but then you'd have to find mini-mini Cadbury eggs (maybe they exist, in the US?)  I did find the metallic eggs which looked really nice.  
Easter Egg Nests
adapted from Dixie Crystals

1 package (11 oz) white chocolate chips (or chopped white chocolate)
2 tablespoons powdered sugar
3/4 cup creamy peanut butter
1 can (8 oz) chow mein noodles
Cadbury Easter Candy Coated Mini Eggs (about 48)

1.  Spray two standard size muffin tins with non-stick spray. Set aside.  (I got only about 16 from this recipe).

2.  In a heavy saucepan, melt white chocolate chips and peanut butter together over low heat.  Alternatively, you can microwave in a large, uncovered, microwave-safe bowl on medium high power for 1 minute; stirring until smooth. If necessary, microwave at additional 10- to 15-second intervals, stirring just until chips are fully melted.

3.  Stir in powdered sugar until well blended and smooth. Fold in chow mein noodles and fold until all ingredients are coated.

4.  Drop by rounded tablespoon into muffin tin and press down gently in center to make a “nest.”  Place 3 chocolate eggs in center of nest.  Refrigerate until hardened, about 20 minutes, then pop out of muffin tins and serve. Can store for up to a week in an air tight container.

**This post and photos are property of http://dishingwithdish.blogspot.com/ **

Saturday, March 14, 2020

Lemon Bar White Chocolate Brownies

These were a delight, really.  Two things I love- white chocolate brownies, and lemon bars- put together for one delicious treat.  I've been wanting to make these for a while and I have so much free time now, being in lockdown! So I finally got to make these.

Lemon Bar White Chocolate Brownies
adapted from Mel's Kitchen Cafe

White Chocolate Brownies:
3/4 cup (12 tablespoons, 6 ounces) butter (I use salted)
6 ounces (real!) white chocolate, chopped
1 1/2 cups (11.25 ounces) granulated sugar
2 large eggs
2 teaspoons vanilla extract
1 to 2 teaspoons fresh lemon zest
2 1/2 cups (12.5 ounces) all-purpose flour
1/4 teaspoon salt
1/2 teaspoon baking powder

Lemon Bar Layer:
4 large eggs
1 1/3 cups (9.25 ounces) granulated sugar
1 teaspoon fresh lemon zest
2/3 cup fresh lemon juice (from about 4-5 lemons)
1/4 cup (1.25 ounces) all-purpose flour
Powdered sugar, for dusting

1. Preheat the oven to 350 degrees F. Grease a 9X13-inch baking pan with nonstick cooking spray. Set aside.

2. For the white chocolate brownies, combine the butter and white chocolate in a microwave-safe bowl and heat for 1-minute increments, stirring in between, until smooth. (I melted this on the stove.) Stir in the granulated sugar, eggs, vanilla extract, and lemon zest and mix until evenly and well-combined. Stir in the flour, salt and baking powder until smooth.

3. Spread the batter evenly in the bottom of the prepared pan. Bake for 18-22 minutes until the brownies are just slightly set but still soft in the center.

4. For the lemon bar layer, in a medium bowl, whisk together the eggs, sugar, lemon zest, lemon juice, and flour until smooth and well-combined.

5. Pour the lemon mixture over the top of the warm white chocolate brownies. Return to the oven and bake until the lemon layer is set, about 18-20 minutes. It's ok if there are bubbles on the surface of the lemon layer. 

6. Let the bars cool completely in the pan. Refrigerate until ready to serve. When ready to serve, dust the top of the bars with powdered sugar. Cut into squares and serve immediately (the powdered sugar melts into the bars the longer they sit, so dust only when ready to serve).


**This post and photos are property of http://dishingwithdish.blogspot.com/**

Wednesday, December 26, 2018

White Chocolate Buckeyes

These candies are controversial Buckeyes, I think.  Comments on the original recipe (which doesn't even use white chocolate) seemed mad that cream cheese and graham crackers crumbs were included in the sacred Buckeyes recipe.  But guess what? The cream cheese and graham crackers are wonderful in this; cutting the sweetness and adding something interesting.  So I'm proud to put these on here; they taste super amazing, still melt in your mouth, and aren't that hard to make, either.  I wanted to try white chocolate this time, and I loved that.....I realized it makes it even worse to Buckeye purists, but oh well.  I got two bars of Italian cooking white chocolate... it worked beautifully when melted in a double boiler with some coconut oil.  It was real white chocolate with cocoa butter and no hydrogenated oils.  I meant to post these before Christmas but I didn't get around to it, so here they are now.  (Regular buckeye recipe from the Joy the Baker is here.)

White Chocolate Buckeyes
adapted from the Kitchn

1 pound powdered sugar (about 3 and 3/4 cups)
1 (16.3-ounce) jar creamy peanut butter (not natural), such as Skippy (about 2 cups)
10 tablespoons salted butter, at room temperature
4 ounces cream cheese, at room temperature (can use Neufchatel)
1 cup graham cracker crumbs (from about 8 graham crackers)
1 1/4 teaspoons kosher salt
12-16 ounces chopped good-quality white chocolate (not chocolate chips)
1 tablespoon refined coconut oil

1.  Place the powdered sugar, peanut butter, butter, cream cheese, graham cracker crumbs, and salt in the bowl of a stand mixer fitted with the paddle attachment. (Alternatively, use an electric hand mixer and large bowl.)

2.  Beat on low speed until just combined, then increase speed to medium and beat, stopping often to scrape down the sides and bottom of the bowl, until the mixture is smooth and holds together when squeezed in the palm of your hand, 2 to 3 minutes. (If using a stand mixer- pay attention to the bottom of the bowl.  There may be dry crumbs down there.  Use a rubber spatula to make sure everything is combined.)

3.  Form into balls- line a rimmed baking sheet with parchment paper. Form the mixture into tablespoon-sized balls (you should get about 72 (1/2-ounce) balls) and place in a single layer on the prepared baking sheet. Refrigerate until very cold and firm, at least 2 hours.

4.  Melt the chocolate with the coconut oil in a double boiler, stirring until smooth.  Let cool 5 minutes. (I didn't let it cool.... and it was fine.  Use your judgment.)

5.  Dip the balls- line a second rimmed baking sheet with parchment paper. Transfer 12 of the chilled peanut butter balls onto it. (Keep the rest in the refrigerator to keep them chilled and firm.) Insert a toothpick into the center of one of the peanut butter balls (don’t let it poke all the way through) and dip it into the chocolate, leaving a small opening (about 1-inch across) at the top of the buckeye.

6.  Shake off the excess chocolate- lift the buckeye out of the chocolate and turn the toothpick horizontally so that you are holding it at a 90° angle to the bowl. Gently shake your hand up and down so that any excess chocolate drips off the buckeye and back into the bowl. (You want to remove as much excess chocolate as possible so that it doesn’t pool around the bottoms of the buckeyes.) When the dripping has stopped, twirl the toothpick so that that very last drip wraps around the buckeye and blends in with the rest of the chocolate. (I was tired and didn't dip them quite this well... but if you have a lot of patience this would be a good idea.  Lol.)

7.  Remove the toothpick- turn the buckeye upright and place back onto the baking sheet. Use your finger or a second toothpick to gently push the buckeye off the toothpick (you’ll cover up the hole it leaves later). Repeat dipping with the remaining buckeyes.  If, at any point, the peanut butter balls begin twirling around on the toothpick as you dip, making it difficult to control, return to the refrigerator until chilled.

8.  Smooth over the toothpick holes (optional... lol) -use your thumb and forefinger to gently pinch the peanut butter filling where the toothpick has left a hole, then use your finger to smooth it out. (You want to wait until the chocolate is set up enough to do this so the buckeye doesn’t slide around.)  Refrigerate until the chocolate is set. Refrigerate until the chocolate is hardened, at least 10 minutes.
**This post and photos are property of http://dishingwithdish.blogspot.com/ **

Friday, December 14, 2018

Peppermint White Chocolate Cookies


These cookies are a twist on the classic White Chocolate Macadamia Nut Cookies.  They're made with white chocolate and crushed peppermint candy (or candy canes) and don't contain any nuts.  The candy melts into the cookies and turns delicious.  Because the candy IS actually melting, it's important to use parchment paper with these cookies.  If you don't, the cookies will stick terribly and be almost impossible to remove from the cookie sheets.
I was lucky to have this bag of crushed candy canes left over in my pantry from last year.  They were still good, not stale or stuck together.  I LOVE these things.  No more unwrapping and crushing individual candy canes.  The color is not as brilliant red, but the convenience is worth it. 

Peppermint White Chocolate Cookies
adapted from Closet Cooking

1/2 cup butter room temperature
1/2 cup brown sugar, packed
1/2 cup white sugar
1 egg
1 teaspoon vanilla extract
1 1/2 cup all purpose flour
1 teaspoon baking soda
1/4 teaspoon salt
1 cup white chocolate chips
1/2 cup peppermint crushed candy cane

1.  Preheat the oven to 350F/180C.  Mix the butter and sugars in a bowl. Beat in the egg and vanilla extract. Mix the flour, baking soda and salt in another bowl. Mix the dry ingredients into the wet until they are just incorporated. Mix in the chocolate and the peppermint candy cane.

2.  Chill the dough in the fridge for 30-60 minutes before placing it onto a parchment paper lined cookie sheet one tablespoon at a time rolled up into balls, using a cookie scoop.

3.  Bake in preheated oven until just lightly golden brown around the edges, about 8-10 minutes.
**This post and photos are property of http://dishingwithdish.blogspot.com/**

Wednesday, October 31, 2018

Happy Halloween 2018!!

Yesterday school was cancelled here because of bad weather.  I finally got a chance to make these Halloween treats with the kids- we never have time to do stuff like this anymore.  It was fun and we had a great day.  We made ghost pretzels and white chocolate Reeses's chocolate PB cookies. 


White Chocolate Ghost Pretzels
adapted from Dessert now Dinner Later

30 (or so) pretzels
10 oz. bag white chocolate chips (I used Trader Joe's)
1 tsp coconut oil or shortening, for thinning the chocolate
1 (.88oz/25g) pkg Wilton Candy Eyeballs

1.  Line a baking sheet with wax paper, parchment paper, or a silicone baking mat. Set aside.

2.  Melt the white chocolate and coconut oil (or shortening) in a glass bowl in the microwave, for short 10-20 second bursts, until melted.  You can also use a double boiler.  I always do this for white chocolate because it seizes so easily.

3.  Immediately dip pretzels, one at a time, in the bowl, using a fork to turn the pretzel over. Shake off excess chocolate from the pretzel with the fork. Be sure to shake the chocolate out of the bottom hole, so it looks like an open mouth -- screaming. Place chocolate dipped pretzels on the prepared baking sheet.

4.  Immediately press two eyeballs into the top two holes for eyes -- add a little extra chocolate if needed.
Repeat with remaining pretzels. Work quickly. Heating the chocolate again only once, if needed.
Allow pretzels to rest and harden. Place in freezer for 10 minutes to speed up the process. Peel pretzels off the baking sheet and enjoy!

White Peanut Butter Cup Cookies
adapted from Allrecipes via here 

1 3/4 cups all-purpose flour (I used 1/2 cup whole wheat pastry flour)
1/2 teaspoon salt
1 teaspoon baking soda
1/2 cup butter, softened
1/2 cup white sugar
1/2 cup chocolate creamy peanut butter
1/2 cup packed brown sugar
1 egg, beaten
1 teaspoon vanilla extract
2 tablespoons milk
40 miniature white chocolate Reeses's peanut butter cups, unwrapped and stuck in freezer for 30 min.
sprinkles for decoration, if desired

1. Preheat oven to 375 degrees F (190 degrees C). Sift together the flour, salt and baking soda; set aside.

2. Cream together the butter, sugar, chocolate peanut butter and brown sugar until fluffy. Beat in the egg, vanilla and milk. Add the flour mixture; mix well. Shape into 40 balls (I just used my smallest cookie scoop- it's probably about 1 teaspoon) and place each into an ungreased mini muffin pan.

3. Bake at 375 degrees for about 8 minutes. Remove from oven and immediately press a mini white peanut butter cup into each ball. Cool and carefully remove from pan. 
**This post and photos are property of http://dishingwithdish.blogspot.com/ **

Thursday, October 18, 2018

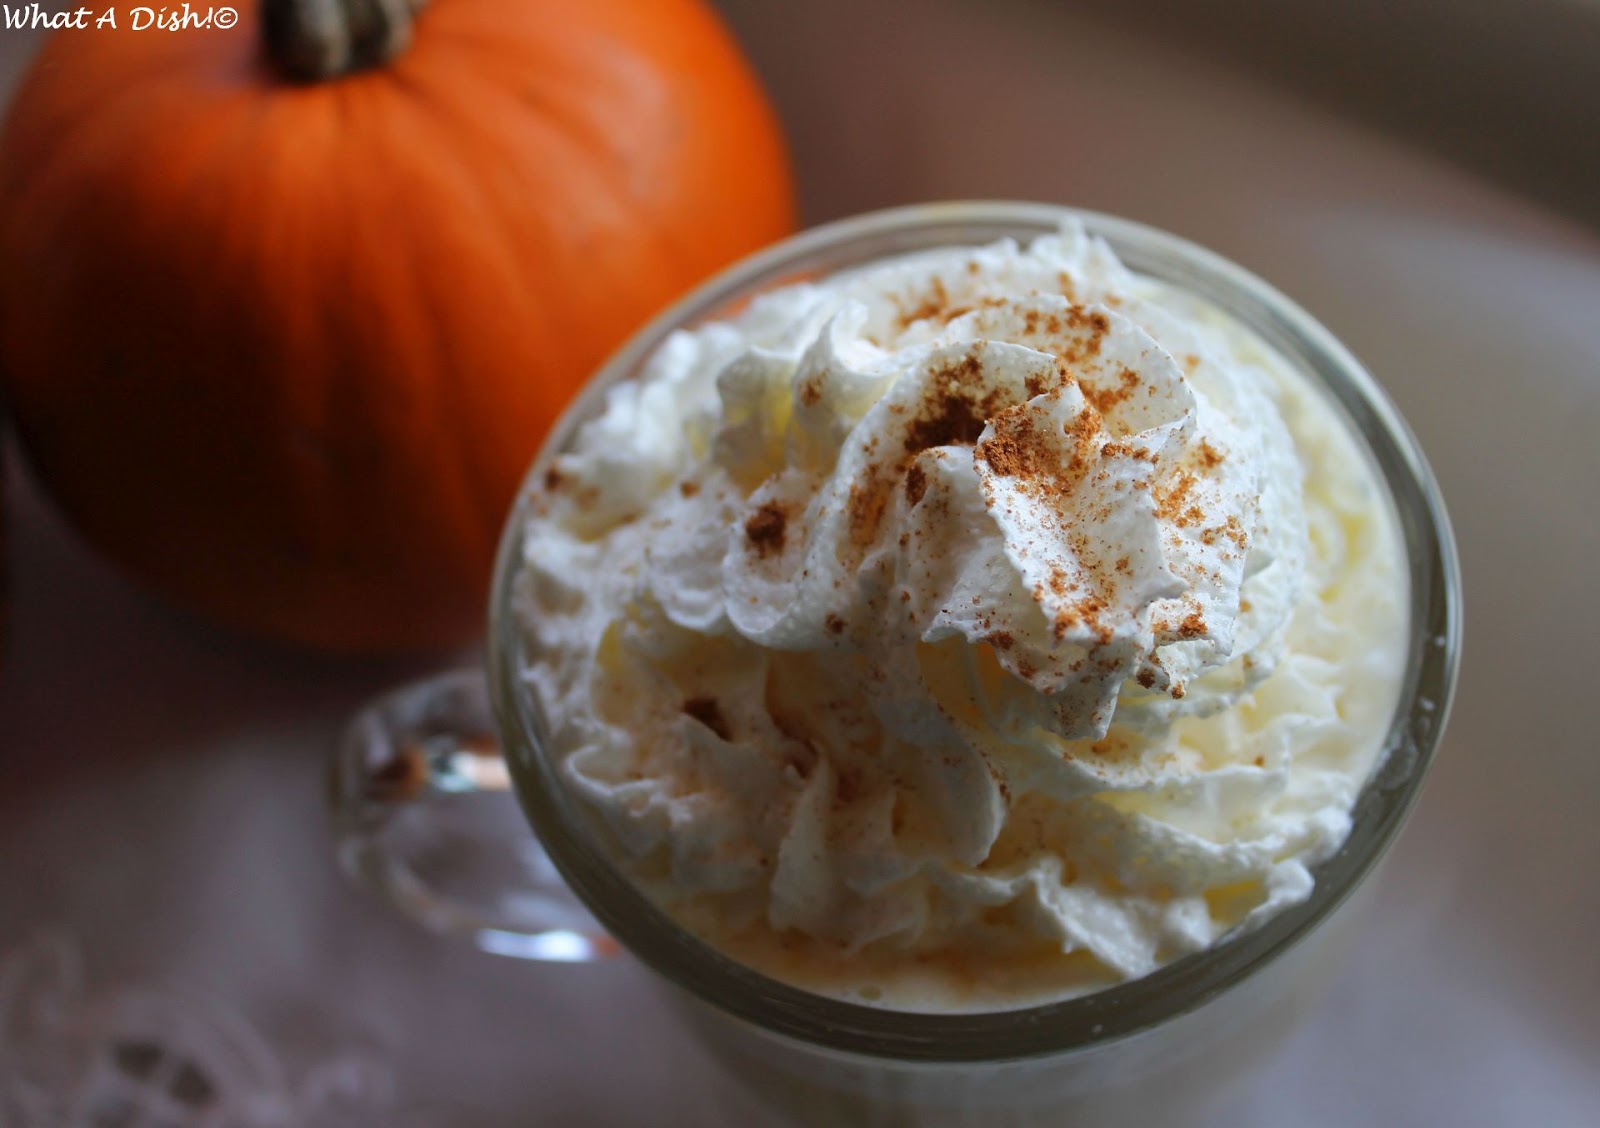
Pumpkin Spice White Hot Chocolate

I already have a recipe for this, here, but that recipe is kind of awkward where you have to cook and puree a tiny bit of pumpkin (what I had on hand at the time.)  I recently found this recipe, using canned pumpkin puree and it's so easy!  I actually had roasted and pureed a whole sugar pumpkin a few days before, so I used the puree from that, but I'd love to try this with canned puree.  It would make it even easier.

Note: I used Penzey's "Pie Spice" for this and it was perfect. I had an unopened McCormick pumpkin pie spice bottle, but when I opened it, it didn't smell like anything.  The Penzey's Pie Spice was perfect in this.

Pumpkin Spice White Hot Chocolate
adapted from Passion for Savings

1 cup canned pumpkin puree (can use homemade)
1 tsp. pumpkin pie spice (I used Penzey's "Pie Spice")
½ tsp. Salt
2 tsp. vanilla
1 12 oz. bag real white chocolate chips (some bags are 10oz- this would probably be fine)
3 cups milk
2 cups half-and-half (or 1 cup half and half, one extra cup milk)
Whipped Cream for Garnish

1.  In a regular size saucepan, combine the pumpkin, pumpkin pie spice, salt, vanilla, milk and half and half.  Heat over medium heat, whisking well, until everything is mixed and quite warm.

2.  Add in white chocolate chips and stir well until melted.  Taste to make sure it is hot to your liking.  Serve warm and top with whipped cream.  Top with an extra sprinkle of pumpkin pie spice or just cinnamon, if desired.

**This post and photos are property of http://dishingwithdish.blogspot.com/ **

Monday, October 8, 2018

Peanut Butter Layer Cake


 I made this for my son's birthday cake back in September.  It was AMAZING!!  The cake itself was delish and so was the frosting.  A lot of times, a layer cake turns out dry and only the frosting is enjoyable.  Not this time! The cake alone was moist (lol) and tasty and the frosting was great too.  The author says using oil instead of butter makes a cake more moist, and she must be right, because this cake uses coconut oil and it's wonderful.  (I think you can use any oil).  The recipe uses natural PB, but I didn't have enough, so I used part natural and part.... un-natural. Lol! I have to say the frosting is really, really hard to spread, but so tasty.  The author recommends putting this recipe into a 9x13 and reducing the frosting. It would be way easier to spread that way.  I was going to try it that way before posting, but I never had time because fall is here and there's too many baked goods now anyways.  If I do try it that way I'll update here.

Btw: we ate this cake up so fast that I never even remembered to take a pic of a slice!!!  Lol!!

Peanut Butter Layer Cake
adapted from The Daring Gourmet

For the Cake:
1½ cups all-purpose flour
2 teaspoons baking powder
½ teaspoon baking soda
½ teaspoon salt
⅓ cup coconut oil (at room temperature) or oil of choice
⅓ cup smooth, natural, unsweetened peanut butter**
1 cup brown sugar
2 large eggs
1 cup buttermilk
1 teaspoon vanilla extract

For the Frosting:
1 cup smooth, natural, unsweetened peanut butter (I used part natural and part regular)**
½ cup butter, softened
3 cups powdered (confectioner's) sugar
up to ½ cup heavy cream or whole milk 
White or Regular Reese's mini PB cups, chopped, optional, for topping

1.  Preheat the oven to 350 degrees F.  Grease 2, 8 or 9-inch round cake pans.  For better removal, grease, then line with waxed paper, grease again, then flour.  This ensures your cake will come out perfectly.  

2.  In a medium bowl, sift the flour, baking powder, baking soda and salt. Set aside.

3.  In a large mixing bowl, add the peanut butter, oil, and brown sugar. Beat until combined and creamy. Add the eggs and vanilla extract and beat just until combined.

4.  Alternately add the flour and buttermilk to the wet mixture, beating just until combined. Be careful not to over-beat or the cake will be dense and dry. A few small lumps of flour is fine.  Pour the batter into the pan.

5.  Bake for about 30 minutes or until a toothpick inserted into the middle of the cake comes out moist, with a few crumbs.  (Not wet with batter but moist. If the toothpick is dry, the cake is over-baked and will be dry).

6.  Let the cakes sit in the pan for 5 minutes, then invert the cakes onto a wire rack to cool completely.

7.  In the meantime, to make the frosting, place the peanut butter and butter in a large mixing bowl. Beat until smooth and creamy. Add the powdered sugar one cup at a time, continuing to beat. Add the heavy cream until you reach a spreadable consistency. (Note: This is a fairly stiff frosting and hard to spread, but it's so good!)

8.   Frost the bottom half of the cake and down the sides. Place the top layer of the cake, upside down, on top of the bottom layer. Frost the top layer and down the sides.  Optional: top frosted cake with chopped Reese's peanut butter cups (I used white chocolate ones.)

*For a little less work, you can bake the cake in a 9X13 cake pan as a sheet cake and make half the amount of frosting to go on top.  I haven't tried this yet, but will update when I do.*

--Update- I recently made this recipe and put it into a 9x13 pan and halved the frosting.  It was good but not as good as the layer cake!!  Still a good way to try this recipe, though. --

**I made this again using only regular peanut butter- Jif Natural, which really isn't natural because it contains added sugars and oils.  Anyway- the frosting was WAY easier to spread and it tasted just as good.  I'll probably use regular pb next time, at least in the frosting.**


**This post and photos are property of http://dishingwithdish.blogspot.com/ **

Wednesday, March 7, 2018

White Chocolate Macadamia Nut Cookies


White Chocolate Macadamia Nut cookies are some of my favorite cookies ever.  I've tried a few recipes in the past, and they've all been good, but not wow.  I tried this recipe recently, from Joy the Baker, and have finally found my go-to recipe for these cookies.  These are soooo good!!  I made them with my daughter during a snow day last week and it was so nice to have these warm cookies baking while it was snowing outside.  These cookies contain some things usually not found in these types of cookies: cream cheese, browned butter, and dry milk powder.  Joy the Baker is a baking genius; if you love White Choc Mac cookies, you need to try this recipe! Note: I only had salted butter and used it, and it was fine.


White Chocolate Macadamia Nut Cookies
adapted from Joy the Baker
Makes about 4 dozen

8 oz. (1 block) cream cheese, well softened
1/2 cup (1 stick) unsalted butter, softened to room temperature (I used all salted; decreased the salt a tiny bit)
1/2 cup (1 stick) unsalted butter, melted to browned and cooled slightly (brown it; dont' burn)
1 cup light brown sugar, packed
1 cup granulated sugar
2 large eggs
2 teaspoons pure vanilla extract
3 cups all-purpose flour
1 cup instant (dry) milk powder
1 1/2 teaspoon baking soda
3/4 teaspoon baking powder
1 teaspoon salt
1 1/2 - 2 cups coarsely chopped macadamia nuts
2 cups coarsely chopped white chocolate

1.  In the bowl of stand mixer fitted with the paddle attachment, beat together the cream cheese and softened butter until light and creamy, about a minute. Make sure that both the cream cheese and butter are very well softened. Add the browned butter and sugars and beat until well combined. Add the eggs and vanilla extract and beat on medium-low speed for 3 minutes until pale and fluffy. In a medium bowl whisk together flour, milk powder, baking soda, baking powder, and salt until well combined.

2.  Add in the dry ingredients and mix until combined. Fold in the chopped nuts and white chocolate.
Wrap the dough in plastic wrap (or cover the bowl in plastic wrap) and refrigerate for at least 1 hour, or overnight.

3. Remove the dough before baking- about one hour early if refrigerated overnight.  Place a rack in the center and upper third of the oven and preheat oven to 350F. Line a baking sheet with parchment paper.

4.  Spoon out dough balls, a heaping 2 tablespoons of dough for each cookie. Place on the prepared baking sheets, providing at least 1 1/2 inches between each cookies. Bake the cookies for 9-12 minutes, until edges begin to brown but the middle is still a bit gooey. Cool before serving to allow them to hold their shape.
**This post and photos are property of http://dishingwithdish.blogspot.com/**

Wednesday, December 6, 2017

Pistachio Hot Chocolate

There's a wonderful product here called Pistachio Paste.  It's like Nutella, but made with pistachios (and no cocoa, obviously). It's sweet, smooth, and has a wonderful pistachio flavor.  I thought it'd be a good idea to incorporate it into some white hot chocolate.  I used this recipe for Italian Hot Chocolate as a base.

Pistachio Hot Chocolate
adapted from here
Two servings

4 oz. real white chocolate, shaved or chopped fine
1 1/2 cups milk
3/4 tablespoon cornstarch
1/2 teaspoon vanilla extract
1/8 teaspoon sea salt
3-4 Tablespoons pistachio paste
whipped cream, optional
chopped pistachios, optional

1. Place shaved chocolate in a small saucepan over low heat and add 2 tablespoons milk and vanilla extract. Use a wooden spoon to stir chocolate as it begins to melt. Slowly add remaining milk and continuing stirring until completely smooth.

2. Add in cornstarch, sea salt, and pistachio paste, and stir until everything is dissolved and combined. Use a whisk to keep it smooth. As it heats up, it will start to thicken. It needs to thicken enough to coat the back of a metal spoon. You can bring to a low simmer if needed.  It's supposed to be thick and smooth.

3. Pour into 2 mugs (top with whipped cream and pistachios if desired) and serve immediately.


**This post and photos are property of http://dishingwithdish.blogspot.com/ **

Thursday, October 26, 2017

Slow Cooker White Hot Chocolate


We had another Narnia party recently- where we watch the movie and eat Turkish delight, hot chocolate, Chex Muddy Buddies (the powdered sugar looks like snow!) and other fun things.  I wanted to make white hot chocolate and I wanted an easy make-ahead recipe.  This was perfect.  Throw it in the crockpot a few hours ahead of time, and then serve with whipped cream.  Make sure and use real white chocolate or real white chocolate chips for this- they should contain cocoa butter and not hydrogenated oils.  The cocoa butter will separate and go to the top, (looking yellow-ish) but just whisk before serving.

Slow Cooker White Hot Chocolate
adapted from Wishesndishes

2 cups heavy whipping cream
6 cups milk
1 teaspoon vanilla
1 (12 ounce) package real white chocolate chips, or 12 oz chopped white chocolate
whipped cream, for garnish

1.  Stir together the whipping cream, milk, vanilla, and white chocolate chips in a 5 quart slow cooker/crock pot (a little smaller or a little larger could also work).

2.  Cover and cook on low for 2 to 2½ hours, stirring occasionally, until mixture is hot and chocolate chips are completely melted. Stir again before serving. Keep on warm setting if you're serving at a party and want to keep it warm. Stir occasionally, because the cocoa butter from the white chocolate will rise to the top. Garnish with whipped cream as desired.  Enjoy!
**This post and photos are property of http://dishingwithdish.blogspot.com/ **