Showing posts with label maple. Show all posts

Monday, November 28, 2022

Maple Pralines


I made these a few weeks ago to use up some heavy cream from another recipe. They were fun and easy to make. I used my digital thermometer to make these. It's actually a meat thermometer, but it works perfectly for candy, too.  These were very sweet, but they are melt-in-your-mouth delicious with the maple flavor and crunch of the nuts. 
Maple Pralines
adapted from Taste of Home

1 cup sugar
2/3 cup heavy whipping cream
1/2 cup maple syrup
2 tablespoons butter
3/4 cup coarsely chopped pecans, toasted

1. In a heavy 1-qt. saucepan, combine sugar, cream and syrup. Cook and stir over medium heat until mixture boils. Reduce heat to medium-low. Cook, uncovered, until a candy thermometer reads 234° F (soft-ball stage), stirring occasionally.

2. Remove from the heat. Add butter; do not stir. Cool, without stirring to 160° F. Stir in pecans. Beat vigorously with a wooden spoon until mixture just begins to thicken but is still glossy. Quickly drop by spoonfuls onto waxed paper. Cool. Store in an airtight container.

**This post and photos are property of http://dishingwithdish.blogspot.com/ **

Friday, October 14, 2022

Brown Butter Maple Blondies


These maple bars were so, so good. They had the perfect chewy texture and flavor, and then that maple glaze just sent them over the top. I'm so glad I found this recipe. I need to make it again, and soon. These were gone way too fast, but I fear that making a double batch would be dangerous. Note: I used salted butter and reduced the salt down to 1/2 tsp in the blondies. I think the glaze tastes better with salted butter- if using unsalted, use two pinches instead of one (taste after one, though!)

Note: I liked these so much I had these for my birthday cake in 2022.  They are so good!! 
Brown Butter Maple Blondies 
adapted from Grandbaby Cakes

For the Blondies
1 1/3 cup light brown sugar packed
1/2 cup butter melted, browned and cooled (*see note below from original blog post)
1/2 cup maple syrup
1 tbsp vanilla extract
2 large eggs
2 cups all-purpose flour
1/2 tsp salt (3/4 if using unsalted butter)
1/4 tsp baking soda

For the Maple Glaze
1/4 cup butter
1/2 cup maple syrup
1 cup confectioner's sugar sifted
pinch of salt

For the Blondies:
1.  Preheat oven to 350 degrees. Prepare a 9x13 sized baking pan with parchment paper making sure to allow some of the paper to come up the sides of the pan for easy removal. (I am lazy and skipped this, but feel free to use it. I used cooking spray. We just ate ours right out of the pan- lol!)

2.  In your mixer bowl, add brown sugar, browned butter, syrup, vanilla and eggs and mix on medium speed until well combined. Slow mixer down to low speed and add flour, salt and baking soda and mix just until combined- do not overmix. Add blondie batter to parchment paper or pan and spread out using a spatula. Bake for 23-27 minutes (*my Euro oven only took 16-17 minutes to be perfect*, but US ovens may need more time) or until toothpick in center comes out clean.

For the Glaze:
1.  While blondies bake, add butter to a pan over low heat along with syrup and allow butter to melt together with syrup. Once butter melts, quickly whisk in sifted confectioner’s sugar and salt ensuring there are no lumps and spread on warm blondies. Allow glaze to set then cut blondies in bars and serve. (I had some lumps, because I was lazy and did not sift the powdered sugar. Nobody cared though, because these tasted so good. I also whisked my arm off trying to get the lumps out- ha ha.) 

*To Brown Butter:
Place butter in a small non-stick saucepan and turn the heat to medium-high. Once the butter has begun to melt, stir it with a wooden or silicone spoon. A whisk will also work just fine. Allow the butter to keep cooking. First, the butter will begin to bubble and then a foam will form at the top. Next, a nutty scent will start to waft up and there will be tiny brown bits floating to the bottom of the pan. You do not want to let it get too dark. Remove the pan from the heat. Transfer the butter to a heat-safe bowl and allow it to cool completely before using. 

**This post and photos are property of http://dishingwithdish.blogspot.com/ **

Friday, November 19, 2021

Pumpkin Slow Cooker Steel-Cut Oatmeal

This is a good oatmeal for fall.  It's great for doing make-ahead breakfasts, too.  Just refrigerate portions in a microwabable (preferably glass) container, add a bit of milk when ready to re-heat, and warm up for a great breakfast throughout the week.  This recipe does make a lot, so it can feed quite a few people, or provide breakfast for a few days for one or two people.  

I already have a pumpkin oatmeal recipe on here, but this new one is nice because it includes a few more spices for flavor, makes a lot more, AND the most important thing- it uses the whole can of pumpkin!!  That's the best.  Oh, the original recipe is quite involved, with cooking some of the ingredients on the stove first, but I looked at that, thought that nobody has time for that, and just proceeded to dump all ingredients into the crockpot and turn it on, which worked just perfectly.  

Pumpkin Slow Cooker Steel-Cut Oatmeal

Adapted from the Kitchn

Cooking spray, olive oil, or coconut oil
1 1/2 cups steel-cut oats
1 (15-ounce) can pumpkin purée
1 teaspoon ground ginger
1/2 teaspoon ground nutmeg
1/4 teaspoon ground cloves
4 cups water
2 cups whole milk (I use one can evaporated milk, make up the difference w/almond milk)
1/4 cup maple syrup
1 (3-inch) cinnamon stick
1 teaspoon vanilla extract
1/4 teaspoon salt

1.  Coat the bottom and sides of a 4- to 6-quart slow cooker with cooking spray, olive oil, or coconut oil.  Add all ingredients to slow cooker; stir.  Cover and cook on low for 4-5 hours (any longer than that in my slow cooker, and it would burn.)  Stir well and remove cinnamon stick.  Serve with extra milk,  maple syrup and/or cinnamon sugar, if desired.  Also makes great leftovers- just add a splash of liquid before reheating in the microwave.  I added some pepitas on top of servings for crunch, in the photos.  
**This post and photos are property of http://dishingwithdish.blogspot.com/ **

Saturday, December 7, 2019

Slow Cooker Maple-Mustard Pulled Pork


 I love pulled pork recipes and especially making sliders out of them with little sweet Hawaiian rolls.  This is a great make-ahead recipe because you're actually supposed to put the pork together with the other ingredients and refrigerate overnight so the flavors meld (I forgot that part, oops).  This recipe made too much extra sauce for our family because not everyone wanted the extra sauce, so I'd cut that in half next time. I made this Pea Salad to go with it.


Slow Cooker Maple-Mustard Pulled Pork
adapted from The Kitchn

For the pork:
1 (4- to 5-pound) boneless pork shoulder or pork butt, halved
1 tablespoon kosher salt
1 teaspoon freshly ground black pepper
3/4 teaspoon dried oregano
1/2 cup maple syrup
3 tablespoons Dijon mustard
1/2 cup low-sodium chicken broth or water
2 tablespoons tamari or soy sauce
1 tablespoon apple cider vinegar
1 large yellow or white onion, peeled and cut into 8 wedges
4 cloves garlic, peeled and smashed

For the maple-mustard sauce: (I'd cut this in half for our fam)
1/2 cup maple syrup
1/4 cup Dijon mustard
1/2 teaspoon dried oregano
1/4 teaspoon kosher salt
Freshly ground black pepper

For serving:
Hamburger or slider buns
Pickled red onion

1.  Make the pork: Trim off any large pieces of fat from the surface of the pork. Sprinkle the salt, pepper, and oregano evenly over all sides of the pork, then rub the seasonings into the meat. Place in the crock of a 6-quart or larger slow cooker.

2.  Place the maple syrup and mustard in a small bowl and whisk to combine. Pour over the pork, then turn the pork so that all sides are coated in the mixture. Pour the broth or water, tamari or soy sauce, and vinegar around, but not on top of, the pork. Scatter the onion pieces and garlic cloves around the pork. Cover and refrigerate the pork in the crock overnight.

3.  Place the crock in the slow cooker and cook on the LOW setting until the meat can be easily shredded, 8 to 10 hours. Transfer the pork to a cutting board. Pour the cooking liquid through a fine-mesh strainer into a measuring cup and discard the solids. Skim the fat from the surface of the cooking liquid.

4.  When it is cool enough to handle, use 2 forks or your fingers to shred the meat into bite-sized pieces. Discard any large pieces of fat. Transfer the pork back to the slow cooker. Add some of the cooking liquid until moist but not wet and toss to combine. Reserve the rest of the cooking liquid for storing leftovers.

5.  Make the sauce: Place all of the sauce ingredients in a small bowl and whisk to combine. Pile the pulled pork onto buns, drizzle with some sauce, and top with pickled onions.

**This post and photos are property of http://dishingwithdish.blogspot.com/**

Sunday, October 27, 2019

Vermont Maple Cookies


I made these cookies twice last week- the last time I brought them to a work potluck and everyone really enjoyed them.  I personally love the maple glaze on these and think it would be awesome for other baked goods.  (Doughnuts, scones, etc).  I left out the white chocolate chips (too sweet, I think) and the nuts (for sharing with others) in this recipe.  I made regular-sized cookies the first time, and the second time, I used a mini cookie scoop (those are the cookies shown).  It made more, and the mini cookies felt just as satisfying as a larger one. 
Vermont Maple Cookies
adapted from Taste of Home

1 cup butter, softened
3/4 cup sugar
3/4 cup packed brown sugar
2 large eggs, room temperature
1 teaspoon maple flavoring
2-1/2 cups all-purpose flour
1 teaspoon baking soda
1 teaspoon salt

MAPLE GLAZE:
1/3 cup butter, cubed (use salted, or add some salt to the glaze)
1-3/4 cups confectioners' sugar
1/3 cup real maple syrup
1/4 teaspoon maple flavoring

1.  Preheat oven to 350°. In a large bowl, cream butter and sugars until light and fluffy. Beat in eggs and maple flavoring. In another bowl, whisk flour, baking soda and salt; gradually beat into creamed mixture. 

2.  Drop dough by rounded tablespoonfuls 2 inches apart onto ungreased baking sheets. Bake 8-10 minutes or until golden brown. (Can make smaller cookies; baked less time.)  Cool on pans 2 minutes. Remove to wire racks to cool completely.

3.  For glaze, in a saucepan, melt butter over medium heat. Remove from heat. Gradually beat in confectioners’ sugar, syrup and maple flavoring until smooth.  Spread or drizzle over cookies; let dry completely. Store between pieces of waxed paper in airtight containers.
**This post and photos are property of http://dishingwithdish.blogspot.com/**

Friday, November 9, 2018

Baked Steel Cut Oats

This recipe is great because you prepare it overnight and let it sit in the fridge.  Then, the next morning, you just bake it.  It's hearty and healthy.  I love another baked oatmeal recipe, and that one used a lot of butter.  It's good, but I feel better about eating this one.

When you make this, it won't be pretty.  Lol.  It's because of the blueberries (I just used a whole bag of frozen blueberries, I think it was 12 oz.)  But, it will taste and smell great!
Baked Steel Cut Oats
adapted from Mel's Kitchen Cafe

1 cup steel cut oats
3/4 cup sliced almonds or chopped walnuts
1 1/4 teaspoons baking powder
1 1/2 teaspoons cinnamon
1/8 teaspoon nutmeg
1/8 teaspoon salt
2 2/3 cups almond milk (or cow's milk)
1 teaspoon vanilla
2 eggs
1/3 cup pure maple syrup (or brown sugar)
1 tablespoon coconut oil or butter, melted
1 – 2 cups fresh or frozen blueberries (can use a bit more if you want)

1.  In a medium bowl mix the oats, almonds, baking powder, cinnamon, nutmeg, and salt together.

2.  In another bowl or in a liquid measuring cup, whisk the milk, vanilla, egg, maple syrup or brown sugar and coconut oil (or butter) together until smooth. It’s ok that the coconut oil/butter will solidify and form small clumps.  Pour the wet ingredients over the oatmeal mixture and stir to combine.

3.  Lightly grease a 9X9-inch baking dish (can use a similar sized baking dish of any shape – 9X9-inch or larger but smaller than a 9X13-inch).

4.  Toss the blueberries over the bottom of the dish. Give the oatmeal mixture a final stir and pour over the top of the blueberries (if using frozen blueberries, the oatmeal will definitely take on more of a blue-ish hue than if using fresh). Cover with plastic wrap and refrigerate overnight (8-12 hours).

5.  In the morning, preheat the oven to 350 degrees, uncover the baking dish and bake for 55-60 minutes until the mixture is set and oats are tender but still slightly chewy. Stir to combine, if desired, or just scoop out in portions as is. Serve with additional milk (to stir into the oatmeal), if desired.

**This post and photos are property of http://dishingwithdish.blogspot.com/**

Thursday, November 16, 2017

Small Batch Granola


This is a great recipe from Joy the Baker.  I actually doubled the recipe, lol, so it wasn't small-batch for me.  But granola lasts forever if stored correctly.  I'm the only one who eats it in my house, but it still lasted until I finished it.  I like how this recipe uses coconut oil and cinnamon.  One can use either whole or sliced almonds in this.

Small Batch Granola
adapted from Joy the Baker
easily doubled

1 1/2 cups old-fashioned oats
2 tablespoons lightly packed brown sugar
1/2 teaspoon ground cinnamon
1/4 teaspoon freshly grated nutmeg
1/2 teaspoon salt
3 tablespoons pure maple syrup
2 1/2 tablespoons coconut oil, melted
1/2 teaspoon pure vanilla extract
1/3 cup raw whole or sliced almonds
1/3 cup unsweetened flaked coconut

1.  Place a rack in the center of the oven and preheat oven to 350 degrees F. Line a small rimmed baking sheet with parchment paper and set aside.

2.  In a medium bowl, toss together oats, brown sugar, cinnamon, nutmeg, and salt.

3.  In a small bowl, whisk together maple syrup, coconut oil, and vanilla extract. Add the wet ingredients all at once to the dry ingredients and toss until all of the oat mixture is coated in moisture.
Spread in an even layer on the prepared baking pan and bake for 10 minutes. Remove from the oven, toss in the almonds, and bake for another 10 minutes. Remove from the oven and toss in the coconut flakes and bake for 10 minutes until everything is golden brown.

4.  Remove from the oven and allow to cool completely before storing or serving.  Store in an airtight container at room temperature.
**This post and photos are property of http://dishingwithdish.blogspot.com/ **

Wednesday, November 19, 2014

Spinach Salad with Maple-Dijon Vinaigrette

The other day I needed to use up some leftover baby spinach, and we hadn't had salad in a while, so I looked for an easy vinaigrette I could make to go with it.  I found this recipe for a whole salad and it Iwas delicious!!  I didn't mix the dressing with the salad, but let everyone add it at the table.  It would be good either way, though.  The apples, onions and bacon were wonderful flavors with the vinaigrette in this.
Spinach Salad with Maple-Dijon Vinaigrette
adapted from My Recipes

1/4 cup maple syrup
3 tablespoons minced shallots or red onion
2 tablespoons red wine vinegar
1 tablespoon canola oil
1 tablespoon country-style Dijon mustard or spicy brown
1/4 teaspoon salt
1/4 teaspoon freshly ground black pepper
1 garlic clove, minced
1/2 cup sliced red onion
1/2 cup chopped Braeburn apple
4 bacon slices, cooked and crumbled
1 (10-ounce) package fresh spinach

1. Combine first 8 ingredients in a large bowl, stirring with a whisk.  Add  remaining ingredients; toss well to coat.  (Or can prepare vinaigrette in separate small bowl; salad in a bigger one; pass vinaigrette at the table for individual salads.)
**This post and photos are property of http://dishingwithdish.blogspot.com/ **

Friday, February 21, 2014

Salted Coconut Caramel Sauce

I spotted this recipe a long time ago; I'm not sure how, probably Pinterest.  I couldn't wait to make it. It was very good, and we used it for a home ice cream sundae party, along with homemade hot fudge.  
This recipe uses a can of full-fat coconut milk in place of the heavy cream one usually uses in caramel sauce. Coconut milk is perfect for this, because of its creamy richness.  There is a slight coconut flavor, but I couldn't taste it with all the ice cream, lol!  I also spread it on pancakes one day.... so good!  This recipe calls for coconut palm sugar, which I happen to have on hand.... I think because of this recipe, lol!  If you don't have that, just use brown sugar.  

Note:  The pic below is taken after resting in the fridge for a while.  All other pics are taken of it "freshly made".  PS:  The author of this recipe is the blogger behind An Edible Mosaic.  She has an awesome Middle-Eastern cookbook out now; check out her blog page.  I have it and everything looks so delicious.   
Salted Coconut Caramel Sauce
adapted from An Edible Mosaic

1 (14 oz/400 g) can full-fat, unsweetened coconut milk
1/4 cup (60 ml) pure maple syrup or honey
1/4 cup (50 g) coconut palm sugar (or brown sugar)
1 teaspoon pure vanilla extract
1/2 teaspoon coarse sea salt
1 tablespoon unsalted butter

1.  Combine the coconut milk, maple syrup (or honey), and coconut palm sugar in a medium saucepan over medium-high heat.  Bring to a boil, then turn the heat down so it doesn't boil over, and boil until thickened, dark amber in color, and reduced to between 1 to 1 1/4 cups, about 15 minutes, whisking frequently. (The cooking process is all about evaporating off the extra liquid. Because of this, it could take longer depending on the weather.)

2.  Turn off heat and whisk in the vanilla, salt, and butter until smooth.  Cool completely, and then use or store in lidded glass jar in the fridge for up to 3 weeks.

Notes:  Vegan Option: Use maple syrup (instead of honey) and use a vegan “butter” spread.

**This post and photos are property of http://dishingwithdish.blogspot.com/ **

Friday, October 25, 2013

Maple Walnut Ice Cream


My daughter chose this ice cream for us to make together.  It was fun to make it with her, and tasted wonderful; perfect for fall!  I love David Lebovitz's ice cream book.  It never fails to make a delicious ice cream.  For this one, make the Maple Walnuts (Wet Walnuts) ahead of time so they can cool completely before being added to the ice cream.  I toast the walnuts in a skillet, remove then, and then use that same skillet to boil the syrup and complete the walnuts.

Last year, I made this Maple Gelato and loved that as well- it was delicious on apple crisp.  I haven't made an apple crisp yet, this year.

Maple Walnut Ice Cream
adapted from David Lebovitz

1 ½ cups whole milk
2 tablespoons sugar
1 ½ cups heavy cream
5 large egg yolks
¾ cup dark amber maple syrup
1/8 teaspoon coarse salt
¼ teaspoon vanilla extract
Wet Walnuts; recipe below


1.  Warm the milk and sugar in a medium saucepan. Pour the cream into a large bowl and set a mesh strainer on top.

2.  In a separate medium bowl, whisk together the egg yolks. Slowly pour the warm mixture into the egg yolks, whisking constantly, then scrape the warmed egg yolks back into the saucepan.

3.  Stir the mixture constantly over medium heat with a heatproof spatula, scraping the bottom as you stir, until the mixture thickens and coats the spatula. Pour the custard through the strainer and stir it into the cream to cool. Add the maple syrup, salt, and vanilla, and stir until cool over an ice bath.

4.  Chill the mixture thoroughly in the refrigerator, then freeze it in your ice cream maker according to the manufacturer’s instructions. During the last few minutes of churning, add the Wet Walnuts, recipe below.

Wet Walnuts

1/4 cup dark amber maple syrup
3/4 cups walnuts, toasted and very coarsely chopped
Big pinch of salt

1.  Heat the maple syrup in a small skillet or saucepan until it just begins to come to a full boil. Stir in the walnuts, then cook until the liquid comes to a full boil once again. Stir the nuts for 10 seconds, then remove them from the heat and let cool completely. The nuts will still be wet and sticky when cooled. Chop coarsely and add to ice cream during last minute of churning.

**This post and photos are property of http://dishingwithdish.blogspot.com/ **

Wednesday, June 5, 2013

Coconut Steel-Cut Oatmeal (Slow Cooker)

I've had the idea of an oatmeal made with coconut milk floating around in my head for a while.  I just took a recipe I've used often, and instead of one can of evaporated milk, I used one can of coconut milk.  It was delicious.  I topped servings with toasted coconut and sliced bananas.  

Coconut Steel-Cut Oatmeal (Slow Cooker)
adapted from here

1 cup steel cut oats
1 can (13.5 oz) coconut milk, plus enough water to bring liquid to 4 cups
1/4 cup pure maple syrup (or homemade)
2 tablespoons packed light brown sugar (add more or less to taste)
1/4 teaspoon salt
1/2 teaspoon ground cinnamon
1.  Lightly coat the inside of a small (2-3 quart) slow cooker with cooking spray. Combine all the ingredients in the slow cooker and stir. Cook for 4-5 hours on low. Stir thoroughly before serving with a rubber spatula or wooden spoon.
2.  If not serving immediately, cool and refrigerate, covered.  In the mornings, place portions in micro-wave safe bowls and microwave for 3-5 minutes, or until hot.  Serve with dairy or almond milk, fresh fruit and/or frozen berries, and flax and chia seeds, if desired, a dash of extra cinnamon, and toasted coconut.

                                                     **This post and photos are property of http://dishingwithdish.blogspot.com/ **

Friday, April 19, 2013

Breakfast Week: Maple & Brown Sugar Slow Cooker Steel-Cut Oatmeal

Maple & Brown Sugar Oatmeal
Here's another slow cooker steel-cut oatmeal recipe, and another idea for mid-week breakfast!  I took the "formula" of one cup oats, 4 cups liquid, plus any sweeteners/spices, and cooked this in my slow cooker on Low for 5 hours, getting inspiration from Mel's Kitchen Cafe again.  I actually think this may be my fave oatmeal out of the other 6 similar recipes I've made.  I used one can of evaporated milk, and just water for the rest of the liquid.  This makes it extra creamy.  You can try reduced-fat evap. milk if you want to cut down on fat/calories.  Since I liked this one so much, and so did my daughter and husband, this was gone in one morning.  Maybe it's time to start doubling the batch!
Maple & Brown Sugar Oatmeal
One thing I've been doing lately, to make our morning oatmeal even healthier, is to make it easier to add mix-ins like chia seeds (good source of Omega-3's and fiber) and ground flax seeds.  I used two clean spice containers and filled each with either chia or flax, then labeled them.  I took the shaker top out, because they are too big to fit through.  This makes it easy to just shake out some onto our oatmeal each day, and it's a good way for me to remember to use this stuff.
Chia & Flaxseed for Oatmeal
Maple & Brown Sugar Slow Cooker Steel-Cut Oatmeal
adapted from Mel's Kitchen Cafe and other sources

1 cup steel cut oats
1 can (12 oz) evaporated milk, plus enough water to bring liquid to 4 cups
1/4 cup pure maple syrup (or homemade)
2 tablespoons packed light brown sugar
1/4 teaspoon salt
1/2 teaspoon ground cinnamon

1.  Lightly coat the inside of a small (2-3 quart) slow cooker with cooking spray. Combine all the ingredients in the slow cooker and stir. Cook for 4-5 hours on low. Stir thoroughly before serving with a rubber spatula or wooden spoon.

2.  If not serving immediately, cool and refrigerate, covered.  In the mornings, place portions in micro-wave safe bowls and microwave for 3-5 minutes, or until hot.  Serve with dairy or almond milk, fresh fruit and/or frozen berries, and flax and chia seeds, if desired, and a dash of extra cinnamon.
Chia & Flaxseed for Oatmeal
**This post and photos are property of http://dishingwithdish.blogspot.com/ **

Wednesday, March 27, 2013

Coconut Oil Granola

Granola with Coconut Oil
On Pinterest lately, I've seen a few recipes for granola using coconut oil instead of canola or some other kind of oil.  I have coconut oil on hand and don't use it enough, so I figured I'd take my regular granola recipe and just swap out the regular oil for coconut.  The recipe already contains coconut, so it was perfect.  I had to melt the coconut oil first in the microwave, and it did not lend a strong coconut flavor to the granola.  I would have been fine either way, but this way, my picky kids ate it without protest.  :) 

Almond Maple Coconut Oil Granola
adapted from here and Allrecipes.com

3 cups rolled oats
1/2 cup sliced almonds or walnuts
2/3 cup raw whole almonds
1/4 cup wheat germ
2 Tablespoons ground flax seeds
1/2 cup pepitas, optional (shelled pumpkin seeds)
1/2 (14 ounce) package flaked coconut
1/3 cup unsalted sunflower seeds
1/3 cup pure maple syrup
2 Tablespoons packed dark brown sugar
1/4 cup coconut oil, melted
2 Tablespoons cup warm water
1/8 teaspoon salt

1. Preheat the oven to 250 degrees F (120 degrees C). Lightly grease 1 large cookie sheets (I use a 9x13 pan) with cooking spray.

2. In a large bowl, toss together the oats, almonds, wheat germ, flax, pepitas, coconut, and sunflower seeds. In a separate bowl, whisk together the maple syrup, brown sugar, coconut oil, water and salt. Pour the liquid over the oat and nut mixture, and stir until evenly coated. Spread out on the prepared cookie sheet.

3. Bake for 1 hour and 15 minutes in the preheated oven, stirring occasionally (every 15-25 min) until evenly toasted. Cool, and store in an airtight container at room temperature.
Granola with Coconut Oil
**This post and photos are property of http://dishingwithdish.blogspot.com/ **

Monday, February 11, 2013

Blueberries and Cream Slow Cooker Steel-Cut Oatmeal

boat1W
Here's another slow-cooker steel-cut oatmeal recipe.  I kind of put this together after making so many other oatmeals; you can pretty much make any flavor, as long as you keep the liquid to oats ratio the same.  Borrowing an idea from this Apple Cinnamon Oatmeal, I used part apple juice for some of the liquid.  This provided sweetness without having to add much sugar.  Although, for good meausure, I did throw in a few tablespoons of maple sugar, because I had it around and enjoy using it.  You can leave it out or sub brown sugar.  If you can't get dried blueberries, try dried cranberries instead.
boatW

Blueberries and Cream Slow Cooker Steel-Cut Oatmeal
by What a Dish!, from inspiration all over the web

1 cup steel cut oats
2 cups apple juice
1 can (1.5 cups) whole evaporated milk
1/2 cup almond/coconut milk (or cow's milk)
1/2 tsp cinnamon
1/2 tsp cardamom
3 TB Maple sugar
1/2 cup (heaping) dried blueberries (or cranberries)

1. Combine all ingredients in small or medium slow cooker; cook on Low for 4-5 hours.

**This post and photos are property of http://dishingwithdish.blogspot.com/ **

Friday, November 16, 2012

Maple Gelato


We recently had company for dinner and I had an excuse to make this delicious ice cream that I've had my eye on for a few weeks.  The base whips up very quickly- you just use pure maple syrup in place of any sugar.  Since this is a gelato, it contains mostly whole milk and very little cream.  It also contains egg yolks for richness. 
You are supposed to use the darker Grade B Maple Syrup, since that flavor is more intense, but I can only purchase Grade A here.  With Grade B, my gelato would have been darker with a more intense maple flavor, but I loved it just the way it was. 
We served this with a delicious Apple Crisp off the same food blog (ezrapoundcake.com)  What a delicious combination!  I'll share the crisp recipe sometime soon.  This would be a delicious ice cream to make for Thanksgiving and serve with apple or pumpkin pie, or an apple crisp like we had.  Our guests were raving over dessert!  :)

Note:  It's so important to always, always strain cooked ice cream mixtures like this before chilling.  I thought I had done a great job of not letting the eggs cook at all while this was on the stove, but when I went to strain it, there was a thin layer or cooked egg mixture on the bottom of my pan.  No problem, because I was straining it anyway.  If I hadn't, the finished ice cream product would be full of little bits of sweet scrambled egg- gross! 

Maple Gelato
adapted from Ezra Pound Cake

1 cup maple syrup, Grade B or darkest available (Grade A works too)
4 egg yolks
2 1/2 cups whole milk
1/4 tsp salt
1/2 cup heavy whipping cream
1.  In a large bowl, combine the syrup and egg yolks. Beat together until it gets noticeably lighter in color, then set aside.  (I used my KitchenAid with paddle attachment.)
2.  Combine the milk and salt in a 3 quart pot over medium heat. Bring to a boil, then take off the heat.  Slowly pour 1/2 cup of the hot milk into the syrup mixture, whisking constantly. Pour the milk/syrup mixture back into the pot with rest of the milk, and add the cream.

3.  Cook over low heat, stirring constantly, until the mixture coats the back of a spoon. Take the thickened mixture off the heat, and pour through a mesh sieve into a bowl or tupperware. Let cool 20 minutes, then cover and refrigerate until cold (overnight is good). 

4.  Freeze in your ice cream maker according to manufacturer's directions.  For firm ice cream, transfer to a freezer container and freeze for about 6 hours or until firm.
**This post and photos are property of http://dishingwithdish.blogspot.com/ **

Friday, October 19, 2012

Overnight Maple-Glazed Cinnamon Rolls

Two weekends ago, I wanted to make some overnight cinnamon rolls.  I didn't want cream cheese frosting; instead, I wanted a smooth maple glaze to top them while they were still warm.  This recipe was perfect!!  I LOVED the maple glaze.  So did everyone else, as they were all fighting over the residue left in the pan. 

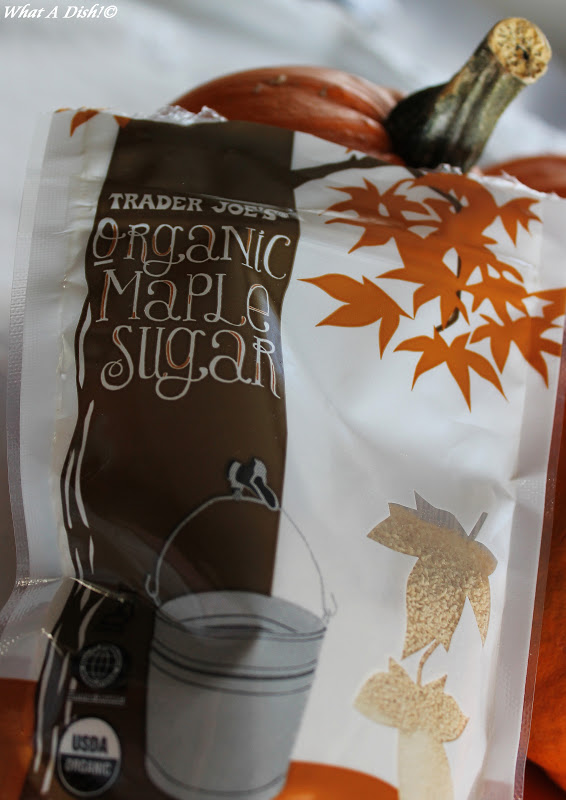
These turned out so big that only 8 rolls fit in my 9x13 pan.  I put the other 4 into a smaller baking dish.  Also, luckily I had brought back some Trader Joe's Maple Sugar when I visited the States- I loved it in here and I know there's no way I'm finding that locally!  I also added a touch of maple extract.
Overnight Maple-Glazed Cinnamon Rolls
adapted from Pink of Perfection

Dough:
1 cup milk
1/3 cup butter
1 (.25 ounce) package active dry yeast
1/2 cup white sugar
4 1/2 cups all-purpose flour (I used 1 cup ww pastry)
1 teaspoon salt
3 eggs
Filling:
1 1/3 cups (packed) light brown sugar
2 1/2 tablespoons ground cinnamon
3 tablespoons unbleached all purpose flour
4 tablespoons unsalted butter, room temperature
Glaze:
1 1/2 cups powdered sugar
1/2 cup maple sugar (if you can’t get maple sugar, use more powdered sugar)
1/4 cup butter, melted
2 tablespoons (or more) whole milk (I used almond milk)
1 teaspoon vanilla extract
1/2 teaspoon maple flavoring
1/8 teaspoon coarse kosher salt
1.  Heat the milk in a small saucepan until it bubbles, then remove from heat. Stir in butter until melted. Let cool until lukewarm.
2.  In a large mixing bowl, combine 2 1/4 cup flour, yeast, sugar and salt; mix well. Add eggs and the milk mixture; beat well. Add the remaining flour, 1/2 cup at a time, stirring well after each addition. When the dough has just pulled together, turn it out onto a lightly floured surface and knead until smooth, adding more flour as needed, about 5 minutes. (Or continue to knead in your KitchenAid, if using).
3.  Cover the dough and let rest for 10 minutes. Meanwhile, in a small bowl, mix together filling ingredients.  Roll out dough into a 9×12 inch rectangle. Spread dough evenly with filling mixture. Roll up dough from the long end and pinch seam to seal. Cut into 12 equal size rolls and place cut side up in a 9×13″ baking pan (may need another smaller pan too). Cover and refrigerate overnight.
4.  The next morning, remove cinnamon rolls from refrigerator and let sit on the counter for about 30 minutes to take the chill off. Preheat oven to 375 degrees F.
5.  Bake for about 20 minutes, or until browned. Meanwhile, in a small bowl (or saucepan used to melt the butter), whisk together glaze ingredients, adding more milk to thin glaze, if necessary. Remove rolls from oven, and pour glaze over hot cinnamon rolls. Serve warm.
**This post and photos are property of http://dishingwithdish.blogspot.com **

Monday, October 8, 2012

Canadian Thanksgiving + Butter Tarts!

Even though we are not Canadian, we celebrated Canadian Thanksgiving today.  I've always wanted to do it, and everyone was home for a school holiday today, so we went for it.  I've been looking for an excuse to make these butter tarts for almost two years now and I'm so glad I finally had a great excuse today!  Butter Tarts are a classic Canadian dessert.  I've wanted to make them ever since the good ol' 90's song, Steal My Sunshine by Len.  I used to listen to this song in high school.  There's some silly dialogue in the beginning that goes like this: Tim: hey Matt.  Matt: Yeah Tim? Tim: Hey have you talked to Mark lately? Matt: Uh..haven't really talked to him but..he looks pretty uh..down. Tim: He looks pretty uh..down? (while laughing) Matt: Yeah well maybe we should cheer him up. Tim: What do you uh.. suppose we should do? Matt: Well does he like butter tarts??!!  (Vid at the bottom of this post!!)

Cheesiest thing ever, but I loved it.  You should go listen to the song (link above) if you haven't already!  Anyway, when looking for a recipe to make these, I came across a Joy of Cooking one, and I bookmarked it to make, but then I came across one with a maple flavor by the Canadian cooking blog, Closet Cooking, and knew that was the one I had to make.  I only changed one thing- I omitted the raisins and just added more walnuts in their place. 

These are like tiny pecan pies, but with walnuts.  I love pastries like this- so delicious.  I found one pastry for a single-crust pie (using my mom's recipe) was the perfect amount for this.  I cut circles that were a little less than 4 inches.  Then press them into a standard muffin tin.

Maple Butter Tarts
adapted from Closet Cooking

1 pie crust pastry for a single-crust pie (chilled)
1 egg
1/2 cup brown sugar (packed)
1/2 cup maple syrup
1/4 cup butter (melted)
1 teaspoon vanilla extract
1/4 teaspoon salt
1/2 cup walnuts (chopped)
1/2 cup raisins (optional- or just sub with more walnuts)

1. Roll the pastry out to 1/8 inch thick and cut out 12, 4-5 inch circles.  Press the circles of dough into a standard sized muffin pan.  Chill the muffin pan in the fridge for 45-60 minutes.

2. Preheat oven to 350 F.  Mix the egg, brown sugar, maple syrup, butter,vanilla extract, salt, walnuts and raisins (or extra walnuts) in a bowl.  Pour the mixture into the tart shells.  Bake until set, about 15-25 minutes.
Our meal to Celebrate Canadian Thanksgiving!  :)


**This post and photos are property of http://dishingwithdish.blogspot.com/ **