Showing posts with label Mexican. Show all posts

Thursday, May 7, 2020

Slow Cooker Carnitas


These were so good!  I already have two other Carnitas recipes, but I think I like this recipe the best- because it's the easiest, but still has outstanding flavor.  For my other recipes, you have to cube the raw pork butt, which is a huuuuge pain in.... the butt.  Ja ja ja!!! (Ha ha ha!!)  For this one, you cook it in the slow cooker and then shred.  I think the end results are the same- no reason to cube.  I'd use this method on my older recipes, too.  You do sear the roast first on the stove, but on one of my other recipes there was cutting + searing.  I loved the end result, but it was too hard to make regularly.  Not anymore though!

Slow Cooker Carnitas
adapted from Carlsbad Cravings

4-5 lbs pork shoulder/pork butt trimmed of excess fat (can use smaller, too)
1 tablespoon olive oil
1/4 cup orange juice
2 tablespoons lime juice
1 teaspoon liquid smoke
2 bay leaves
1 onion, chopped
1 jalapeno, deveined, deseeded, chopped, optional

Wet Spice Rub:
3 tablespoons olive oil
2 tablespoons tomato paste
1 tablespoon reduced sodium soy sauce
1/4 cup brown sugar, packed
1 tablespoon ground cumin
2 tsps EACH dried oregano, salt
1 tsp EACH chili powder, garlic powder, onion powder
1/2 tsp EACH smoked paprika, pepper
1/2-1 teaspoon ground chipotle chili pepper (optional; adds heat)

1.  Heat 1 tablespoon olive oil over high heat in a large nonstick skillet. Using tongs or 2 forks, sear pork on all sides until lightly browned. Transfer pork to a large plate or cutting board until cool enough to handle.

2.  Meanwhile, whisk together all of the Wet Spice Rub ingredients in a medium bowl. When pork is cool enough, massage Wet Spice Rub evenly all over, then transfer pork to slow cooker. Add orange juice, lime juice, liquid smoke, and 2 bay leaves to slow cooker. Top pork with onions and optional jalapeno. Cook on LOW for 8 to 10 hours or on high for 5-6 hours OR until pork is fall apart tender and easily shreds with a fork.

3.  Remove pork from slow cooker to cutting board, shred, and add back to slow cooker and toss with juices. Cook on low for 20 minutes. Meanwhile, preheat oven to 450 degrees F. Line a large baking sheet with foil.

4.  After 20 minutes, remove pork (do NOT discard juices in slow cooker) and add shredded pork to baking sheet in an even layer. Drizzle with some of the remaining juices (about 1/4 cup) and bake for 15 minutes then broil to desired crispiness, watching closely so meat doesn’t burn (about 5-10 minutes). Drizzle with additional juices and toss. (If you have leftovers---- they are SO good warmed up on the stove in a non-stick skillet.  They get all crispy in places that way. I can't figure out how to broil in my Euro oven, so i actually preferred the stovetop method.)  

5.  Serve warm in tortillas, on rice, salad, etc. with favorite toppings.


**This post and photos are property of http://dishingwithdish.blogspot.com/ **

Friday, June 8, 2018

Mexican Street Corn Soup


This is a soup inspired by Mexican Street Corn, kind of like this corn salad- Esquites.  I don't think this soup is a thing in Mexico; but it's still SO delicious.  I loved this so much.  There were some leftovers and those tasted even better.  Lime juice isn't included in the original recipe, but I served this with lime wedges and it really took it to the next level.  The bacon was tasty, although I'm pretty sure it's not part of actual Mexican street corn.  Lol.  I can't get the right kind of cheese here; cotija, so crumbled feta makes a great substitute.  


Mexican Street Corn Soup
adapted from The Stay at Home Chef

4 tablespoons butter
1 small white onion, chopped
1 jalapeno, minced (remove seeds/ribs for less heat)
4-5 cloves garlic, crushed
3 tablespoons flour
2 teaspoons ground cumin
1 teaspoon chili powder
4 cups chicken stock
6 cups frozen corn kernels
1 teaspoon sugar
1 teaspoon salt- or to taste
1½ cups heavy cream, half and half, or whole milk (I used a mix of cream and milk)
1 cup freshly chopped cilantro

Toppings:
6 slices bacon, cooked and crumbled
½ cup crumbled cotija or feta cheese
1 jalapeno, sliced
avocado, slices
chopped cilantro
lime wedges

1.  Melt the butter in a large saucepan over medium high heat. Add in the onions and minced jalapeno and sauté for about 5 minutes, then stir in garlic and cook an additional 1 minute.

2.  Stir in the flour, cumin, and chili powder and cook 1-2 minutes. Whisk in the chicken stock until smooth and bring to a boil. Add in the corn, sugar, and salt. Once it returns to a boil, reduce the heat to low and simmer 10 minutes.

3.  Stir in cream or milk and cilantro. Serve topped with any or all of the toppings. 
**This post and photos are property of http://dishingwithdish.blogspot.com/ **

Thursday, June 1, 2017

Mexican Corn & Tomato Salad


I made this delicious salad a few weeks ago; I've really been slacking in the blogging department lately.  Anyway, I loved the flavors of this salad- which is basically Esquites (Mexican Corn Salad) with tomatoes thrown in, and more cheese.  (Weirdly enough, I blogged about Esquites a year plus one day ago!)

Just make this, ok?  It's summertime, and you need salads like this; it'd delicious and easy and there's veggies.  So just do it.

Mexican Corn & Tomato Salad
adapted from Mel's Kitchen Cafe

For the salad:
1 tablespoon olive oil
1 1/2 cups fresh or frozen (thawed at room temp) corn kernels
2 cups halved grape or cherry tomatoes
1 cup crumbled queso fresco cheese, or feta
2 tablespoons chopped fresh cilantro
Salt, pepper and sugar to taste

For the dressing:
1 tablespoon freshly grated lime zest (zest the lime(s) before juicing)
1 tablespoon fresh lime juice
1 tablespoon white wine vinegar
1 tablespoon olive oil
1 tablespoon minced garlic (from about 3 garlic cloves)

1.  In a large skillet, heat the 1 tablespoon olive oil over medium heat. Stir in the corn and cook until soft (but not mushy), 3-5 minutes, stirring/tossing occasionally. Cool corn slightly and set aside.
Whisk together the lime zest, lime juice, vinegar, 1 tablespoon olive oil and garlic in a small bowl.
In a medium bowl, combine the tomatoes, cheese, cilantro and corn. Toss the salad with the vinaigrette and season with salt, pepper and sugar to taste.
**This post and photos are property of http://dishingwithdish.blogspot.com/ **

Thursday, June 2, 2016

Esquites (Mexican Corn Salad)

I've made Esquites before, but I found a new recipe that was a tiny bit different and I wanted to try it out.  We have fresh chives growing, and they produced blossoms, so we added some of those into the salad as well.  I love the little purple blossoms.  All of the flavors in this worked so well together and we really enjoyed it.
Esquites (Mexican Corn Salad)
adapted from the Kitchn

2 tablespoons sunflower, canola, or other neutral cooking oil
4 cups fresh or frozen yellow corn, thawed if frozen (from about 6 ears)
2 cloves garlic, minced
1 small hot pepper (such as jalapeño or red chile), seeded and minced (I used jarred)
3 tablespoons crumbled cotija or feta cheese, plus more for garnishing
2 tablespoons mayonnaise (or more to taste)
2 tablespoons chopped cilantro
2 tablespoons chopped chives, with flowers, if available
1 1/2 teaspoons Mexican-style chili powder (or regular)
Juice from two limes
Kosher salt, to taste

1.  In a large cast iron skillet, heat oil on medium-high until shimmering. Add the corn and cook, stirring occasionally, until the corn is toasted and golden brown, 15 to 20 minutes. Add the garlic and cook for another 30 seconds or so. Remove from the heat and allow to cool for a few minutes.

2.  In a mixing bowl, combine the toasted corn mixture with the remaining ingredients. Adjust seasonings, adding more of your preferred flavors, if desired. Serve at room temperature with additional cotija cheese.
**This post and photos are property of http://dishingwithdish.blogspot.com/ **

Friday, June 20, 2014

Coconut Horchata

horW
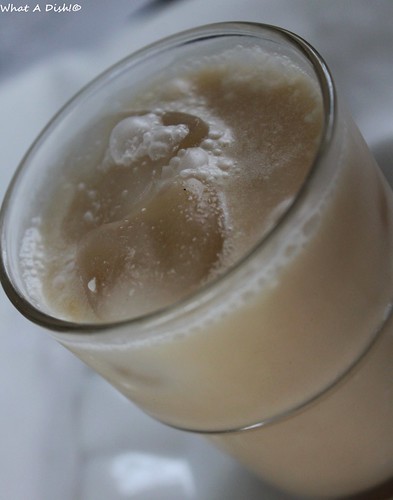
Way back in May, on Cinco de Mayo, we had this for our drink that night.  :)  I forgot what else we had, probably Carnitas and guacamole or something.  My husband I love horchata, and usually just make the rice kind.  (Horchata is a dairy-free rice drink from Mexico, usually flavored with cinnamon.)  I love that this recipe uses coconut milk also.  The only thing is that the coconut milk is kind of hard to incorporate; just whisk really well and enjoy anyway.  I think the kids tried this and like it.... but I don't remember.
hor4W
Coconut Horchata
adapted from Allrecipes

1 cup uncooked white rice
1/2 teaspoon ground cinnamon
4 1/2 cups water, divided
2/3 cup light or regular coconut milk
1/3 cup superfine sugar (or to taste)
1 teaspoon vanilla extract

1. Pour rice, cinnamon, and 3 cups water in a blender; blend until rice begins to break up, about 1 minute.
Transfer rice mixture to a large bowl and stir in remaining 1 1/2 cups water; let stand for at least 3 hours, whisking occasionally.

2.  Strain rice mixture with a fine sieve into a large pitcher and discard rice.  Stir coconut milk, sugar, and vanilla extract into the pitcher. Chill completely and stir before serving over ice.


                                                          **This post and photos are property of http://dishingwithdish.blogspot.com/ **

Monday, July 22, 2013

Mexican Corn Salad (Esquites)

I spotted this recipe on Closet Cooking some time ago, but had to wait to make it.  On the remote island we live on, it's hard to get corn on the cob.  You can get a version of it, but it's not the same as the super-sweet North American version.  So, I waited until we came to the States on vacation to make this. 
The best pan for this would probably be cast-iron, to really get the char on the corn.  All our rental condo had was non-stick cookware though, so I made due with that and it was fine.  But I wasn't really able to get a char at all.  This was still delicious, though.  

Mexican Corn Salad (Esquites)
adapted from Closet Cooking

  • 2 tablespoons butter
  • 3 cups corn (about 3-4 ears), cut from the cob
  • 1 small jalapeno, seeded and finely diced
  • 3 tablespoons mayonnaise
  • 1 glove garlic, grated
  • 2 green onions, sliced
  • 1 handful cilantro, chopped
  • 1 lime, juiced
  • 2 tablespoons cotija or feta cheese, crumbled
  • chili powder to taste
  • 1.  Melt the butter in a heavy skillet over medium-high heat.  Add the corn, toss, and let it si,t cooking until charred.  Mix it up and let it char again, about 6-10 minutes.  Add the jalapeno, saute for a minute and remove from heat.  Mix everything and serve warm or at room temperature.  (I sauteed the garlic too, but some fresh garlic flavor would also have been nice.)

**This post and photos are property of http://dishingwithdish.blogspot.com/ **

Friday, June 7, 2013

Carnitas II (Can Make in the Crockpot!)

After trying another recipe for Carnitas, I saw Closet Cooking's version.  His was slightly different, plus he included a slow cooker version, so I made it right away.  My husband and I really loved this version, too, and I LOVE that the bulk of the cooking is done in the crockpot.  You just have to reduce the sauce and broil the meat after.  Since I made it in the crockpot, I reduced the water down to one cup.  
This time, I had the ingredients on hand to make Guacamole Salsa from Domestic Creativity.  (Scroll down for recipe.)  I also made some Pico de Gallo.  All of these flavors together was SO good; almost too much to take in all at once!!  I LOVED this meal.  I don't want to make it too often, because the cut of meat you have to use (Pork butt or Boston butt or shoulder; all the same thing, and from the shoulder, NOT the derriere!) is so fatty that I try not to.  Although I have a pork butt in my fridge right now..... but I might freeze it for later.  (You have to buy stuff when you see it, here, or it may be a while until you see it again!)  

Carnitas II (Slow Cooker)
adapted from Closet Cooking

  • 1 (2-4 lb) pork butt or shoulder, fat trimmed and cut into 2 inch pieces
  • 1/2 teaspoon salt
  • 1 tablespoon oil
  • 1 cup water
  • 3/4 cup orange juice
  • 1/4 cup lime juice
  • 4 cloves garlic, chopped
  • 1 tablespoon chili powder
  • 1 teaspoon cumin
  • 1 teaspoon oregano
  • 1/2 teaspoon pepper

  • 1.  Season the pork with the salt.  Heat the oil in a large pan over medium-high heat, add the pork, sear on all sides and set aside.  Add 1 cup water and scrape the brown bits from the bottom of the pan.

  • 2.   Place everything in a slow cooker and cook until the pork is falling apart tender, about 4-5 hours on high or 6-8 hours on low.  Remove the pork from the liquid, set aside to cool and shred, removing any fat.  Place pork on a rimmed baking sheet, lined with greased foil.

  • 3.  Meanwhile, skim any fat from the liquid and simmer (in a large skillet) to reduce to 1 cup.  Mix the liquid into the pork on the baking sheet, spread it out in a single layer, and broil until crispy on top, about 4-6 minutes.  Flip and broil until crispy, about 4-6 minutes.  Enjoy on by itself or in tacos, burritos, quesadillas, etc.  

Guacamole Salsa
adapted from Domestic Creativity

1 8oz jar salsa verde (my sub since I cannot get tomatillos here)
1 jalapeno pepper or pickled jalapenos
1/3 bunch cilantro
1 thick slice of onion
juice of 1 lime
1 garlic clove
1 avocado
salt, to taste (I omitted since salsa was salty)

1.  Blend everything in a food processor or blender and serve it over the Carnitas meat in tacos.  Keeps in the fridge for a week in a sealed container.
 
**This post and photos are property of http://dishingwithdish.blogspot.com/ **

Friday, May 3, 2013

Pork Carnitas (for Cinco de Mayo!)

carnW
Recipes for Carnitas are all over the internet recently.  They are very popular and it's easy to see why.  They are delicious!  When I made this recipe from Domestic Creativity's blog, I didn't have everything on hand to make the Avocado Salsa she made with hers, so I didn't, but I'm sure that would have taken this to a whole new level.  I really want to make that sometime soon.  We just topped ours with sour cream and cilantro.
carn2W
Pork Carnitas
adapted from Domestic Creativity

3-4 pounds boneless pork butt, fat trimmed and cut into 2 inch cubes
1/2 tsp salt, or to taste
3/4 tsp pepper
1 tsp ground cumin
1 onion, peeled and halved
2 bay leaves
1 tsp dried oregano
2 Tb fresh lime juice
2 C water
1 medium orange, juiced,  and keep the spent halves

1.  Adjust oven rack to lower middle position and heat to 300 degrees.   Combine all the ingredients in a large Dutch oven or oven-safe stock pot (with lid), including the spent orange halves and juice. Bring the mixture to a simmer over medium-high heat, uncovered.   Once it simmers, cover pot and transfer it to the oven.  Cook until the meat falls apart when prodded with a fork, about 2 hours.

2.  Remove the pot from the oven and turn on the broiler. Use a slotted spoon to remove the meat from the pan and place it on a large foil-lined jelly roll pan sprayed with cooking spray. Remove and discard everything from the pot except for the cooking liquid. Place pot over medium high heat on the stove and boil until thick and syrupy, about 20 minutes. You should have about 1 C of liquid remaining when it is finished.


3.  While the liquid is reducing, use two forks to pull each cube of pork into three equal sized pieces. Once the liquid has become a syrup, gently pour it over the pork pieces on the baking sheet and lightly toss, trying not to break up pork further.  Taste and add additional salt and pepper.

4.  Make sure the pork is in a single layer on the baking sheet. Place the jelly roll pan on the lower middle rack of the oven and broil until the top of the meat is well browned and edges are slightly crisp, about 5 to 8 minutes. Using a wide metal spatula, flip the pieces of meat and broil the other side until well browned and edges are slightly crisp, 5 to 8 minutes. Don't overcook or meat will dry out!  Serve immediately in a tortilla with all your favorite toppings.  (My oven is in code or something and I have no idea how to turn on the broiler.  So I just heated it as hot as it would go for this last step.)

carn3W
**This post and photos are property of http://dishingwithdish.blogspot.com/ **

Sunday, December 2, 2012

Mexican Sweet Corn Cake

sccW
I LOVE the Sweet Corn Cake at Chevy's restaurant.  Well, I did love it, about 10 years ago, when I went there like one or two times, lol!!  I still remember how good it was though; my fave part of the meal.  I've been playing around with the idea of making it at home for a while, but I finally did when I spotted a recipe from Our Best Bites.  This stuff is gooood, and just like Chevy's!! 

For those who are not familiar, I think this is kind of like Spoon Bread, although it's weird I'm using that to describe this, since I've never had Spoon Bread, either.  Ha ha!  It's slightly sweet and very corn-flavored, and scoop-able.  It bakes in a water bath- don't be scared.

Mexican Sweet Corn Cake
adapted from Our Best Bites

1/2 cup real butter, softened
1/3 cup masa harina
1/4 cup water
1/4 cup corn meal
1/3 cup sugar
1/4 teaspoon table salt
1/2 teaspoon baking powder
2 tablespoons milk
1 1/2 cups fresh or frozen corn

1.  Preheat oven to 350.  Combine butter, masa harina, and water, and milk in a medium sized bowl and beat until creamy.

2.  Add corn meal, sugar, salt, and baking powder on top of the creamed butter mixture and use a fork or whisk to lightly whisk just the dry ingredients together. Beat the entire mixture until smooth. Place corn in food processor (I leave mine frozen) and pulse until roughly broken up. Add water and corn to bowl and mix until combined.

3.  Spread mixture in an ungreased 8×8 inch pan and top with foil. Place 8×8 pan inside a 9×13 inch pan and place both pans in oven. Pour hot water in 9×13 inch pan just until it goes about an inch up the sides. Bake for about 55 minutes. Remove from oven, uncover, and let sit 10-15 minutes before serving.
scc2W
**This post and photos are property of http://dishingwithdish.blogspot.com/ **

Saturday, July 7, 2012

Queso Blanco Dip

I've spotted various white cheese dip recipes on the internet in the past year or so, and they all sparked my interest and made me want to make some!  Almost every recipe I've seen calls for melted white American cheese, and I really didn't want to use that, so I never actually made any of those recipes.  Then, they started selling Mexican Asadero cheese at my local store, so I bought some and finally found a recipe online for white cheese dip, using Asadero instead of white American!  I was so happy! 

This particular recipe is also different in that it uses a white sauce (bechamel).  That's the base of every Mac & Cheese recipe I make, so I am very good at making it!  (We have way too much mac and cheese around here....)  This recipe was so easy.  I actually made it for dinner after a long day at the pool, and we had this dip with chips, and some fruits and veggies on the side.  Everyone loved it!  The kids just ate it up.  It was so good!  I used pickled jalapenos and only put a little bit in; next time I would add more.  Actually, next time I think I'll use a mix of sharp cheddar and pepper-jack cheese.  I loved the Asadero in here, but I would like more of a kick, and plus, the Asadero was kind of expensive!  Lol. 

Two years ago I made a yellow Chile con Queso dip... which we all loved, as well!
Queso Blanco Dip
adapted from Rockin' Robin's Mexican Recipes

1/2 yellow onion, finely chopped (I omitted this because of time)
3 cloves garlic, minced
2 tsp. olive oil
1/4 cup butter
1/4 cup white flour
2 cups milk
1 tsp. ground cumin
4 oz. canned chopped green chiles, drained
2 fresh jalapeno peppers, seeded, deveined, and finely chopped OR similar amount pickled jalapenos
10-12 oz. monterey jack OR Mexican asadero cheese, shredded
salt to taste
fresh ground pepper to taste

1.  In a small skillet, saute onion in olive oil for 5 to 10 minutes over medium heat. Stir frequently to prevent burning.  Add the garlic, reduce the heat to low, and cook for 5 min. Set aside.

2.  In a 2 quart sauce pan, melt the butter over very low heat.  Once the butter is just melted, add the flour and stir with a whisk to blend it together.  Turn the heat up just a little bit so that you can see the flour/butter mixture slightly bubbling. Stir constantly for 1 minute.  Now add a little milk while continuing to stir with the whisk. Add the rest of the milk and turn the heat up to medium.  Continue to whisk for about 5 to 10 minutes. You will notice the sauce thickening.

3.  Turn the heat down just a little and add the cumin, onion and garlic mixture, the green chiles, and the jalapenos. Stir until well mixed and hot.  Add a pinch of salt and pepper and stir.
 
4.  Turn off the heat and add the shredded cheese, one handful at a time.  Stir each handful in with the whisk until melted. Keep adding handfuls and stirring until all the cheese is mixed in and creamy.  Serve immediately.

**This post and photos are property of http://dishingwithdish.blogspot.com/ **

Tuesday, May 1, 2012

Mexican Molletes (Moyetes)

This is a delicious, simple dish.  These are Mexican Moyetes, sometimes spelled Molletes.  A friend from Mexico taught a group of ladies from my church how to make these.  I think if Bolillos are available, those are what is typically used, but over here, thick loaves of Italian bread suffice.  You take slices of bread, spread some softened butter over them, and brown them, butter side-down, on a griddle.  Then you spread refried beans over them, top that with cheese, and bake until the cheese melts.  These are then topped with Crema (make your own by mixing a small amount of milk into regular sour cream) and Pico de Gallo

My kids LOVE these!  Well, so do I (and my husband).  I tried to make homemade beans when I tried these at home, but I think my beans were old, because I soaked them overnight, cooked them FORever, and they were still not tender enough!  Next time, I am just going to use storebought refried beans. 

The recipe below is just rough measurments, since that's what I did when I made them.  :)  This makes quite a lot if you use the whole loaf of bread.
Mexican Molletes (Moyetes)
from my Friend A.P.

1 large loaf Italian or French bread (not a baguette)
Soft butter
Refried beans, one or two cans (or homemade)
Shredded cheese; I used a Mexican blend
About 1 cup sour cream
1-2 Tablespoons milk
Fresh Pico de Gallo, for serving

1.  Preheat the oven to 350 F.  Slice the loaf of bread lengthwise first, and then cut into individual-sized pieces.  (So they look like boats).  Pre-heat a large skillet or counter-top griddle to about 350.  Spread softened butter over the cut, flat sides of the bread.  Brown the bread slices, butter side down, until a bit browned and crispy.

2.  Remove the bread slices onto baking sheets, buttered-side-up.  Spread the browned surfaces with refried beans, and top that with cheese.  Add as much or as little as you want.  Bake for 5-10 minutes, or until the beans are warmed through and the cheese is melted.

3.  Meanwhile, whisk the milk into the sour cream.  Start with 1 Tablespoon, or even less, and then add milk, if needed, to get a slightly runny, but still thick, consistency.  This is your Crema. 

4.  When the Molletes are done, serve with the Crema and Pico do Gallo for topping.  Some of my kids love both the crema and Pico, or they can choose just the Crema or even eat one "plain".  These are yummy, and versatile! 
**This post and photos are property of http://dishingwithdish.blogspot.com/ **

Friday, October 21, 2011

Slow Cooker Mexican Black Beans

We had these delicious black beans with fajitas a while ago.  They were the pefect side dish for that.  I only made a half-recipe, and we still had leftovers for days.  Good things beans last a few days in the fridge.  The next few days, I made myself a Black Bean Quesadilla for lunch using these and it was very tasty.  The last day I ate these, I just warmed them up in the micorwave and topped them with a bit of light sour cream and cilantro, and ate them that way.  I love beans, and these are good just by themselves!

Since I did make a half-recipe of this, I was able to use the half-can of tomatoes that I had stored in the fridge after making this bean recipe.  I will reflect the way I made this (the half-recipe) below.  I used my smaller crockpot, but if you are making the full recipe, you'll need a large crockpot.

Slow Cooker Mexican Black Beans

From A Year of Slow Cooking
(Recipe cut in half)

8-10 oz. dried black beans, (sorted; remove pebbles, etc), rinsed, soaked overnight, then drained
3 cups chicken broth or veggie broth
3 cloves garlic, smashed and chopped
1/2 (14.5-ounce) can diced tomatoes, or 1 cup fresh chopped tomatoes
1/2 tablespoon cumin
1/2 tablespoon chili powder

1.  Put the drained beans into your slow cooker, then add the chopped garlic, broth, tomatoes, cumin, and chili powder. Stir well to combine.

2.  Cover and cook on low for 8 hours, or until tender (may take a little longer, depending on your slow cooker.  Just check them). 
**This post and photos are property of http://dishingwithdish.blogspot.com/**

Thursday, May 5, 2011

Horchata for Cinco de Mayo!

Happy Cinco de Mayo!  We did not have Mexican food for dinner, but at least we had this delicious Mexican drink- Horchata is a beverage made out of rice, almonds, and cinnamon.  Many recipes call for milk, as well, but I wanted one without- it just seems more "authentic" to me.  Not sure if I'm right or not, but that's the way I wanted to go.  So, Homesick Texan's blog came to the rescue- what a delicious recipe!  When adding the sugar syrup, taste as you go- I didn't even add all of it, and it was still almost too sweet.  This was as good as any Horchata I've had in restaurants. 

Horchata
from Homesick Texan

2/3 cup of uncooked rice
1 1/4 cups of blanched almonds
1 teaspoon of lime juice
Zest from one lime (optional- I didn't use)
1 cinnamon stick
1 teaspoon vanilla extract
1 cup of sugar or brown sugar, depending on how dark you want the drink (I used part brown & part white)

1.  In a blender or spice grinder, grind the rice until it’s powdery. Place ground rice, almonds, lime juice, lime zest and the cinnamon stick in a pot or bowl and cover with two cups of warm water. Cover and let stand overnight or for eight hours.

2.  After the mixture has soaked, take out the cinnamon stick and pour contents into a blender with two cups of water and blend until smooth. Take a mesh colander that has been double lined with cheesecloth, and over a bowl or pitcher slowly pour the mixture, wringing the cheesecloth to get every last drop out. You should have a milky, smooth liquid at this point. If there are still rice and almond bits floating around, strain it again.
3.  In a pot, heat up one cup of sugar and one cup of water on medium heat until the sugar has dissolved. Stir this sugar water into the horchata- only adding half at a time, and tasting as you go.  Add to taste- you may not need all of it.  Add the vanilla, and one more cup of water, and serve over ice or chilled.

4.  Keeps for several days in the refrigerator.  You might notice some separation after a day, but just stir it and it'll be right again.

**This post and photos are property of http://dishingwithdish.blogspot.com/ **

Thursday, April 21, 2011

Cilantro-Lime Soup

This soup was delicious- and just I needed on a day when I was sick with a cold.  I used homemade chicken stock, and that flavor, along with the cilantro and citrus-y lime, just tasted SO good together.  This is based on a Mexican soup from Yucatan- Sopa de Lima.  I had limes and cilantro leftover from my recent Southwest Burgers, and this light and refreshing soup was just the most perfect way to use them up.  I really, really enjoyed it.  My husband is also sick and he loved it too- he's stealing my daughter's pink thermos today so he can take some leftovers for lunch.  :) 

My kids didn't seem crazy about this, but two of them ate it without really saying anything, so I'll take it.  I'd still make this again, just because the adults liked it so much!!  This is a brothy soup and not terribly filling, but it was just perfect for us as a main dish since we didn't have huge appetites anyway.  To make it more filling, maybe once could add cooked rice (to individual bowls) or a can of rinsed black beans, but I have not tried these ideas.  I really, really love citrus flavors, and cilantro, and this was so easy to make, as well!  Ok, I'll stop going on and on now. 
Cilantro-Lime Soup
adapted from Epicurious (Bon Appétit)

2 tablespoons olive oil
1 medium onion, chopped
2 garlic cloves, minced
1 tablespoon chili powder
2 skinless boneless chicken breast halves, cut into 3/4-inch pieces (I used chicken thighs)
4 cups low-salt chicken broth (canned or homemade)
1 cup fresh or frozen corn kernels
1 cup chopped seeded tomatoes or 1 can petite diced tomatoes, undrained
1/2 bunch fresh cilantro sprigs, rinsed, and tied together with kitchen string.

1/4 cup chopped fresh cilantro
1/4 cup fresh lime juice
Sour cream

1.  Heat oil in heavy large saucepan over medium-high heat. Add onion and garlic; sauté until slightly softened, about 3 minutes. Add chili powder; stir 1 minute. Add chicken; stir 2 minutes. Add broth, corn, tomatoes and 1/2 bunch cilantro sprigs to saucepan; bring to boil. Reduce heat and simmer until chicken is cooked through, about 10 minutes. Discard cilantro sprigs. (Can be made 1 day ahead. Chill. Bring to simmer before continuing.)

2.  Add chopped cilantro and lime juice to soup. Season with salt and pepper to taste. Garnish bowls with sour cream.

**This post and photos are property of http://dishingwithdish.blogspot.com/ **

Friday, February 11, 2011

Pico de Gallo

I am lucky enough to have a friend from Mexico here who has graciously agreed to teach me some authentic Mexican dishes.  Yesterday, she had me and a few other ladies over, and we made flautas.  To go along with those, we also made two different kinds of salsa, and she had made some tomatillo salsa ahead of time.  Besdies the tomatillo salsa, we made this deLISH fresh Pico de Gallo, and also a cooked salsa that contained tomatos, garlic, and some dried, smoked chilis.  We ate the flautas topped with crema, white cheese, our choice of salsa, and lettuce, tomato, and onion.  They were so beautiful, but I didn't want to bust out my camera in front of everyone, plus, I could not wait to dig in!  I ate my face off, I'm afraid to say, but I loved every bite. 

I jotted down her Pico de Gallo recipe and headed to the store immediately upon leavng her house, so that I could buy the ingredients and make it ASAP.  Sadly, I had to wait till today to make it, since yesterday I was up to my eyeballs in cookie dough and frosting all afternoon/evening, but I'm happy to say that the Pico is all assembled and waiting for me in the fridge for dinner tonight... I can't wait. 

On a side note, I dropped off some of those cookies to that same friend today to say thanks, and she sent me home with a bag of homemade tamales!  I told her I would be happy to learn more dishes, and we have a date to make sopes next week (and she wants me to teach her how to bake cookies!)

This is her recipe but with my tiny changes- namely only using one jalepeno instead of three because I'm a wimp!  I also remove all seeds and ribs from the jalepeno.  She uses lemon juice instead of lime, and I just love the lemon in there.  It's so good. 

Pico de Gallo
from L.B.

5-6 Roma tomatoes, seeded and chopped
1 small white onion, chopped
1-3 fresh jalepenos, finely chopped
1/2 bunch fresh cilantro, chopped
juice of either 1 small lemon or lime, or the juice of 1/2 large lemon (can add more to taste)
salt, about 1/2 teaspoon, or to taste

1.  Combine ingredients in a bowl.  Refrigerate to allow flavors to blend, or eat right away and enjoy.  :)

**This post and photos are property of http://dishingwithdish.blogspot.com/ **
Saturday, October 16, 2010

Mexican Corn Chowder

Thanks to Eating, Etc. again for turning me onto a great recipe.  This is a Mexican-inspired corn chowder, and the flavors all together are great.  I used chipotle chili powder for the first time and liked it- although it is spicy!  I'm a spice wimp, though.  I doubled this recipe for our fam but didn't increase the chili powder, onion, all of the cumin, or the salt.  I didn't have fresh corn on the cob on hand, so I just used frozen.  This thickened up more once I took it off the stove, so dont' worry if it isn't super thick right away.  Eating, Etc. got this from Closet Cooking, who got it from another blog.  This one has been around, and it's easy to see why!  ;)  (I'm SUCH a cheese ball). 

Mexican Corn Chowder
adapted from Eating, Etc.

6-8 slices bacon, cooked & broken into bite-size pieces
1 medium onion, chopped
4 celery stalks, chopped
1 fresh red or green jalapeno pepper, chopped (I left this out)
1 1/2 tsp ground cumin
1 tsp smoked paprika
1/4 tsp ground chipotle chili powder
1/2 tsp salt
ground black pepper, to taste
2-3 potatoes, peeled & diced
4 Tbs. corn meal
4 cups (1 quart) low-sodium chicken broth
2 cup skim or 1% milk
1 tsp dried oregano
2-4 ears of corn, kernels cut from the cob & 1 cob reserved OR
3 cups frozen corn
2 handfuls cilantro, chopped, plus extra for garnish
shredded colby-jack cheese, for garnish, optional

1) Cook the bacon in a large pot; remove from pot and set aside.

2) In the bacon grease, sauté onions, celery, jalapeno, cumin, paprika, chili powder, salt, and pepper until onion is soft, about 5-7 minutes.

3) Add the potato and cook for 5 minutes.

4) Sprinkle the corn meal over onion-potato mixture.

5) Add the broth, milk, oregano, corn kernels, and corn cob.

6) Bring to a boil, then reduce heat to low and simmer covered for 30 minutes.

7) Remove from heat and stir in the bacon & cilantro and remove the cob.

8) Serve immediately.

**This post and photos are property of http://dishingwithdish.blogspot.com **

Tuesday, September 28, 2010

Homemade "Refried" Beans

This recipe for refried beans doesn't involve any frying at all; only mashing cooked pinto beans.  It's so easy; all the work is done in the crockpot, and then you have a delish side dish to go with any Mexican-themed meal.  I've been making this recipe for a while; whenever I needed some refried beans to go with something.  These are also good used in other recipes, like Spoon Tacos or Burritos

The onion used in this recipe can get so soft that you can mash it up right with the beans, but if it doesn't get that soft (what happened to me last time), you can just discard the onion after cooking.  The good flavor will still be there.

A lot of times I'll cook these on low overnight, and throughout the next day.  Works great.  It is a little unsettling to wake up at 3am to the smell of beans cooking, but it's worth that weirdness. 

I've kind of taken a break from cooking much lately; as my husband is working hard on his Master's degree and hasn't been home very often for the last two weeks.  There have been a lot of grilled cheese or cold cereal or yogurt nights here lately.  Maybe I'll get my groove back again soon!

Homemade "Refried" Beans
from Allrecipes

1 onion, peeled and halved
3 cups dry pinto beans, rinsed (approx. 1 pound)
1/2 fresh jalapeno pepper, seeded and chopped
2 tablespoons minced garlic
1-2 teaspoons salt (to taste!!)
1 teaspoons fresh ground black pepper
1/8 teaspoon ground cumin, optional
9 cups water

1.Place the onion, rinsed beans, jalapeno, garlic, salt, pepper, and cumin into a slow cooker. Pour in the water and stir to combine. Cook on High for 8 hours, adding more water as needed. Note: if more than 1 cup of water has evaporated during cooking, then the temperature is too high.

2. Once the beans have cooked, strain them, and reserve the liquid. Mash the beans with a potato masher, adding the reserved water as needed to attain desired consistency.
 
**This post and photos are property of http://dishingwithdish.blogspot.com/ **