Showing posts with label fruit. Show all posts

Thursday, June 26, 2025

Cherry Crisp


This cherry crisp was so delicious! And easy. It uses frozen cherries so you can make it anytime. I loved the almonds in here. I also added a bit of almond extract to the cherries. 
Cherry Crisp
adapted from Valerie's Kitchen 

36 ounces frozen dark cherries, no sugar added, thawed (3 12-ounce bags)
1 tablespoon fresh lemon juice
1 teaspoon pure vanilla extract
1/4 to 1/2 teaspoon almond extract, optional
3/4 cup granulated sugar
1 ½ cups all-purpose flour, divided
3/4 cup old fashioned oats
1/2 cup light brown sugar
1/2 cup sliced almonds, divided
1/2 teaspoon salt
3/4 cup butter, cut into 1-inch slices

1.  Preheat oven to 375 degrees F. Lightly coat a 9- x 13-inch baking dish with non-stick cooking spray.
In a large bowl, toss cherries with lemon juice, vanilla and optional almond extract. Add granulated sugar and ¼ cup flour and stir to combine. Pour into the prepared baking dish.

2.  In a medium bowl, combine remaining 1 ¼ cups flour, oats, brown sugar, ¼ cup sliced almonds, and salt. Work in the butter with a pastry blender or fork until the mixture resembles coarse crumbs. Sprinkle over the fruit. Sprinkle with remaining almonds.

3.  Bake in preheated oven for 45 to 50 minutes, or until topping is golden brown.
**This post and photos are property of http://dishingwithdish.blogspot.com/ **

Sunday, December 3, 2023

Blueberry Crumble Pie

I really loved this pie. We had it for Thanksgiving this year. Usually, I make this old recipe for blueberry pie, but I wasn't 100% happy with the topping the last time. I decided to look for a new recipe that included oats in the topping, because that sounded good. Kind of like a fruit crisp inside a pie crust. 

I used two bags (12 oz. each) of frozen blueberries for this. The original recipe's author says not to do this, but it's November in Italy. I can only get frozen blueberries this time of year, so I just decided to go with it. They were perfect! The author does state that although she prefers fresh, but if you use frozen, you might have to bake it a bit longer. I did this- about 10 extra minutes. I made sure to cover it with foil, so it didn't brown too much. 

I really enjoyed how firm the filling was in this recipe. I'm attributing that to the use of both flour and cornstarch in the recipe. It didn't fall apart upon serving! Score. 

Blueberry Crumble Pie  

1 unbaked single-pie piecrust 
5 and 1/2 cups (about 780g) fresh blueberries* (2, 12 oz bags of frozen, unthawed bags are perfect)
1/2 cup (100g) granulated sugar
1/3 cup (41g) all-purpose flour
1 Tablespoon cornstarch
1 Tablespoon lemon juice
1 teaspoon lemon zest

Crumble Topping:
1/2 cup (100g) packed light or dark brown sugar
6 Tablespoons (46g) all-purpose flour
1 teaspoon ground cinnamon (I used Penzey's Pie Spice)
6 Tablespoons (85g) salted butter, very cold and cubed
2/3 cup (57g) old-fashioned whole rolled oats

1.  Make the filling: In a large bowl, mix blueberries, granulated sugar, flour, cornstarch, lemon juice, and zest together until thoroughly combined. Place filling in the fridge until needed in step 2. Preheat oven to 400°F (204°C). (Do not thaw frozen blueberries first; just use straight from freezer.) 

2.  Roll out the chilled pie dough: On a floured work surface, roll out a disk of chilled dough. Turn the dough about a quarter turn after every few rolls until you have a circle 12 inches in diameter. Carefully place the dough into a 9-inch pie dish. Tuck it in with your fingers, making sure it is smooth. Spoon the cold filling into the crust. Flute or crimp the pie crust edges. Place pie in the refrigerator until needed in the next step.

3. Make the crumble: Mix the brown sugar, flour, and cinnamon together in a medium bowl. Using a pastry cutter, cut the cold butter into the brown sugar mixture until coarse crumbs are formed. Stir in the oats and sprinkle over pie.

4. Place the pie onto a large baking sheet and bake for 25 minutes. Keeping the pie in the oven, turn the temperature down to 375°F (190°C) and bake for an additional 30-35 minutes. After the first 20 minutes of bake time, you may want to cover the pie with foil to prevent the edges from browning too quickly. **If using frozen blueberries, you may want to add 10 minutes to the baking time so it can bake and later thicken up thoroughly.**

5. Allow the pie to cool for 3 full hours at room temperature before serving. This time allows the filling to thicken up. Cover leftovers tightly and store in the refrigerator for up to 5 days. (Can also bake the night before and refrigerate. I did this for Thanksgiving.) 

**This post and photos are property of http://dishingwithdish.blogspot.com/**

Saturday, August 13, 2022

Nectarine, Mascarpone, and Gingersnap Tart


This was fun to make, and the end result is beautiful, and tasty. You make a crust using gingersnaps, layer on a creamy mixture, and then top it with nectarines with a jam glaze. A tart pan with a removable bottom is used in this recipe. This recipe comes from Smitten Kitchen
Nectarine, Mascarpone, and Gingersnap Tart
adapted from Smitten Kitchen

Crust:
37 gingersnap cookies, coarsely broken (about 9 ounces)
6 tablespoons unsalted butter, melted

Filling:
1 8-ounce container mascarpone cheese
6 ounces cream cheese, room temperature
1/4 cup sour cream
1/4 cup sugar
1 teaspoon grated lemon peel
1/4 teaspoon vanilla extract

Topping:
4 to 5 small nectarines, halved, pitted, cut into thin slices
1/4 cup peach jam, warmed

For crust: Preheat oven to 350°F. Finely grind gingersnaps in processor. Add butter and blend until crumbs are evenly moistened. Press mixture over bottom and up sides of 9-inch-diameter tart pan with removable bottom. (Use a cold metal measuring cup to get a nice, clear distinction between the base and sides.) Bake crust until color darkens, pressing sides with back of spoon if beginning to slide, about 8 minutes. Cool completely.

For filling: Beat first 6 ingredients in medium bowl until smooth. Spread filling in prepared crust. Cover loosely and refrigerate at least 2 hours and up to 1 day.

For topping: Overlap nectarine slices atop filling in concentric circles. Brush with jam. Serve, or refrigerate up to 6 hours.


**This post and photos are property of http://dishingwithdish.blogspot.com/ **

Monday, April 26, 2021

Cranberry-Glazed Almond Cookies (Gluten Free)

I loved these cookies! I bookmarked them awhile ago, during the holidays, and never got around to making them until now.  Back then, I bought a bag of cranberries and stuck them in the freezer with this recipe in mind.  I can't wait to make these again.  They turned out so well; for some reason I wasn't expecting much but they were so good.  
Cranberry-Glazed Almond Cookies (Gluten Free)

adapted from the Kitchn

1 medium lemon
2 cups super-fine or finely ground almond flour (192 grams, not almond meal)
1 cup granulated sugar
1 teaspoon vanilla extract
1/2 teaspoon ground cardamom
1/2 teaspoon kosher salt
2 large egg whites
1 cup fresh or frozen cranberries
1 cup powdered sugar

1.  Arrange a rack in the middle of the oven and heat the oven to 350°F. Line a baking sheet with parchment paper.

2.  Finely grate the zest of 1 medium lemon (about 1 tablespoon) into a medium bowl. Reserve the lemon. Add 2 cups almond flour, 1 cup granulated sugar, 2 large egg whites, 1 teaspoon vanilla extract, 1/2 teaspoon ground cardamom, and 1/2 teaspoon kosher salt to the lemon zest. Beat against the side of the bowl with a wooden spoon until so well combined the almond flour hydrates and forms a paste-like dough.

3.  Dampen your hands and form the dough into 1-tablespoon balls. (I just used a small cookie scoop.)  Place on the baking sheet evenly spaced apart.  Using the palm of your hand, press each ball down to flatten slightly until about 3/4-inch thick.

4.  Bake until the bottom edges and tops turn a light golden color, about 8-10 minutes. Take the baking sheet out of the oven. Using the bottom of a drinking glass or mug, press down on each cookie to flatten them slightly until 1/4-inch thick. Return to the oven and bake for 2 minutes more (I skipped this step with one batch and noticed no difference). Transfer the cookies to a wire rack to cool slightly while you make the glaze.

5.  Juice the reserved lemon until you have 2 tablespoons juice. Place the juice and 1 cup cranberries in a small saucepan over medium heat and bring to a gentle simmer. Simmer until the cranberries start to burst and the juices reduce slightly, 2 to 3 minutes.

6.  Fit a fine-mesh strainer over a medium bowl. Add the cranberries to the strainer and press the fruit through with a spoon or rubber spatula. Be sure to scrape the underside of the sieve (that’s where you’ll find most of the strained pulp). You should have about 2 tablespoons fruit pulp in the bowl, discard the contents of the strainer.

7.  Sift 1 cup powdered sugar into the pulp and whisk until smooth and well incorporated. The glaze should be bright pink-red and glossy.

8.  Dip each warm cookie, top down, into the glaze. Let any excess drip off before inverting and returning to the rack. (I just spread on with a butter knife.)  Let cool completely; the glaze will harden as it sits.


**This post and photos are property of http://dishingwithdish.blogspot.com/**

Wednesday, May 13, 2020

Blueberry Cobbler (Using Frozen Blueberries!)


This cobbler was so good!!  It reminds me of a recipe my Aunt used to make- you layer fruit, batter, and then pour boiling water on top of the whole thing and bake.  It sounds weird but it turns into this delicious combo.  Plus, using frozen berries makes it super easy (and pretty cheap, too).  I used 2, 12 oz. of frozen blueberries for this.  My baking dish was pretty deep, though, and while it was really good this way, I wonder what adding one more bag of blueberries would do- I want to try that next time and I'll update.  We had this in lieu of dinner tonight with some vanilla ice cream.  :)

Update: I made this again with 3, 12-oz bags of frozen blueberries for my deeper-dish 9x13 and it was a good amount. For a regular, more shallow 9x13, I'd use 2 bags. 

Blueberry Cobbler (Using Frozen Blueberries!)
adapted from Reluctant Entertainer

5-7 cups frozen blueberries, or fresh (I used 2 or 3, 12 oz. bags of frozen*)
1 lemon juiced
6 Tbsp butter melted
1 cup milk
1 cup sugar
1/2 tsp salt
2 tsp baking powder
2 cups flour
1/2 tsp vanilla extract
1/2 cup sugar
2 Tbsp cornstarch
2 cups boiling water

1.  Preheat oven to 375 degrees.  Spray a 9x13 pan with cooking spray. Lay the blueberries on the bottom,  and squeeze juice of 1 lemon over the berries.

2.  In a medium bowl, mix together the melted butter, milk, sugar, salt, baking powder, flour, and vanilla. Pour over the berries.

3.  In the same bowl, add the remaining 1/2 cup of sugar and 2 Tbsp cornstarch. Mix together and sprinkle on top of the cobbler mixture.

4.  Pour 2 cups of boiling water over the entire cobbler. Bake for about 1 hour. (Check at 45-50 minutes. Biscuit topping should be golden brown, like pictured.) Let cool a few minutes and serve warm with vanilla ice cream.

**This post and photos are property of http://dishingwithdish.blogspot.com/ **

Friday, April 24, 2020

Strawberry Tiramisu

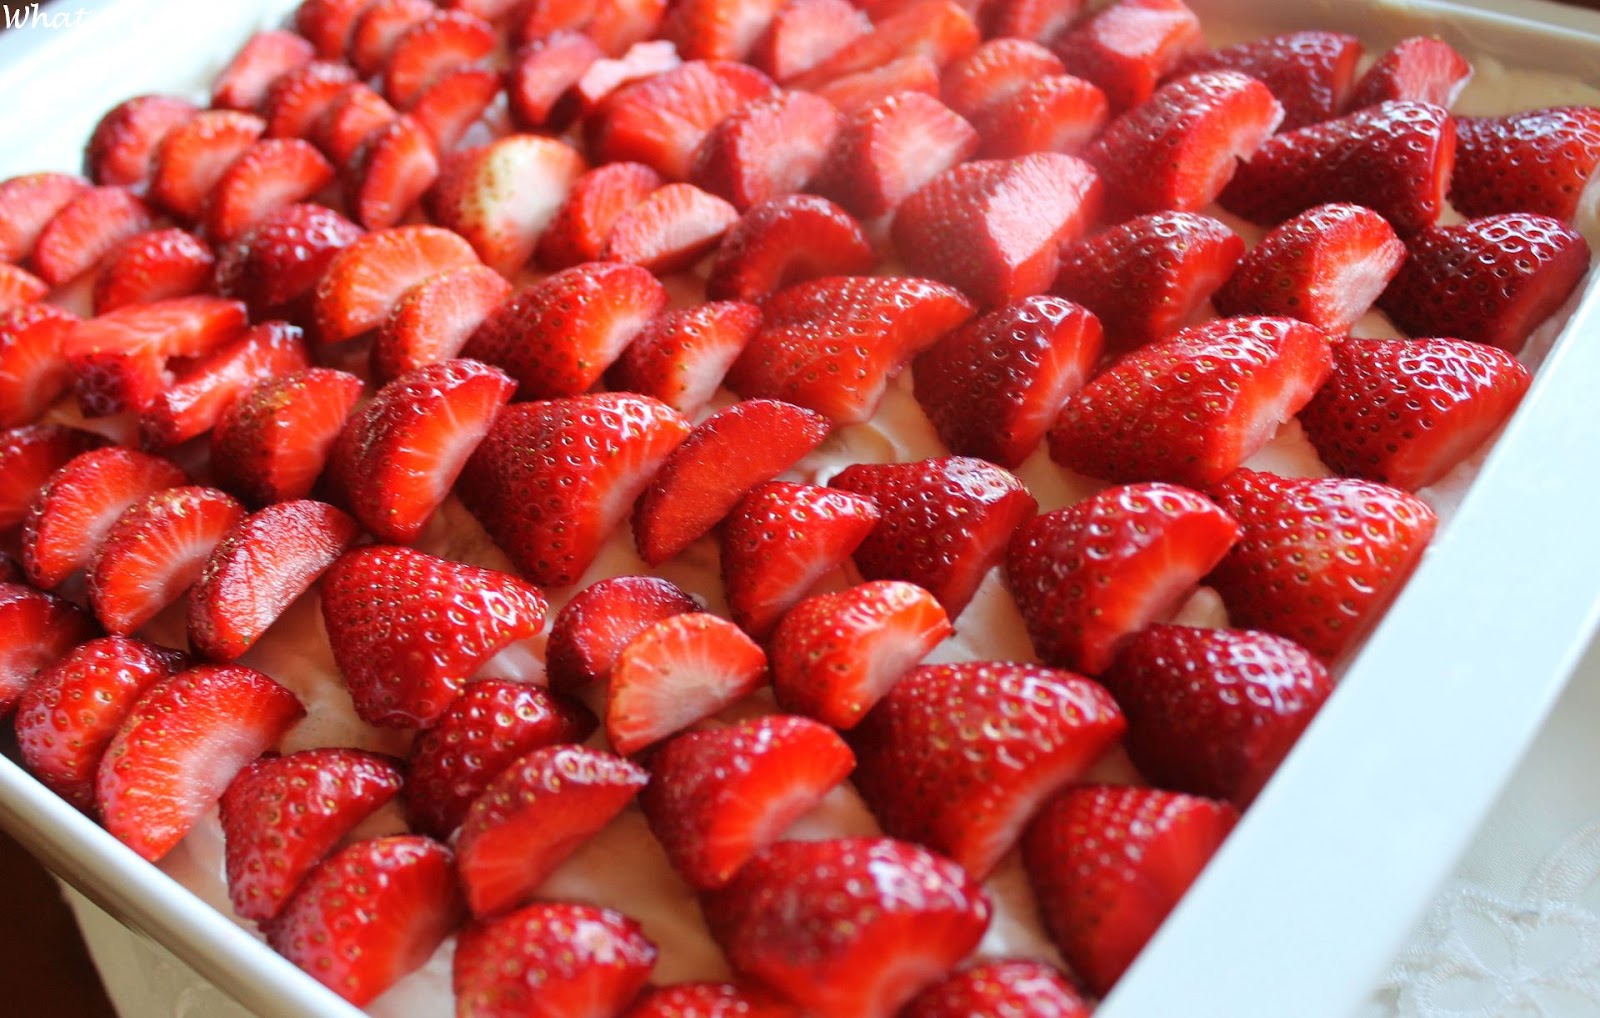
I love Strawberry Tiramisu.  I first made it in a cooking class, and I finally made it at home recently, twice.  Lol.  For the liquid, instead of the coffee that's in usual Tiramisu, I used an Italian red multi-fruit juice.  I also cooked the egg yolks and sugar together in a double boiler until it reached 160 degrees F, to quell any raw-egg fears.  Although... I think European eggs/chickens are vaccinated against salmonella so it would have been fine.  But anyway... it worked well.  I just did it first so it could cool off before adding to other ingredients. 

This makes a lot!!  It filled up a giant 9x13 pan.  It wouldn't work in a regular one, I think. You need a pan with deep sides, for sure. 

Strawberry Tiramisu
from myself :)

5 egg yolks
1 cup granulated sugar
750 grams mascarpone cheese (about 1.5 pounds), room temperature
1 1/2 packages lady fingers (estimated... buy 2 packages, you might need more or less)
1 1/2 cups heavy cream
1/4 cup powdered sugar
1 teaspoon vanilla extract
1 1/2 kilo strawberries, rinsed, hulled and sliced in half (3-4 grocery store packages)
1/2 cup or more of any red multi-fruit juice (not cranberry) or orange juice or lemoncello, if you want

1.  In a double boiler, cook egg yolks and granulated sugar, whisking constantly, until it reaches 160 degrees F.  Set aside off the heat to cool slightly.

2. Beat egg mixture with mascarpone until light and fluffy.

3.  In a separate bowl, beat heavy cream until soft peaks form.  (I used my stand mixer for the cream, and my hand mixer for the egg mixture.)  Carefully fold the egg mixture into the cream with a silicone spatula. 

4.  Dip ladyfingers in juice quickly, on both sides.  You want the liquid to seep into them but not too much.  You don't want them to be soggy, or too dry.  You can dip one first and bite into it to test, if you've never done this before.  As you dip, lay the dipped lady fingers in the bottom of a large (deep) 9x13 pan in a single layer.  Top with half of the mascarpone cream mixture.  Top with an even layer of halved strawberries.  Repeat layers- dipped ladyfingers, mascarpone cream mixture, strawberries.  Best refrigerated for a few hours; overnight is best. 
**This post and photos are property of http://dishingwithdish.blogspot.com/**/

Tuesday, June 25, 2019

Orange Julius

Happy First Day of Summer, a few days ago.  Lol.  We were on vacation in Malta.  I'll hopefully post about that soon.  I also need to post about Spain, from back in April. Anyway...... I recently made Orange Juliuses for the kids for the first time ever.  Weird, I know.  My mom used to make these for us all the time as kids. The kids loved them so much, we've been having them every Sunday night with popcorn, instead of our usual frozen lemonade smoothie.  This recipe is The Kitchn's version. 

Orange Julius
adapted from The Kitchn
Makes 6 servings

2 cup milk (whole, 2%, or skim)
2 teaspoons vanilla extract
1 12-ounce can frozen orange juice concentrate
1/2 cup sugar
3 cups ice cubes

1.   Pour the milk and vanilla in a blender and pulse until combined.  Add the frozen orange juice concentrate. Blend until fully combined with the milk. Add the sugar and ice cubes; blend until cubes are crushed and mixture has thickened. If things end up a little thick, just add a tablespoon of milk and mix once again. Pour the drink into glasses.
**This post and photos are property of http://dishingwithdish.blogspot.com/**

Wednesday, December 5, 2018

Blueberry Crisp

I really love fruit crisps, but don't have many recipes for them on my blog.  (I do have a few apple crisp recipes, and this lovely sweet cherry one.)  I love making crisps in winter with frozen fruit, which is what I used for this recipe.  Two 12 oz bags were the perfect amount for this recipe.  It was SO quick and easy to make, and tasted wonderful with vanilla ice cream.  I really love this recipe and want to try it with other fruit like cherries, other berries, peaches, etc. 


Blueberry Crisp
adapted from Spend with Pennies

5 cups blueberries fresh or frozen
2 tablespoons sugar
3 tablespoons flour
1 lemon

Topping:
1/4 cup butter softened
1/2 cup brown sugar
1/4 cup flour
3/4 cup oats regular or quick
1/4 teaspoon cinnamon

1.  Preheat the oven to 375°F.  Grate the rind of the lemon and squeeze the juice of half of the lemon. Toss blueberries, with sugar, lemon rind, 1 tablespoon lemon juice and 3 tablespoons flour. Place in a 2qt baking dish. (I "measured" my baking dish by pouring 2 quarts of water into it to make sure it fit.... lol.)

2.  With a fork, combine the butter, brown sugar, oats, flour, nuts if using and cinnamon until crumbled. (Can also use a pastry blender.)  Sprinkle over blueberries.

3.  Bake 35-40 minutes or until the top is golden brown and the fruit is bubbly. Cool slightly and serve warm.
**This post and photos are property of http://dishingwithdish.blogspot.com/ **

Thursday, November 29, 2018

Cranberry Curd Bars


These Cranberry Bars were so fun to make and satisfying- a great weekend baking project.  You make your own cranberry curd (like lemon curd) from cooking down fresh cranberries, straining the mixture, and then mixing with sugar, eggs and egg yolks, and lemon juice and cooking and stirring until thickened.  Then strain again and pour over the pre-baked shortbread crust.  Bake a little longer to just set the curd, and you're done.  I found it important to have two strainers (or sieves) on hand for this recipe. The original calls for you to wash the sieve to use again, but I think it would have been too hard by hand with all of those cranberry seeds.  I was glad I had more than one on hand.

These would be great for Thanksgiving, but we had too many desserts already.  So I made them after those desserts were gone- lol.  If making for Thanksgiving, prepare the day before, because I think it'd be too much work for the day of.


Cranberry Curd Bars
adapted from the Kitchn

For the crust:
1 cup walnut pieces
1 cup all-purpose flour
1/2 cup powdered sugar
1/2 teaspoon ground cinnamon
1/2 teaspoon salt
8 tablespoons (1 stick) butter, cut into 8 pieces and at room temperature

For the cranberry curd:
12 ounces fresh or frozen cranberries (about 3 cups- a little more/less is fine)
1/2 cup water
1 cup granulated sugar
4 large eggs
4 large egg yolks
2 tablespoons freshly squeezed lemon juice (from 1/2 lemon)
1/4 teaspoon salt
8 tablespoons (1 stick) butter, cut into 8 pieces and at room temperature
Powdered sugar, for dusting

1.  Make the crust: Spray a 9x13 baking pan with cooking spray, or grease with butter.  You can line with parchment, if desired, so you can lift out the whole thing to cut after, but I just prefer to cut right from the pan and store in the pan.

2.  Place the nuts in the bowl of a food processor fitted with the blade attachment and pulse until coarsely ground, about 15 (1-second) pulses. Add the flour, sugar, cinnamon, and salt, and pulse until finely ground, about 10 (1-second) pulses. Scatter the butter over the top of the flour-nut mix and pulse until the mixture forms moist clumps, 20 to 25 (1-second) pulses. (You can do this by hand: chop the walnuts finely, mix the dry ingredients, then cut in the butter with a pastry cutter.)

3.  Transfer the mixture into the baking dish and press into the dish with your hands or the bottom of a floured drinking glass, making it as even as possible. Refrigerate at least 30 minutes. Twenty minutes before the crust is ready, arrange a rack in the middle of the oven and heat to 350°F.

4.  Bake the crust until beginning to brown around the edges, 10 to 15 minutes. Meanwhile, prepare the cranberry curd.

5.  Make the cranberry curd: Place the cranberries and water in a medium saucepan over medium heat and bring to a boil over medium-high heat. Continue to cook, stirring occasionally, until all the cranberries have burst open and are mushy, about 5 minutes. Meanwhile, fit a fine-mesh strainer over a large bowl.

6.  Pour the cranberry mixture into the strainer and press the cranberry purĆ©e through using a spatula until only pulp remains in the strainer. (This takes a few minutes; keep stirring, scraping the bottom of the strainer frequently.)  Set the purĆ©e aside to cool to room temperature, about 10 minutes. Meanwhile, discard the contents of the strainer and clean the strainer and the saucepan for reuse. (It's easy enough to clean the pan, but I would just get a second, un-used strainer ready for the next step.)

7.  Add the sugar, eggs, egg yolks, lemon juice, and salt to the cranberry purĆ©e and whisk until smooth. Return the cranberry mixture to the saucepan over medium heat. Stir the curd continuously, making sure to scrape the bottom and corners of the pan, until it comes to a simmer and thickens slightly, coats the back of a spoon, and registers about 150°F on an instant-read thermometer (there's some wiggle-room, so don't fret about being exact), 5 to 11 minutes.

8.  Remove the pan from the heat, add the butter all at once, and stir until completely melted. Pour the curd through the strainer again into a clean bowl to strain out any small chunks of cooked egg. Pour the warm cranberry curd onto the crust and spread into an even layer.

9.  Bake until the curd is set but still jiggles slightly in the center, 10 to 12 minutes. Place the pan on a wire rack and cool for 1 hour. Refrigerate until chilled through, at least 2 hours and up to 1 day.

10.  When ready to serve, just cut pieces right from the pan and serve.  Or, if you used parchment: run a thin knife around the edge of the pan to loosen the cranberry bar slab. Use the parchment paper as handles to lift the slab from the pan onto a cutting board. Trim off the sides to make even edges if desired. Cut into 24 pieces. Dust the tops of the bars with powdered sugar, which will melt into the cranberry curd and make a sweet glaze. 

**This post and photos are property of http://dishingwithdish.blogspot.com/**

Monday, November 26, 2018

Turkey Cranberry Panini

This grilled sandwich was easy and delicious.  I copied an idea from Mel's Kitchen Cafe, but didn't want to run to the store for missing ingredients, so I subbed or omitted things.  I didn't have Brie, so I used Baby Bell cheese, lol.  I didn't have spinach so I left it off.  I used regular Italian sandwich bread (like American sandwich bread, only much smaller) instead of something hearty or fancy.  And I just now realized I was supposed to add some Dijon.  Lol! You might not have leftovers anymore to make this, but keep this in mind for next year.

Btw, "Panini" just means "sandwiches" in Italian.  The "i" ending makes it plural.  It doesn't mean pressed or grilled sandwiches, but in the US it does mean that, so I'll keep that in the title.  I just used my regular sandwich griller thingy for this; I don't have a real panini press.
Turkey Cranberry Panini
adapted from Mel's Kitchen Cafe

For each sandwich:
2 slices favorite sandwich bread
favorite white cheese
leftover cooked turkey, sliced
Dijon mustard, optional
2-3 Tablespoons cranberry sauce, more or less to taste
Butter, for grilling

1.  On one slice of bread spread Dijon according to taste.  Layer on cheese, turkey, cranberry sauce, and another layer of cheese.

2.  Top with the other slice of bread. Butter the outsides of the bread. 

3.  Cook the sandwich in a hot skillet/griddle/panini press, pressing down with a spatula or a heavy saucepan (if you aren’t using an actual panini or sandwich press), flipping halfway through, until the bread is golden on both sides, and the cheese is melted.  Serve immediately.

**This post and photos are property of http://dishingwithdish.blogspot.com/**

Friday, November 9, 2018

Baked Steel Cut Oats

This recipe is great because you prepare it overnight and let it sit in the fridge.  Then, the next morning, you just bake it.  It's hearty and healthy.  I love another baked oatmeal recipe, and that one used a lot of butter.  It's good, but I feel better about eating this one.

When you make this, it won't be pretty.  Lol.  It's because of the blueberries (I just used a whole bag of frozen blueberries, I think it was 12 oz.)  But, it will taste and smell great!
Baked Steel Cut Oats
adapted from Mel's Kitchen Cafe

1 cup steel cut oats
3/4 cup sliced almonds or chopped walnuts
1 1/4 teaspoons baking powder
1 1/2 teaspoons cinnamon
1/8 teaspoon nutmeg
1/8 teaspoon salt
2 2/3 cups almond milk (or cow's milk)
1 teaspoon vanilla
2 eggs
1/3 cup pure maple syrup (or brown sugar)
1 tablespoon coconut oil or butter, melted
1 – 2 cups fresh or frozen blueberries (can use a bit more if you want)

1.  In a medium bowl mix the oats, almonds, baking powder, cinnamon, nutmeg, and salt together.

2.  In another bowl or in a liquid measuring cup, whisk the milk, vanilla, egg, maple syrup or brown sugar and coconut oil (or butter) together until smooth. It’s ok that the coconut oil/butter will solidify and form small clumps.  Pour the wet ingredients over the oatmeal mixture and stir to combine.

3.  Lightly grease a 9X9-inch baking dish (can use a similar sized baking dish of any shape – 9X9-inch or larger but smaller than a 9X13-inch).

4.  Toss the blueberries over the bottom of the dish. Give the oatmeal mixture a final stir and pour over the top of the blueberries (if using frozen blueberries, the oatmeal will definitely take on more of a blue-ish hue than if using fresh). Cover with plastic wrap and refrigerate overnight (8-12 hours).

5.  In the morning, preheat the oven to 350 degrees, uncover the baking dish and bake for 55-60 minutes until the mixture is set and oats are tender but still slightly chewy. Stir to combine, if desired, or just scoop out in portions as is. Serve with additional milk (to stir into the oatmeal), if desired.

**This post and photos are property of http://dishingwithdish.blogspot.com/**

Friday, August 31, 2018

Mirabelle Plum Jam


I love this recipe from David Lebovitz.  I made his Red Plum & Strawberry Jam last year, but didn't get around to blogging about it (I think I didn't get a chance to take pics, but maybe they're around somewhere.  If so, I'll post that recipe too).

Anyway, I first made this with just regular yellow plums from my wild yard.  But then, I realized that we have a plum tree that I'm pretty sure is a Mirabelle plum tree!  I made the jam again with those plums and it was even better than the regular yellows.  It tastes honeyed.  I added vanilla and I loved that addition.  I made extra and put it in the freezer, so I hope it freezes well.

Note: this recipe also works with regular yellow plums.


David Lebovitz's Mirabelle Plum Jam
adapted from David Lebovitz

1 pound (450g) mirabelle plums
2/3 cups (130g) sugar
1 teaspoon freshly squeezed lemon juice
optional: 1/2 to 1 teaspoon kirsch, eau-de-vie or vanilla extract

1. Pit the mirabelles. I found the best way to do this was use my cherry pitter.  My plums were small enough.  After pitting, I cut each one in half.

2. Put the pitted plums in a non-reactive saucepan. Add enough water so it’s about 1/4-inch (a scant 1cm) deep in the pan. Cover and cook over medium heat, until the mirabelles are cooked through, about 8 to 10 minutes. (At this point, you can choose to blend some of the mixture up with an immersion blender.  I did this with one batch, and left one batch "whole".  If you don't blend, it's still very good and more like preserves, as it's very chunky.  Both ways are good, though.)

3. Add the sugar and lemon juice and continue to cook the mirabelles over medium heat, stirring frequently, until the liquid looks syrupy and thick. If you want to check it for doneness, you can turn it off and put a dab on a chilled plate in the freezer and check it in a few minutes, when it’s cold: if it wrinkles when you nudge it, it’s done. If using a candy thermometer, the jam will set at around 218-220ĀŗF (103-104ĀŗC). (I found mine set around 210-212.)

4. Remove from heat, add the kirsch, eau-de-vie or vanilla, if using, and balance the flavor with a little bit more lemon juice, if desired. (When cool enough to taste.) Pour the jam into a clean jar, cover, and refrigerate until ready to eat.

Storage: The jam will keep in the refrigerator for at least two weeks. (I stuck one jar in the freezer, but haven't pulled it out yet to see how well it freezes.)

**This post and photos are property of http://dishingwithdish.blogspot.com/**