Showing posts with label dips/dressings/sauces. Show all posts

Saturday, May 16, 2026

Slow Cooker Buffalo Chicken Dip

This dip is really good, easy to make and good for a crowd. I made this the first time for my son's class party where he needed to bring food. Then I liked it so much I made it again for just our fam. This recipe uses canned chicken, and I think this is the first time I've ever used it. It's a good use for it, I think, but one could use previously cooked "fresh" chicken, as well. I even thought about subbing white beans in for the chicken for a meatless version, but haven't tried that yet. I used a homemade ranch dressing for this (made from the dry mix). 

Slow Cooker Buffalo Chicken Dip  
adapted from Iowa Girl Eats

12.5 oz can chunk chicken breast, drained, Swanson brand recommended (I use low-sodium)
8 oz cream cheese or Neufchatel, softened to room temperature
4 oz finely shredded Colby Jack or cheddar cheese
1/2 cup Buffalo Wing Sauce, or more for additional spiciness, Sweet Baby Ray's or Franks Wing Sauce recommended
1/2 cup ranch dressing
tortilla chips, celery sticks, and carrot sticks for dippers

1. Add chicken, softened cream cheese, shredded cheese, wing sauce, and ranch dressing to a 3 quart or 6 quart crock pot.

2. Stir to combine then heat on LOW until hot, 1-1/2 — 2 hours, stirring a couple of times. If using a 6 quart crock pot, the dip will be hot in about 1-1/2 hours. Serve with dippers.

**This post and photos are property of http://dishingwithdish.blogspot.com/ **

Sunday, November 23, 2025

Cheesy Pinto Beans (Bean + Rice Bowls)

My husband and I LOVED these simple bean and rice bowls. I found the recipe randomly on Facebook. You just simmer canned beans on the stove, mashing some, and stirring. As they cook, they turn creamy, like beans from a Mexican restaurant in the US. I loooove them! You include the bean liquid, and at first, it does not seem like it will work, but it does. These were so delicious and easy. You just need some rice to go along with them, and whatever toppings you want. We used chopped tomatoes, minced white onions, guacamole, chopped lettuce, and cilantro-lime ranch. For the ranch dressing, I just mixed up some Trader Joe's dry mix with the ingredients listed and blended it with some fresh cilantro and lime juice.
              
Cheesy Pinto Beans (Bean + Rice Bowls)
adapted from a random FB recipe

1 cup dry rice (or more if you want more)
oil
1/4 tsp red pepper flakes, optional
1/2 tsp garlic powder
2 cans pinto beans (about 30 oz. total)
1 tsp ground cumin
1 tsp smoked paprika
1/4 tsp black pepper
1/2 cup shredded cheddar (or any shredded cheese)
Topping ideas: guacomole, chopped tomatoes, chopped lettuce, diced onion, hot sauce, **cilantro-lime ranch, sour cream

1. Cook rice as directed and set aside- I always use my rice cooker. For more flavor, cook in low-sodium broth.

2. Meanwhile, in a medium pot (I used non-stick), heat oil over medium heat. Add red pepper flakes and garlic powder and saute until frangrant, about 15 seconds. Don't burn the garlic. 

3. Add pinto beans, liquid and all, and stir. With a potato masher, mash half of the beans right in the pot. Add the remaning spices, stir, and bring to a simmer. The beans will look watery at first, but will thicken upon cooking and stirring. Keep going at it; dont' get discouraged. At first I thought it wasn't working out, but it ended up being perfect after cooking/stirring. 

4. Stir in cheese until melted. Serve on top of rice with optional toppings and enjoy!

**Cilantro-lime ranch dressing- I made a half-recipe using Trader Joe's dry ranch mix (instructions are on the bottle), then I blended it with a small bunch of cilantro and some lime juice. You can make this a day or two ahead of time. You can also use a dry packet of Hidden Valley ranch, OR just take pre-made Ranch and blend it with some cilantro and lime. You can also just use plain sour cream and fresh cilantro, seperately.**

**This post and photos are property of http://dishingwithdish.blogspot.com/ **

Monday, September 8, 2025

Everything & the Elote Greek Yogurt Dip-TJ's Copycat

I tried this dip, from Trader Joe's, this summer when we were in the US. It was good and seemed simple enough to re-create at home. I brought back a few jars of my beloved Elote seasoning, and made this the other day. It was delish with thick corn chips for dipping. 

I used a German brand of Greek-style yogurt for this- it's a bit thinner than the ones I tried in the US. The US ones were so thick, a spoon could stand up straight in them. The German one I like here is more like a sour cream texture. Use whatever you like here- if your yogurt is too thick, you can thin it with milk. I used full-fat, but you can experiment with lower fat or fat free. This reicpe is from the ingredient list on the TJ's dip, plus a few recipes I found online. 
Everything & the Elote Greek Yogurt Dip TJ's Copycat
from around the Web

1 heaping cup plain Greek yogurt
1/2 cup frozen super sweet white OR yellow corn kernels (or canned)
1/2 cup crumbled feta cheese OR crumbled cojita cheese
2 teaspoons TJ's Everything & the Elote Seasoning Blend
2 tablespoons chopped cilantro, optional
tortilla chips/veggies for serving

1. If corn is frozen, run warm water over it a little strainer and set aside to drain while you make the recipe. 

2. Mix the yogurt, corn (if ready), feta, Elote Seasoning, and cilantro in a bowl. If you didn't add the corn before, add it now. You can eat this right away or refrigerate until serving. I let mine sit overnight. Enjoy!
**This post and photos are property of http://dishingwithdish.blogspot.com/ **

Wednesday, April 10, 2024

Honey Chipotle Lime Chicken Bowls


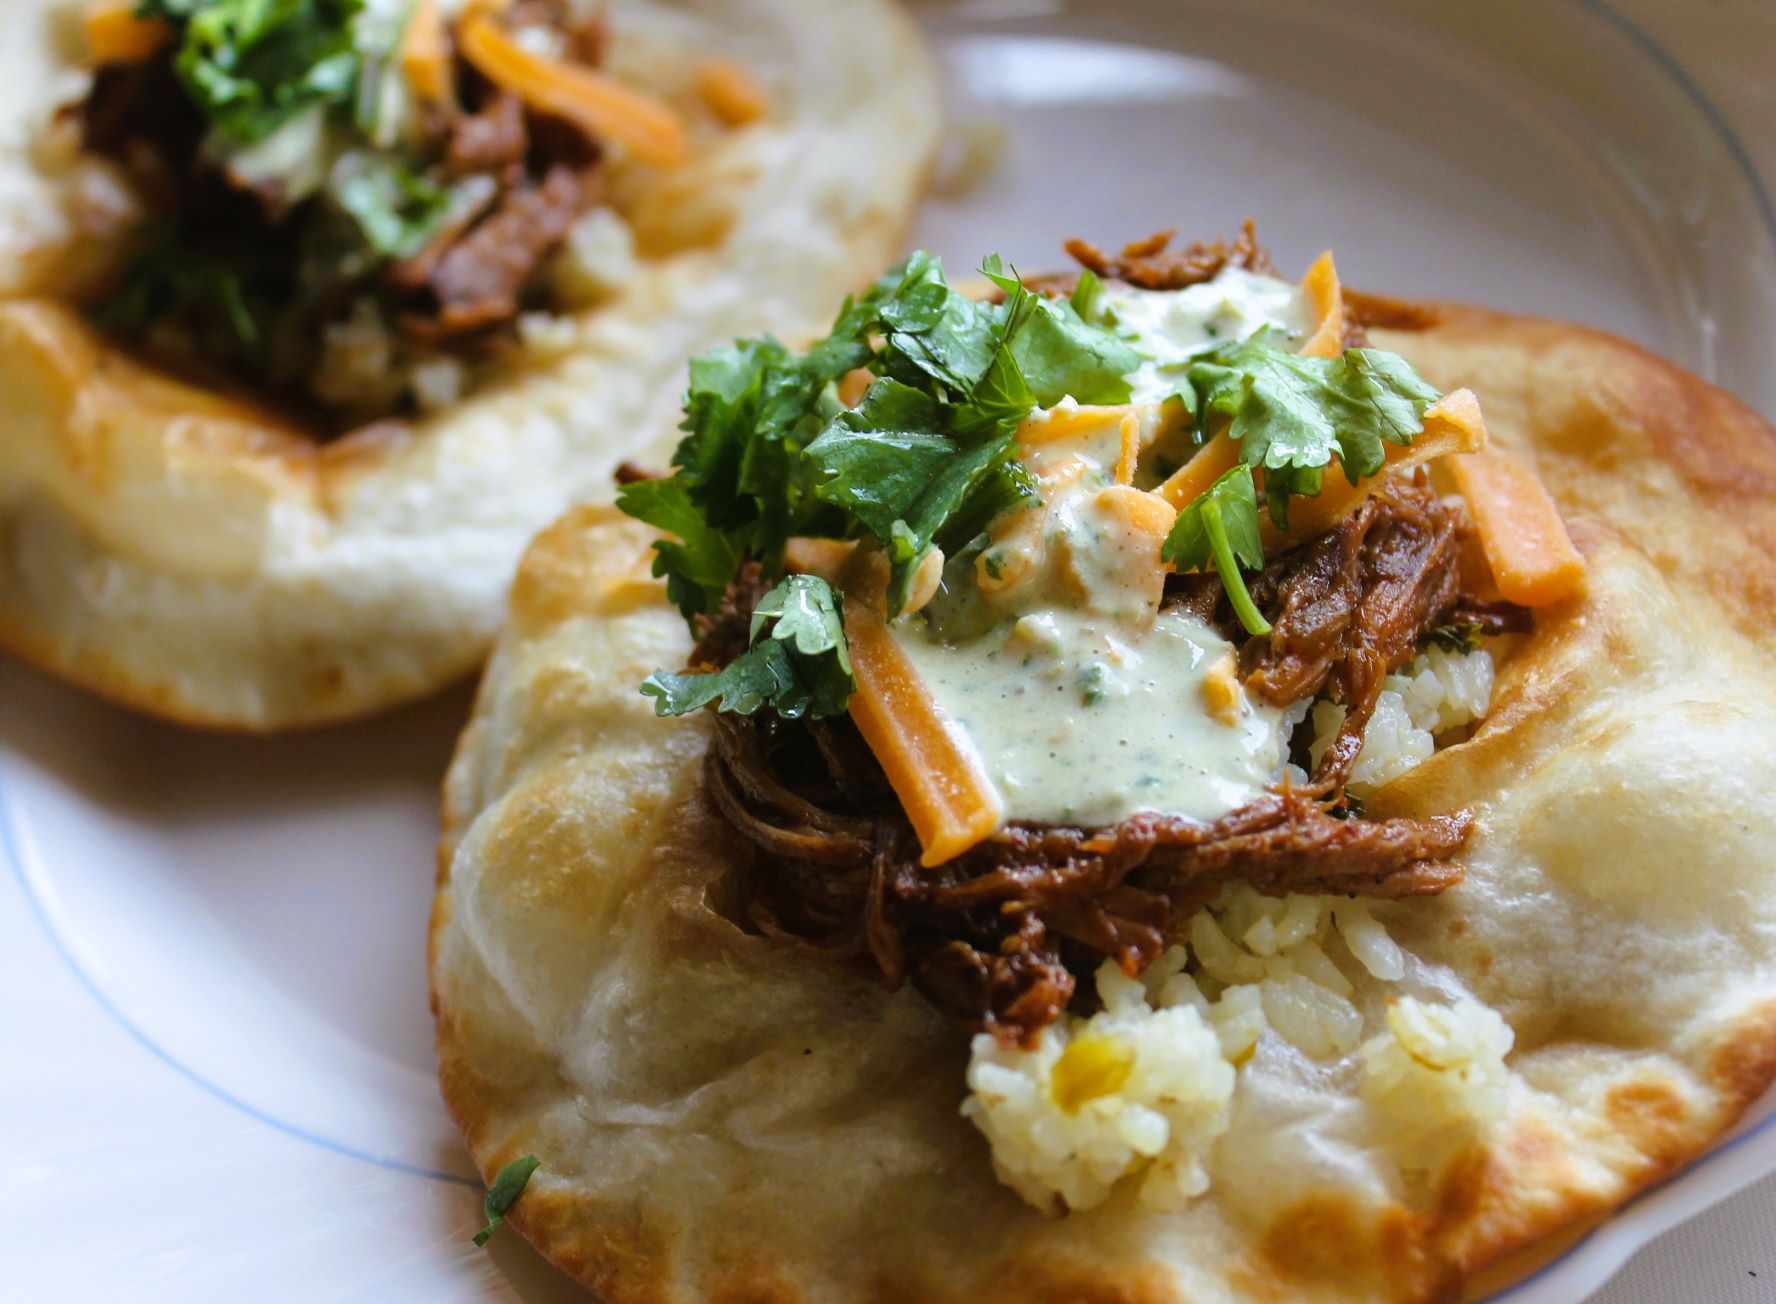
These bowls were so full of flavor and delicious. You have a bed of cilantro-lime rice, topped with spinach and other veggies, and then you add the grilled chipotle chicken and finish it off with a cilantro-lime ranch dressing. So much flavor! The leftover dressing and grilled chicken really dress up a plain salad, too. You can make the cilantro-ranch ahead, plus set the chicken to marinate. 

Honey Chipotle Lime Chicken Bowls   

Honey Chipotle Lime Chicken:
2 tablespoons olive oil
2 tablespoons freshly squeezed lime juice (I use bottle key lime)
2 tablespoon honey
2 tablespoons finely chopped chipotle peppers and adobo sauce, mostly sauce if you can (I use jarred paste)
1 tablespoon Dijon mustard
4 to 5 cloves garlic, finely minced or pressed through a garlic press
2 to 3 tablespoons chopped fresh cilantro
½ teaspoon salt, I use coarse, kosher salt
Pinch of black pepper
2 pounds thin cut boneless skinless chicken breasts 

Bowls:
Spinach, lettuce or spring mix
Chopped tomatoes
Chopped or sliced avocado
Fresh limes
Pickled jalapenos or banana peppers
Cilantro lime rice, recipe below
Cilantro lime dressing, recipe below

1.  For the marinade, whisk together the olive oil, lime juice, honey, chipotle peppers and sauce, Dijon mustard, garlic, cilantro, salt and pepper. Place the chicken in a shallow dish or ziploc bag and pour the marinade over the top. Make sure the chicken is evenly coated. Cover and refrigerate for 2 to 24 hours (the flavor gets better the longer it marinades).

2,  Cook the chicken on a grill, in a skillet or in the oven (broiled) until cooked through, about 4-5 minutes per side, depending on how it’s cooked. Let rest for 5-10 minutes. Slice the chicken into strips and serve with any or all of the bowl ingredients. (Add your own to the list, too!)

Cilantro Lime Rice

1 tablespoons butter
1 ¼ cups rice, long grain white rice or jasmine rice works best
2 ¼ cups low-sodium chicken broth
¾ teaspoon salt
¼ teaspoon freshly ground black pepper
Juice and zest of 1 large lime (I used 2 TBS key lime juice)
2 tablespoons chopped cilantro
¼ teaspoon ground cumin

Rice cooker (stovetop directions below)- Add all of the ingredients to your rice cooker except the lime juice and cilantro. Turn the rice cooker on to cook. When rice is done cooking, stir in the lime juice and cilantro with your rice paddle. Serve. 

Stovetop- In a skillet or medium saucepan, melt the butter and add the rice. Stir, letting the rice and butter cook for 1-2 minutes. Add remaining ingredients and bring to a boil. Reduce heat, cover and cook for 15-16 minutes. Remove from heat and let stand, covered, for 10 minutes. Fluff with fork and serve.

Cilantro Lime Dressing

½ cup buttermilk (I used buttermilk powder + water with good results)
½ cup mayonnaise
½ cup sour cream, light or regular
¼ cup salsa verde or a small can of Hatch chilis
1 tablespoon fresh lime juice, from about 1 medium lime (I used bottle key lime)
1 teaspoon garlic powder
1 teaspoon dried parsley
½ teaspoon onion powder
Pinch of dried dill, about 1/8 teaspoon
Pinch of salt, I use coarse, kosher salt
Pinch of black pepper, I use coarsely ground black pepper
½ cup coarsely chopped cilantro
1 green onion, white and green parts coarsely chopped, or small bunch of chives (can be left out if needed)

1. Combine all the ingredients in a blender (or use an immersion blender) and process until smooth. Thin with additional buttermilk, milk, or lime juice, if you want to adjust the consistency. Refrigerate until ready to serve (the taste gets better with time – it can be made several days in advance).
**This post and photos are property of http://dishingwithdish.blogspot.com/ **

Saturday, October 7, 2023

Pasta Bolognese

I was craving a Bolognese sauce, and came across David Lebovitz's recipe later that day. I bought the ingredients really soon after and made this on a Sunday afternoon. It smelled great cooking and tasted even better. I used Trader Joe's "Cascatelli" pasta, which I brought back from the US this last summer, because I can't find it over here.... in Italy. Lol. Ironic. This would be good with any pasta shape, though. 

Pictured below are the ingredients I used... mixed ground meat (beef, veal and pork), and a small tray of veggies. 

Pasta Bolognese 
adapted from David Lebovitz

3 tablespoons butter, salted or unsalted, plus 1 tablespoon for finishing the pasta
3 tablespoons olive oil
1/2 cup (60g) diced onions
1/2 cup (65g) diced celery
1/2 cup (65g) diced carrots, (peeled)
12 ounces (340g) ground beef (I used a mix of veal, beef, and pork)
1 teaspoon salt, or more to taste
freshly-ground black pepper
3/4 cup (180ml) whole milk
1/8 teaspoon freshly ground nutmeg
1 cup (250ml) dry white wine
1 1/2 cups (350ml) canned plum tomatoes, crushed, with their juice
1 1/2 tablespoons tomato paste
1 pound (450g) pasta

1.  Melt the butter with the olive oil in a soup pot over medium-high heat. Add the onions and cook, stirring frequently, until the onions are soft and translucent, about 3 minutes. Add the celery and carrots and cook, stirring a few times, until they start to wilt, 3 to 4 minutes.

2.  Add the ground beef/meat, salt, and some freshly ground pepper. Lower the heat to medium and cook, stirring, until the beef is no longer raw on the outside. Pour in the milk, and cook at a steady simmer, stirring occasionally, until the milk is absorbed. Add a dusting of nutmeg and the wine and continue to cook until the wine is mostly absorbed. (This should take about 10-15 minutes.)

3.  Add the tomatoes in their juice and the tomato paste. Let come close to a boil then lower the heat to as low as possible until the sauce is just barely bubbling. Cook the sauce uncovered for 1 hour, stirring every once in a while, until most of the liquid is absorbed but the mixture is still wet, rich and thick. You can use the sauce now, or you can cook it for another hour. Add up to 1/2 cup of water if it dries out too much.

4.  To serve, cook the pasta in lightly salted water as directed on the package. (Before draining, reserve a little of the pasta cooking water.) Drain the pasta and toss the hot pasta in the Bolognese sauce with 1 tablespoon of butter. If the sauce needs a bit of thinning out, add a little splash of the reserved pasta water.

**This post and photos are property of http://dishingwithdish.blogspot.com/ **

Tuesday, July 11, 2023

Carnitas Bowls

I made this Carnitas recipe again recently, but instead of using it as a taco filling, we made Carnitas bowls with the meat, rice, sauteed veggies, pickled red onions, salsa, cilantro-lime dressing, jalapenos, and fresh cilantro. So good and flavorful! There is a lot of prep, but you can do a lot of things ahead of time. 
Carnitas Bowls 
adapted from here

4-5 lbs pork shoulder/pork butt trimmed of excess fat (can use smaller, too)
1 tablespoon olive oil
1/4 cup orange juice
2 tablespoons lime juice
1 teaspoon liquid smoke
2 bay leaves
1 onion, chopped
1 jalapeno, deveined, deseeded, chopped, optional

Wet Spice Rub:
3 tablespoons olive oil
2 tablespoons tomato paste
1 tablespoon reduced sodium soy sauce
1/4 cup brown sugar, packed
1 tablespoon ground cumin
2 tsps EACH dried oregano, salt
1 tsp EACH chili powder, garlic powder, onion powder
1/2 tsp EACH smoked paprika, pepper
1/2-1 teaspoon ground chipotle chili pepper (optional; adds heat)

Toppings:
Warm cooked rice
Sauteed peppers and zucchini (or fave veggies)
Fresh or jarred salsa
Cilantro-Lime Dressing (scroll down) OR sour cream
Pickled jalapenos
Fresh cilantro

1. Heat 1 tablespoon olive oil over high heat in a large nonstick skillet. Using tongs or 2 forks, sear pork on all sides until lightly browned. Transfer pork to a large plate or cutting board until cool enough to handle. (If I'm feeling super lazy I skip this searing part.... because it does get seared or broiled at the end. You can choose to do this, or just dump it all in the crockpot without searing.) 

2. Meanwhile, whisk together all of the Wet Spice Rub ingredients in a medium bowl. When pork is cool enough, massage Wet Spice Rub evenly all over, then transfer pork to slow cooker. Add orange juice, lime juice, liquid smoke, and 2 bay leaves to slow cooker. Top pork with onions and optional jalapeno. Cook on LOW for 8 to 10 hours or on high for 5-6 hours OR until pork is fall apart tender and easily shreds with a fork.

3. Remove pork from slow cooker to cutting board, shred, and add back to slow cooker and toss with juices. Cook on low for 20 minutes. Meanwhile, preheat oven to 450 degrees F. Line a large baking sheet with foil.

4. After 20 minutes, remove pork (do NOT discard juices in slow cooker) and add shredded pork to baking sheet in an even layer. Drizzle with some of the remaining juices (about 1/4 cup) and bake for 15 minutes then broil to desired crispiness, watching closely so meat doesn’t burn (about 5-10 minutes). Drizzle with additional juices and toss. Another way to crisp the meat up is to sear in batches in a non-stick skillet on the stove.  (Or use a counter-top griddle.) 

5. Serve warm over rice with sauteed veggies, pickled red onions, salsas/sauces, pickled jalapenos and fresh cilantro. (Or other fave toppings!)

**This post and photos are property of http://dishingwithdish.blogspot.com/**

Thursday, May 11, 2023

Sweet Pulled Pork


Yum. I finally tried another Sweet Pork recipe; my first one being in 2009. I used to make that one all the time, but then stopped for some reason. I spotted this one on Carlsbad Cravings and wanted to give it a try. Like all of the recipes on that site, this is super flavorful and there is a lot involved if you want to add even more flavor (making some Cilantro-Lime Ranch), BUT, you can prep a lot ahead of time. One should make the dressing ahead of time so it thickens and becomes more flavorful. I have a good recipe for Cilantro-Lime Ranch already that goes with my old Sweet Pork recipe, but I tried this one and it was also wonderful. I used green salsa in place of the tomatillos. 

The first night, we ate the pork and sauce in tacos (1st pic). The second night, we used the leftover meat with leftover Cilantro Lime Rice in the best rice bowls I have ever had in my life. (Other pics.)  (Click on this recipe and scroll all the way to the bottom for the Cilantro Lime Rice recipe- made in a rice cooker.) We topped the bowls with the leftover Cilantro Lime Ranch (recipe below) fresh cilantro, pickled jalapenos, and sliced avocados. Omgosh- I absolutely loved this meal. It was SO GOOD. I love sweet pork tacos but maybe I'll make this again just for rice bowls. 

Note: For the enchilada sauce, I used the leftovers from this recipe. But you can use a small can. 

Sweet Pulled Pork  
adapted from Carlsbad Cravings

4-5 lbs boneless pork shoulder (pork butt) trimmed of excess fat
1 1/2 Tablespoons EACH chili powder, garlic powder
1 ½ – 2 teaspoons chipotle chili powder
1 1/2 tsp EACH salt, onion powder, smoked paprika, cumin
3/4 teaspoon pepper

SLOW COOKER PHASE 1
3/4 cup Coke, NOT diet
1/2 cup mild salsa
1/3 cup packed brown sugar
1 4 oz. can mild diced green chilies

SLOW COOKER PHASE 2
3/4 cup enchilada sauce
1/4-1/2 cup packed brown sugar
1 4 oz. can mild diced green chilies
All remaining Mixed Spices
salt to taste
Hot sauce to taste

1.  Mix all of the mixed spices together in a resealable container. Set aside. Lightly grease slow cooker with nonstick cooking spray. Set aside. Transfer pork to slow cooker. Separate out 1 ½ tablespoons spices to use after the pork is cooked. Rub all remaining spices evenly over all sides of pork (it will seem like a lot but use all of it).

2.  Add all Slow Cooker Phase 1 Ingredients to the pork. Cook on LOW for 6-8 hours or until pork is tender enough to shred. Shred pork into larger sections in crock pot and continue to cook on LOW for 30 minutes.

3.  Transfer all of the slow cooker contents to a strainer to drain off excess liquid from pork. Transfer pork to cutting board and shred into smaller pieces and discard any excess fat. Add pork back to slow cooker (along with any accumulated green chiles, etc.) then stir in all of Phase 2 ingredients starting with just 1/4 cup brown sugar. Cook another 15-30 minutes on LOW or until heated through OR just keep on the warm setting if you aren’t serving immediately. Taste and add additional brown sugar for sweeter, hot sauce for spicier or more enchilada sauce for saucier.

4.  Serve in tacos, enchiladas, burrito bowls, etc. with Cilantro Lime Dressing (recipe below) along with Cilantro Lime Rice and any toppings you desire.

Cilantro Lime Dressing
adapted from Carlsbad Cravings

1/3 cup packed cilantro
1 tomatillo, husks removed and roughly chopped (or a few TBS green salsa)
1 jalapeno deveined, seeded, roughly chopped, or some pickled slices
1garlic clove, peeled
1/2 cup real mayonnaise
1/2 cup sour cream; may sub Greek yogurt
1 1/2 teaspoons lime juice 
1 tablespoon dry ranch seasoning mix (I used Penzey's buttermilk dressing mix)
1/4 teaspoon smoked paprika optional 
Milk as needed

1.  Add all of the ingredients to a blender puree until smooth, scraping sides down as needed. Add milk, a tablespoon at a time to reach desired consistency. Chill before serving. Dressing will thicken in the refrigerator. Keeps well for 5-7 days in the fridge. 

**This post and photos are property of http://dishingwithdish.blogspot.com/ **

Monday, January 30, 2023

Mexican Street Corn (Elotes) Dip

Oh wow, I absolutely loved this dip. I made it for our dinner a bit ago, just because I wanted to- no special occasion, except my local store had delicious tortilla chips- the kind made from whole fried tortillas- usually impossible to find here. They were wonderful with this dip. The brand was Cazo de Oro. They reminded me of Juanita's tortilla chips sold in the NW. Sadly, they are all gone now, and I can't find more. I added some Trader Joe's "Everything But the Elote" seasoning mix to this recipe, making it even better. (I added that in lieu of the salt/pepper.) 

PS: I used canned corn for this, per the recipe, and it was wonderful. This might be the first time I've ever used canned corn (besides creamed corn, for recipes). It didn't have the "canned corn" taste like I feared, and the original recipe stated canned corn held up better for this recipe than frozen. I used one can white, one can yellow.  I also used Japanese Kewpie Mayo; which I think made this even more divine! Use what you have, though.  


Mexican Street Corn (Elotes) Dip
adapted from Carlsbad Cravings

12 ounces cream cheese, softened
1 cup sour cream
1/2 cup mayonnaise
2 tablespoons lime juice
1 ½ teaspoons chili powder
1 teaspoon ground cumin
1/2 tsp EACH salt, pepper OR 1 tsp TJ's "Everything But the Elote Seasoning"

ADD LATER
4 oz. can diced green chiles, drained (I used Hatch green chilis- yum)
4 oz. can diced jalapeno peppers, drained (or less to taste)
1/2 cup cilantro, chopped (measure before chopping)
1/4 cup thinly sliced green onions
1 cup shredded sharp cheddar cheese
2 cups shredded Pepper Jack cheese, divided
1/2 cup cotija cheese, crumbled, divided (OR use crumbled Feta)
1 tablespoon olive oil
2, 15 oz. cans sweet corn, drained, rinsed, air-dried for a bit (I used one can white, one can yellow)
2 cloves garlic, minced

1. Preheat oven to 350 degrees F.  Add cream cheese, mayonnaise, sour cream, lime juice and all seasonings to a large bowl. Stir until combined (use a handheld mixer if desired to make it extra creamy).  Stir in green chilies, jalapenos (add to taste), cilantro, green onions, cheddar, 1 cup Pepper Jack cheese, and ¼ cup Cotija/Feta; set aside.

2.  Heat oil in a large cast iron skillet over a medium-high heat. Add the corn and cook for 5-7 mins, until slightly charred. Add garlic and sautĆ© for 30 seconds. Transfer corn to the cream cheese mixture and stir to combine.

3.  Spoon mixture into an ungreased 2-qt. baking dish or 10” skillet and spread into an even layer. Evenly top with remaining 1 cup pepper Jack and ¼ cup Cotija/Feta cheese.  Bake uncovered at 350 degrees for 15-20 minutes or until cheese is hot and bubbly. Garnish with additional cilantro, Cotija and jalapenos or hot sauce if desired. Serve with your favorite tortilla chips.


**This post and photos are property of http://dishingwithdish.blogspot.com/ **

Sunday, September 4, 2022

Clam Dip

This clam dip is great for a movie or game night. We had a similar dip at my sister's house a few years ago as we played board games together. My kids still remember that and how fun it was, so we re-created it a few weeks ago. We never got to the board games though, because we just ate this dip right away and it was gone.  Ha ha. 

Clam Dip

8 oz cream cheese , softened
1/4 cup sour cream
1 clove garlic , minced
1/4 teaspoon dried parsley flakes (or 1 teaspoon fresh chopped parsley)
1/2 teaspoon Worcestershire sauce
Dash Tabasco or favorite hot sauce
1 6.5 oz can minced clams drained; juice reserved

1. In a mixing bowl, beat cream cheese until smooth. Stir in sour cream, garlic, parsley, Worcestershire sauce and hot sauce.

2. Stir in drained clams. Add reserved clam juice from the canned clams to thin the dip to desired consistency. Chill for 1-2 hours before serving. Taste and adjust seasonings as needed.
Serve with potato chips or crackers. Clam Dip will last, covered in the refrigerator for 3-5 days.
**This post and photos are property of http://dishingwithdish.blogspot.com/ **

Saturday, July 16, 2022

Italian-American Iceberg Salad

This salad was surprisingly good! It seems like a simple and basic salad but there's a lot of good flavor here. It's a bit similar to Olive Garden's famous salad. If I make it again, I don't think it needs the mini fresh mozzarella balls; the Provolone provided enough cheese flavor.  (Note: Provolone piccante is a more aged cheese, but it's still soft. It's easy to find over here in Italy; not sure about the US.)
Italian-American Iceberg Salad 
adapted from Epicurious

1/2 cup olive oil
5 tablespoons white wine vinegar
1 tablespoon mayonnaise
1 tablespoon sugar
1 1/2 teaspoons dried oregano
1 garlic clove, finely grated
Kosher salt, freshly ground pepper
1 small head of iceberg lettuce
1/2 small red onion, sliced into rings
2 ounces provolone piccante cheese, thinly sliced 
1 cup drained small mozzarella balls, torn (optional- it ends up being a lot of cheese)
10 pepperoncini, halved if large

1. Whisk oil, vinegar, mayonnaise, sugar, oregano, and garlic in a small bowl. Season with salt and pepper.

2. Cut lettuce in half through stem end. Tear apart into large pieces. Arrange on a platter and scatter onion, provolone, mozzarella, and pepperoncini over, nestling in among leaves. Drizzle with dressing to coat to your liking (you’ll probably have some extra) and top with more black pepper.
**This post and photos are property of http://dishingwithdish.blogspot.com/ **

Monday, October 4, 2021

Olive Garden Alfredo Sauce

I have not been to Olive Garden in many years, and I'm not sure I've ever had their Alfredo Sauce, but I did like this recipe enough to make it twice.  (By the way, Alfredo Sauce is not Italian...you do not find it here unless you are in a very touristy area trying to attract Americans.  Also... adding chicken to a pasta dish is downright sacrelige over here, so forget finding Chicken Alfredo Pasta! Lol.  Also, adding garlic to a cream pasta dish is probably iffy, at best.  Italy is full of strict food rules.  It's ok though, we can still enjoy this American dish. :) )    I liked this recipe because it's not JUST heavy cream, butter and cheese.  There is a roux and some milk added in addition to those ingrdients- ha ha.  It's easy to make- the last time I made it, I overcooked the flour/butter mixture a little, so it made the color of the sauce a bit darker.  Still delicious, though. 
Olive Garden Alfredo Sauce 
adapted from Princess Pinky Girl

6 tbsp salted butter
1 tbsp minced garlic
2 tbsp all-purpose flour
1 ½ cups heavy whipping cream
1 ½ cups whole milk
1 cup Parmesan cheese shredded
1 tsp garlic powder
½ tsp salt
16 oz package dry fettuccine
Fresh parsley finely chopped, optional

1.  Cook pasta per package directions, drain and set aside.

2.  In a large skillet over medium heat add butter and let it melt. Add minced garlic and garlic powder. Whisk together to combine.  Sprinkle the flour over the butter and garlic mixture. Whisk together and then slowly add the heavy cream and milk while whisking. Let sauce begin to boil and then reduce heat to low and allow it to simmer for 2-3 minutes.  Add Parmesan cheese and whisk together.

3.  Add the cooked and drained fettuccine. Use tongs to toss the pasta in the sauce. Garnish with fresh parsley and serve.
**This post and photos are property of http://dishingwithdish.blogspot.com/**

Monday, March 29, 2021

BBQ Chicken Salad w/Creamy Cilantro Dressing

This salad was so flavorful and just fun to eat.  The chicken is supposed to be tossed in BBQ sauce, but I skipped that.  I did include the BBQ sauce in the dressing like the recipe stated, and that was good.  I need to make big salads like this more often.  Now that spring is here, I plan on more salads like this.  
BBQ Chicken Salad w/Creamy Cilantro Dressing
adapted from Mel's Kitchen Cafe

CHICKEN AND SALAD:
3 cups cooked, shredded chicken
2 cups BBQ sauce, optional (see below)
½ head iceberg lettuce, cored and chopped
2 romaine hearts, chopped
1/2 red onion diced
¼ cup chopped fresh cilantro
1 1/2 cups frozen corn, thawed
1 can (15 ounces) black beans, rinsed and drained
2-4 ounces sharp cheddar cheese, cubed small or shredded
2-4 ounces Monterey jack cheese, cubed small or shredded

CREAMY BBQ CILANTRO LIME DRESSING:
1 cup mayonnaise, light or regular
1/3 cup milk
1/3 cup buttermilk 
2 tablespoons fresh cilantro, finely chopped
1 tablespoon lime juice
1 teaspoon white or apple cider vinegar
1 teaspoon granulated sugar
1 garlic clove, finely minced
1/2 teaspoon salt
1/8 teaspoon cayenne pepper
1/8 teaspoon black pepper
1/4 teaspoon ground cumin
1/4 to 1/2 cup BBQ sauce

1.  For the salad, combine the cooked chicken and BBQ sauce in a medium bowl. Refrigerate until ready to use. (I chose to just use plain chicken here, no BBQ.  But it'd be good either way.)

2.  In a large bowl, toss together the iceberg lettuce, romaine lettuce, red onion, cilantro, corn, black beans and cheese. Toss the mixed salad with about 1/4 to 1/2 cup of the dressing, if desired. OR, you can serve the dressing on the side, which is what we did. Place salad on plates and top with the prepared BBQ chicken and additional dressing.

3.  For the dressing, combine all the ingredients together and whisk (or shake, if using a jar) vigorously to combine. I choose to mix in my food processor for a smoother dressing.  Refrigerate until ready to serve.
**This post and photos are property of http://dishingwithdish.blogspot.com/ **

Wednesday, May 20, 2020

Chicken Cordon Bleu Casserole


Yum- I loved this recipe.  It was by far the easiest Chicken Cordon Bleu shortcut recipe I've tried, and the tastiest.  I've never made *actual* chicken cordon bleu- lol!!  I don't want to or need to after this.  (Check out the other recipes I've tried in the link above.)  I increased the sauce on this by 50%, and it was probably too much, but I loooove sauce.  Lol!  It's probably not necessary for normal, non-loving sauce people to increase the sauce.  You decide!  Recipe below is original way with no increases. I served this with rice so I could pour that sauce on.  You know it.

Chicken Cordon Bleu Casserole
adapted from Closet Cooking
(can increase the sauce by 50% if you're feeling extra saucy)

3 tablespoons butter
3 tablespoons flour
1 cup chicken broth
1 cup milk
1 tablespoon lemon juice
1 tablespoon dijon mustard
1 tablespoon grainy mustard
1/2 teaspoon smoked paprika
salt and pepper taste
4-6 boneless, skinless chicken breasts
1/4 pound deli sliced ham (2 slices per breast)
1/4 pound deli sliced swiss cheese (2 slices per breast)
2 tablespoons butter
1 cup panko breadcrumbs
1/4 cup parmigiano reggiano (parmesan), grated

1.  Preheat the oven to 350 F and grease a 9x13 or similar sized baking dish.  Melt the butter in a saucepan over medium heat and cook until it just starts to brown, before sprinkling in the flour, mixing and cooking until it just starts to brown, about 2-3 minutes.

2.  Add the chicken broth and milk, bring to a boil, reduce the heat and simmer until the sauce thickens, about 2-3 minutes, before mixing in the lemon juice, mustards, paprika, salt and pepper and removing from the heat.

3.  Place the chicken breasts in a single layer in a baking pan, top with the ham (2 slices) followed by the cheese (2 slices), and the sauce.

4.  Melt the butter, mix in the breadcrumbs followed by the parmesan and sprinkle it over the chicken in the pan. Bake in a preheated 350F/180C oven until the chicken is cooked through, the breadcrumbs are golden, and the sides are bubbling, about 30-40 minutes.
**This post and photos are property of http://dishingwithdish.blogspot.com/ **

Thursday, April 16, 2020

Slow Cooker Pot Roast & Gravy

I really like this pot roast.  It's cooked in the slow cooker, but you make a gravy at the end that's better than the usual watery slow cooker juices you're usually left with.  The recipe contains a small can of tomato sauce but it doesn't taste tomato-y; instead, it adds great flavor.  This recipe actually makes too much gravy, lol.  (Not all of my kids like gravy; if you have a gravy-loving fam, it would be perfect.)  Note: If you don't have these particular spices on hand, leave them out and sub with others of your choice.
ROAST:
3 to 5 pound rump or chuck roast, trimmed of extra fat
Coarse, kosher salt and pepper
2 tablespoons olive oil
1 to 2 large yellow onions, sliced in thick rings
3 cloves garlic, smashed
8 ounce can tomato sauce
3 cups low-sodium beef broth
2 tablespoons Worcestershire sauce
1/4 teaspoon allspice
1/4 teaspoon dried thyme
1/2 to 1 teaspoon coarse, kosher salt
1/4 to 1/2 teaspoon black pepper
1 bay leaf
6 to 7 large carrots, peeled and cut into 2- or 3-inch pieces

GRAVY:
4 tablespoons butter
1/2 cup all-purpose flour
3 to 4 cups juices/drippings from roast

1.  Season the roast on all sides with a few pinches of salt and pepper. Heat the olive oil in a large skillet over medium-high heat until hot and rippling. Add the roast, and brown on all sides, about 1-2 minutes per side.
Place the onions in the bottom of a 7-or 8-quart slow cooker, toss the smashed garlic on top, and transfer the roast to sit on top of the onions and garlic.

2. In the same skillet, reduce the heat to medium and add the tomato sauce, scraping up the browned bits from the bottom of the skillet. Add the beef broth, Worcestershire sauce, allspice, thyme, salt and pepper (use less salt and pepper if you used regular beef broth and not low-sodium). Add the bay leaf.
Pour the mixture over the roast. All slow cooker sizes are different but it helps if the meat is mostly covered with liquid (or at least the liquid comes up nearly to the top of the meat). Nestle the carrots around the roast.
Cover and cook on low 8-9 hours until the meat is very tender.

3. Transfer the meat, carrots, and onions to a platter and tent with foil. Remove the bay leaf and pour the drippings/juice from the slow cooker into a large measuring cup (or into a fat separator if you want to pour off excess fat).

4. For the gravy, melt the butter in a medium pot until sizzling. Stir in the flour and cook for 30 seconds or so. Whisking vigorously and constantly, gradually add 3 to 4 cups of the pot roast juices, until the desired consistency of gravy is reached. Continue stirring quickly while the gravy comes to a simmer. Let it cook for 1-2 minutes. Season to taste with additional salt and pepper, if needed. Serve immediately with the pot roast and vegetables (and mashed potatoes, of course!).

**This post and photos are property of http://dishingwithdish.blogspot.com/**/